Techniques abound in the intricate world of knitting, each offering unique possibilities to transform yarn into beautiful, functional creations. Among these techniques, the three-needle bind-off is a versatile and essential skill for knitters of all levels.
Whether crafting cozy blankets, warm scarves, or even intricate sweaters, understanding this technique can elevate your knitting projects to a new level of professionalism. So, what is a three-needle bind in knitting?
As the name suggests, the three-needle bind-off involves using three knitting needles instead of the traditional two. This method provides a sturdy and neat way to finish seams, join pieces, or create a decorative edge.
This comprehensive guide will unravel the mystery of the three-needle bind-off, breaking it down step by step. So, let’s dive in and explore the art of the three-needle bind-off in knitting.
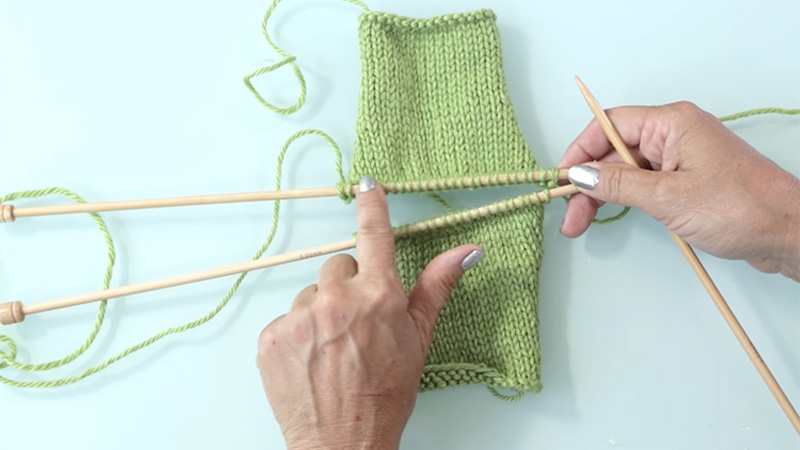
What Is a Three-Needle Bind-Off in Knitting? 7 Steps
A three-needle bind-off in knitting is a technique that uses three needles to create a secure, neat, and seamless join between two pieces of knitting. It’s commonly used for shoulder seams in sweaters or joining other knitted sections.
This method has a sturdy and attractive finish, making it a valuable skill for knitters. The three-needle bind-off is a valuable knitting technique that creates a secure and polished seam when joining two pieces of knitting together.
This method is commonly used for shoulder seams in sweaters or when attaching other knitted sections like blanket squares. This step-by-step guide will walk you through performing a three-needle bind-off.
Step 1: Prepare Your Knitting
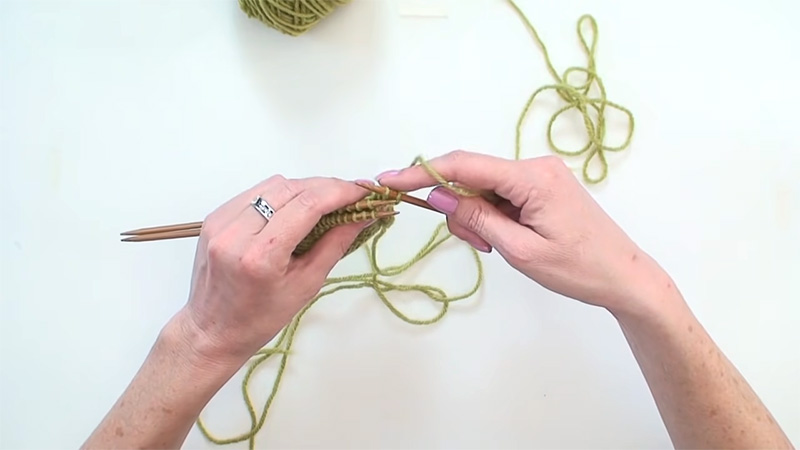
Collect two pieces of knitting you want to join and a third knitting needle of a suitable size for your yarn. Collect a yarn in the same or a coordinating color as your knitting.
Ensure that both pieces of knitting you want to join are complete and ready for seaming. Make sure your working yarn is on the same side of both pieces.
Step 2: Hold Your Knitting Needles
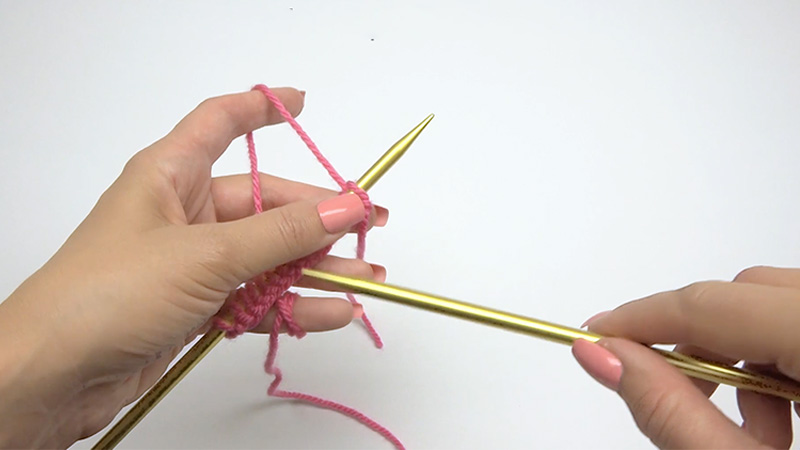
Hold one piece of knitting in your left hand with the right side facing you, and the other piece in your right hand with the wrong side facing you.
Position them so that the edges you want to join are aligned. This is important to make sure everything goes smoothly when sewing.
Step 3: Insert the Third Needle
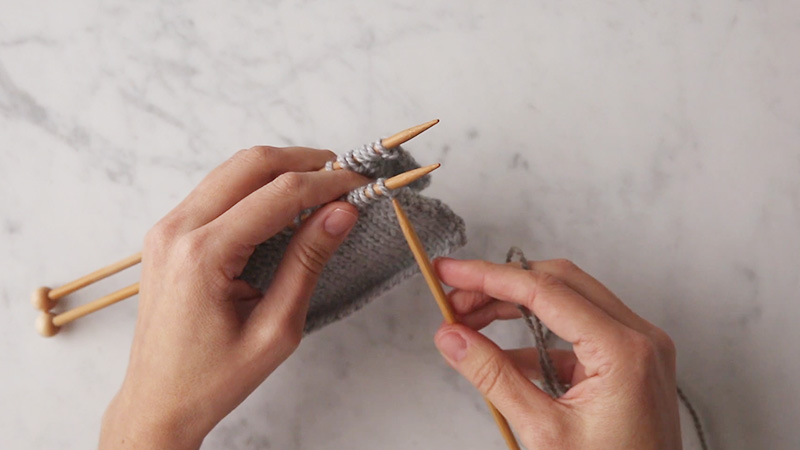
Take your third knitting needle and insert it through the first stitch on the front needle (left-hand needle) as if to knit.
Now, insert the same needle through the first stitch on the back needle (right-hand needle) as if to knit. It would be best if you had both stitches on the third needle.
Step 4: Knit the Two Stitches Together
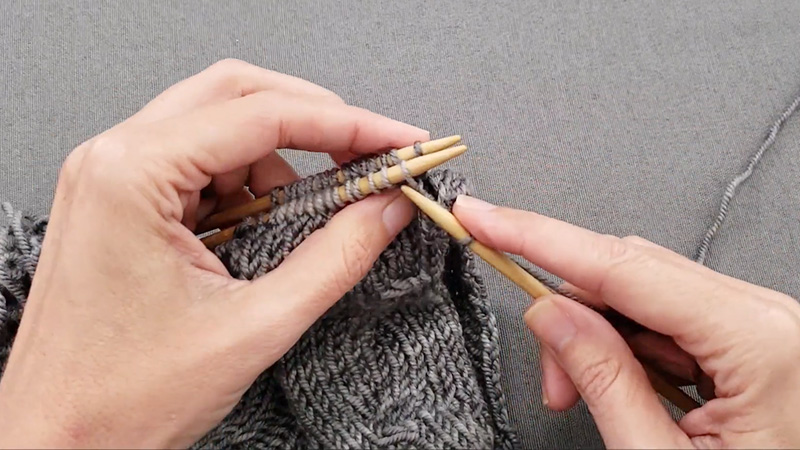
Wrap your working yarn around the third needle as if to knit and pull it through both stitches on the front and back needles.
You’ve essentially knit these two stitches together. Slide the resulting stitch off the front and back needles, leaving just one stitch on your third needle.
Step 5: Repeat Steps 3 to 4
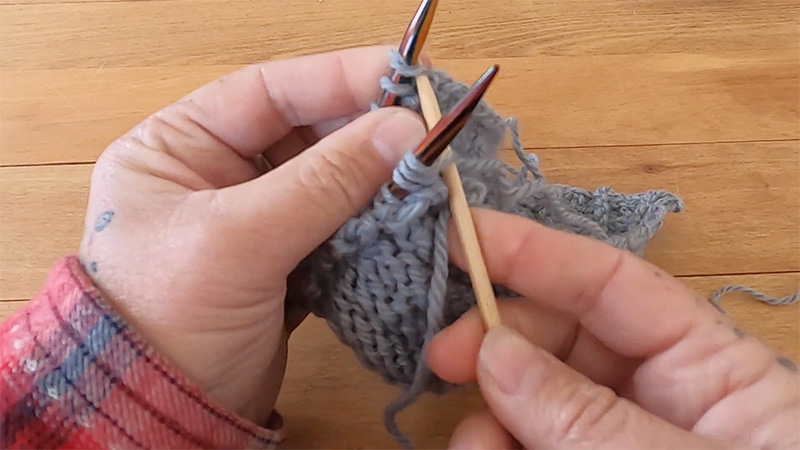
Repeat steps 3 to 4, inserting your third needle through the next stitches on both the front and back needles, knitting them together, and binding off until you’ve worked through all the stitches on both needles. You’ll have one stitch remaining on your third needle.
If you’re finished joining these pieces, cut your working yarn, leaving a tail of several inches. You’ll use this tail to secure the final stitch.
Step 6: Secure the Last Stitch
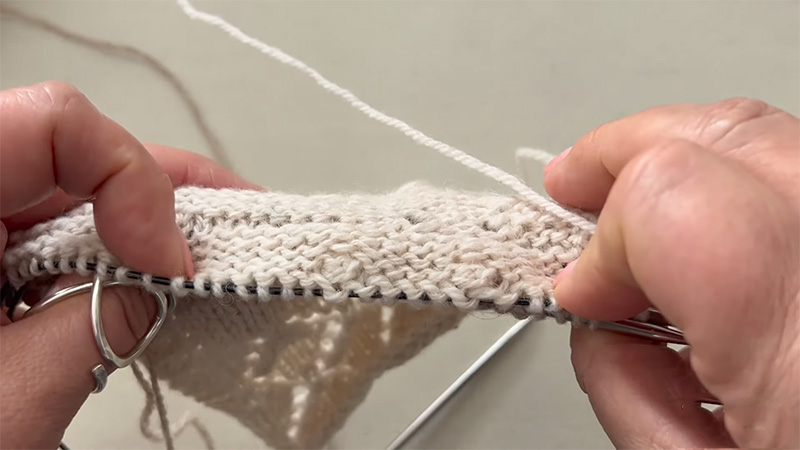
Thread the yarn tail through the last stitch on your third needle and gently pull it tight to secure the stitch. This ensures that your seam won’t unravel.
If your project requires it, weave in the yarn tails from the cast-on and bind-off edges and any additional yarn tails from color changes or joins.
Step 7: Admire Your Work
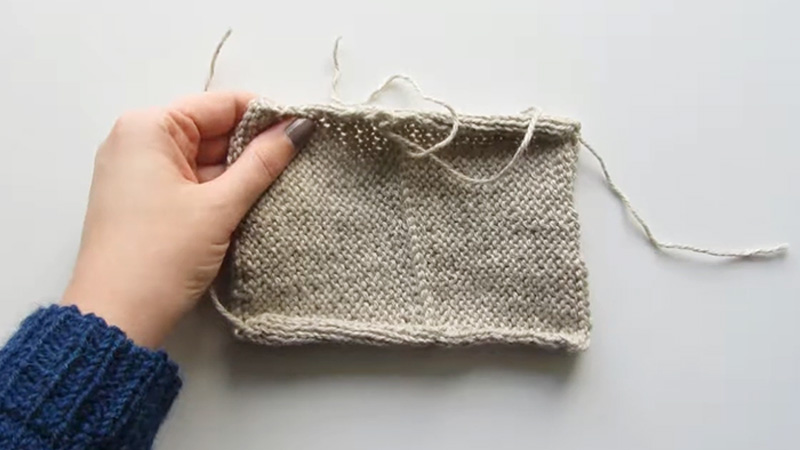
Congratulations! You’ve completed a three-needle bind-off, joining two pieces of knitting together with a sturdy and polished seam. Take a moment to appreciate your craftsmanship.
Tips and Notes
Ensure that your third needle is of an appropriate size for your yarn. It should be neither too large nor too small to create an even tension. Pay attention to your tension while working on this technique. Consistent tension ensures a neat and even seam.
If you’re new to the three-needle bind-off, practice scrap yarn first to get a feel for the technique before applying it to your project.
This technique is not limited to shoulder seams. You can use it to join other pieces, such as squares for blankets or the top of mittens.
Choose yarn for seaming that matches the color or coordinates with your project, as the seam may be visible. Keep track of your stitches to ensure you work through all of them. Missing a stitch can lead to uneven seams.
Difference Between 3 Needle Bind Off and Kitchener Stitch
In knitting, both the three-needle bind-off and the Kitchener stitch combine two pieces of knitting together seamlessly.
However, their techniques, applications, and the type of seam they produce differ. Let’s explore the distinctions between these two essential methods.
Three-Needle Bind Off
Technique
As the name suggests, the three-needle bind-off involves using a third knitting needle to bind off stitches from two separate pieces of knitting. It creates a sturdy and visible seam on the right side of the work. It is a straightforward and relatively quick technique.
Applications
The three-needle bind-off is commonly used for joining shoulder seams in garments, such as sweaters. It’s suitable for seams that are not intended to be invisible and can even add a decorative element to the project.
It’s ideal for joining pieces where strength and durability are important, such as the shoulders, where there may be a lot of stress.
Appearance
The seam created by the three-needle bind-off is visible and adds a subtle ridge or decorative detail to the right side of the work. It’s a good choice when you want the seam to be a design element in your project.
The three-needle bind-off is relatively easy to learn and execute, making it accessible to knitters of various skill levels.
Kitchener Stitch (Grafting)
Technique
Kitchener stitch, also known as grafting, involves weaving live stitches together from two pieces of knitting using a tapestry needle and a length of yarn.
It creates an invisible, seamless join, mimicking the look of continuous knitting. The process requires attention to detail and following a specific pattern of steps.
Applications
Kitchener stitch is commonly used for closing the toe of socks, joining the front and back of a cowl or scarf, and creating seamless joins in items like mittens and baby booties.
It’s the preferred method when you want a completely invisible seam with no visible ridge or interruption in the pattern.
Appearance
The hallmark of Kitchener stitch is its ability to create an almost invisible seam. When done correctly, the joined stitches blend seamlessly into the surrounding knitting.
It’s the ideal choice for the finished piece to appear as if knit in one continuous piece.
Kitchener stitch can be more challenging for beginners due to its specific instructions and the need for precise tension control. However, with practice, it becomes a valuable skill.
Choosing Between Them
When deciding between the three-needle bind-off and Kitchener stitch, consider the following factors:
Visibility
Opt for the three-needle bind-off if you want a visible seam that adds a decorative element to your project. It can also be a faster option.
The Kitchener stitch is the superior choice when a seamless, invisible join is essential. It’s perfect for items where you want the knitting to look uninterrupted.
Project Type
Consider the type of project you’re working on. The three-needle bind-off is a strong and practical choice for garments with shoulder seams. For accessories or items where seamless joins are crucial, use Kitchener stitch.
Both techniques have their place in knitting, and mastering both will expand your repertoire and allow you to tackle a wider range of projects confidently.
Whether adding a decorative touch with the three-needle bind-off or achieving an impeccable, seamless finish with Kitchener stitch, these skills are invaluable for knitters seeking to elevate their craft.
FAQs
Is the three-needle bind-off the same as the three-needle cast-off?
No, these are different techniques. The three-needle bind-off is used for joining two pieces of knitting, while the three-needle cast-off is a method to create a neat edge on one piece of knitting, often used in shoulder seams.
Can I use any size of the third needle for the three-needle bind-off?
It’s best to use a third needle of a suitable size for your yarn to maintain consistent tension. Choosing a needle that matches your project’s gauge will ensure a tidy seam.
Does the three-needle bind-off create a bulky seam?
The seam created by the three-needle bind-off can be slightly bulkier than the Kitchener stitch, but it’s still relatively flat. The bulkiness depends on factors like yarn thickness and tension.
Can I use the three-needle bind-off for joining pieces with different stitch counts?
Yes, you can use the three-needle bind-off to join pieces with different stitch counts by matching up stitches from both pieces as evenly as possible. It’s essential to distribute any extra stitches evenly along the seam.
Is the three-needle bind-off suitable for lace knitting or delicate projects?
While it can be used in lace knitting, the three-needle bind-off may not be the best choice for extremely delicate lacework, as it leaves a slightly visible seam. A more discreet technique like Kitchener stitch or grafting might be preferred for such projects.
Conclusion
The three-needle bind-off is a knitting technique that empowers knitters to seamlessly connect pieces, finish edges, and add structural integrity to their projects.
While it may seem like an advanced skill, our guide has demonstrated that knitters of all levels can master it with practice and patience.
This method ensures the durability of your creations and adds a polished and professional touch to your hand-knit garments and accessories.
As you continue your knitting journey, remember that each technique you learn expands your creative toolkit and allows you to explore new design possibilities.
Now that you’ve delved into the intricacies of the three-needle bind-off, you can take your knitting projects to the next level.
Whether you’re constructing cozy blankets, intricate cardigans, or any other knitting project, this technique is a valuable addition to your repertoire.
Leave a Reply