Zipper pockets are a versatile addition to any sewing project, be it clothing, bags, or accessories. They not only provide functional storage but also add a touch of professionalism to your creations.
Whether you’re a seasoned seamstress or a beginner looking to enhance your sewing skills, learning how to sew a zipper pocket is a valuable skill to have in your repertoire.
In this comprehensive guide, we will discuss how to sew a zipper pocket. We’ll cover the essential tools and materials you’ll need, offer expert tips to ensure precision, and break down the steps in a beginner-friendly manner.
By the end of this tutorial, you’ll have the confidence and expertise to seamlessly incorporate zipper pockets into your sewing projects, elevating them to the next level of craftsmanship. So, grab your sewing machine and let’s dive into the world of zipper pocket sewing.
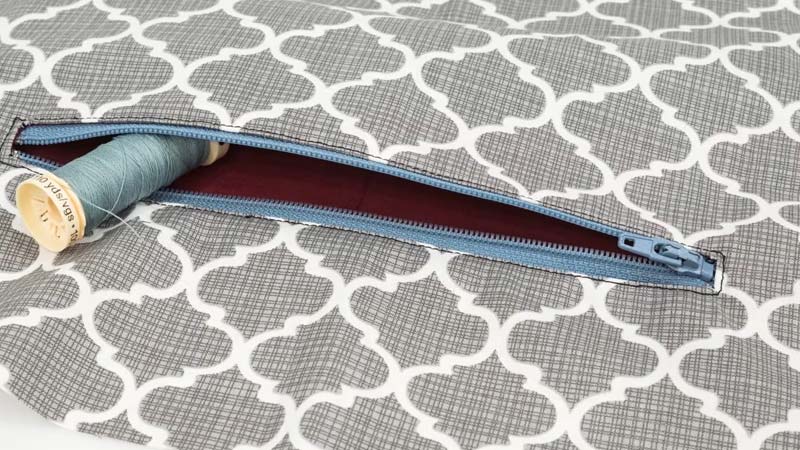
How to Sew a Zipper Pocket? 6 Steps
Sewing a zipper pocket may seem challenging, but with the right instructions and some practice, you can master this skill. Here’s a step-by-step guide to help you sew a zipper pocket:
Materials You’ll Need
- Fabric for your project
- Zipper (appropriate length for your pocket)
- Matching thread
- Sewing machine or needle for hand-sewing
- Pins
- Scissors
- Iron and ironing board
- Fabric marker or chalk
Step 1: Prepare Your Fabric

Cut out two fabric pieces for your pocket, one for the pocket lining and one for the pocket facing. Decide where you want to place the zipper pocket on your project and mark its boundaries on both fabric pieces.
Step 2: Attach the Zipper
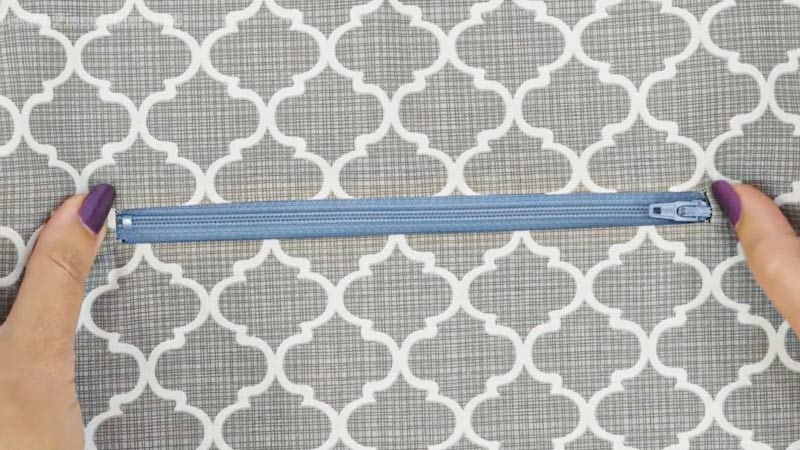
Place the zipper face down on the right side of the pocket facing fabric, aligning the marked boundaries. Pin the zipper in place.
Using a zipper foot on your sewing machine, sew along the edge of the zipper tape, keeping your stitches close to the zipper teeth.
Step 3: Sew the Pocket Lining
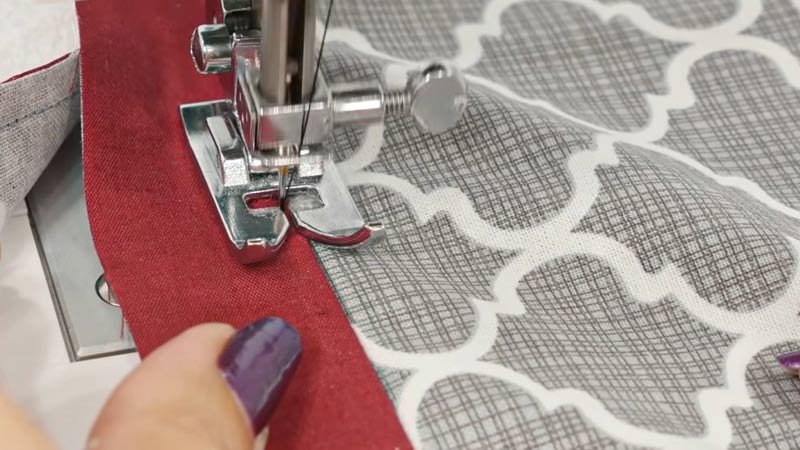
Lay the pocket lining fabric on top of the pocket facing with right sides together. Pin the three sides of the pocket (excluding the side with the zipper) together. Sew around the pinned edges, leaving a small gap at the bottom to turn the pocket right-side out.
Step 4: Turn and Press
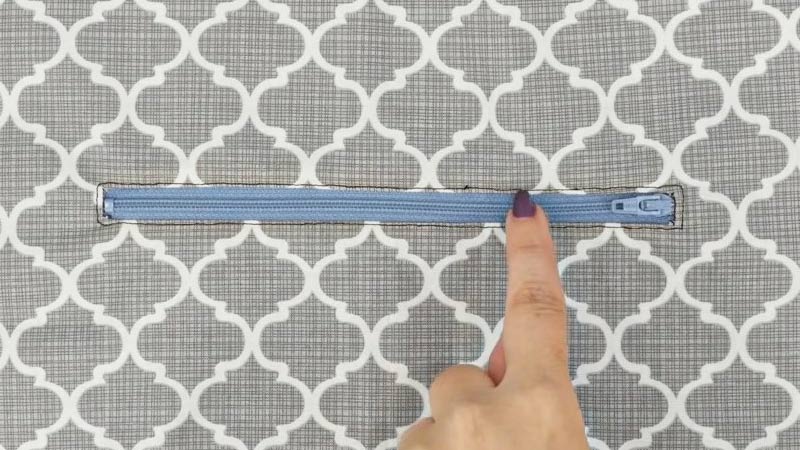
Trim any excess fabric and corners to reduce bulk. Carefully turn the pocket right-side out through the gap you left in the lining. Use an iron to press the pocket, ensuring the edges are crisp and flat.
Step 5: Finish the Pocket
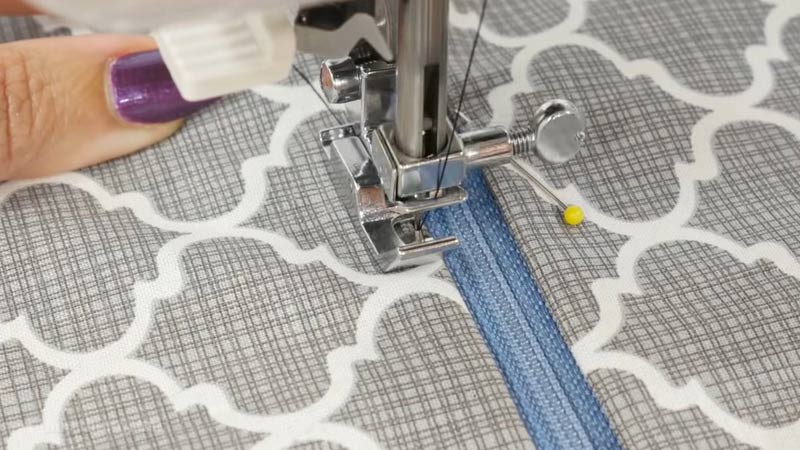
Close the gap in the lining by sewing it shut either by hand or with your sewing machine. To secure the ends of the zipper, you can add a few stitches across the top and bottom.
Step 6: Test Your Zipper Pocket
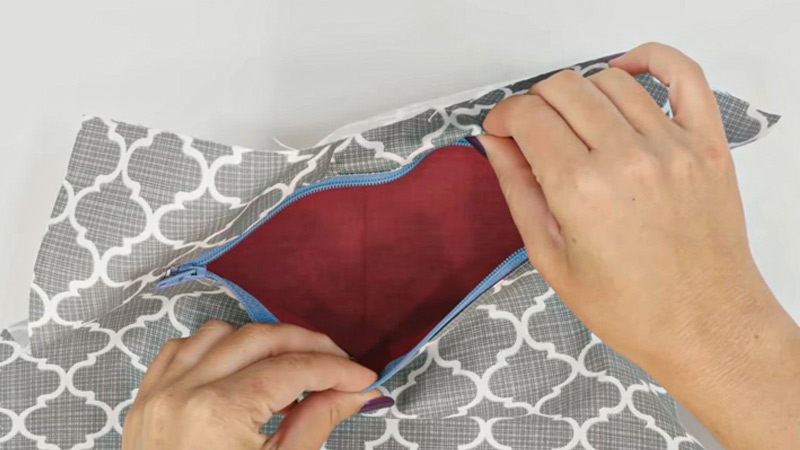
Check that your zipper opens and closes smoothly. Look for holes or odd stitches. If everything looks good, trim any loose threads.
Congratulations! You’ve successfully sewn a zipper pocket. Practice this technique on various projects to improve your skills, and soon you’ll be adding stylish and functional zipper pockets to your creations with ease.
How Do You Sew an Invisible Zipper into a Pocket?
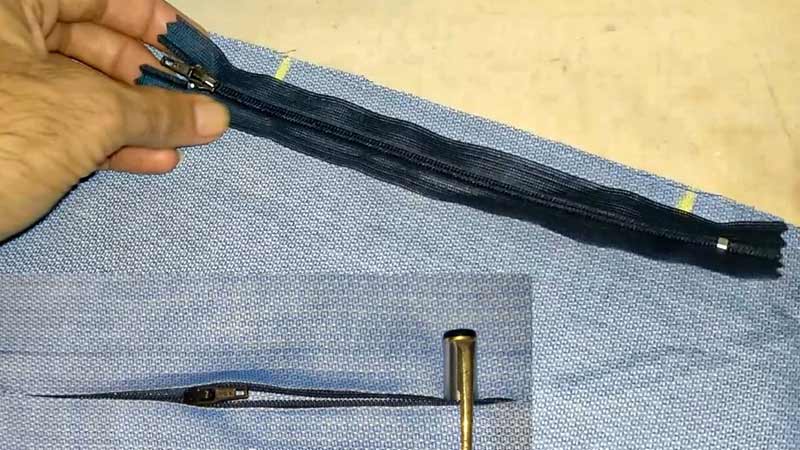
Sewing an invisible zipper into a pocket can seem tricky, but with some guidance, you can achieve a polished and concealed zipper installation. Follow these steps to sew an invisible zipper into a pocket:
Materials You’ll Need
- Fabric for your pocket
- Invisible zipper (appropriate length for your pocket)
- Matching thread
- Sewing machine with an invisible zipper foot
- Pins
- Iron and ironing board
- Fabric marker or chalk
Step 1: Prepare Your Fabric
Cut out two fabric pieces for your pocket, one for the pocket lining and one for the pocket facing. Make sure both fabric pieces are the same size and shape.
Step 2: Mark Zipper Placement
Determine where you want the invisible zipper to be placed in your pocket. Mark this area on both the pocket facing and lining fabric pieces using a fabric marker or chalk.
Step 3: Prepare the Zipper
Open the zipper and press it flat with an iron to remove any creases. Lay the zipper face down on the right side of the pocket facing fabric, aligning the marked boundaries. Pin the zipper tape to the fabric.
Step 4: Stitch One Side of the Zipper
Attach the invisible zipper foot to your sewing machine. Start sewing the zipper in place by positioning the fabric under the foot, with the needle on the side of the zipper that corresponds to the marked line.
Sew along the zipper tape, keeping the zipper foot aligned with the teeth. Go slowly to ensure accuracy. When you reach the bottom, backstitch to secure the zipper.
Step 5: Stitch the Other Side of the Zipper
Now, align the other side of the zipper tape with the marked line on the other fabric piece (pocket lining). Pin it in place. Sew along this side of the zipper tape, just like you did with the first side.
Step 6: Complete the Pocket
Once both sides of the zipper are sewn, close the zipper to ensure it works smoothly. Pin the remaining sides of the pocket (excluding the side with the zipper) together, right sides facing.
Sew around the pinned edges, leaving a small gap at the bottom to turn the pocket right-side out.
Step 7: Turn and Finish
Trim any excess fabric and corners to reduce bulk. Carefully turn the pocket right-side out through the gap you left in the lining. Use an iron to press the pocket, ensuring the edges are crisp and flat.
Step 8: Close the Lining
Close the gap in the lining by sewing it shut either by hand or with your sewing machine. To secure the ends of the zipper, you can add a few stitches across the top and bottom.
Now you’ve successfully sewn an invisible zipper into your pocket, creating a clean and concealed look. Practice this technique, and you’ll become proficient at adding invisible zippers to various sewing projects.
How Do You Sew a Mesh Zipper?
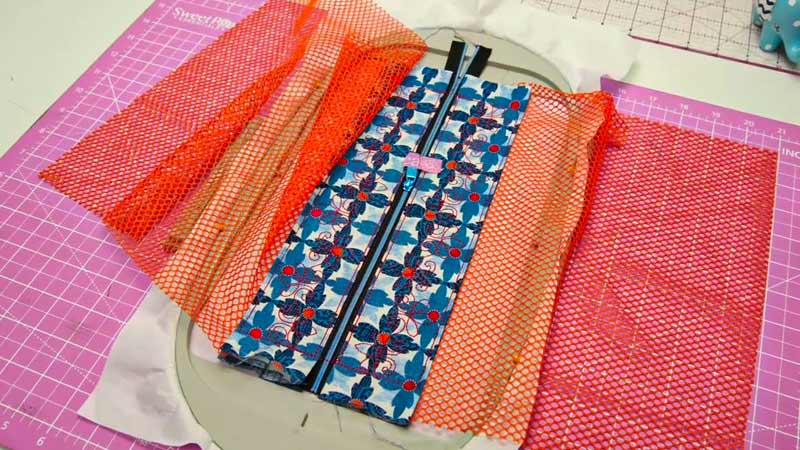
Sewing a zipper onto mesh fabric can be a bit different from sewing it onto regular fabric due to the lightweight and open nature of mesh. Here’s a step-by-step guide on how to sew a zipper onto mesh fabric:
Materials You’ll Need
- Mesh fabric
- Zipper (length appropriate for your project)
- Matching thread
- Sewing machine or needle for hand-sewing
- Pins
- Iron and ironing board
- Fabric marker or chalk
Step 1: Prepare Your Fabric
Cut out two pieces of mesh fabric for your project, one for the pocket facing and one for the pocket lining. Make sure both pieces are the same size and shape.
Step 2: Mark Zipper Placement
Determine where you want the zipper to be placed in your mesh pocket. Mark this area on both the pocket facing and lining fabric pieces using a fabric marker or chalk. Be sure to mark the width of the zipper tape.
Step 3: Prepare the Zipper
Open the zipper and press it flat with an iron to remove any creases. Lay the zipper face down on the right side of the pocket facing fabric, aligning the marked boundaries. Pin the zipper tape to the fabric, ensuring it doesn’t stretch or distort the mesh.
Step 4: Stitch One Side of the Zipper
Attach a zipper foot to your sewing machine or use a zipper presser foot if you have one.
Start sewing the zipper in place by positioning the fabric under the foot, with the needle on the side of the zipper that corresponds to the marked line.
Sew along the zipper tape, keeping the zipper foot aligned with the teeth. Go slowly to ensure accuracy. When you reach the bottom, backstitch to secure the zipper.
Step 5: Stitch the Other Side of the Zipper
Align the other side of the zipper tape with the marked line on the other fabric piece (pocket lining).
Pin it in place. Sew along this side of the zipper tape, just like you did with the first side.
Step 6: Complete the Pocket
Once both sides of the zipper are sewn, close the zipper to ensure it works smoothly.
Pin the remaining sides of the pocket (excluding the side with the zipper) together, right sides facing for the mesh fabric.
Sew around the pinned edges, leaving a small gap at the bottom to turn the pocket right-side out.
Step 7: Turn and Finish
Trim any excess fabric and corners to reduce bulk. Carefully turn the pocket right-side out through the gap you left in the lining. Use an iron to press the pocket, ensuring the edges are crisp and flat.
Step 8: Close the Lining
Close the gap in the lining by sewing it shut either by hand or with your sewing machine. To secure the ends of the zipper, you can add a few stitches across the top and bottom.
With these steps, you’ve successfully sewn a zipper onto mesh fabric, creating a functional and durable pocket. Mesh fabric can be delicate, so be gentle while sewing to avoid stretching or damaging it.
Practice this technique, and you’ll be able to incorporate zippers into various mesh fabric projects.
FAQs
What is the difference between an invisible zipper and a regular zipper?
Invisible zippers have a hidden appearance when sewn into a garment, making them less noticeable. They are commonly used in formalwear and dresses. Regular zippers are visible and come in various styles.
How do I determine the right zipper length for my project?
Measure the length of the opening where you intend to install the zipper. It’s recommended to choose a zipper slightly longer than the opening. You can trim any excess zipper tape once it’s sewn in place.
What can I do if my zipper gets stuck or won’t zip smoothly?
If your zipper is stuck, try gently tugging on the fabric around it while wiggling the zipper pull.
If it still won’t move, you may need to carefully remove any fabric caught in the zipper teeth. For smoother zipping, consider applying zipper lubricant.
Can I sew a zipper without a sewing machine?
Yes, you can sew a zipper by hand using a needle and strong thread. It requires more patience and precision but is entirely possible. Ensure your stitches are secure and evenly spaced for a neat finish.
What are the best practices for sewing zippers on delicate fabrics like silk or chiffon?
When working with delicate fabrics, use a fine needle and lightweight thread that matches the fabric color.
Baste or pin the zipper in place before sewing to prevent the fabric from shifting. You can also reinforce the area around the zipper with interfacing to add stability.
Conclusion
Sewing zipper pockets can seem daunting at first, but with practice and the right guidance, it becomes an attainable skill that opens up a world of creative possibilities.
Zipper pockets not only serve a practical purpose but also allow you to add flair and functionality to your sewing projects.
Remember, the key to success is patience and practice. Don’t be discouraged by initial setbacks; instead, view them as opportunities to learn and improve.
As you become more proficient, you’ll find yourself incorporating zipper pockets into various designs, enhancing their aesthetic appeal and usability.
With the knowledge gained from this guide and your newfound confidence, you’re well on your way to becoming a zipper pocket pro.
So, keep those sewing machines humming and your creativity flowing. Happy sewing, and may your zipper pockets always be a perfect blend of style and functionality!
Leave a Reply