The blanket stitch, a fundamental hand-sewing technique, offers both functionality and aesthetic appeal in the realm of crafting and sewing. Its name suggests a primary application—edging blankets—but this versatile stitch finds use in a plethora of creative projects.
This guide will walk you through the step-by-step process of mastering the basic blanket stitch, enabling you to secure fabric edges, add decorative elements, or embark on intricate embroidery journeys.
Whether you’re a seasoned crafter seeking to refine your skills or a beginner eager to explore the world of hand sewing, learning the blanket stitch opens doors to a wide range of possibilities for enhancing the beauty and durability of your creations.
What Is Blanket Stitch?
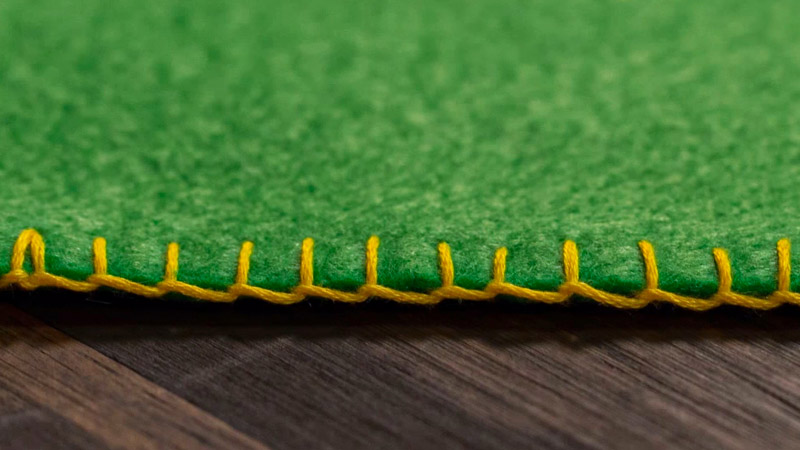
Blanket stitch is a versatile hand-sewing technique widely used in various crafts, particularly for securing fabric edges and adding decorative touches.
It involves a series of evenly spaced, perpendicular loops of thread along the edge of the fabric. The stitch’s name originates from its initial use in finishing the edges of blankets, but it has since found applications in embroidery, quilting, and other sewing projects.
This stitch not only reinforces fabric edges but also adds an attractive, handcrafted element to creations. By mastering the blanket stitch, crafters can enhance the durability and aesthetics of their work in a myriad of creative ways.
10 Steps to Do Blanket Stitch
Blanket stitch is a simple and versatile hand sewing technique used in various crafts, such as sewing, embroidery, and quilting.
It is commonly used to finish the edges of blankets, hence the name, but it can also be applied to a wide range of sewing projects to secure edges, add decorative elements, or even create functional seams.
Here’s a step-by-step guide on how to do a basic blanket stitch:
Materials you’ll need:
- Fabric or material you want to stitch.
- A needle suitable for your fabric (typically a sharp or embroidery needle).
- Thread in a color that complements your fabric.
- Scissors to cut the thread.
Steps to do a basic blanket stitch:
1. Prepare your fabric
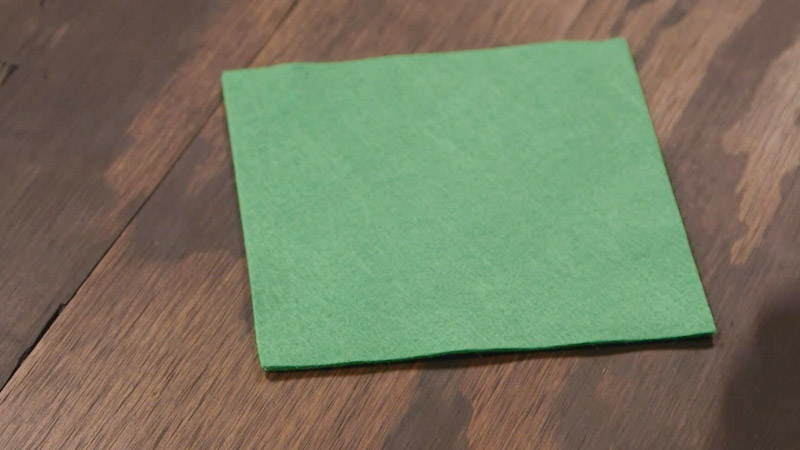
Start by inspecting your fabric. Ensure it’s clean, free from any loose threads or debris, and that the edges you plan to stitch together are straight and even.
If necessary, use an iron to press the fabric to create a flat, wrinkle-free surface, which will make stitching easier and result in a neater finish.
2. Thread the needle
Select an appropriate needle for your project; for most fabrics, a sharp or embroidery needle will work well. Cut a length of thread, usually between 18 to 24 inches, considering the size of your project.
Thread the needle, leaving a tail of about 2-3 inches, and tie a secure knot at the opposite end to prevent the thread from slipping through the fabric.
3. Insert the needle
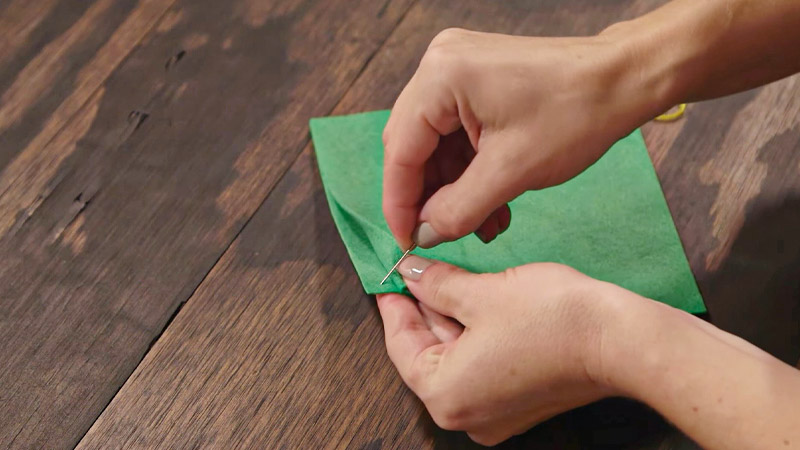
Position your fabric so that the edge you want to stitch is easily accessible. Begin by inserting the needle from the backside of the fabric to the front, starting at the very edge where you intend to commence your blanket stitching.
4. Position the needle

Pay close attention to the orientation of the working thread (the part connected to the spool). It should lay flat against the fabric and extend to the right. This ensures that your stitches are consistent and secure.
5. Form the first stitch
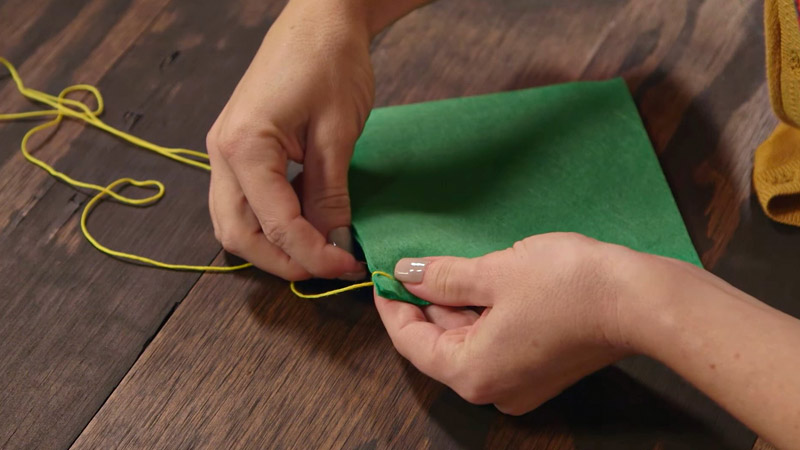
After bringing the needle up through the fabric, insert it back into the fabric a short distance (typically 1/8 to 1/4 inch) from the starting point, angling the needle diagonally. The needle should emerge from the edge of the fabric.
6. Loop the thread
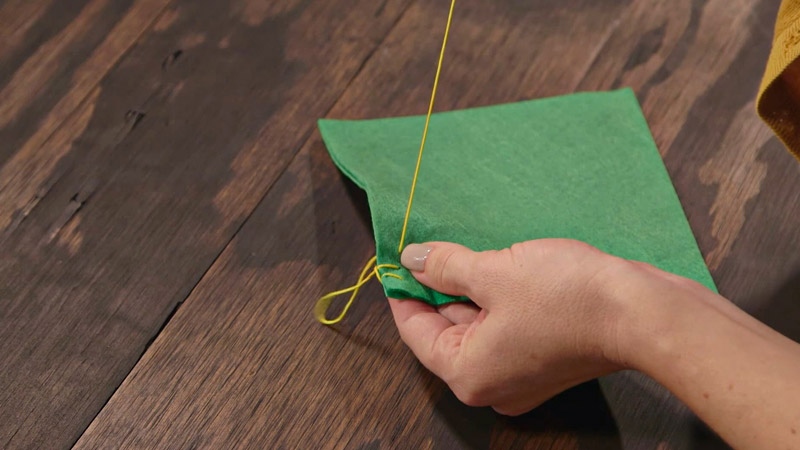
As you pull the needle through, leave a small loop of thread on the edge of the fabric. This loop is the signature feature of the blanket stitch.
7. Secure the loop
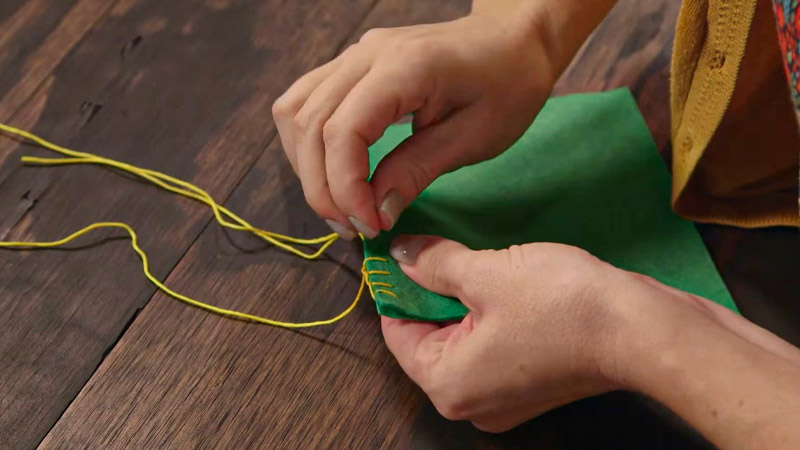
Pass the needle through the loop you’ve created, moving from the bottom to the top, and pull it gently but firmly to tighten. This action locks the loop in place and forms the first blanket stitch. Be mindful not to pull too tightly, as this can distort the fabric.
8. Repeat the process
Continue working along the edge of the fabric, following steps 5 to 7 consistently. Maintain an even spacing between your stitches to create a uniform and aesthetically pleasing blanket stitch pattern.
The regularity of your stitches contributes to the overall appearance of your project.
9. Finish the edge
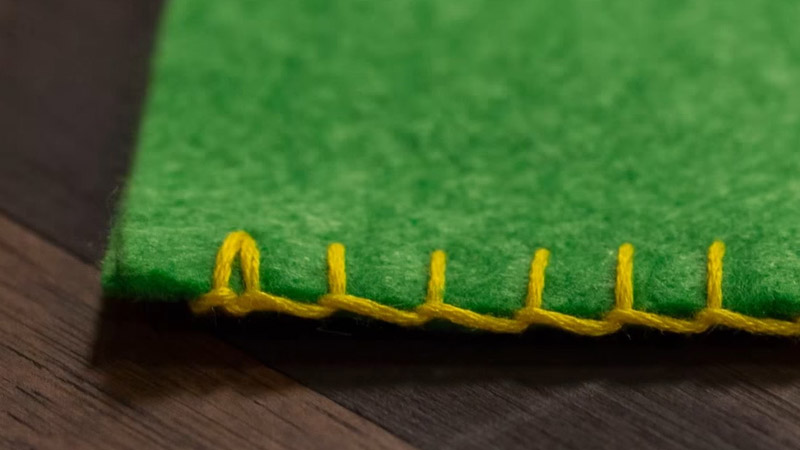
When you reach the end of your sewing project or the point where you want to stop, make a small backstitch by passing the needle to the backside of the fabric.
This secures the last loop in place. To prevent the thread from unraveling, tie a knot on the backside of the fabric.
10. Trim excess thread
Lastly, use sharp scissors to carefully trim any excess thread, both at the beginning and end of your stitching. Ensure that you don’t cut too close to your knots to avoid them coming undone.
What to Consider When Stitching Blankets?
When stitching blankets, several important considerations can ensure that your project turns out beautifully and serves its intended purpose effectively.
Here are key factors to keep in mind:
Fabric Selection
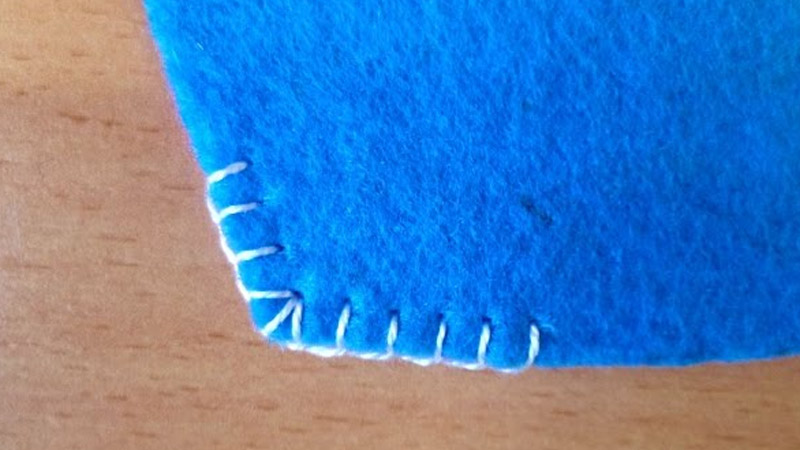
The choice of fabric is pivotal for your blanket’s comfort and durability. For a warm and cozy blanket, options like fleece, flannel, or wool provide excellent insulation.
If you prefer a lightweight and breathable blanket, consider cotton or a cotton-blend fabric. The fabric’s texture and pattern should also align with your design vision.
Thread Quality
Investing in a high-quality thread is essential for a sturdy and long-lasting blanket. Threads come in various materials, such as cotton, polyester, and nylon.
Choose one that complements your fabric type and doesn’t fray easily. The thread color should match or contrast with your fabric, depending on the desired effect.
Stitch Type
Selecting the appropriate stitch type depends on your project’s purpose and design. The classic blanket stitch is great for reinforcing edges and adding a decorative touch. For a quick and simple finish, a basic running stitch can suffice, especially on less visible areas.
Needle Size
The needle size should match your fabric’s thickness. For heavier fabrics like wool, use a larger needle to prevent snagging or breaking. Fine, sharp needles work well with delicate fabrics like silk or chiffon.
Stitch Length
Determine the ideal stitch length by considering both functionality and aesthetics. Longer stitches create a more decorative look, while shorter stitches offer greater strength and security, ideal for heavily used blankets.
Color and Design
Thread color can greatly influence your blanket’s overall appearance. Consider whether you want the stitching to blend in or stand out as a design element. Plan any embroidery or decorative elements to ensure they harmonize with the overall look.
Blanket Size
Carefully measure and plan the dimensions of your blanket to suit its intended use. For a bed, make sure the blanket is wide and long enough to cover the mattress adequately. If it’s for decorative purposes, you have more flexibility in size.
Pattern Alignment
If your fabric has patterns or motifs, take the time to align them correctly, so the finished blanket looks polished and well-crafted. Proper alignment enhances the visual appeal.
Edge Finishing
Determine how you want to finish the edges of your blanket. The blanket stitch provides a decorative and functional edge, while a serged edge gives a clean, professional look. Folded hems are another option for a neat and polished finish.
Quilting (if applicable)
If you’re creating a quilted blanket, plan the quilting design carefully. Consider both the aesthetics and functionality of the quilting pattern.
Ensure that the layers of your quilt (top, batting, and backing) are securely basted together before quilting.
Care Instructions
Think about how the blanket will be laundered and factor this into your material and stitch choices. Be sure to include care instructions if you plan to gift or sell the blanket.
Time and Patience
Blanket projects can be time-consuming, especially if you’re adding intricate stitching or quilting. Ensure you have the patience and time to complete the project to your desired level of quality.
FAQS
Can I use the blanket stitch for leatherworking?
Yes, you can use the blanket stitch for leather projects, especially when sewing two pieces of leather together.
What’s the difference between a regular blanket stitch and a twisted blanket stitch?
The twisted blanket stitch involves twisting the working thread around the needle before pulling it through the loop.
Can I use a sewing machine for blanket stitching?
While it’s possible to create a blanket stitch look with a sewing machine, the traditional blanket stitch is a hand-sewing technique.
It’s often preferred for its precision, control, and the decorative touch it adds.
Is there a way to create a blanket stitch without a knot at the beginning?
Yes, you can start the blanket stitch without a knot by anchoring the thread with a few small backstitches on the fabric’s backside.
Are there alternative stitches similar to the blanket stitch?
Yes, there are similar stitches like the buttonhole stitch and the whipstitch.
To Recap
Mastering the art of the blanket stitch opens up a world of creative possibilities in sewing, embroidery, and crafting.
This versatile hand-sewing technique not only provides functional reinforcement to fabric edges but also adds an appealing decorative element to your projects.
Whether you’re enhancing the durability of a cozy blanket, creating intricate embroidery patterns, or simply adding a touch of handmade charm to your creations, the blanket stitch proves invaluable.
With practice and a keen eye for detail, you can achieve precise, uniform stitches that elevate the quality and aesthetics of your work.
So, dive into the world of blanket stitching, explore its variations, and let your imagination run wild as you embark on your sewing journey.
Leave a Reply