Creating pom-poms by hand is a delightful and crafty endeavor that adds a whimsical touch to various projects and accessories. Whether you’re looking to embellish a hat, or scarf, or decorate your living space, crafting pom-poms is a fun and creative process that anyone can enjoy.
With just a few simple materials and some easy-to-follow steps, you can fashion these fluffy and colorful adornments to suit your style and preferences.
In this guide, we’ll take you through the step-by-step process of making pom-poms from scratch, offering tips and creative ideas along the way. Get ready to infuse your DIY projects with a dose of playful charm as we explore the world of handmade pom-poms.
How to Make a Pom Pom by Hand? (8 Steps)
Creating a pom pom by hand is a delightful and straightforward DIY project that adds a touch of whimsy to various crafts and accessories. Whether you want to embellish a hat, a scarf, or decorate a room, making pom poms by hand is a fun and creative process.
Here’s a step-by-step guide on how to make a pom pom by hand:
Step 1: Gather Your Materials
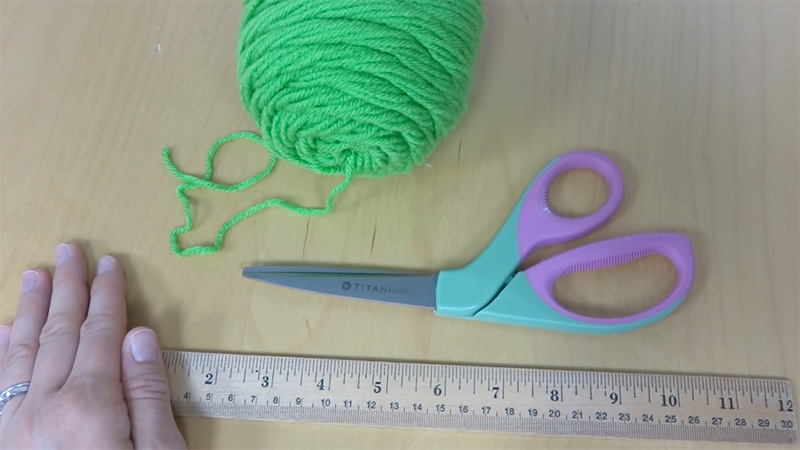
Before you embark on your pom-pom-making adventure, make sure you have all the necessary materials ready. You’ll need yarn in your preferred color, a pair of sharp scissors, and optionally, a piece of cardboard.
The yarn’s texture and thickness will influence the final look of your pom-pom, so choose accordingly. A small piece of cardboard can be used for wrapping the yarn if you prefer a more structured approach to create your pom-pom.
Step 2: Begin Wrapping the Yarn
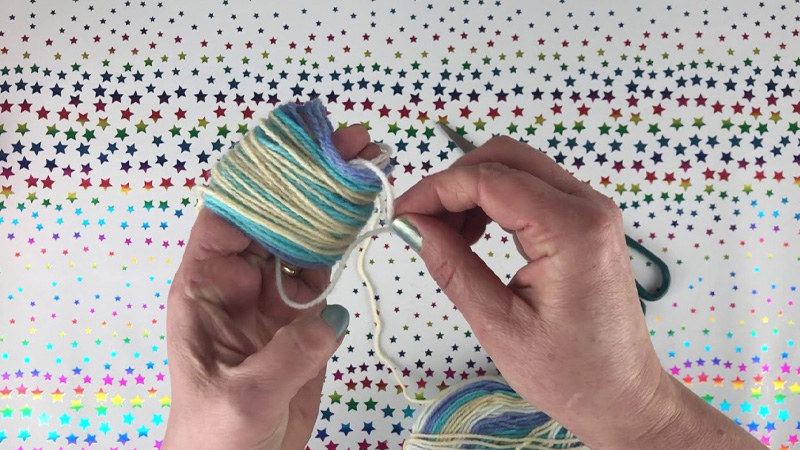
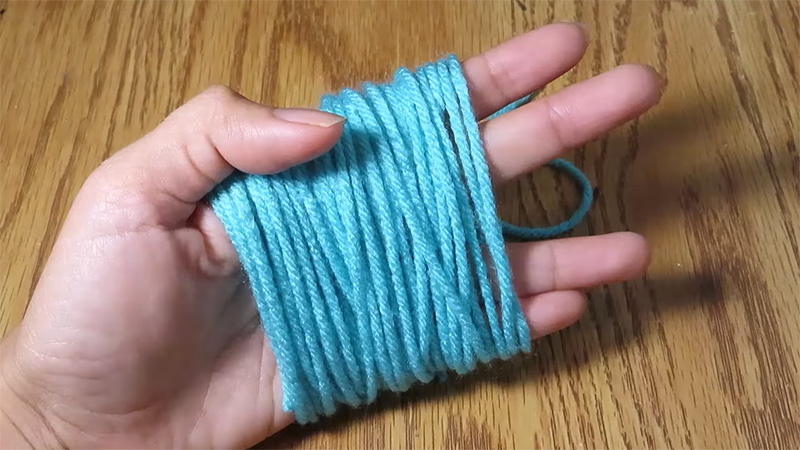
Hold one end of your chosen yarn against your palm, leaving a short tail of about 2-3 inches hanging from your hand. This tail will serve as the securing element later.
With the yarn tail in place, start wrapping the yarn around your fingers, making sure to keep the wraps snug and close together. The more wraps you make, the fuller your pom-pom will be.
Adjust the number of wraps to suit your desired pom-pom thickness.
Step 3: Cut the Yarn
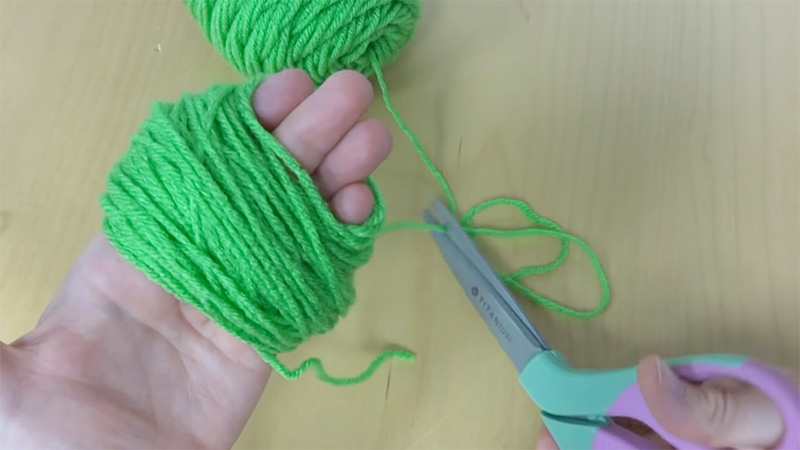
Once you’ve wrapped the yarn to your desired thickness, it’s time to cut it. Carefully snip the yarn, leaving another short tail of about 2-3 inches on the other end.
This second tail will also play a crucial role in tying your pom-pom together.
Step 4: Secure the Center
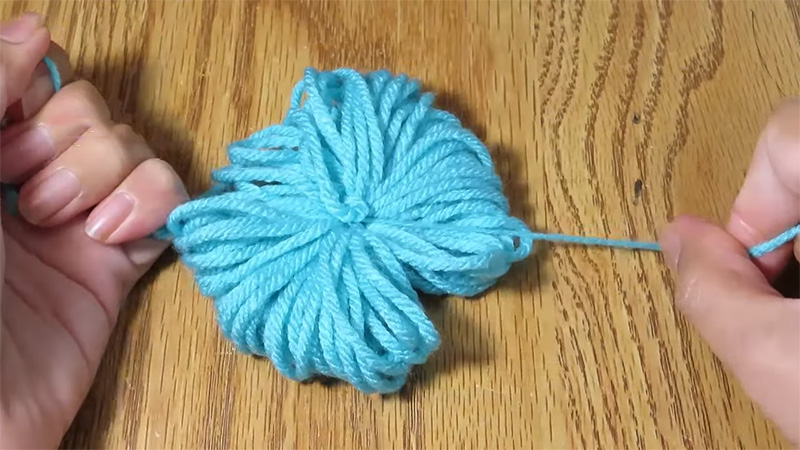
Slide the bundle of wrapped yarn off your fingers while keeping it in its looped shape. This looped yarn will form the basis of your pom-pom. Now, take the 2-3 inch piece of yarn you left hanging when you initially started wrapping and thread it through the looped yarn bundle.
Proceed to tie it securely around the center of the bundle to create a knot. It’s essential that the knot is firm enough to hold your pom-pom together but not too tight, as you’ll need some flexibility for fluffing and shaping it later.
Step 5: Cut the Loops
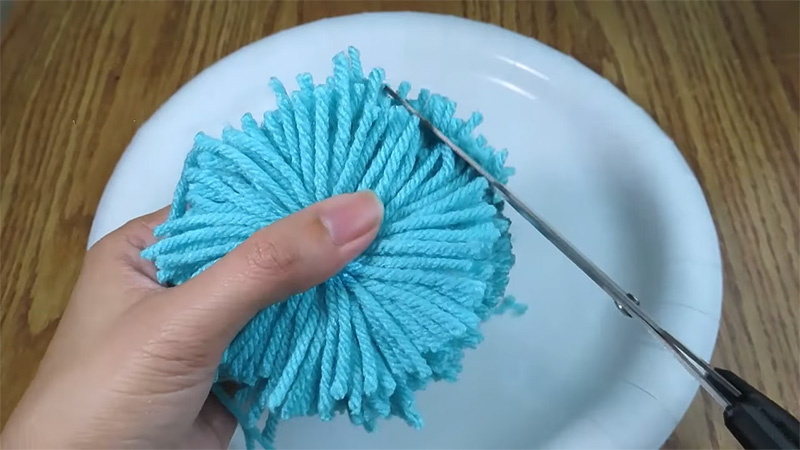
With the knot in place, you’ll now have a bundle of yarn loops at both ends. These loops will form the foundation of your pom-pom’s fluffiness. Using your sharp scissors, carefully cut through all the loops on both ends of the bundle.
Be cautious not to accidentally cut the tie you made in the center while doing this.
Step 6: Fluff and Shape Your Pom-pom
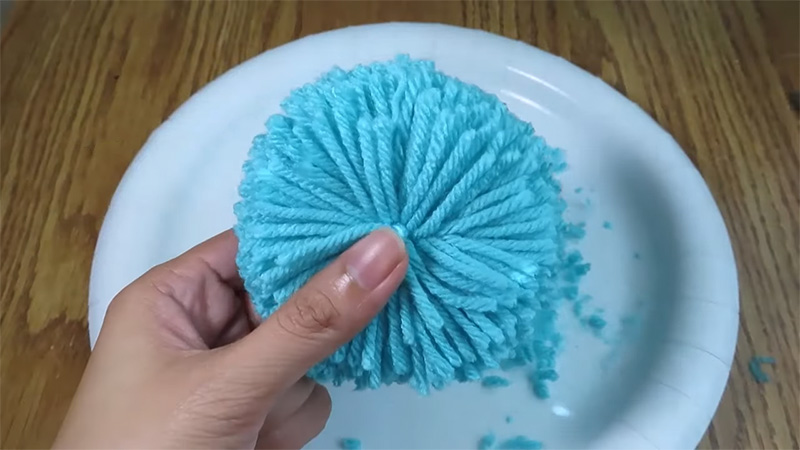
At this stage, your pom-pom might look a bit like a compact, messy bundle of yarn. Don’t worry; this is perfectly normal. Begin the transformation by gently pulling and separating the strands of yarn.
As you do this, you’ll notice your pom-pom taking on a rounder and fluffier appearance. Experiment with how much you fluff and shape it to achieve the desired fullness.
Step 7: Trim and Perfect
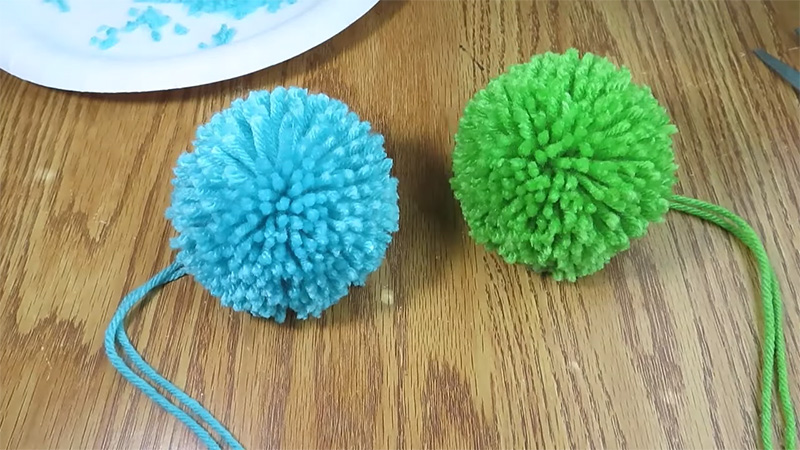
Once your pom-pom is fluffy and round, it’s time to give it a polished appearance. Use your sharp scissors to trim any long or stray yarn pieces that may disrupt its shape.
Take your time with this step, as precise trimming will help your pom-pom look neat and well-rounded.
Step 8: Attach Your Pom-pom
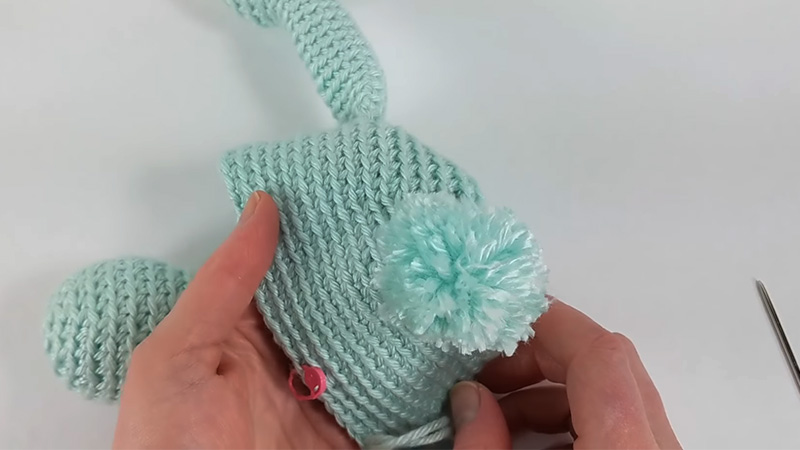
With your handmade pom-pom ready, it’s time to attach it to your project of choice. Whether it’s a hat, scarf, or decorative item, you can use the two small tails of yarn you left at the beginning when you started wrapping.
Thread them through a needle and securely sew the pom-pom onto your chosen item. Ensure your attachment is firm, especially if the item will be washed or frequently worn.
How Long Does It Take to Make a Pom-pom by Hand?
Making a pom-pom by hand is a relatively quick and satisfying crafting endeavor. The time required depends on the size and complexity of the pom-pom you want to create.
On average, a small to medium-sized pom-pom can be completed in about 15 to 30 minutes. Larger pom-poms may take slightly longer. The process includes wrapping the yarn, tying the center, cutting, fluffing, and shaping.
With a bit of practice, you’ll find that making pom-poms is not only fun but also a delightful way to add a touch of whimsy to your projects.
What Are Some Creative Ways to Use Handmade Pom-poms?
Handmade pom-poms are versatile and can be used in various creative ways to add a playful and decorative touch to your projects.
Here are some creative ideas:
Fashion Accessories
Pom-poms can be fabulous fashion accents. Attach them to hats, scarves, and mittens to instantly upgrade your winter wardrobe. Mixing and matching pom-pom colors with your outfit adds a playful and fashionable touch.
Bag Embellishments
Plain handbags can get a stylish makeover with the addition of pom-poms. You can attach them to bag handles, zipper pulls, or even as a tassel. This simple DIY trick transforms your bag into a personalized fashion statement.
Keychains and Bag Charms
Transform ordinary keychains into eye-catching accessories by attaching a colorful pom-pom. Alternatively, make bag charms by securing pom-poms to a keyring or lobster clasp.
These charming accessories make for thoughtful gifts.
Home Decor
For a whimsical and cozy home, craft pom-pom garlands or curtain tiebacks. Pom-pom-trimmed throw pillows and blankets add a touch of playfulness to your living space, making it more inviting and cheerful.
Gift Wrapping
Elevate your gift-giving game with pom-pom gift toppers. These cute and fluffy accents can be tied to ribbons or attached to gift tags, turning any present into a delightful surprise.
Jewelry
Create unique jewelry pieces using mini pom-poms. From earrings and necklaces to bracelets, pom-pom jewelry adds a fun and colorful dimension to your accessory collection.
Party Decorations
Planning a celebration? Pom-poms are perfect for party decor. Craft pom-pom garlands, use them as balloon ties, or create vibrant table centerpieces to set the mood for a festive event.
Pet Accessories
Your furry friends can join in the fun too! Attach a pom-pom charm to your pet’s collar or make playful toys adorned with pom-pom accents. It’s a cute and interactive way to pamper your pets.
Dream Catchers
Enhance your dream catchers with pom-poms to infuse a boho and whimsical vibe into your bedroom or nursery decor. These delightful additions add an extra layer of charm and positivity.
Footwear
Put your personal stamp on your shoes by adding pom-poms. Whether you’re attaching them to laces or using them as shoe charms, these personalized embellishments make a statement with every step.
Craft Projects
Pom-poms are excellent for various craft projects. Incorporate them into wreaths, ornaments, and DIY holiday decorations. The texture and vivid colors of pom-poms make your creations pop.
Event Accessories
If you’re planning formal events like weddings, consider integrating elegant pom-pom accents into corsages, boutonnieres, or table centerpieces. They add a touch of sophistication and playfulness to special occasions.
Curtain Tiebacks
Curtain tiebacks adorned with pom-poms offer both style and function. They can give your windows a stylish makeover while keeping your curtains neatly in place.
Photo Props
Oversized pom-poms are fantastic additions to photo props for parties or themed photoshoots. They lend a playful and visually appealing element to your snapshots, making them even more memorable.
Bookmarks
Craft colorful pom-pom bookmarks to make your reading experience more enjoyable. These charming bookmarks also make thoughtful gifts for bookworms and bibliophiles.
Crafty Greeting Cards
Personalize your homemade greeting cards by adding mini pom-poms as tactile and charming details. Recipients will appreciate the extra effort and whimsical touch.
Tips for Making a Pom Pom by Hand
Creating pom poms by hand can be a fun and rewarding craft, but it’s important to keep a few tips in mind to achieve the best results.
Here are some helpful tips for making pom poms by hand:
Choosing the Right Yarn
Selecting the appropriate yarn is crucial for a successful pom pom. Consider using soft and fluffy yarn for a cozy texture. Thicker yarn will result in a fuller pom pom, while thinner yarn will yield a more delicate look.
Experiment with different yarn types to achieve the desired effect for your project.
Consistent Wrapping
As you wrap the yarn around your fingers or cardboard, maintain consistent tension to ensure uniformity in your pom pom. Even wraps will help you create a balanced and well-shaped pom pom.
Avoid wrapping too tightly, as it can make it challenging to tie the center knot later.
Sharp Scissors Are Essential
Sharp scissors are your best friend when it comes to trimming the pom pom. Dull scissors can lead to frayed or uneven cuts, so make sure your scissors are in excellent condition to achieve clean and precise results.
Tying Secure Knots
When tying the center knot, aim for a balance between secure and not overly tight. A knot that’s too tight can distort the shape of the pom pom or cause the yarn to break.
Ensure the knot holds the yarn together without excessive tension, allowing you to fluff and shape it effectively.
Trimming With Care
After cutting the loops, proceed with trimming the pom pom slowly and carefully. Take small, incremental cuts to achieve an even and well-rounded shape.
Regularly step back to assess the symmetry and adjust as needed to create the perfect pom pom.
Shape and Fluff to Perfection
Once the loops are trimmed, use your fingers to fluff and shape the pom pom to your desired fullness and roundness. Gently separate and pull apart the yarn strands to achieve a balanced and fluffy appearance.
Be patient and enjoy the process of bringing your pom pom to life.
Extra Yarn on Hand
Keep a supply of extra yarn nearby while making pom poms. You may need it for tying knots, attaching the pom pom to your project, or making additional pom poms.
Having extra yarn readily available ensures a smoother crafting experience.
Experiment With Colors
Don’t be afraid to get creative with yarn colors. Experiment with different combinations to craft unique and eye-catching pom poms. Multi-colored pom poms can add a playful and vibrant touch to your projects.
Consider Pom Pom Makers
If you plan to create multiple pom poms regularly, consider investing in pom pom maker tools. These tools simplify the process and help you produce consistent pom poms in various sizes, saving you time and effort.
Combining Pom Poms
Explore the option of combining multiple pom poms of different sizes, colors, and textures to craft stunning garlands, accessories, or decorations. Mixing and matching pom poms can add depth and visual interest to your projects.
Secure Attachment
When attaching pom poms to your projects, such as hats or scarves, use a needle and thread or yarn to securely sew them in place. This ensures that your pom poms stay firmly attached, especially if the items will be washed or frequently worn.
Practice Patience and Enjoyment
Crafting pom poms can be a time-consuming but rewarding process. Embrace the journey, take your time, and savor the creative experience. The patience you invest will be evident in the quality of your handmade pom poms.
FAQs
How do I determine the size of the pom-pom I want to make?
The size of your pom-pom depends on the amount of yarn you use and the number of wraps around your fingers. More wraps and yarn will result in a larger pom-pom.
Can I make multi-colored pom-poms?
Yes, you can create multi-colored pom-poms by using different colors of yarn and wrapping them together. This creates a marbled or variegated effect.
Can I use different types of yarn for making pom-poms?
Yes, you can use various yarn types, including soft and fluffy yarn for a cozy texture or thicker yarn for a fuller pom-pom.
Can I wash items with pom-poms attached?
It’s best to hand wash or spot clean items with pom-poms attached, as machine washing may cause the pom-pom to lose its shape or unravel.
How can I attach a pom-pom securely to a project like a hat or scarf?
You can securely attach a pom-pom by threading the tails of yarn left from the wrapping process through a needle and sewing them securely onto your project. Make sure to sew through several layers of fabric to ensure a strong attachment.
To Recap
Crafting pom-poms by hand is a rewarding and versatile skill that opens the door to endless creative possibilities.
Whether you’re using them to spruce up your wardrobe, decorate your home, or add a personal touch to gifts, these fluffy little wonders are sure to bring joy and whimsy to your projects.
By following the simple steps outlined in this guide and keeping in mind the helpful tips we’ve shared, you can create pom-poms of various sizes and colors to suit your unique style and needs.
So, don’t hesitate to dive into the world of handmade pom-poms. With a dash of patience and a sprinkle of creativity, you can craft these charming adornments that will brighten up your life and inspire countless crafty adventures.
Happy pom-pom making!
Leave a Reply