Finishing a blanket stitch is a crucial skill in the world of embroidery and sewing, adding both functionality and aesthetics to your projects.
The blanket stitch not only secures fabric edges, preventing fraying and unraveling, but it also enhances the overall appearance, transforming a simple edge into a decorative detail.
Properly finishing this stitch is essential for durability, ensuring your creations can withstand wear and tear over time. Moreover, it lends a professional touch to your handcrafted items, conveying a sense of craftsmanship and value.
In this guide, we will explore step-by-step instructions on how to finish a blanket stitch neatly and securely, ensuring your projects maintain their charm and functionality.
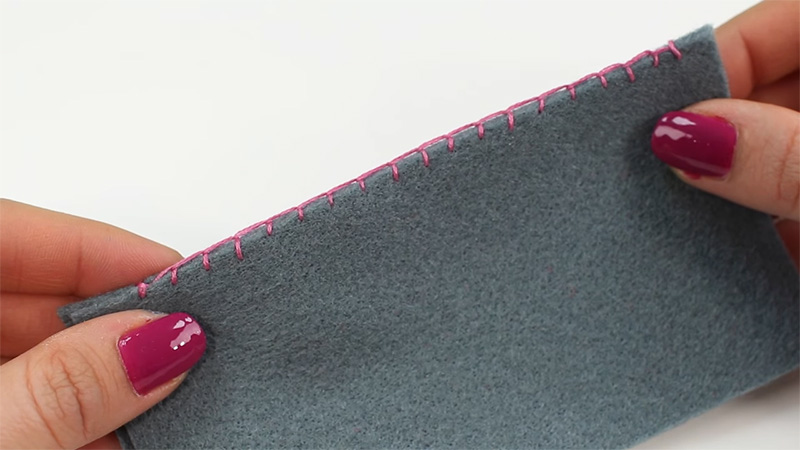
What is Finish a Blanket Stitch? 10 Steps
To finish a blanket stitch, secure the last stitch by either creating a knot or using the backstitch method. The knot involves flipping the fabric to the wrong side, pulling the thread through, and forming a knot.
For added durability and an invisible finish, use the backstitch technique by creating small, evenly spaced backstitches on the fabric’s edge. Proper finishing ensures the stitch remains secure, preventing fraying, and adds a professional touch to your fabric projects.
How to Finish a Blanket Stitch?
The blanket stitch, with its decorative edging and versatile applications, is a staple in the world of hand embroidery. Yet, one crucial aspect of mastering this technique is knowing how to finish it neatly and securely.
Here’s a step-by-step guide on how to complete a blanket stitch, ensuring your projects look polished and professionally executed:
Step 1: Position the Thread
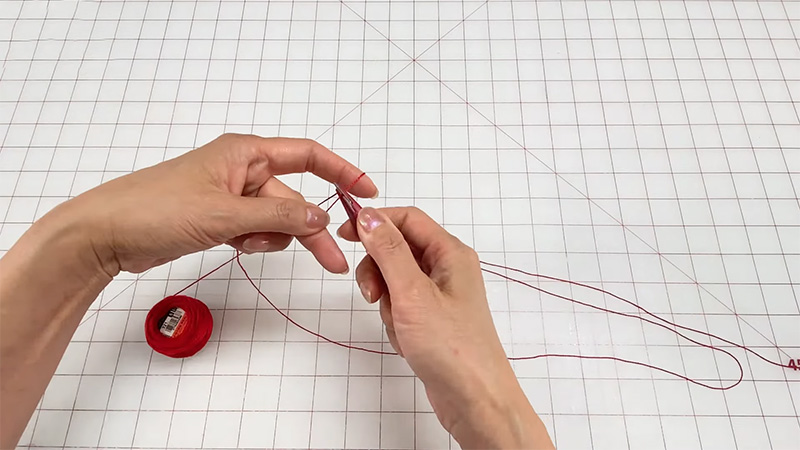
Start by bringing your threaded needle to the back of the fabric through the bottom of your last blanket stitch. Ensure that the thread is taut and securely anchored in place before proceeding.
Step 2: Create a Knot
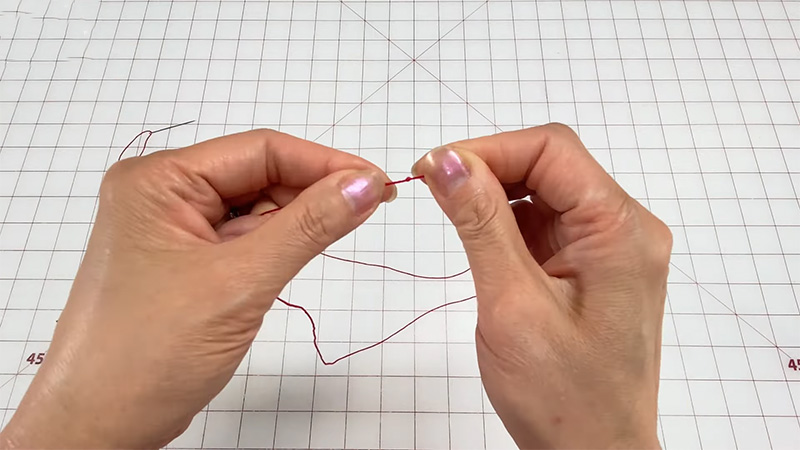
For the simplest and most common finishing method, flip the fabric over to the wrong side. Then, bring the thread through the bottom of your last stitch, leaving behind a small loop.
Step 3: Secure the Knot
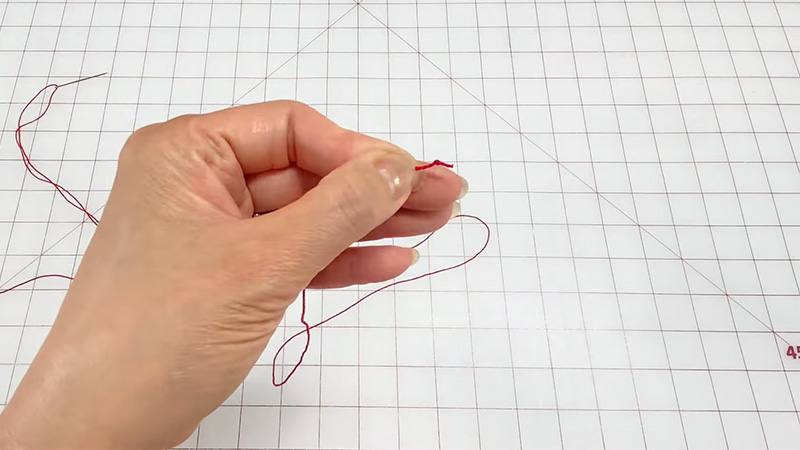
Now, pass the needle through this loop and pull it tight. This action creates a knot that will secure the thread and effectively finish the blanket stitch.
Step 4: Trim Excess Thread
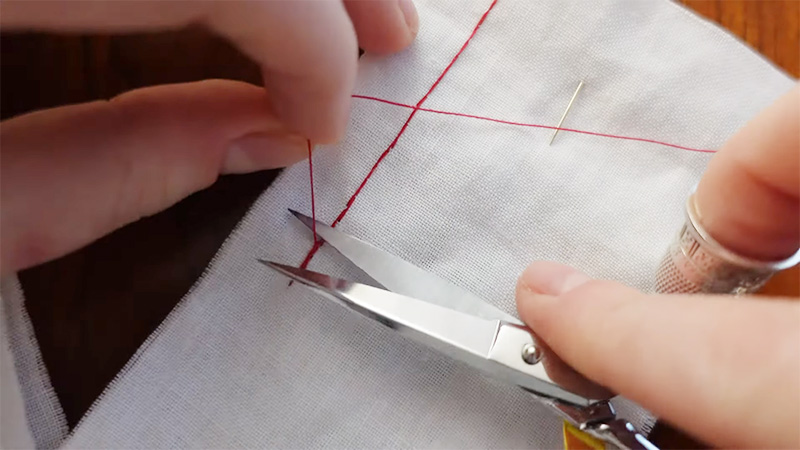
With the knot securely in place, use scissors or thread snips to trim any excess thread close to the knot. This step ensures a clean and tidy finish.
Keep in mind that this method may leave a minor bump on the edge of your fabric. It’s best suited for situations where the back of your work won’t be visible or when working with non-slippery thread.
Step 5: Weave in the End (Optional)
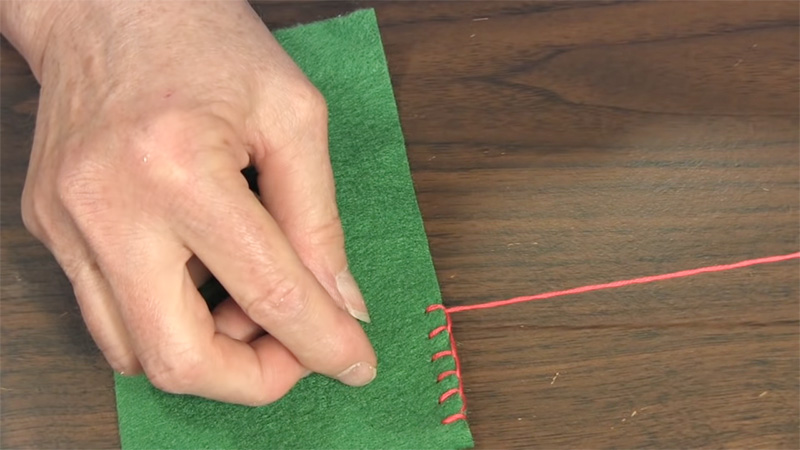
For a more discreet and secure finish, particularly when the back of your work is visible or when working with slippery threads, consider weaving in the end.
Start by bringing the needle and thread to the back of the fabric through the bottom of your last blanket stitch.
Step 6: Weave in
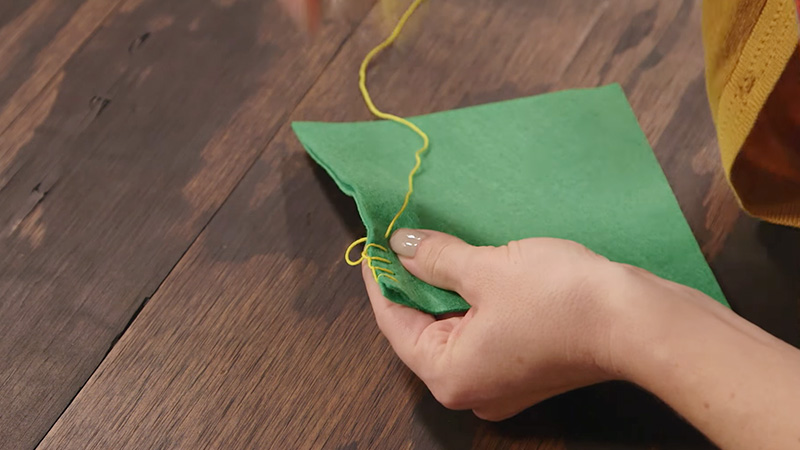
On the wrong side of the fabric, carefully weave the thread through the stitches, following the direction of your blanket stitch. Continue weaving for about an inch or more, depending on the thickness of your thread and fabric.
Step 7: Trim Excess
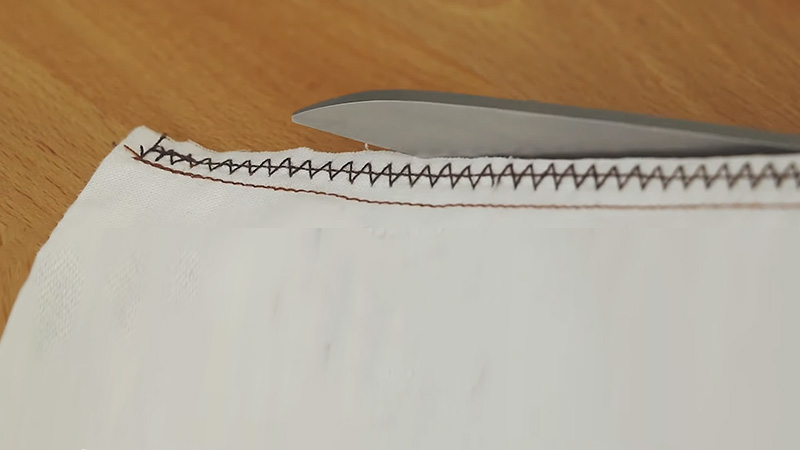
After weaving in the end, cut off any excess thread close to the fabric. This method results in a smooth, flat edge on your fabric, preventing the thread from unraveling and ensuring a professional finish.
Step 8: Backstitch (Alternative to Knot)
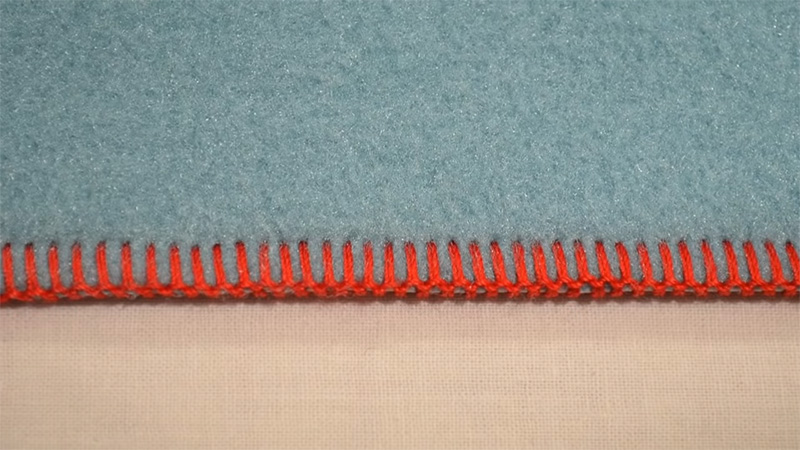
If you prefer a more secure and invisible finish, particularly for single-layer fabrics or when the back of your work won’t be visible, you can opt for the backstitch method.
Step 9: Create a Backstitch
Start by bringing the needle and thread to the front of the fabric through the bottom of your last blanket stitch. Then, make a small backstitch by bringing the needle back through the fabric approximately 1/8 inch away from your last stitch.
Depending on the thread and fabric thickness, repeat the backstitch once or twice.
Step 10: Trim Excess Thread
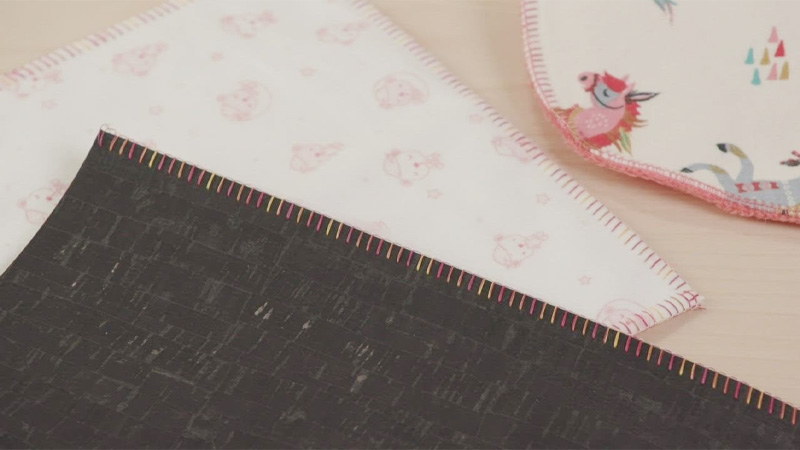
Finally, trim any excess thread close to the fabric to complete the backstitch finish. This technique ensures a strong and nearly invisible end to your blanket stitch.
What is the Purpose of Finishing a Blanket Stitch?
The purpose of finishing a blanket stitch is multi-fold and essential in the realm of sewing and embroidery.
Here are the primary purposes:
Preventing Fraying
One of the main functions of the blanket stitch is to secure the edges of fabric, preventing fraying and unraveling. This is especially important for items like blankets, quilts, and clothing seams, as it ensures the fabric’s longevity and durability.
Enhancing Aesthetics
A neatly finished blanket stitch adds a decorative and professional touch to fabric edges. It transforms a plain edge into an attractive and visually pleasing detail, making it ideal for decorative embroidery, appliqué work, and edge embellishments.
Durability
Properly finished blanket stitches are more robust and can withstand everyday wear and tear. This is crucial for items that will be subjected to frequent use, washing, or handling, such as table linens and upholstery.
Functional and Decorative
The blanket stitch serves a dual purpose. It not only functions as a seam finish but also offers a decorative element to your sewing and embroidery projects, enhancing their overall appeal.
Professional Look
Whether you’re crafting items for personal use or for sale, a well-finished blanket stitch conveys a sense of professionalism and craftsmanship. It adds value to your handcrafted items and can make them more desirable to buyers or recipients.
Tips for Achieving a Professional Finish on Blanket Stitch Projects
Blanket stitching is a versatile and attractive way to finish fabric edges, but achieving a professional finish can be a skillful endeavor. Whether you’re working on a quilting project, adding an embroidered border, or simply want to enhance the aesthetics of your fabric work.
Here are some valuable tips to help you achieve that polished and expert touch:
Choose the Right Thread and Needle
Selecting the appropriate thread and needle is paramount. Ensure your thread matches your fabric or complements your design. Use a needle that’s suitable for both your fabric type and thread thickness.
A mismatch can result in uneven stitches or fabric damage.
Maintain Consistency
Consistency is key to a professional finish. Aim for uniform stitch length and spacing throughout your project. Using a ruler or stitch guide can help you achieve this consistency.
Start With a Secure Knot
Begin your blanket stitch with a small, secure knot to anchor your thread. This prevents it from pulling through and ensures the stability of your stitches.
Pay Attention to Tension
Maintain consistent thread tension. Avoid pulling the thread too tightly, which can distort the fabric, or leaving it too loose, which can make the stitches sloppy.
Practice to find the right balance.
Mind Your Corners
Turning corners requires careful attention. Adjust your stitch spacing and length when approaching a corner to maintain a clean, sharp appearance.
Secure Endings Properly
Finish your blanket stitch securely to prevent unraveling. Options include knots, weaving in the end, or using a backstitch. The choice depends on your project’s requirements.
Trim Excess Thread Neatly
Use sharp scissors or thread snips to trim excess thread close to the fabric. Precision in this step ensures a clean and tidy finish.
Practice Patience
Blanket stitching can be meticulous, so patience is your ally. Rushing through your project can lead to mistakes. Take your time and concentrate on each stitch.
Inspect Your Work
Regularly inspect your work as you progress. This allows you to catch any errors or inconsistencies early on, making it easier to correct them.
Press if Appropriate
For certain projects, pressing the finished blanket stitch with an iron can flatten the stitches and give your work a more polished appearance. Be mindful of the fabric type and any special care instructions.
Use Quality Materials
Invest in high-quality fabric, thread, and tools. Quality materials often yield more professional results.
Practice and Learn
Blanket stitching is a skill that improves with practice. Don’t be discouraged by initial imperfections; embrace them as opportunities for improvement.
FAQs
What materials and tools do I need for finishing a blanket stitch?
Materials and tools for finishing a blanket stitch: fabric, matching thread, a sewing needle, scissors, optional thimble, fabric glue, or a heat-sealing tool for synthetic threads.
What should I do if I want a secure but nearly invisible finish on my blanket stitch?
For a secure yet nearly invisible finish on a blanket stitch, use the backstitch method, creating small, evenly spaced backstitches close to the fabric edge.
Do different fabrics or thread types require different finishing techniques for blanket stitches?
Yes, different fabrics and thread types may require tailored finishing techniques. Delicate fabrics may benefit from glue, while sturdy ones can use knots or backstitches for security.
Can I use the same finishing techniques for both hand-sewn and machine-sewn blanket stitches?
Yes, the same finishing techniques like knots, weaving, or backstitches can be applied to both hand-sewn and machine-sewn blanket stitches for secure and tidy results.
Which is better, a knot or weaving in the end, to finish a blanket stitch?
The choice between a knot and weaving in the end to finish a blanket stitch depends on the project; knots are simpler, while weaving provides a flatter, neater look.
What are the mistakes to avoid when finishing a blanket stitch?
Mistakes to avoid when finishing a blanket stitch: uneven stitch length, inconsistent spacing, skipping stitches, excessive thread tension, insecure starting knots, corner neglect, messy endings, and rushing the process.
To Recap
Mastering the art of finishing a blanket stitch is a valuable skill that elevates your embroidery and sewing projects to a professional level. This essential technique not only guards against fabric fraying but also enhances the visual appeal of your creations.
Whether you opt for the simplicity of a knot or the added security of weaving in the end, your choice should align with the project’s requirements and desired aesthetics.
As you become proficient in this finishing process, your handmade items will not only withstand the test of time but also carry an air of craftsmanship and care.
So, remember to pay attention to the details, secure those final stitches, and watch as your projects shine with a polished and neatly finished blanket stitch.
Leave a Reply