Mastering the art of using a rotary cutter is a fundamental skill for those immersed in the realms of sewing, quilting, and crafting. This versatile tool, with its circular blade and precision-cutting capabilities, unlocks a world of creative possibilities.
By following a series of well-defined steps, you can harness its potential to make precise cuts through various materials, ensuring your projects are executed with precision and finesse.
Whether you’re a seasoned enthusiast or just beginning to explore the world of fabric and paper crafting, understanding how to use a rotary cutter effectively is essential.
In this guide, we will break down each step to help you unlock the full potential of this indispensable tool and elevate your crafting endeavors.

What is a Rotary Cutter?
A rotary cutter is a handheld tool used in sewing and crafting. It features a circular blade attached to a handle and is designed for precision fabric cutting.
This versatile tool can cut through multiple layers of fabric, paper, or other materials with ease, making it a popular choice for quilters, seamstresses, and DIY enthusiasts.
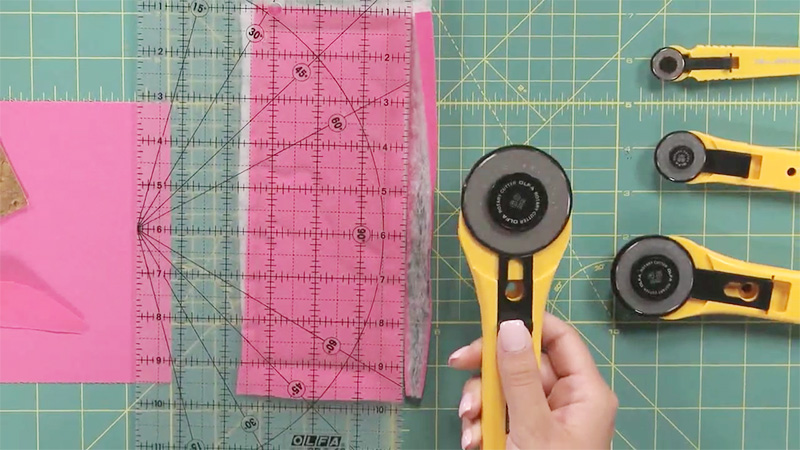
Rotary cutters come in various blade sizes and are essential for achieving clean, straight cuts in various projects.
How to Use a Rotary Cutter?
Using a rotary cutter is an essential skill for anyone working with fabric, whether you’re a quilter, seamstress, or craft enthusiast. Rotary cutters offer precision and efficiency in cutting fabric, making your projects more manageable and accurate.
Here’s a guide on how to use a rotary cutter effectively:
Prepare Your Workspace
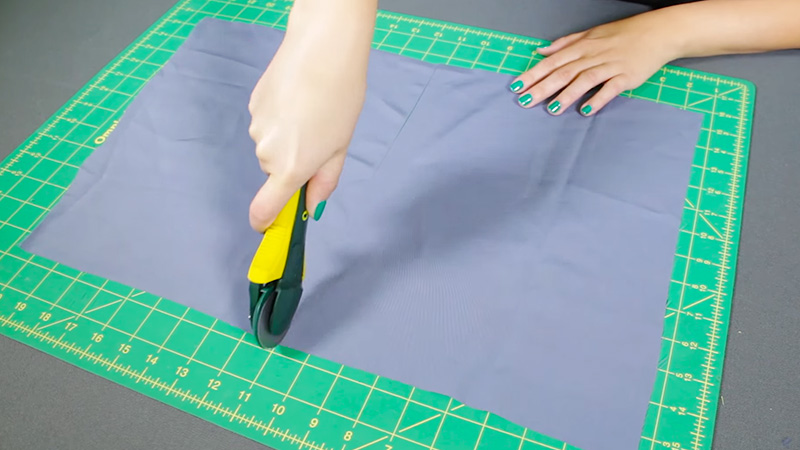
Before you begin, create a clean and organized workspace. Clear a flat surface and lay down a self-healing cutting mat. Ensure you have adequate lighting and ample room to work comfortably.
Prepare Your Fabric
Lay your fabric on top of the cutting mat, right side up. Smooth out any wrinkles or folds in the fabric to create a flat, even surface. For multiple layers, align them neatly to ensure uniform cuts.
Measure and Mark
Use a clear acrylic ruler to measure and mark the dimensions you need for your project. Place the ruler on the fabric, aligning it precisely with the intended cutting line.
Ensure the ruler is straight and parallel to the mat’s grid lines.
Secure the Ruler
Hold the ruler securely with your non-dominant hand, making sure it doesn’t shift during the cutting process. Keep your fingers a safe distance from the cutting path to prevent accidents.
Position the Rotary Cutter
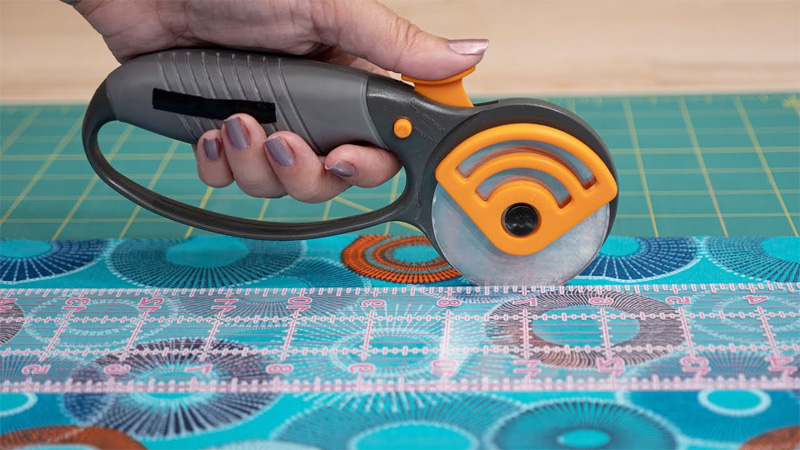
Hold the rotary cutter in your dominant hand, gripping the handle firmly. Position the rotary cutter’s blade guard against the edge of the ruler where you intend to start cutting.
Ensure the blade guard is fully extended.
Expose the Blade
Gently press down on the rotary cutter’s handle to extend the blade. Most rotary cutters have a locking mechanism to control blade exposure. Always unlock it before cutting and lock it when not in use for safety.
Start Cutting
Begin cutting by pushing the rotary cutter away from you while following the edge of the ruler. Maintain a steady, controlled cutting motion, applying even pressure on the rotary cutter.
Avoid jerky or rushed movements.
Keep the Blade Aligned
Throughout the cut, ensure that the rotary cutter’s blade stays in contact with the ruler’s edge. Proper alignment is critical for achieving straight and precise cuts.
Finish the Cut
Continue cutting until you reach the end of the fabric or the marked line. As you approach the end, release the pressure on the rotary cutter’s handle to retract the blade safely.
Lift the Cutter
After completing the cut, lift the rotary cutter carefully away from the fabric and ruler. Verify that the blade is safely retracted before moving it away from your work area.
Inspect the Cut
Examine the cut edge of the fabric for accuracy. It should be straight, clean, and even if you followed the ruler’s edge closely. Address any irregularities or inaccuracies as needed.
Repeat as Needed
If you have more cuts to make for your project, repeat the entire process for each cut, ensuring precise measurement and alignment each time.
Close the Blade
After finishing your cutting tasks, promptly close or retract the rotary cutter’s blade according to the manufacturer’s safety instructions to prevent accidents.
Store Safely
When not in use, store the rotary cutter safely in a designated container or with the blade retracted, ensuring it’s out of reach of children and pets.
Proper storage prolongs the blade’s life and reduces the risk of accidents.
What is a Rotary Cutter Used for?

A rotary cutter is a versatile and indispensable tool used primarily in sewing, quilting, and crafting. It consists of a handle and a circular blade that can rotate, hence the name “rotary cutter.” This tool is designed to make the process of cutting fabric, paper, leather, and other materials much more precise, efficient, and convenient compared to traditional scissors or shears.
Here’s a detailed look at what a rotary cutter is used for:
Cutting Fabric
Rotary cutters are especially popular among quilters and seamstresses. They allow for straight and accurate cuts through various types of fabrics, including cotton, silk, denim, and more.
With a rotary cutter, you can easily cut fabric into strips, squares, triangles, or any desired shape, ensuring precision in measurements.
Quilting
Quilters use rotary cutters extensively to cut fabric pieces for patchwork and quilting projects. The ability to cut multiple layers of fabric at once saves time and ensures that pieces match up perfectly.
This is crucial for achieving precise seams and intricate quilt patterns.
Crafting
Beyond sewing and quilting, rotary cutters find applications in a wide range of crafting projects. Crafters use them for cutting paper, felt, vinyl, and even lightweight wood.
The clean, sharp cuts they provide are essential for achieving professional-looking results in projects like scrapbooking, card making, and paper art.
Pattern Cutting
Dressmakers and tailors use rotary cutters to cut patterns from paper or fabric. The accuracy of rotary cutting helps ensure that clothing pieces fit together perfectly during garment construction.
It’s also handy for cutting out patterns for home décor projects like curtains and pillowcases.
Trimming Excess Seam Allowance
After sewing seams, rotary cutters are used to trim excess fabric from seam allowances. This reduces bulk in the seams and allows for a smoother, more professional finish on garments and quilts.
Slicing Through Multiple Layers
Rotary cutters are designed to cut through several layers of material simultaneously. This capability is especially useful when working on large projects or when creating identical pieces, as it significantly speeds up the cutting process.
Accuracy and Efficiency
One of the main advantages of using a rotary cutter is the precision it offers. The circular blade maintains a consistent cutting angle, resulting in straight, even cuts.
This accuracy is crucial for ensuring that pieces fit together seamlessly in sewing and quilting projects.
Reduced Hand Fatigue
Using a rotary cutter is often less tiring on the hands and wrists compared to using scissors, making it an excellent choice for individuals with hand or wrist issues.
Safety Features
Most rotary cutters come with safety features such as blade guards that retract when not in use and locking mechanisms to secure the blade during storage, reducing the risk of accidents.
How to Choose the Right Size Rotary Cutter Blade?

Choosing the right size rotary cutter blade is essential for achieving precise and efficient cuts in your sewing, quilting, or crafting projects.
Here’s a step-by-step guide on how to select the appropriate blade size:
Consider the Material
The first factor to consider is the type of material you’ll be cutting. Smaller blades, such as 28mm or 45mm, are suitable for delicate fabrics like silk or lightweight cotton.
In contrast, larger blades, like 60mm, are better for thicker fabrics such as denim, upholstery material, or when cutting multiple layers.
Assess Project Complexity
Evaluate the complexity of your projects. Smaller blades excel at intricate designs, tight curves, and detailed work. If your projects involve many small, detailed cuts, a smaller blade offers greater control.
Larger blades are better for straightforward cuts in projects with less intricate designs.
Account for Cutting Layers
Consider whether you’ll be cutting multiple layers of fabric or material at once. For tasks that involve several layers, like quilting, a larger blade can efficiently cut through the bulk in a single pass.
Smaller blades are more suitable for precision cutting of single layers.
Evaluate Cutting Efficiency
Think about the efficiency of your cutting tasks. Smaller blades may require more passes for straight-line cuts, which can be time-consuming in larger projects.
Larger blades cover more surface area in a single pass, making them more efficient for straight-line cuts, especially when cutting in bulk.
Prioritize Personal Comfort
Your comfort during extended cutting sessions matters. Smaller blades are lighter and can be more comfortable for prolonged use, reducing the risk of hand and wrist fatigue.
If you have hand or wrist issues, opt for a smaller, lighter blade for enhanced comfort.
Factor in Blade Replacement Cost
Keep in mind that larger blades typically come with a higher cost for replacement blades. When deciding on the blade size, consider the budget for ongoing maintenance and replacement.
Consider Skill Level
Your experience level in crafting and cutting also plays a role in blade selection. Beginners may find it easier to control a smaller blade, which is conducive to learning precision cutting techniques.
Experienced users may choose larger blades to improve efficiency, especially for larger projects.
Verify Accessory Compatibility
Check if there are compatible accessories, such as rulers, templates, and cutting mats, designed for the blade size you’re considering. Some projects may require specialized accessories that align with your chosen blade size.
FAQs
What materials can I cut with a rotary cutter?
A rotary cutter can cut fabrics (cotton, silk, denim), paper, leather, vinyl, felt, and various craft materials, offering versatility for many creative projects.
Are there safety precautions when using a rotary cutter?
Yes, safety precautions are crucial when using a rotary cutter. Always engage the blade guard, use a cutting mat, and keep fingers away from the blade’s path.
Can I use a rotary cutter for curved cuts and intricate designs?
Yes, a rotary cutter can be used for curved cuts and intricate designs. Use a smaller blade for better control and precision in such projects.
How often should I change the rotary cutter blade?
Change the rotary cutter blade when it becomes dull or shows signs of wear. For frequent use, consider replacing it every 3-5 projects or when cuts become less precise.
Can I use a rotary cutter without a cutting mat?
Using a rotary cutter without a cutting mat is not recommended. A cutting mat protects surfaces, prolongs blade life, and ensures clean, accurate cuts.
To Recap
Mastering the use of a rotary cutter is a valuable skill that empowers creators in sewing, quilting, and crafting to achieve precision, efficiency, and superior results.
Through careful preparation of your workspace, accurate measurement and marking, secure ruler placement, and controlled cutting techniques, you can harness the full potential of this versatile tool.
The rotary cutter’s ability to effortlessly glide through various materials, whether fabric, paper, or more, enables a world of creative possibilities.
Remember to prioritize safety by maintaining blade guard engagement and proper storage practices. With practice and adherence to the steps outlined in this guide, you can confidently wield your rotary cutter, enhancing the quality of your projects and expanding your horizons in the realm of creativity.
Leave a Reply