Threading a sewing machine may seem like a daunting task, especially if you’re new to sewing. However, mastering this essential skill is the gateway to creating beautiful and functional stitches.
Whether you have a traditional mechanical machine or a modern computerized one, the process follows a similar pattern. In this comprehensive guide, we’ll unravel how to thread a sewing machine.
From understanding the various parts of your machine’s threading system to troubleshooting common issues, you’ll gain the knowledge and confidence needed to thread your machine with ease.
A well-threaded machine ensures smooth sewing and prevents frustrating thread snags and jams.
So, whether you’re a novice sewer or someone looking to refresh their skills, let’s dive into the world of threading and unlock your sewing machine’s full potential. Follow along, and soon you’ll be stitching with confidence and precision.
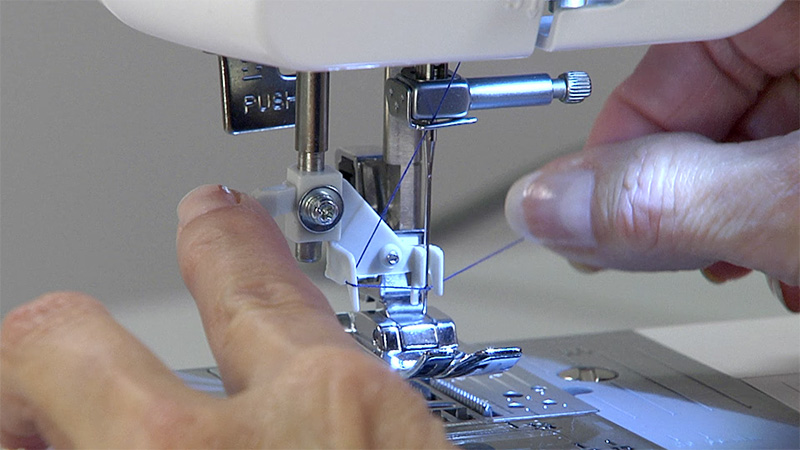
How to Thread a Sewing Machine? 6 Steps
Threading a sewing machine can seem complex, but it’s a fundamental skill that’s essential for sewing success. In this step-by-step guide, we’ll break down the process into detailed, easy-to-follow steps.
We’ll use a typical front-loading bobbin sewing machine for reference. Always consult your sewing machine’s manual for specific instructions, as different models may have variations.
Step 1: Prepare Your Machine
Before you start threading, ensure your sewing machine is powered off and unplugged. Familiarize yourself with the different parts of your machine, including the presser foot, tension dial, take-up lever, and bobbin winder.
Step 2: Wind the Bobbin
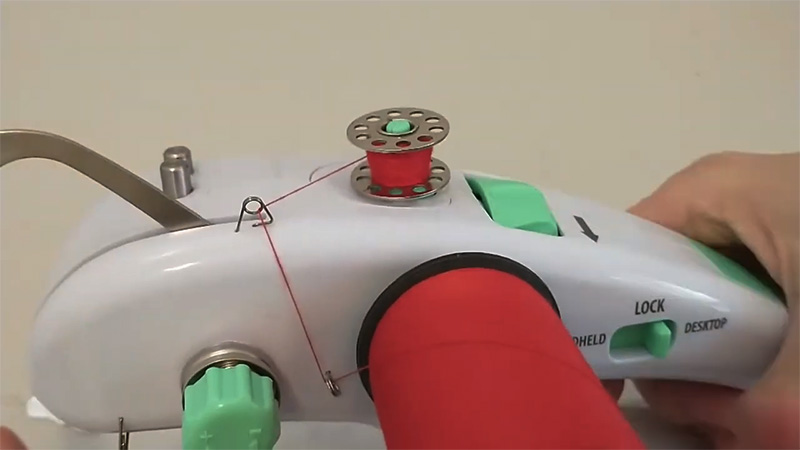
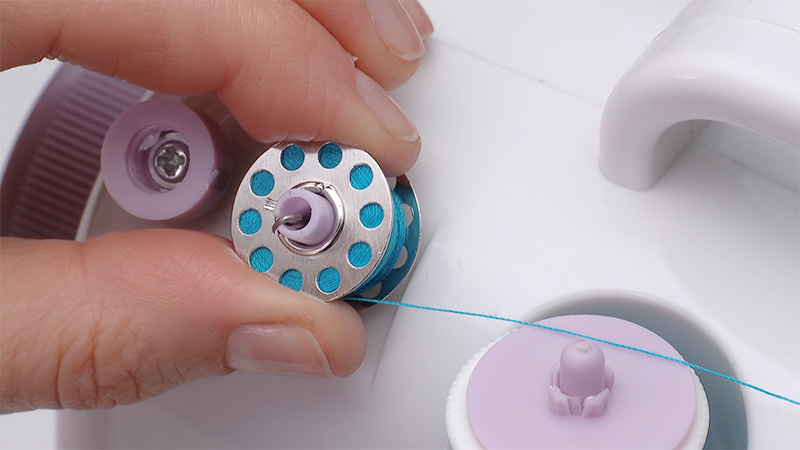
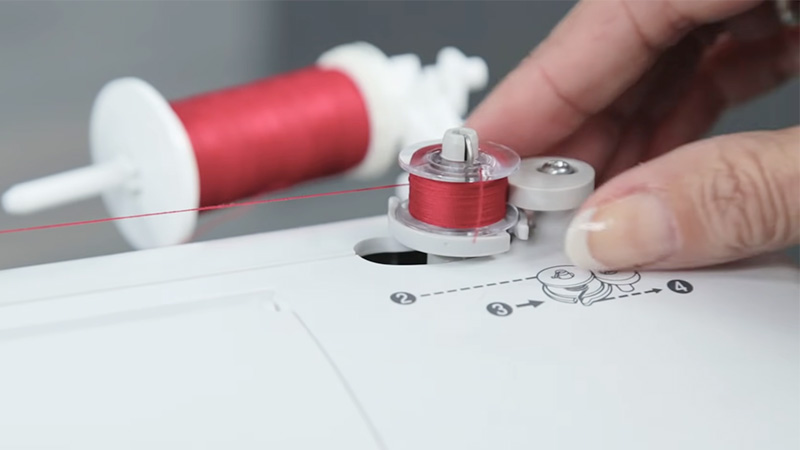
Begin by winding a bobbin with the thread you intend to use. Place the spool of thread on the spool pin and secure it with a cap or holder. Position an empty bobbin on the bobbin winder, slide it into place, and secure it by engaging the winder mechanism.
Thread the thread through the bobbin winding tension disc (if your machine has one) and then around the bobbin a few times. Finally, push the bobbin winder to start winding. Stop when it’s full, cut the thread, and disengage the bobbin winder.
Step 3: Place the Bobbin
Open the bobbin case, usually located beneath the needle plate, and insert the newly wound bobbin. Make sure the thread unwinds in the correct direction, following the arrow guide. Pull the thread into the bobbin case’s thread slot.
Step 4: Thread the Upper Thread
Now, let’s thread the upper part of the sewing machine. Raise the presser foot to release tension on the thread. Thread the upper thread through the thread guide located at the top of the machine (near the spool pin).
Bring the thread down, passing it through any additional thread guides on your machine. Next, thread the upper thread through the tension discs.
These are usually located directly above the needle and are critical for maintaining proper tension in your stitches. Thread the thread from right to left between the tension discs, ensuring it’s properly seated in the tension mechanism.
After passing through the tension discs, guide the thread through the take-up lever. The take-up lever moves up and down with your needle. Thread the needle from front to back. You can use a needle threader if your machine has one.
Step 5: Checking Tension and Lower the Bobbin Thread
With the presser foot still up, gently pull on the upper thread. You should feel resistance, indicating the thread is properly engaged with the tension mechanism. If the thread pulls freely, it’s not correctly threaded. Recheck the threading path.
Now, lower the presser foot. This action engages the tension discs and secures the thread in place. To bring up the lower thread (bobbin thread), hold the upper thread and manually turn the handwheel towards you (counter-clockwise).
This will lower the needle and bring the lower thread up through the needle plate. Use a pair of scissors or tweezers to grab the bobbin thread and pull it out.
Step 6: Final Checks
After completing the threading process, it’s crucial to perform some final checks. Ensure both the upper and lower threads are under the presser foot and toward the back of the machine.
Hold both threads toward the back while you start sewing to prevent them from getting tangled. Double-check the upper thread tension; it should be set according to your fabric and project requirements.
By following these detailed steps, you should have successfully threaded your sewing machine. Practice threading until you’re comfortable with the process, as it’s a skill that forms the foundation of your sewing endeavors. Happy sewing!
Why Do My Sewing Needle Keeps Breaking?
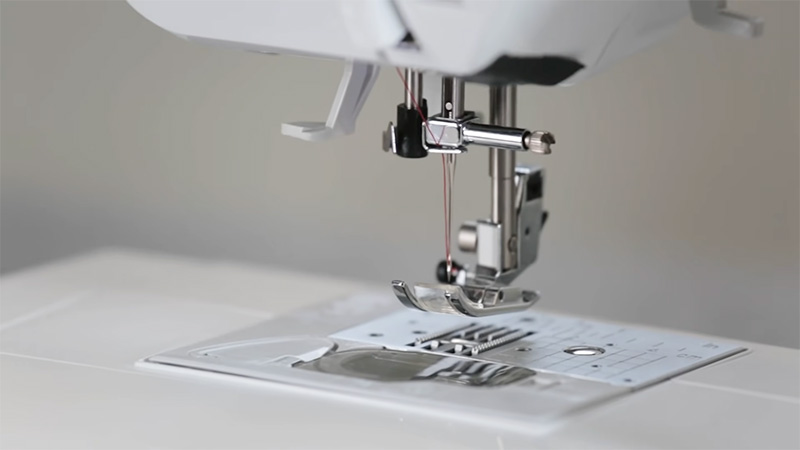
A sewing needle can break for several reasons, and it can be frustrating. Here are some common reasons why sewing needles might keep breaking:
Wrong Needle Type
Using the wrong type or size of needle for your fabric can cause breakage. Needles come in various sizes and styles for different fabrics. Ensure you’re using the appropriate needle for the material you’re sewing.
Dull Needle
A dull or damaged needle is more likely to break. Needles should be replaced after 6-8 hours of sewing or if they become bent or damaged. Make sure the needle is properly installed, with the flat side facing the back. If it’s not inserted correctly, it can hit the bobbin case or hook and break.
Fabric Jamming
If fabric gets jammed in the machine or caught on the needle, it can cause the needle to break. Ensure smooth and even fabric feed by using the correct presser foot and maintaining proper tension.
Thread Tension
Incorrect thread tension can cause the needle to break. Check that your machine’s tension settings match your fabric and thread. Sewing over pins can bend or break the needle. Always remove pins before they reach the presser foot.
Speed and Force
Sewing too quickly or with excessive force can stress the needle, especially when sewing through thick layers of fabric or seams. Slow down and let the machine do the work.
Machine Issues
Problems with your sewing machine, such as a misaligned needle, a bent needle bar, or timing issues, can cause needle breakage. Consult your machine’s manual or seek professional repair if you suspect machine-related problems.
Low-quality or old needles may be more prone to breaking. Invest in high-quality needles from reputable brands.
Needle Size and Thread Compatibility
Ensure that the thread you’re using is appropriate for the needle size. Using thread that’s too thick for the needle can cause breakage. To prevent your sewing needle from breaking, start by checking the needle type and size.
Ensure it’s in good condition, and confirming that you’re using the right thread and fabric combination. Additionally, sew at a steady pace and handle your machine and fabric carefully to avoid jams or excessive force.
How to Thread the Bobbin Thread into the Machine?
Threading the bobbin thread into your sewing machine is a crucial step in the sewing process. Here’s a general guide on how to do it:
Access the Bobbin Area
Open the cover or compartment that houses the bobbin. On most machines, this is located beneath the sewing machine’s needle plate. If there’s an old bobbin in the machine, remove it by gently pulling it out.
Prepare the Bobbin
Wind the desired thread onto an empty bobbin. Most machines have a bobbin winding mechanism on the top, near the handwheel. Follow your machine’s manual for guidance on how to wind the bobbin correctly.
Insert the wound bobbin into the bobbin case. Ensure the thread unwinds in a clockwise direction, as specified in your manual.
Thread the Tension Guide
Thread the loose end of the bobbin thread through the small tension guide or slot in the bobbin case. It’s crucial to follow any threading path indicated in your machine’s manual.
Seat the Bobbin
Hold the bobbin case by the latch or handle, and carefully place it into the bobbin holder in the machine. You should feel or hear a slight click when it’s properly seated.
Thread the Upper Thread
Thread the upper thread through the machine’s threading path, following the specific threading guide provided in your machine’s manual. This usually involves passing the thread through various thread guides, the tension discs, and the needle.
Lower the sewing machine’s needle into the bobbin area by turning the handwheel towards you (always turn it towards you).
Bring Up the Bobbin Thread
Hold the end of the upper thread, then manually turn the handwheel towards you to lower and then raise the needle again. As the needle comes back up, it should catch the bobbin thread and bring it up through the needle plate.
Retrieve the Bobbin Thread
Gently pull the bobbin thread loop up through the needle plate. Both the upper thread and bobbin thread should now be ready for sewing. Close the bobbin compartment cover securely. Plug in your sewing machine and turn it on.
Test Sew
Run a few stitches on a scrap piece of fabric to ensure both the upper and bobbin threads are properly threaded and the machine is sewing correctly.
Remember, your sewing machine’s manual is the best resource for detailed, model-specific instructions on threading the bobbin and machine. Always follow the manufacturer’s recommendations for safe and proper operation.
FAQs
How do I thread a sewing machine for the first time?
Threading a sewing machine for the first time can be intimidating, but it becomes easier with practice.
Start by consulting your machine’s manual for specific instructions. Typically, you’ll need to follow a threading path that passes through thread guides, tension discs, and the needle.
Why does the thread keep breaking while I’m sewing?
Thread breakage can occur for various reasons, including incorrect threading, tension issues, using the wrong needle, or sewing too quickly. To troubleshoot, rethread the machine, check the tension settings, ensure you’re using the correct needle and thread for your fabric.
What should I do if the thread gets stuck or tangled in the bobbin area?
If the thread becomes tangled or stuck in the bobbin area, stop sewing immediately and turn off the machine.
Carefully remove the fabric and any jammed thread. Open the bobbin case, clean it, and rethread the bobbin following your machine’s manual.
How do I adjust the thread tension on my sewing machine?
Adjusting thread tension depends on your sewing machine’s design. Most machines have a tension dial or knob that can be turned to increase or decrease tension.
To balance the tension, start with the machine threaded correctly and test on a scrap of your fabric.
Can I use different thread brands in the bobbin and upper thread?
While it’s generally recommended to use the same brand and type of thread in both the bobbin and upper thread for consistent results, you can use different brands in a pinch. Just ensure the thread weight and fiber content are similar to prevent tension issues.
Conclusion
Threading your sewing machine is a fundamental skill that every seamstress, from beginners to seasoned pros, must master. This guide has taken you through the essential steps and tips for threading your sewing machine..
Remember, practice makes perfect. Don’t be discouraged if you find it a bit tricky at first. With time and experience, you’ll become more adept at threading your machine swiftly and accurately.
Properly threaded, your sewing machine becomes a powerful tool, transforming fabric into beautiful creations. As you sew, pay attention to the quality of your stitches, as this can be a telltale sign of whether your machine is threaded correctly.
Whether you’re sewing garments, quilts, or crafts, a well-threaded sewing machine is your ticket to success. Keep your machine clean, follow the manufacturer’s guidelines, and refer back to this guide whenever needed. With practice and patience, threading your sewing machine will become second nature.
Meta:
Leave a Reply