In the intricate world of sewing, attention to detail is paramount, and one of the fundamental aspects that demand precision is adding and sewing seam allowances.
Seam allowances serve as the framework upon which every sewing project is built, ensuring a proper fit, durability, and a polished finish. Learning how to add & sew seam allowances correctly is a skill that every sewist, whether a beginner or an experienced hand, must master.
This comprehensive guide on how to add and sew seam allowances will provide you with step-by-step instructions, methods, and the necessary tools to ensure that your fabric pieces are cut to the correct size, allowing you to sew with confidence.
From measuring and marking seam allowances accurately to stitching them securely, each aspect will be demystified, empowering you to embark on a wide range of sewing projects with accuracy and finesse.

What is a Seam Allowance?
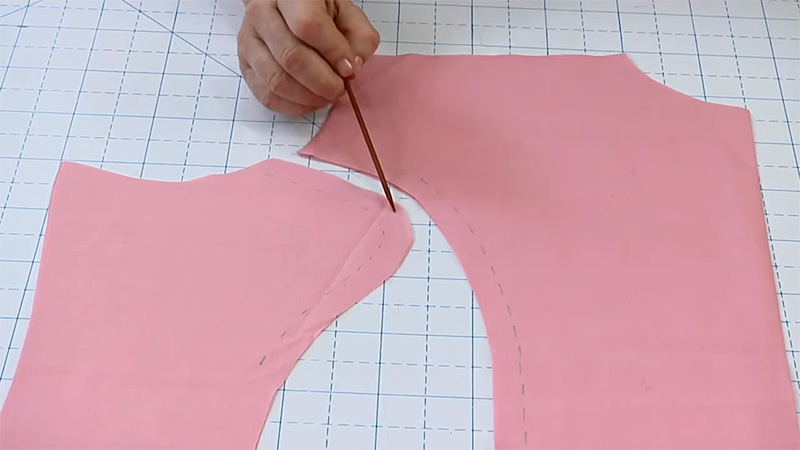
A seam allowance is a designated area of fabric beyond the stitching line in a sewing project. It’s the space between the stitching line and the fabric’s raw edge, and it’s essential for creating sturdy, clean, and well-finished seams.
Seam allowances vary in width depending on the sewing pattern or project, but a common measurement is 5/8 inch (approximately 1.5 cm) in many garment sewing patterns.
Seam allowances provide room for stitching, reinforcing the seam’s strength, and they also allow for adjustments, modifications, and fitting changes during the sewing process.
They are a critical element in achieving professional-quality sewing results, ensuring that seams are strong, durable, and free from fraying while maintaining the desired fit and appearance of the finished item.
How to Add and Sew Seam Allowance?
Here are the simple methods for adding and sewing seam allowances:
Pattern with Included Seam Allowance:
Many commercial sewing patterns come with pre-printed seam allowances. Simply cut your fabric along the pattern pieces, following the lines provided, to automatically include the seam allowance.
Measuring and Marking Seam Allowance:
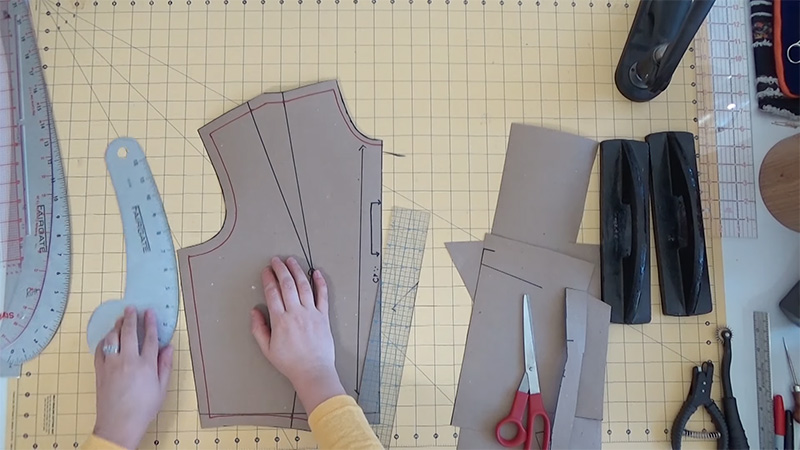
For patterns without seam allowances, you can measure and mark them directly onto your fabric using a clear ruler and fabric chalk or a washable fabric marker. Add the specified seam allowance to each pattern piece before cutting.
Using a Seam Allowance Guide:
Seam allowance guides, like seam gauges or magnetic seam guides, attach to your sewing machine to help maintain a consistent seam allowance as you stitch. Simply adjust the guide to the desired width.
Tape or Masking Tape Method:
Apply painter’s tape or masking tape to your sewing machine’s throat plate, marking the desired seam allowance width. Use this as a visual guide while sewing.
Paper Seam Allowance Template:
Create a paper template with the desired seam allowance width. Lay it on your fabric, trace around it with fabric chalk or a marker, and then cut along the marked lines.
Specialty Sewing Foot:
Some sewing machines come with specialty feet, like edge-stitching or quilting feet, that have built-in guides for seam allowances. Attach the appropriate foot and sew, keeping the fabric aligned with the guide.
Seam Allowance Ruler:
Seam allowance rulers, such as a clear gridded ruler with a lip, can be placed against the fabric edge while cutting to ensure accurate seam allowances.
These seven methods provide various options for adding and sewing seam allowances, catering to different preferences and sewing situations.
Choose the method that best suits your project and equipment to ensure precise and consistent seam allowances in your sewing endeavors.
How Do You Calculate Seam Allowance?

Calculating seam allowances is a crucial step in sewing, ensuring that your fabric pieces will come together with the correct fit and finish. Here are the necessary measurements to consider when calculating seam allowances:
Pattern Instructions:
Always start by consulting the sewing pattern or project instructions. Patterns often include specific seam allowance measurements for various areas of the garment or item. Follow these instructions carefully to achieve the desired fit and finish.
Standard Seam Allowance:
The most common seam allowance in sewing is 5/8 inch (approximately 1.5 cm). Many commercial patterns use this standard measurement. Check your pattern’s instructions to confirm if this is the recommended seam allowance.
Flat-Felled Seams:
For flat-felled seams, such as those used in denim jeans, the seam allowance is typically 1/4 inch (about 0.6 cm) on the first stitching pass and 5/8 inch (approximately 1.5 cm) on the second pass.
Consult your pattern or project instructions for precise measurements.
French Seams:
French seams require a narrow initial seam allowance, usually around 1/4 inch (about 0.6 cm), followed by a wider seam allowance of 3/8 inch (approximately 1 cm). These measurements help encase raw edges neatly.
Bound Seams:
When creating bound seams, you’ll need to consider the width of the bias tape or binding you’re using. Typically, bias tape is 1/2 inch (about 1.3 cm) wide when folded in half, resulting in a 1/4 inch (approximately 0.6 cm) seam allowance.
Hems and Edges:
For hems and finished edges, the seam allowance can vary based on your project’s specifications. It may be as small as 1/4 inch (about 0.6 cm) for a narrow hem or as wide as 1 inch (approximately 2.5 cm) for a deep hem or edge finish.
Personal Adjustments:
Depending on your fitting preferences and alterations, you may need to adjust seam allowances. Keep a sewing journal or notes for future reference, documenting any changes you make for a customized fit.
Calculating seam allowances involves careful consideration of pattern instructions, standard measurements, and specific techniques like flat-felled seams, French seams, or bound seams.
These measurements play a critical role in achieving the desired fit, durability, and appearance of your sewing projects. Always follow the recommended seam allowances in your patterns and adjust them as needed to suit your project requirements or personal preferences.
What Tool Is Used To Add Seam Allowance?

Adding seam allowance is a crucial step in sewing, and various tools can help achieve this task accurately. Here are the tools commonly used to add seam allowance:
Clear Ruler with Seam Allowance Guides:
A clear ruler with printed seam allowance markings is a versatile tool. It allows you to measure and mark seam allowances directly on your fabric before cutting.
Pattern Notcher:
A pattern notcher creates small, V-shaped notches along the edge of a paper pattern. These notches indicate the seam allowance width and placement, making it easy to transfer the allowance to the fabric.
Seam Allowance Gauge:
A seam allowance gauge is a small measuring tool designed specifically for sewing. It often has multiple notches or edges that correspond to common seam allowance widths, helping you measure and mark fabric accurately.
Seam Allowance Wheel:
This tool resembles a small pizza cutter with adjustable markings. You roll it along the edge of the pattern, and it transfers the seam allowance directly onto your fabric as you cut.
Clear Acetate Sheets:
Clear acetate sheets with printed seam allowance markings can be placed on top of your pattern. You can then trace the seam allowance directly onto your fabric with a marking tool.
Marking Chalk or Fabric Markers:
Chalk or fabric markers allow you to draw or trace seam allowances onto the fabric directly based on your pattern or desired measurements.
Seam Allowance Ruler:
A seam allowance ruler is designed specifically for measuring and marking seam allowances. It typically has a lip that sits against the fabric edge while you mark the allowance width.
These tools assist in adding seam allowances accurately, whether you’re working with sewing patterns, making pattern adjustments, or customizing seam allowances for your sewing projects.
Choosing the right tool depends on your preferences and the specific needs of your project.
FAQs
Do I need to add seam allowance to a sewing pattern?
It depends on the pattern. Some patterns include seam allowances, while others don’t. Always check the pattern’s instructions and guidelines to determine whether you need to add seam allowances.
What is the standard seam allowance width?
The standard seam allowance width in sewing is 5/8 inch (approximately 1.5 cm). However, it can vary based on the pattern or project requirements, so always check the instructions provided.
How do I mark seam allowances accurately on my fabric?
Use tools like clear rulers with seam allowance guides, seam allowance gauges, or marking chalk to measure and mark seam allowances directly on your fabric. Ensure precision by aligning these tools with your pattern or project’s requirements.
Can I adjust seam allowances for a custom fit?
Yes, you can. Seam allowances can be adjusted to accommodate fitting preferences or pattern alterations. Be sure to make any changes consistently across pattern pieces to ensure proper alignment during sewing.
What if I cut fabric without seam allowances?
If you accidentally cut fabric without seam allowances, you may need to modify your pattern pieces or adjust your sewing plan. It’s advisable to retrace or re-cut your fabric with the correct seam allowances to avoid fitting and construction issues later on.
Conclusion
As we conclude this guide on how to add and sew seam allowances, it becomes evident that precision in this aspect of sewing is a cornerstone of success. Seam allowances may appear as simple lines on paper, but they play a pivotal role in the outcome of your sewing projects.
Accurate seam allowances ensure that your pieces align perfectly, that your seams are strong, and that your finished product maintains its intended fit.
By mastering the techniques outlined in this guide, you gain the ability to take your sewing endeavors to new heights. Whether you’re crafting garments, quilts, or home decor items, adding and sewing seam allowances correctly is the first step toward achieving professional-quality results.
So, embrace the art of seam allowances and watch your sewing projects come together with precision, elegance, and durability.
Leave a Reply