Sewing a sleeve is a fundamental skill in the world of garment construction, and mastering this art opens up a realm of creative possibilities for sewers of all levels.
Sleeves come in various styles and shapes, each requiring unique techniques, but the principles remain the same. Whether you’re crafting a tailored blazer, a flowing dress, or a cozy sweater, understanding how to sew a sleeve is essential for achieving a well-fitted and beautifully finished garment.
In this comprehensive guide, we will embark on a journey through the methods and nuances of sewing sleeves. From set-in sleeves to raglan and kimono styles, we will explore the step-by-step techniques that make each type unique.
Whether you’re an experienced seamstress looking to refine your skills or a novice eager to learn the basics, this guide will equip you with the knowledge and confidence to sew sleeves that fit and flatter, enhancing the beauty and functionality of your handmade garments.

How To Sew A Sleeve?
Here are the simple methods for sewing a sleeve:
Set-In Sleeve
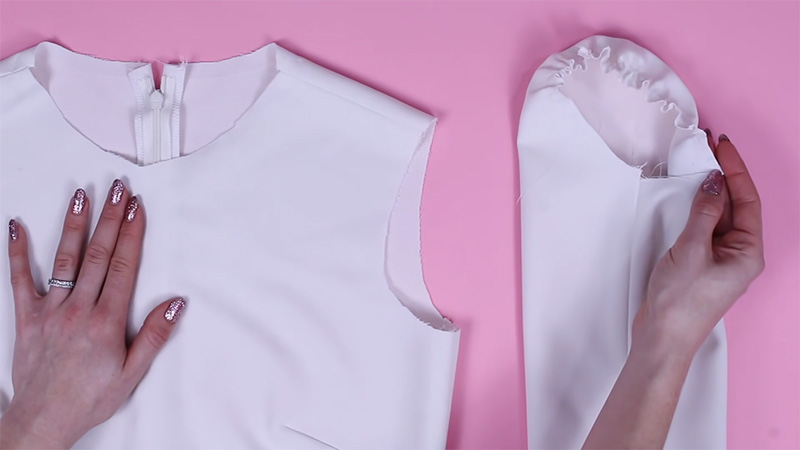
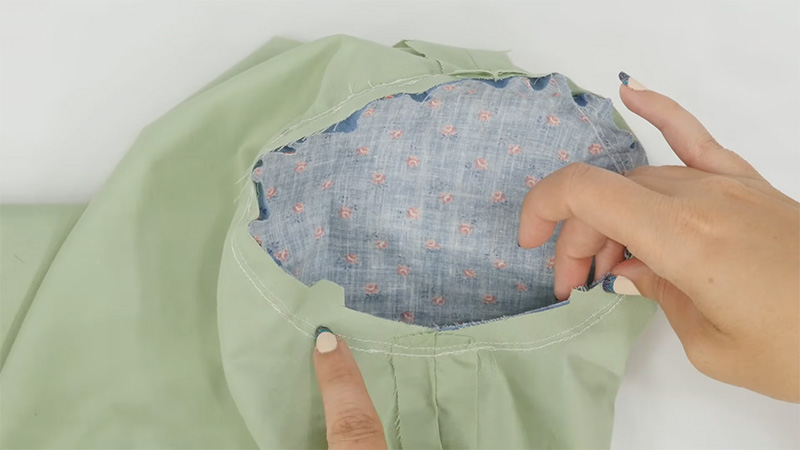
The set-in sleeve is one of the most common methods for attaching sleeves to a garment. To sew it, you’ll first sew the shoulder seam of the garment, then match the sleeve cap to the armhole, pin or baste it in place, and sew along the curve of the armhole.
This method provides a tailored and fitted look, making it suitable for various types of clothing, including blouses, shirts, and dresses.
Raglan Sleeve
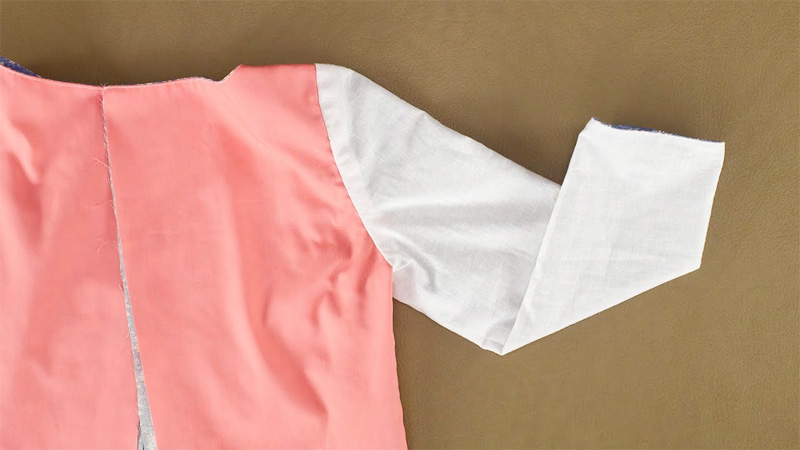
Raglan sleeves are known for their diagonal seams that run from the neckline to the underarm. To sew a raglan sleeve, you’ll attach the sleeve pieces to the front and back bodice, creating a continuous line from the neckline to the sleeve cuff.
Raglan sleeves offer ease of movement and a distinctive look, making them a popular choice for sportswear and casual garments.
Kimono Sleeve
Kimono sleeves are wide, flowing sleeves that are attached directly to the bodice without a traditional armhole. To sew a kimono sleeve, you’ll lay the sleeve and bodice flat, matching their edges, and then stitch them together in one continuous seam.
This method creates a relaxed and comfortable fit, often seen in kimono-style dresses and tops.
Dolman Sleeve
Dolman sleeves are characterized by their loose, roomy fit and unique design where the sleeve is integrated with the bodice without a separate armhole seam.
To sew a Dolman sleeve, you’ll typically sew the side seams of the bodice and sleeve together in one continuous seam. This style offers comfort and a trendy, oversized look, making it suitable for casual tops and sweaters.
Gathered Sleeve
Gathered sleeves add fullness and volume to the upper arm area. To sew a gathered sleeve, you’ll create gathers or pleats at the sleeve cap and attach it to the armhole.
This method is often used for dresses, blouses, and historical costume pieces, providing a feminine and decorative touch.
Elasticized Sleeve
Elasticized sleeves are created by attaching a casing with elastic at the sleeve hem. To sew them, you’ll fold and sew a casing near the sleeve’s edge, leaving a small opening to insert the elastic. Once the elastic is threaded through and secured, you’ll close the casing.
This method is common in children’s clothing and casual garments, offering ease of movement and a snug fit at the wrist.
Two-Piece Sleeve
Two-piece sleeves consist of two separate pieces—a top sleeve and an under sleeve—sewn together along the seamline. This method allows for greater shaping and tailoring possibilities, often seen in fitted jackets and blazers.
To sew a two-piece sleeve, you’ll sew the top and under sleeves individually and then join them at the seams.
These seven methods offer versatility for sewing sleeves, allowing you to choose the style that best suits your garment and design preferences. Each method provides a distinct look and fit, catering to various sewing projects and styles.
What Is The Easiest Sleeve To Sew?

The easiest sleeve to sew often depends on your level of sewing expertise and the specific garment you’re working on.
Here are the kinds of sleeves that are generally considered easy to sew:
Cap Sleeve
Cap sleeves are the easiest to sew due to their simplicity and minimal shaping. They provide minimal coverage and are often seen on summer tops and dresses. Sewing a cap sleeve involves attaching a small, gently curved piece of fabric to the armhole, making it a beginner-friendly choice.
Dolman Sleeve
Dolman sleeves are also relatively easy to sew because they don’t require setting in a traditional armhole. You sew the side seams of the bodice and sleeve together in one continuous seam.
Dolman sleeves are known for their loose fit, making them comfortable and forgiving for beginners.
Kimono Sleeve
Similar to Dolman sleeves, kimono sleeves are straightforward to sew. They are wide and flowing, extending from the neckline to the underarm. Sewing a kimono sleeve involves attaching the sleeve to the bodice without a separate armhole, simplifying the process.
Gathered Sleeve
Gathered sleeves are easy to sew and add a touch of femininity to your garment. You create gathers or pleats at the sleeve cap and then attach it to the armhole. This method is commonly used in dresses, blouses, and children’s clothing.
Elasticized Sleeve
Elasticized sleeves are among the easiest to sew, especially for casual garments. You sew a casing near the sleeve’s edge, insert elastic, and then close the casing.
This style is often used in children’s clothing and provides a comfortable and adjustable fit.
Short Sleeve with Cuff
Short sleeves with cuffs are simple to sew and can be found in many casual tops and shirts. You fold and sew a cuff onto the sleeve hem, which adds a polished finish without the complexity of a full-length sleeve.
Flutter Sleeve
Flutter sleeves are charming and easy to sew, making them an excellent choice for beginner sewers. They involve attaching a small, flared piece of fabric to the sleeve opening, creating a delicate fluttery effect. Flutter sleeves are often seen on dresses and tops, adding a whimsical touch to your garments.
While these sleeves are generally considered easy to sew, keep in mind that the ease of sewing can also depend on factors such as the fabric you’re working with and your sewing skills.
As you gain confidence and experience, you can gradually tackle more complex sleeve styles.
Supplies To Use For Sewing The Hong Kong Seam Finish

Here are the necessary supplies for sewing the Hong Kong seam finish:
Bias Binding or Fabric Strips
Bias binding or fabric strips are the key materials for the Hong Kong seam finish. Bias binding is typically used for its flexibility and ease of application.
You can either purchase pre-made bias binding or create your own by cutting fabric strips on the bias (a 45-degree angle to the fabric grain) for added flexibility.
Fabric Seam Allowances
The fabric seam allowances refer to the edges of the fabric that you’ll be finishing with the Hong Kong seam. Ensure that the seam allowances are properly pressed open and prepared for the binding or fabric strips.
Scissors or Rotary Cutter
Sharp fabric scissors or a rotary cutter with a cutting mat are essential for accurately cutting bias binding or fabric strips. Precise cutting ensures that the strips are even and uniform.
Pins or Clips
Pins or sewing clips are helpful for securing the bias binding or fabric strips in place before stitching. They prevent shifting and help maintain alignment as you sew.
Sewing Machine
A sewing machine with a straight-stitch function is necessary for attaching and edge stitching the bias binding or fabric strips along the seam allowances. Make sure your machine is in good working order and has a compatible needle for your fabric type.
Iron and Ironing Board
An iron and ironing board is crucial for pressing open the seam allowances, folding the bias binding or fabric strips, and creating crisp, well-defined seams. Proper pressing ensures a polished finish.
Thread
High-quality thread in a color that complements your fabric is necessary for stitching the bias binding or fabric strips in place. A matching thread color ensures a neat and cohesive look for your Hong Kong seam finish.
With these essential supplies on hand, you’ll be well-prepared to execute the Hong Kong seam finish with precision and professionalism, enhancing the durability and aesthetics of your sewing projects.
What Fabric Is Used For Hong Kong Finish?

The choice of fabric for a Hong Kong finish largely depends on the type of garment and its intended use.
Here are the fabrics commonly used for Hong Kong finishes:
Cotton Poplin
Cotton poplin is a versatile and easy-to-work-with fabric, making it suitable for Hong Kong finishes. It’s commonly used for lightweight and breathable garments like summer dresses and blouses. Its crispness allows for clean and defined seams.
Cotton Lawn
The cotton lawn is a finely woven, lightweight cotton fabric often chosen for its softness and breathability. It’s a popular choice for blouses, dresses, and skirts. The delicate nature of the cotton lawn pairs well with the finesse of a Hong Kong finish.
Silk Charmeuse
Silk charmeuse is a luxurious and smooth fabric known for its glossy surface. It’s commonly used for eveningwear, lingerie, and blouses. A Hong Kong finish on silk charmeuse adds durability while maintaining the fabric’s elegant drape.
Linen
Linen is a natural fabric known for its breathability and casual aesthetic. It’s often used for summer dresses, pants, and casual blouses. A Hong Kong finish on linen garments adds a touch of refinement while preserving their relaxed charm.
Wool Crepe
Wool crepe is a lightweight and slightly textured fabric often chosen for its draping qualities. It’s a popular choice for tailored dresses, skirts, and trousers. Using a Hong Kong finish on wool crepe helps maintain the fabric’s structure and longevity.
Rayon Challis
Rayon challis is a soft and flowy fabric with a slight sheen. It’s commonly used for dresses, blouses, and scarves. A Hong Kong finish on rayon challis adds durability to delicate garments while allowing them to maintain their fluidity.
Chiffon
Chiffon is a sheer and delicate fabric known for its elegance. It’s often used for evening gowns, blouses, and overlay garments. A Hong Kong finish on chiffon provides stability to seams without compromising the fabric’s ethereal quality.
When selecting a fabric for a Hong Kong finish, consider both the fabric’s properties and the garment’s purpose. A well-chosen fabric enhances the final result, ensuring that the Hong Kong finish complements the garment’s style and functionality.
FAQs
What are the basic steps for sewing a sleeve into a garment?
The basic steps for sewing a sleeve involve pinning or basting the sleeve into the armhole of the garment, sewing along the seamline, easing in any excess fabric to create a smooth curve, and pressing the seam.
Depending on the sleeve style, there may be additional steps, such as setting in gathers or pleats.
How do I ensure a sleeve fits correctly into the armhole?
To ensure a sleeve fits correctly, make sure the sleeve cap (the curved portion) matches the armhole curve. Ease any excess fabric by gathering stitches or pinning evenly.
Take your time to distribute the ease evenly, and test the fit before sewing the final seam. Adjust as needed for a smooth fit without puckers or wrinkles.
What is the difference between set-in, raglan, and kimono sleeves?
Set-in sleeves are sewn into a traditional armhole, often used for tailored garments. Raglan sleeves have diagonal seams from the neckline to the underarm, allowing ease of movement.
Kimono sleeves are wide and extend from the neckline to the underarm without a separate armhole seam. Each style offers a different look and fit for your garment.
How can I finish the sleeve seam for a professional look?
To finish the sleeve seam, you can use techniques like French seams, serging, or zigzag stitching to prevent fraying. The choice of finishing method depends on your fabric type and the look you want to achieve. Always follow the pattern instructions or choose a finish that complements your garment’s style.
What do I do if I encounter puckers or wrinkles while sewing a sleeve?
If you encounter puckers or wrinkles, it’s essential to check your pinning or basting and the distribution of ease. Ensure that the sleeve cap aligns with the armhole curve and that the easing is even.
Adjust and re-pin as needed. Sometimes, a slight adjustment of the tension on your sewing machine can also help eliminate puckers. Practice and patience will improve your sleeve-sewing skills over time.
Conclusion
As we conclude our exploration of sewing sleeves, we recognize that this skill is the cornerstone of garment construction. Whether you’ve been sewing for years or are just beginning your sewing journey, mastering the art of sewing sleeves opens the door to endless creative opportunities.
Sleeves not only provide functionality and comfort but also contribute significantly to the overall aesthetics of a garment.
By understanding the various sleeve styles and the techniques required to sew them, you gain the power to transform fabric into fashion, bringing your unique designs to life.
From the precision of set-in sleeves to the ease of Dolman and kimono sleeves, your newfound expertise will allow you to create clothing that fits impeccably and expresses your personal style.
As you continue to hone your skills and explore the vast world of garment sewing, remember that sleeves are more than just fabric and stitches they are a canvas for your creativity and a testament to your sewing craftsmanship.
Leave a Reply