Adding a touch of sophistication and charm to your gift-wrapping or crafting projects is easier than you might think. Curling fabric ribbon is a delightful skill that can transform ordinary ribbons into beautifully adorned creations.
Whether you want to embellish a gift, decorate a bouquet, or enhance a DIY project, this art form can elevate your designs to a new level of elegance.
This guide will discuss how to curl fabric ribbons with finesse and precision. You’ll learn the essential techniques, discover creative variations, and gain the confidence to infuse your style into your ribbon curling endeavors.
So, gather your favorite ribbons, unleash your creativity, and embark on a journey to master curling fabric ribbons. Your creations are about to become more captivating than ever before!
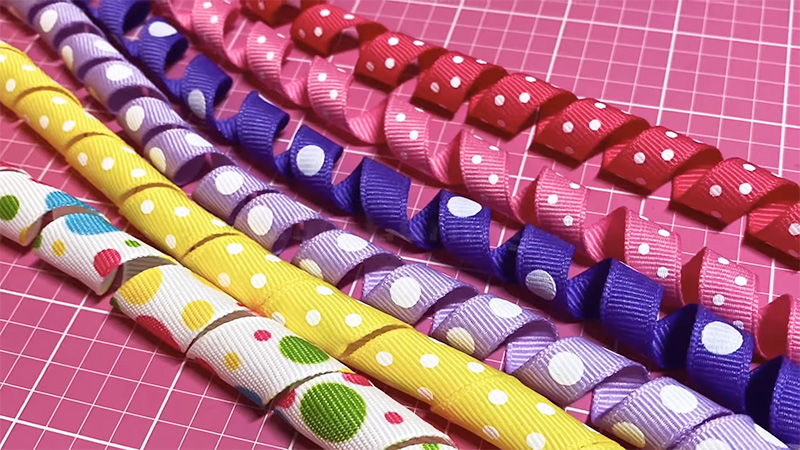
How to Curl Fabric Ribbon? 6 Steps
Whether you’re a beginner or looking to refine your technique, this comprehensive guide will walk you through the art of curling fabric ribbons step by step.
Step 1: Cutting the Ribbon
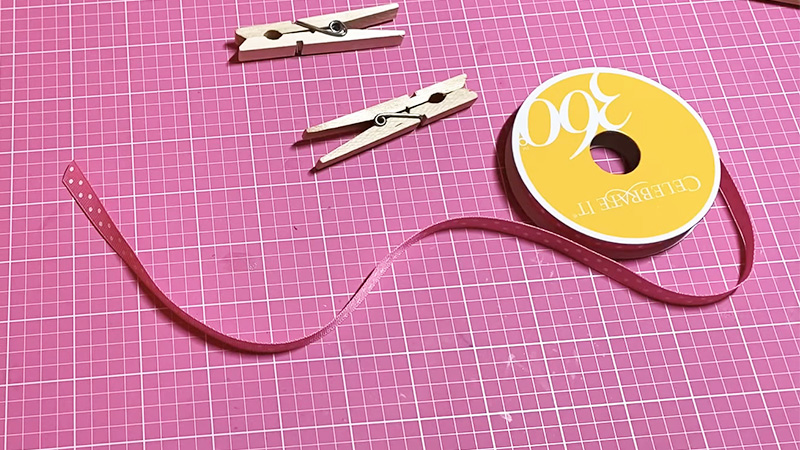
Start by cutting the ribbon to your desired length using sharp scissors. Ensure the ends are straight and free from fraying.
If your ribbon is new or particularly stiff, you may want to loosen it up. Pull the ribbon between your thumb and the edge of a table or countertop to relax the fibers. This will make it easier to curl.
Step 2: Using Scissors to Curl
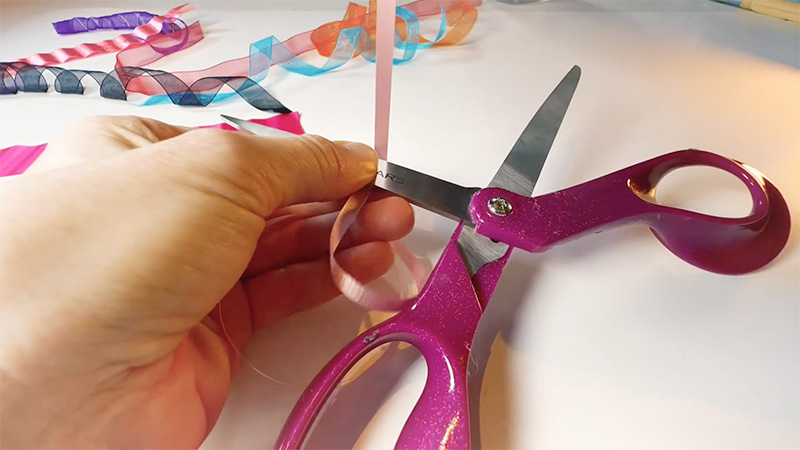
One of the simplest methods is to use scissors. Hold the ribbon firmly at one end between your thumb and the scissor blade. Then, pull the ribbon across the blade while applying gentle pressure.
The ribbon will start to curl as it passes over the blade. Adjust the pressure to control the tightness of the curl. Continue curling until you reach the other end.
Step 3: Using a Pen or Pencil
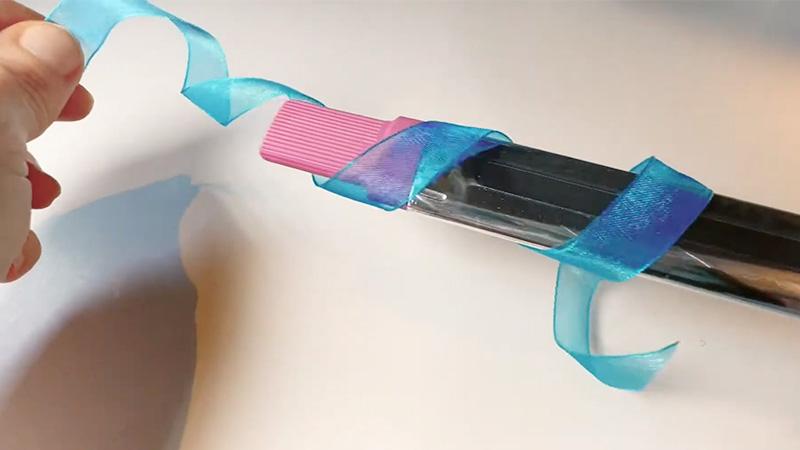
Another straightforward technique is to use a pen or pencil. Hold the ribbon at one end and wrap it around the pen or pencil, leaving a small portion uncurled.
Secure the uncurled end and gently pull the ribbon off the pen or pencil. You’ll have a beautiful spiral curl.
Step 4: Using a Curling Tool
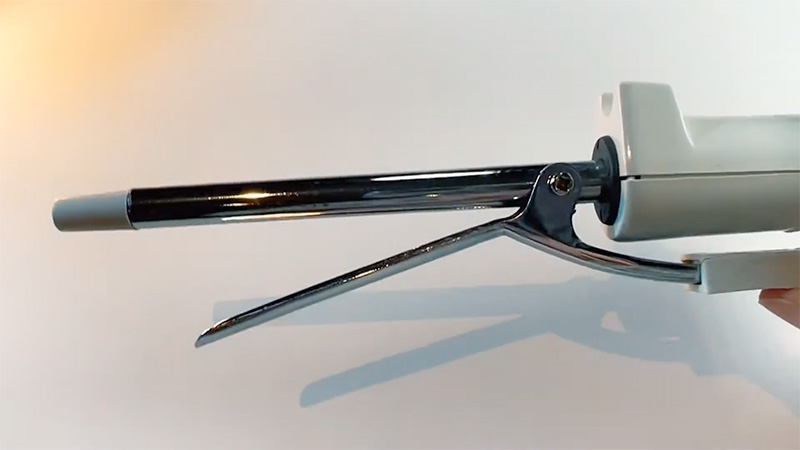
Curling tools designed specifically for this purpose provide precise curls with minimal effort. Place the ribbon between the curling tool’s blades, hold the ribbon taut, and pull the tool along the length of the ribbon. The blades will create uniform curls as you go.
You can use a hair straightener or flat iron for wider ribbons that don’t curl easily. Set the straightener to a low heat setting and run it gently over the ribbon.
Be careful not to overheat or burn the ribbon. As you glide the straightener along, the ribbon will curl beautifully.
Step 6: Adjusting the Curl
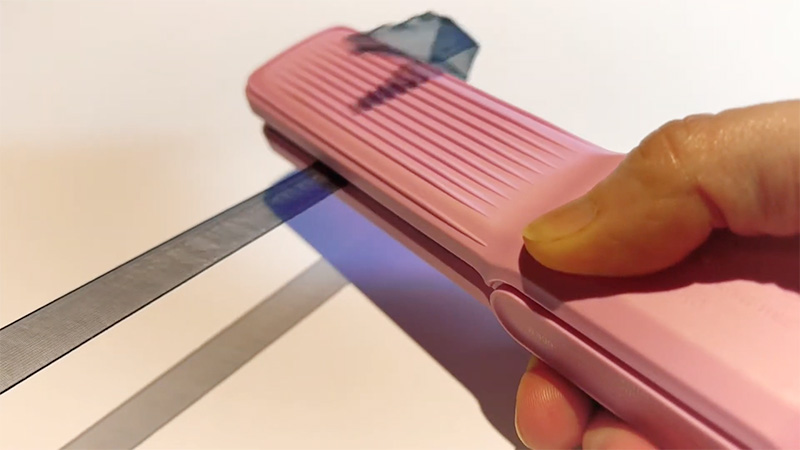
Once you’ve curled the entire length of the ribbon, you may want to adjust the curls to your liking. Use your fingers to loosen or tighten them gently to avoid damaging the ribbon.
Now that you have a perfectly curled ribbon, it’s time to incorporate it into your project. Whether tying it onto a gift, creating bows, or using it as a decorative element, the curled ribbon adds elegance and charm.
Tips and Tricks
Experiment with different ribbon widths, colors, and textures to achieve various effects. Consider using fray check or clear nail polish on the cut ends to prevent ribbon fraying.
If you’re curling a lot of ribbon, take breaks to avoid straining your hands. Practice makes perfect, so don’t be discouraged if your first attempts aren’t flawless. Keep practicing, and you’ll improve your curling skills.
Materials You’ll Need
Curling fabric ribbon is a common technique for adding decorative touches to gifts and craft projects. Here’s a table listing the materials you’ll need for curling fabric ribbon:
| Material | Description |
| Fabric ribbon | The ribbon you want to curl. |
| Scissors | For cutting the ribbon to the desired length. |
| Curling tool or scissors with serrated blades | To curl the ribbon. |
| Tape (optional) | To secure the ends of the ribbon before curling. |
| Ruler (optional) | For measuring and cutting the ribbon evenly. |
| Lighter or heat source (optional) | For sealing the ribbon ends and preventing fraying. |
| Craft adhesive (optional) | For attaching the curled ribbon to projects. |
| Decorative embellishments (optional) | Such as stickers, bows, or charms for additional decoration. |
How to Curl Fabric Ribbon in the Oven?
Curling fabric ribbons in the oven is a creative and unconventional method that can produce unique results. Follow these steps to curl fabric ribbon using your oven.
Materials You’ll Need
Choose the ribbon you’d like to curl. This method works best with ribbons made of synthetic materials, like polyester or satin. Use a baking sheet or a similar oven-safe tray.
You’ll need aluminum foil to support and shape the ribbon. After that, follow the step-by-step instructions given below:
Preheat the Oven
Start by preheating your oven to a low temperature, around 200-250°F (93-121°C). It’s essential not to use a higher temperature, as many ribbons can melt or scorch at high heat.
Cut the ribbon to your desired length, remembering it will curl as it heats. Ensure the ribbon is clean and free from any dust or debris.
Shape the Aluminum Foil
Tear off a sheet of aluminum foil and fold it lengthwise to create a long strip. The width of the strip should be slightly narrower than your ribbon’s width. This strip will act as a support for your ribbon.
Lay your ribbon flat on the aluminum foil strip. Press the ribbon onto the foil, ensuring it adheres but isn’t too tightly secured.
Bake the Ribbon
Place the ribbon and foil strip onto the baking sheet and put it in the preheated oven. Leave the oven door slightly ajar to allow moisture to escape. Bake for approximately 5-10 minutes, keeping a close eye on the ribbon.
Check for Curling
After a few minutes, carefully check the ribbon. It should start to curl as it heats up. If it’s not curling as much as you’d like, leave it in the oven for a bit longer. Be cautious not to overheat, which can cause the ribbon to melt or become brittle.
Remove and Cool
Once the ribbon has curled to your desired extent, carefully remove it from the oven. Use tongs or oven mitts to handle the hot foil and ribbon. Allow the ribbon to cool completely on a flat surface.
Adjust and Use
Once the ribbon has cooled, you can gently adjust the curls. If the curls aren’t as tight as you’d like, you can reheat the ribbon briefly and then reshape it.
Monitor the ribbon closely in the oven to prevent it from overheating or burning.
Safety Tips
Use caution when handling hot foil and ribbon. Keep a safe distance between the ribbon and any heating elements in your oven. This method may not work well with all types of ribbon, so it’s a good idea to test a small piece before curling a more significant length.
Curling fabric ribbons in the oven can yield unique and customized results for your projects. Experiment with different ribbon types and lengths to achieve the desired curls for your creative endeavors.
How to Permanently Curl Ribbon?
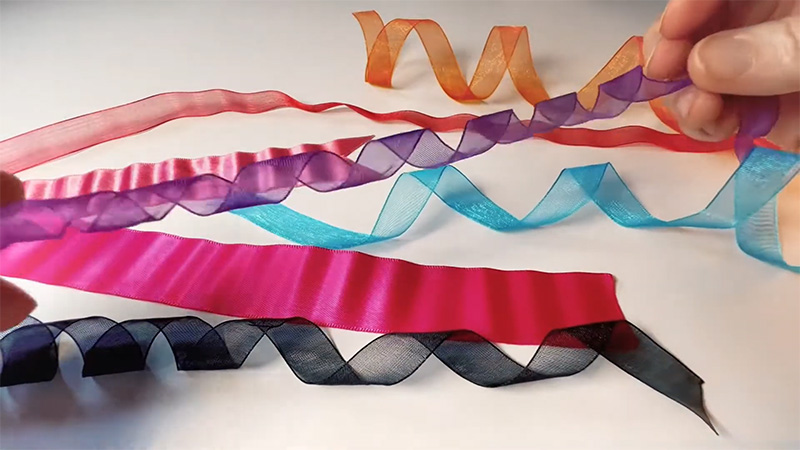
Permanently curling ribbon requires a different approach than temporary curling methods. Here’s how you can achieve permanent curls in fabric ribbon
Materials You’ll Need
Select the ribbon you want to curl. Keep in mind that not all ribbon materials will hold permanent curls well. Satin and grosgrain ribbons tend to work best.
You’ll need a curling iron or a hair straightener, depending on your desired curl aluminum foil to protect the ribbon while applying heat.
Prepare the Ribbon
Cut the ribbon to the desired length, and ensure it’s clean and free from dust or debris. Wrap a piece of aluminum foil around the section of the ribbon you want to curl. Ensure the foil is snug but not too tight, allowing the ribbon to move freely inside the foil.
Use a Curling Iron
If you want tight curls, Set your curling iron to a low to medium heat setting (usually around 250-300°F or 120-150°C). The lower the heat, the longer you’ll need to hold the ribbon. Use a larger curling iron barrel or wand if you want loose curls.
Curl the Ribbon
Carefully wrap the foil-encased ribbon around the curling iron barrel for tight curls. Hold it for 10-15 seconds or until the ribbon has heated through.
For looser curls, wrap the foil-encased ribbon around a more extensive section of the curling iron barrel and hold it for a shorter time, about 5-10 seconds.
Release and Cool
Carefully unwrap the ribbon from the foil while it’s still warm. Hold it in place for a few seconds until it cools. This cooling process helps set the curl.
Continue this process for all sections of the ribbon that you want to curl. Allow the curls to cool completely before handling them too much.
Final Adjustments
Once the curls have cooled, you can gently adjust them to your liking. Be careful not to pull too hard, which could straighten the curls. You can use a fabric or craft adhesive to seal the curls to make them even more permanent.
Apply a small amount of adhesive to the base of each curl and hold it in place until it dries. Remember that permanently curled ribbon can be more delicate than untreated ribbon, so handle it carefully.
This method works well for creating beautifully curled ribbons for long-term decorative purposes, such as crafting or floral arrangements, where the curls need to hold their shape over time.
FAQs
Can I permanently curl any ribbon?
Not all ribbon types hold permanent curls well. Synthetic materials like satin and grosgrain tend to work best for permanent curling. Natural fibers like cotton or silk may not hold curls as effectively.
Can I use a regular hair curling iron for ribbon curling?
Yes, you can use a regular hair curling iron, but ensure it’s clean and free from hair products to avoid transferring residues onto the ribbon. Use a low to medium heat setting, and remember that you’re working with a different material.
Can I reverse or straighten the permanently curled ribbon?
While trying and reversing or straightening permanently curled ribbons is possible, it can be challenging. The heat altered the synthetic ribbon’s fibers, making it less cooperative in returning to its original form.
How long will the curls stay permanent?
The permanence of the curls depends on various factors, including the ribbon material, the amount of heat applied, and how well you set the curls. Generally, these curls will stay in place for a long time, making them suitable for decorative purposes.
Can I wash a ribbon that has been permanently curled?
Washing permanently curled ribbons may cause the curls to relax or lose shape, mainly if you use hot water. It’s best to spot-clean the ribbon if necessary to maintain the curls. If you must wash it, use cold water and avoid vigorous scrubbing or wringing.
Conclusion
Curling fabric ribbon is a versatile and artistic skill that can breathe life and charm into your various projects.
With the techniques and tips in this guide, you now have the knowledge and expertise to create beautifully curled ribbons that will leave a lasting impression.
Whether you’re wrapping gifts for loved ones, crafting decorations for special occasions, or simply indulging in a creative endeavor, the art of ribbon curling is a valuable addition to your repertoire.
Remember to experiment, explore different ribbon types and colors, and, most importantly, let your creativity flow. Each curled ribbon is an opportunity to showcase your unique style and attention to detail.
So, embrace this craft enthusiastically, and may your curled fabric ribbons always add a touch of elegance and personal flair to your projects.
Leave a Reply