Vinyl cutting is an artful craft that allows you to create custom decals, stickers, labels, and more with precision and style. But how to cut vinyl with Cricut?
If you own a Cricut cutting machine, you’re in for a world of creative possibilities. Whether you’re a seasoned DIY enthusiast or a beginner looking to explore the world of vinyl cutting, this comprehensive guide is here to walk you through the process.
In this step-by-step tutorial, we will demystify the art of vinyl cutting using your Cricut machine, offering you the knowledge and confidence to bring your creative visions to life.
You’ll learn the essential tools and materials required, how to set up your Cricut machine for vinyl cutting, design and software considerations, and crucial tips for ensuring a clean and professional finish.
From personalized gifts to home décor and beyond, cutting vinyl with Cricut opens doors to endless crafting opportunities. So, let’s embark on this creative journey and transform your ideas into beautiful vinyl creations.

How to Cut Vinyl with Cricut?
The process of cutting vinyl with a Cricut machine starts with gathering the necessary tools and materials. Follow the steps given below to perfect your technique for professional-looking results.
Getting Started
Before you embark on your vinyl-cutting journey with Cricut, it’s essential to gather the necessary tools and materials. To create or import your design, you can use Cricut Design Space, which is compatible with most Cricut machines.
You’ll need a device to work with the design software and connect to your Cricut machine. Ensure your Cricut machine is connected to power and the Internet for a smooth experience.
Setting Up Your Cricut Machine
Start by turning on your Cricut machine and ensuring it’s connected to your computer or mobile device. This connection allows you to send your designs to the machine.
Place the StandardGrip cutting mat on a flat surface, and make sure it’s clean and free from dust or debris. The mat’s stickiness is what holds the vinyl in place, so it should be clean for a secure grip.
Use scissors to cut the vinyl sheet or roll it to a size that fits your cutting mat, leaving some extra space around your design.
In Cricut Design Space, select the type of vinyl you’re using (e.g., adhesive vinyl or HTV) from the list of available materials. This setting ensures that your Cricut machine cuts with the appropriate settings.
Designing Your Vinyl Project
Now that your Cricut machine is set up, it’s time to create or import your design. You can design within Cricut Design Space or import pre-made designs.
Use the design tools in Cricut Design Space to craft your design. You can add text, shapes, and other elements to create a custom design from scratch.
If you have a design saved as an image or SVG file, you can import it into Cricut Design Space. Make sure the design fits within the size of your vinyl and cutting mat.
Once your design is ready, ensure that it’s properly sized and positioned within the virtual cutting mat in Cricut Design Space. This step helps you visualize how the design will be cut on your actual vinyl.
If you’re working with heat transfer vinyl (HTV), it’s crucial to mirror your design before cutting. This ensures that when you transfer the design to your project, it’s the right way around.
Cutting Your Vinyl
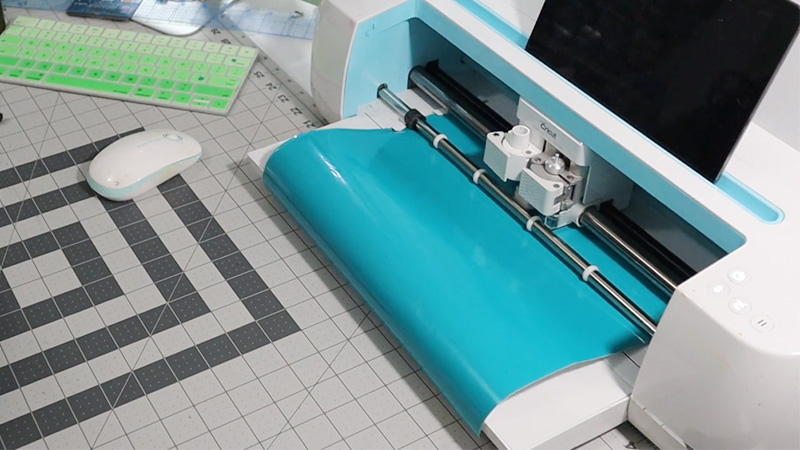
With your design prepared and the Cricut machine set up, you’re ready to cut the vinyl. Align the vinyl on the StandardGrip cutting mat, making sure it’s smooth and without wrinkles or air bubbles.
Press it firmly onto the mat to ensure a secure hold. Follow the on-screen instructions in Cricut Design Space to load the cutting mat into your Cricut machine. The machine will then measure and calibrate the mat.
Once your Cricut machine is ready, press the “Go” or “C” button on your machine or in the software to begin the cutting process. The machine will follow the cutting path defined in your design.
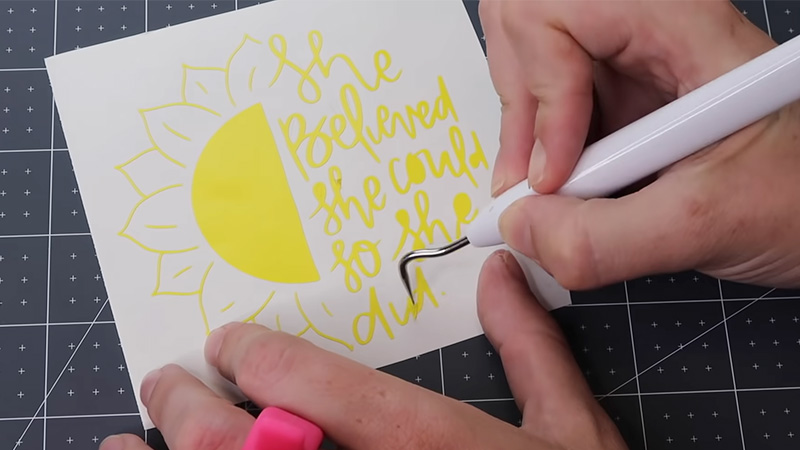
After cutting is complete, carefully remove the cutting mat from the machine and gently peel off the excess vinyl around your design. Use weeding tools to remove any fine details or small pieces.
Applying Your Vinyl Design
The final step is applying your vinyl design to your desired surface, whether it’s a laptop, a water bottle, a T-shirt, or any other project. Ensure the surface is clean and dry. If you’re working with HTV, pre-heat your surface to the recommended temperature.
Carefully place your vinyl design onto the surface, ensuring it’s straight and in the desired location. Use a scraper tool to apply even pressure to the vinyl, securing it to the surface. If you’re using HTV, follow the recommended heat and press time instructions.
If your design is on transfer tape, gently peel it away, leaving the vinyl design in place. For adhesive vinyl, simply peel away the backing.
Tips for Success
Vinyl cutting is a skill that improves with practice. Don’t be discouraged if your first attempts aren’t perfect. Try different types of vinyl and designs to explore the full range of possibilities.
Take your time when weeding and applying the vinyl to ensure a clean and professional finish. Regularly clean your Cricut machine, mats, and blades for optimal performance. For intricate designs, consider using transfer tape to keep all the pieces aligned during application.
When working with heat transfer vinyl, be sure to follow safety precautions and use heat-resistant materials. With this step-by-step guide, you’re well on your way to becoming a vinyl-cutting pro with your Cricut machine.
Do I Need a Special Blade to Cut Vinyl?

No, you do not need a special blade to cut vinyl with a regular Cricut machine. The standard fine-point blade that comes with your Cricut machine is well-suited for cutting most types of vinyl, including adhesive vinyl and heat transfer vinyl (HTV).
Here’s a more detailed explanation of why the standard fine-point blade works for vinyl cutting:
Fine-Point Blade Compatibility
The standard fine-point blade is the default blade that comes with most Cricut machines. It is a versatile cutting tool designed for a wide range of materials, and it can handle vinyl with ease.
The fine-point blade is capable of making precise and intricate cuts, which is essential for achieving clean and professional results when working with vinyl.
Adjustable Settings
While the fine-point blade is standard, Cricut machines allow you to adjust the settings for the blade depending on the material you’re working with. This means you can fine-tune the pressure, speed, and depth of the blade’s cut to suit the specific vinyl you’re using.
In Cricut Design Space, you’ll find a variety of material settings that include different types of vinyl, such as adhesive and HTV, ensuring that the blade performs optimally for each material.
Adhesive Vinyl
When working with adhesive vinyl, the fine-point blade will precisely cut through the vinyl layer while leaving the paper backing intact.
This backing provides support and stability during the cutting process, ensuring that your design is accurately transferred to your project.
Heat Transfer Vinyl (HTV)
For HTV, the fine-point blade again shines. It can intricately cut through the vinyl layer while preserving the carrier sheet, which holds the vinyl design in place for transfer.
This is crucial when working with HTV, as it allows you to transfer the design onto your fabric or other surfaces effectively.
Blade Maintenance
To ensure that your fine-point blade continues to cut accurately and cleanly, it’s important to regularly inspect and maintain it. If the blade becomes dull or shows signs of wear, it’s a good idea to replace it with a new fine-point blade.
Keeping your blade sharp and in good condition will result in better cuts and longer blade life.
Alternative Blades
While the standard fine-point blade is perfectly suitable for vinyl cutting, Cricut does offer additional blades for specialized materials and techniques.
For instance, the Deep Point Blade is designed for thicker materials like chipboard, leather, and magnetic sheets, and it’s not necessary for vinyl cutting. Similarly, the Rotary Blade is meant for cutting fabric and is not intended for vinyl.
So, you do not need a special blade to cut vinyl with a regular Cricut machine. The standard fine-point blade is well-equipped to handle vinyl materials, offering precise and clean cuts for both adhesive and heat transfer vinyl.
To achieve the best results, ensure your blade is in good condition, adjust the settings as needed for the type of vinyl you’re using, and follow the recommended techniques for vinyl cutting with your Cricut machine.
FAQs
Can I use any type of vinyl with my Cricut machine?
Cricut machines are compatible with a wide range of vinyl types, including adhesive vinyl and heat transfer vinyl (HTV). You can choose from various colors, finishes, and specialty vinyl options.
Do I need to mirror my design for adhesive vinyl?
No, you do not need to mirror your design when working with adhesive vinyl. You only need to mirror your design when using heat transfer vinyl (HTV) to ensure that the design is oriented correctly when you apply it to your project.
Can I reuse a cutting mat for vinyl after it’s been used with other materials?
It’s best to reserve a cutting mat specifically for vinyl if you want to avoid any residue or debris from other materials affecting your vinyl projects. If you’ve used your mat for other materials, be sure to clean it thoroughly before using it for vinyl cutting to maintain the adhesive surface’s grip.
What should I do if my vinyl design isn’t cutting correctly or is tearing during the process?
If your vinyl design isn’t cutting correctly or is tearing, consider the following troubleshooting steps. Ensure that the fine-point blade is sharp and in good condition. Check that the cutting mat is clean and free from debris, wrinkles, or bubbles.
Can I cut intricate and detailed designs with my Cricut machine?
Yes, Cricut machines, including regular Cricut models, are known for their ability to cut intricate and detailed designs with precision. The fine-point blade and adjustable settings in Cricut Design Space allow you to create highly detailed and delicate vinyl designs.
Conclusion
Cutting vinyl with a Cricut machine is an incredibly versatile and rewarding craft that can add a personal touch to your projects and bring your creative visions to life.
Armed with the knowledge and skills you’ve gained from this guide, you’re now well-equipped to explore this exciting world of DIY vinyl cutting.
Remember that practice makes perfect, so don’t be discouraged if your initial attempts aren’t flawless.
With dedication and a little experimentation, you’ll soon master the art of vinyl cutting and unlock a realm of possibilities for customizing and decorating everything from your home to gifts for loved ones.
As you continue on your vinyl-cutting journey, keep exploring new techniques, designs, and ideas. The only limit is your imagination. So, grab your Cricut machine and start crafting with confidence. We can’t wait to see the amazing vinyl creations you’ll bring to life.
Leave a Reply