The tent stitch is a fundamental technique in needlepoint and canvas work embroidery, known for its versatility and ability to create precise, even stitches.
Mastering the tent stitch, used widely in creating backgrounds or filling in intricate designs, is essential for any embroidery enthusiast.
This method involves a series of diagonal stitches on a grid-like canvas, resulting in a smooth and uniform surface. Each step plays a crucial role in perfecting this technique, from selecting the right materials to achieving consistent tension.
In this guide, we’ll walk you through the step-by-step process of sewing a tent stitch, ensuring your embroidery projects achieve a polished, professional finish.
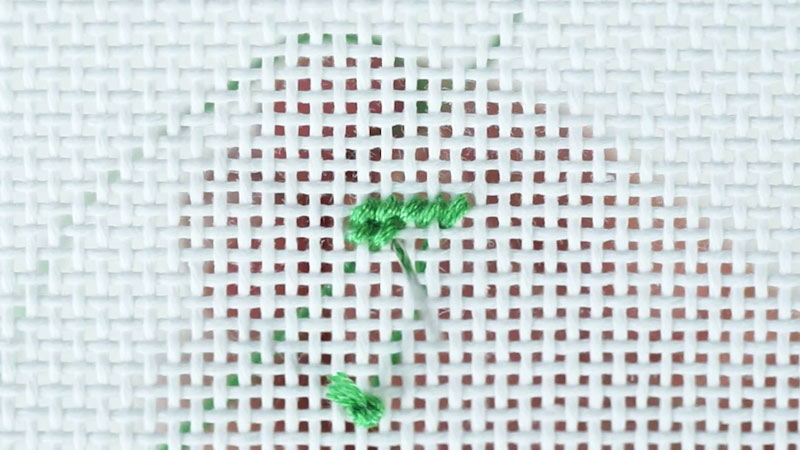
How Do You Sew a Tent Stitch? 9 Steps
Sewing a tent stitch is fundamental in needlepoint and canvas work embroidery. This stitch type is commonly used for creating small, even, and diagonal stitches that fill in a canvas or fabric evenly.
Tent stitch is particularly popular for creating backgrounds or solid areas in needlepoint designs, and it’s relatively easy to learn.
Here’s a step-by-step guide on how to sew a tent stitch:
Materials you’ll need:
- Needlepoint canvas or fabric
- Tapestry needle.
- Tapestry yarn or embroidery floss
- Scissors
Step 1: Thread Your Needle
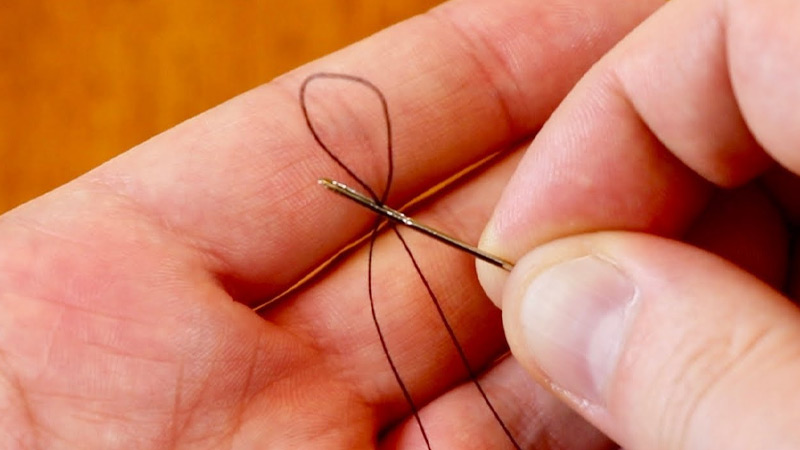
Select a tapestry needle that corresponds to the canvas or fabric you’re using. Thicker fabrics may require a larger needle. If you’re working with tapestry yarn, separating a single strand for stitching is important.
Hold one end of the strand and gently pull until it separates from the others. Thread the separated strand through the eye of the needle, ensuring it’s long enough for your project but not so long that it becomes unwieldy.
Step 2: Start at the Back
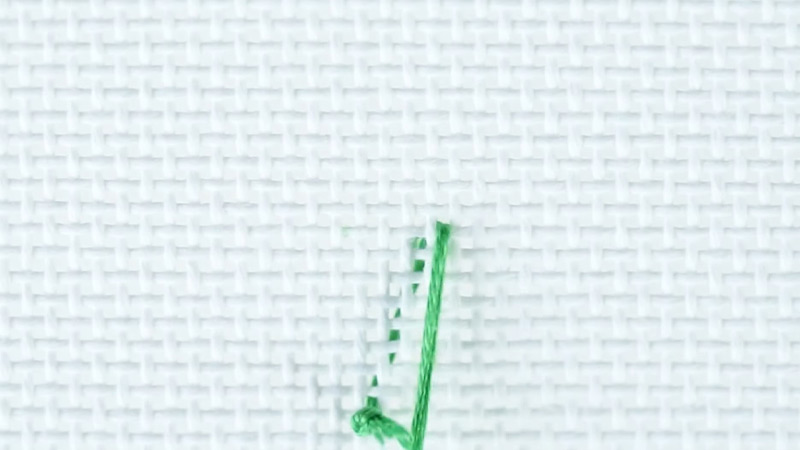
Position your canvas or fabric so that you have easy access to the backside. Beginning from the back allows you to conceal the starting point of your thread.
Insert the needle up through the back at the exact point where you want the first stitch to begin. Be careful not to pull the thread through, leaving a small tail at the back. This tail will be secured later.
Step 3: Stitch Direction
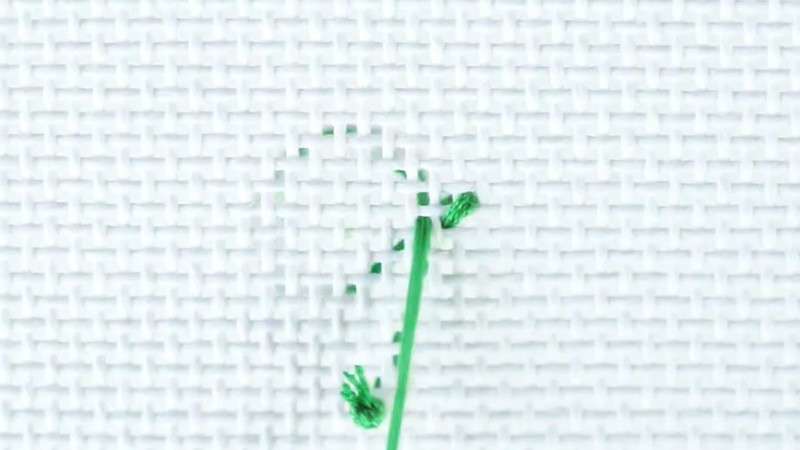
Consider the design and effect you’re aiming for. Bottom-left to top-right is a popular choice, but you might prefer bottom-right to top-left depending on your project. The direction of your stitches can greatly impact the overall look of your work.
Step 4: Make Your First Stitch
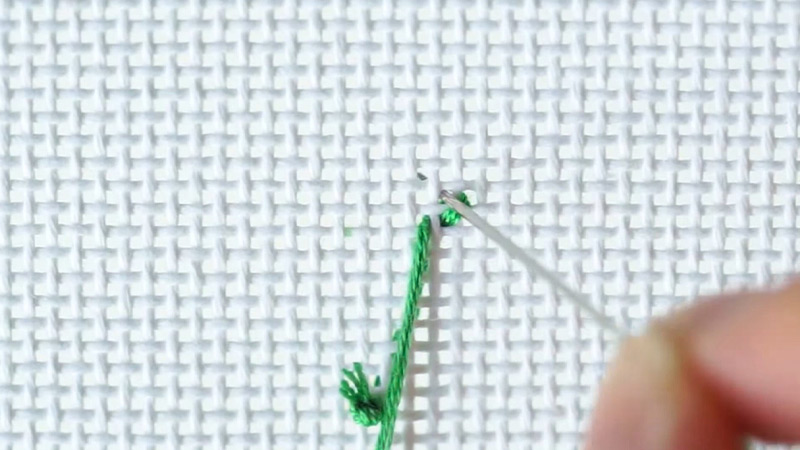
With the needle positioned at the starting point, gently insert it down through the fabric at the spot where you want the stitch to end.
Pay attention to the length of the stitch. A longer stitch will create a more open, textured appearance, while a shorter stitch will yield a denser, smoother finish.
Step 5: Maintain Tension
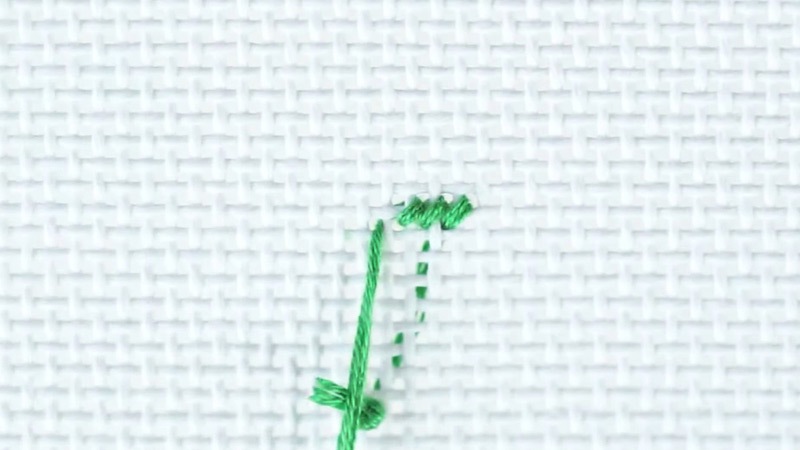
As you pull the thread through, maintain a consistent tension. It should be taut enough to lie flat against the fabric but not so tight that it distorts the canvas. Proper tension ensures that your stitches will be even and well-defined.
Step 6: Continue Stitching
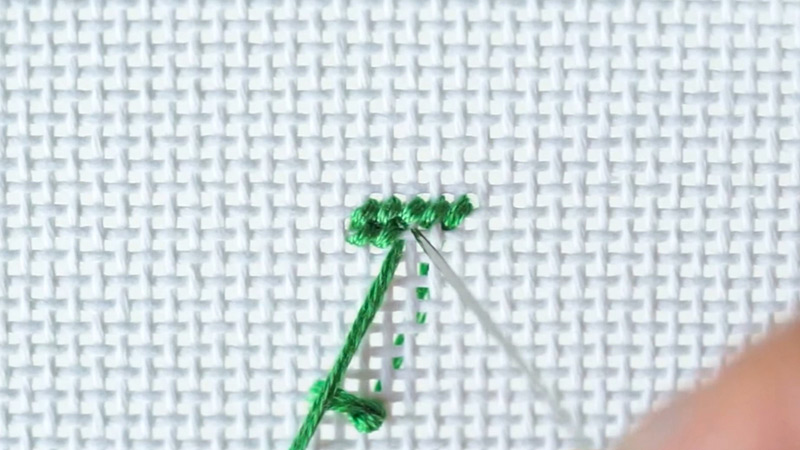
Repeat steps 2 through 4 to create a row of tent stitches. Ensure that each subsequent stitch follows the same diagonal direction as the previous one. Keep the stitches close together, avoiding any gaps or overlaps. Consistency in spacing and direction is crucial for achieving a polished and uniform appearance.
Step 7: Work Subsequent Rows
When you reach the end of a row or need to change colors, bring the needle up through the back at the starting point of the new row.
Maintain the same slanting direction and ensure consistent tension as you continue stitching. This step is crucial for maintaining the flow and continuity of your design.
Step 8: Secure the Thread
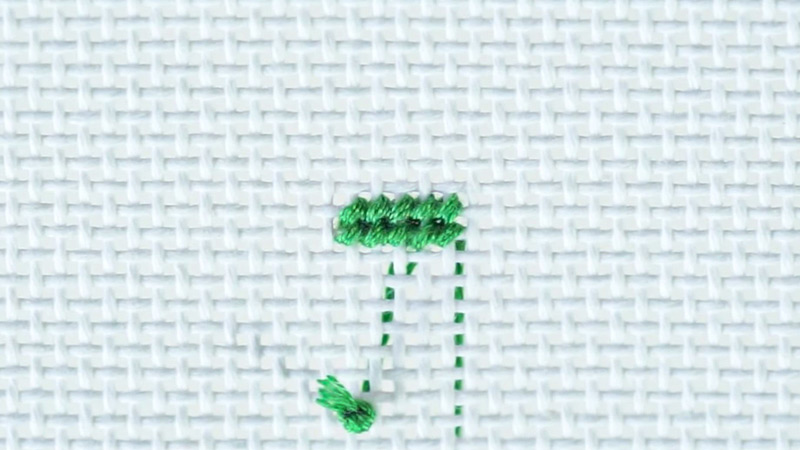
To finish a section or change colors, secure the thread by weaving it through the backside of the canvas or fabric.
This process hides loose ends and ensures that your stitches won’t unravel over time. Take care to weave the thread through several existing stitches for added security.
Step 9: Trim Excess Thread
Using a pair of sharp scissors, carefully trim any excess thread. Be cautious not to cut too close to the fabric, as this could risk unraveling your stitches. Leave a small tail behind to provide a tidy and secure finish.
Variations of Tent Stitch
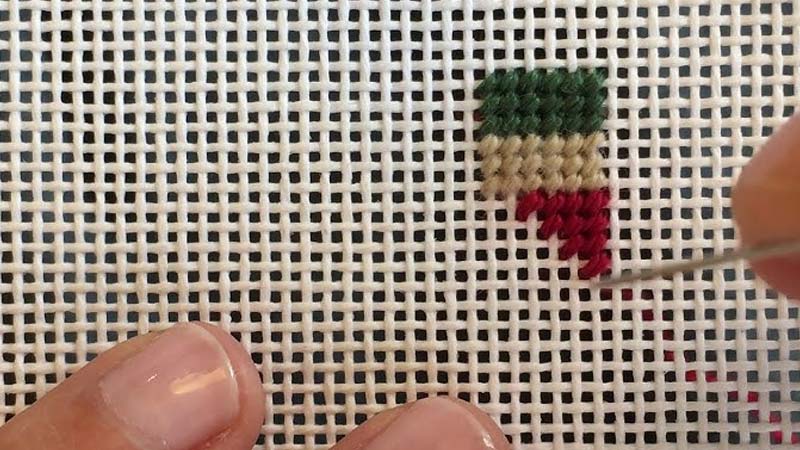
The tent stitch, a staple in needlepoint and canvas work, offers a versatile foundation for creating intricate designs. Beyond the classic method, several variations add depth, texture, and visual interest to your projects.
Let’s delve into some of these captivating techniques:
Half Tent Stitch
The half-tent stitch is a modification that provides a subtler, shaded effect. You can create a softer transition between colors and shades by working with half stitches in one direction.
This technique is especially useful for creating nuanced gradients or delicate details in your needlepoint.
Basketweave Stitch
The basketweave stitch is essential for ensuring the longevity and stability of your needlepoint projects.
Unlike the standard tent stitch, which may create a slight bias in the canvas, the basketweave stitch adds an extra layer of interlocking threads. This technique results in a more even distribution of tension and improved coverage.
Scottish Stitch
The Scottish stitch, also known as the Victorian cross stitch, introduces an element of complexity to your needlepoint creations.
Crossing stitches in a particular sequence allows you to craft intricate patterns with a unique texture. This technique is ideal for embellishing your designs’ borders, frames, or focal points.
Mosaic Stitch
The mosaic stitch offers an excellent choice for those seeking a bold and geometric look. You can create striking visual effects by combining contrasting colors in a grid-like pattern.
This technique is perfect for crafting eye-catching backgrounds or focal points in your needlepoint projects.
Slanting Gobelin Stitch
The slanting Gobelin stitch introduces a dynamic element to your needlepoint, allowing you to play with angles and directions.
By altering the slant of your stitches, you can create diagonal patterns that add movement and depth to your designs. This technique is particularly effective for creating textured backgrounds or intricate motifs.
Creative Uses of Tent Stitch
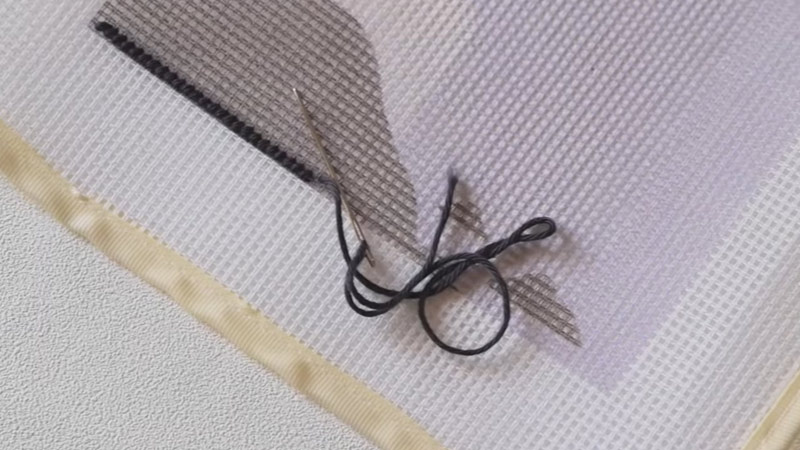
Tent stitch, a versatile embroidery technique, finds innovative applications beyond traditional needlepoint.
Explore the following creative uses:
Contemporary Needlepoint Art
In contemporary needlepoint art, the tent stitch is a foundational technique that allows artists to create intricate, complex designs. Artists often experiment with various colors, shades, and thread textures to produce visually captivating pieces.
The precision and versatility of the tent stitch enable the creation of abstract compositions, geometric patterns, and even lifelike representations.
Textured Backgrounds
The tent stitch can add depth and dimension to embroidery projects by creating textured backgrounds. Artisans can achieve a range of effects by skillfully adjusting stitch length, direction, and color.
This technique is particularly effective in landscapes, where it can emulate the texture of foliage or the play of light on water.
Embellishing Fashion and Accessories
By incorporating the tent stitch into fashion items and accessories, crafters can infuse them with a touch of sophistication and personalization. Handbags, scarves, and clothing become canvases for unique, custom designs.
Monograms, intricate patterns, or even miniature scenes can be meticulously stitched, transforming these pieces into wearable works of art.
Home Decor
Tent stitch provides an excellent method for crafting bespoke home decor items. Pillows, cushion covers, table runners, and wall hangings can be personalized to complement interior decor schemes.
The controlled precision of the tent stitch allows for the creation of intricate designs that add a touch of elegance to any living space.
Patchwork and Quilting
In patchwork and quilting, the tent stitch finds a unique application. Quilters can use this technique to outline and emphasize specific patterns or blocks within their creations.
The tent stitch can also create richly textured designs, adding an extra layer of visual interest to the final quilt.
Mixed Media Art
The tent stitch adds an intriguing textural element to mixed media artworks when combined with other artistic mediums, such as painting or collage. This combination allows for the creation of visually complex and multidimensional pieces.
The contrast between the tactile nature of embroidery and other artistic mediums creates a dynamic visual experience.
Personalized Gifts
The tent stitch lends itself beautifully to crafting personalized gifts. Monogrammed handkerchiefs, bookmarks, or framed initials become cherished keepsakes.
These thoughtful presents showcase the care and effort put into creating a unique, one-of-a-kind item for a special recipient.
Miniature Artwork
Creating miniature scenes or portraits using the tent stitch requires high precision and attention to detail. This art form demands a steady hand and a keen eye for composition.
The tent stitch’s ability to produce fine, controlled stitches makes it ideal for crafting tiny masterpieces with intricate patterns and delicate shading.
Three-Dimensional Embroidery
In three-dimensional embroidery, the tent stitch is used strategically to create raised and textured surfaces.
By manipulating stitch length and direction, artisans can sculpt intricate details, resulting in tactile pieces. This technique is well-suited for crafting embroidered sculptures, ornaments, and jewelry.
Troubleshooting Common Mistakes During Stitching
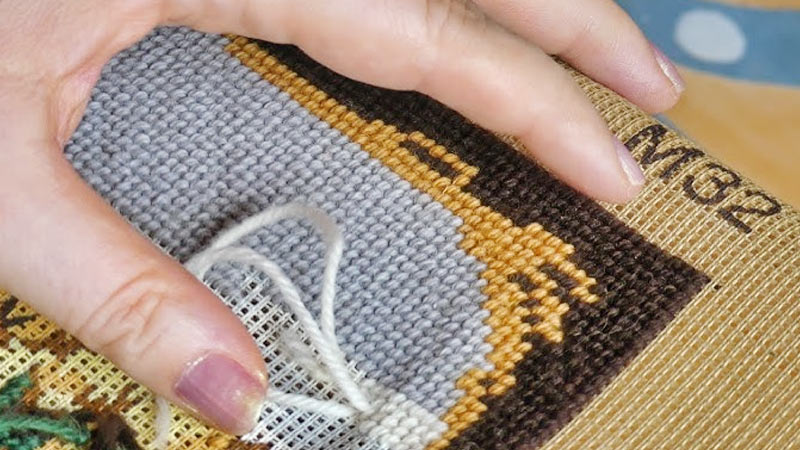
Embroidery, while a delightful craft, can sometimes pose challenges.
Here are some common issues you might encounter and how to address them:
Uneven Tension
Uneven tension can lead to stitches that appear irregular or puckered. To fix this, make sure to pull the thread gently but firmly. Avoid pulling too tightly, as it can distort the fabric.
Knots and Tangles
Frequent knots and tangles in your thread can be frustrating. To prevent this, use shorter lengths of thread. If you do encounter a knot, be patient and carefully untangle it rather than pulling forcefully.
Puckering
A puckered or wrinkled appearance in the fabric around the stitches indicates a need for adjustment. Ensure you use an appropriately sized needle, and avoid pulling the thread too tight. The fabric should be taut but not stretched.
Splitting Threads
If the needle pierces the threads of the fabric rather than going between them, switch to a sharp, high-quality needle suitable for your fabric. Be gentle and guide the needle between the threads rather than forcing it.
Tips for Mastering Tent Stitch
Mastering the tent stitch is foundational in creating intricate and captivating needlepoint designs.
Here are some invaluable tips to help you refine your technique and elevate your embroidery projects:
Choose Right Materials
Begin your tent stitch journey with high-quality materials. Choose a suitable canvas or fabric and ensure you have the appropriate tapestry needle and thread. The right tools lay the foundation for successful stitching.
Practice Consistent Tension
Maintaining even tension in your stitches is crucial for a polished finish. Avoid pulling too tightly, which can distort the fabric, and refrain from being too loose, which may result in uneven stitches. Practice finding the right balance.
Use Proper Lighting
Good lighting and comfortable seating are often overlooked but essential for needlepoint precision. Adequate illumination helps you see the stitches clearly, while comfortable seating supports your posture for extended periods of stitching.
Keep Stitches Neat and Close
Ensure that your stitches are neatly placed and close together. This creates a smooth, even surface, especially when working on backgrounds or filling large areas.
Master the Diagonal Slant
The direction in which you slant your stitches can greatly impact the overall look of your needlepoint. Consistency in slanting directions contributes to a uniform and professional appearance.
Experiment with Stitch Length
Varying stitch length can add texture and depth to your work. Shorter stitches create a denser, smoother surface, while longer stitches offer an open, textured effect. Experiment with different lengths to achieve your desired outcome.
FAQS
What is a tent stitch in embroidery?
The tent stitch is a basic, diagonal embroidery stitch used in needlepoint and canvas work.
What materials do I need for tent stitching?
You’ll need a tapestry needle, suitable thread or yarn, and a canvas or fabric for needlepoint.
How do I maintain a consistent tension in tent stitching?
Achieving even tension is crucial. Pull the thread taut enough to lie flat against the fabric but not so tight that it distorts it. Practice finding the right balance.
Can I use a tent stitch for intricate designs or just backgrounds?
Tent stitch is versatile and can be used for intricate designs and backgrounds. It’s commonly employed for creating detailed patterns and filling in larger areas.
How do I secure the thread at the end of a tent stitch row?
To secure the thread, weave it through the backside of the canvas or fabric. This ensures that your stitches won’t unravel over time.
To Wrap Up
Mastering the art of the tent stitch opens up a world of creative possibilities in needlepoint and canvas work embroidery. Its precision and versatility allow for creating intricate, beautifully detailed designs.
You can achieve professional-level results with careful attention to materials, tension, and stitch direction. Remember, practice and patience are your greatest allies in perfecting this technique.
Whether crafting contemporary needlepoint art or embellishing fashion and accessories, the tent stitch will undoubtedly become a valuable skill in your embroidery repertoire.
So, pick up your needle and thread and embark on a journey of creating stunning, intricate designs with the timeless tent stitch.
Leave a Reply