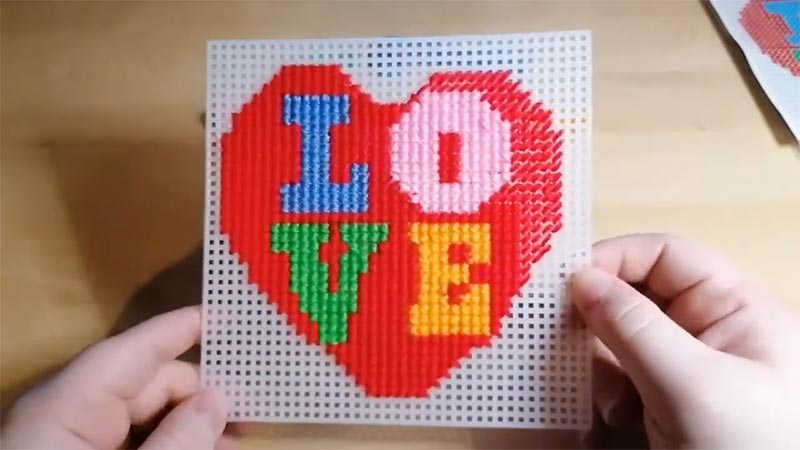
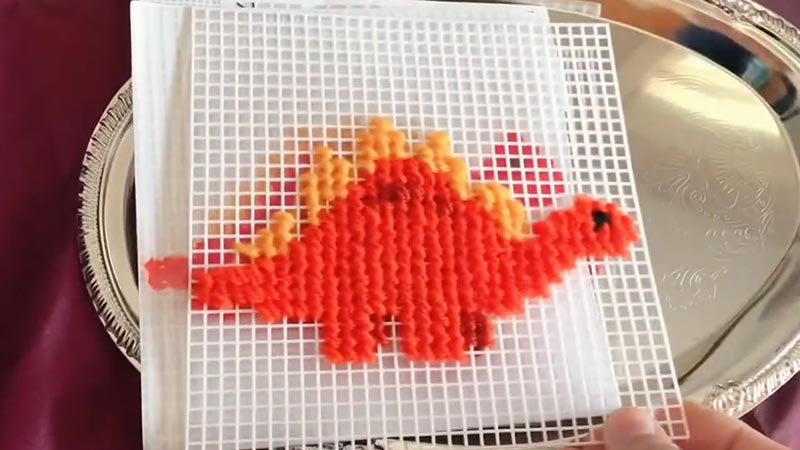
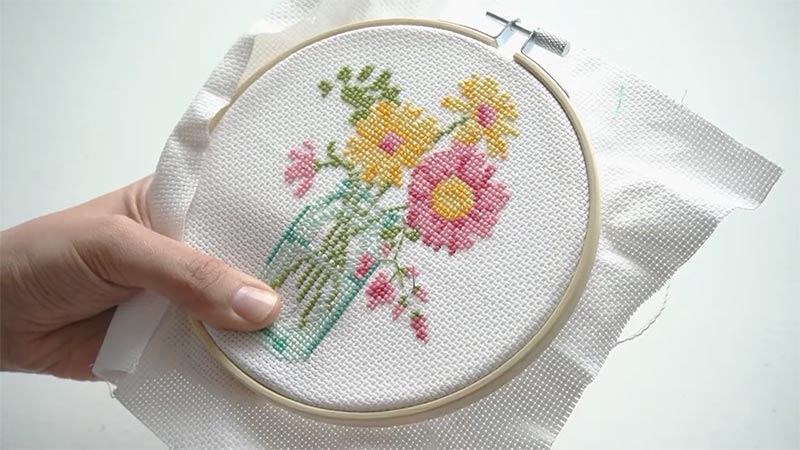
Children’s stitching is an exciting journey into the world of creativity and craftsmanship. Cross-stitching is a timeless art that allows kids to express themselves through colorful threads and patterns.
This beginner’s guide will outline the steps and techniques tailored specifically to young stitchers, ensuring a safe and enjoyable experience.
From selecting the right materials to mastering basic stitches and creating charming designs, this introduction will empower kids to embark on their cross-stitching adventures confidently.
As they stitch their way through, they’ll develop essential fine motor skills and unleash their artistic potential, one stitch at a time.

What Is Cross Stitch?
Cross stitch is a form of embroidery that involves creating decorative designs on fabric using a needle and thread. It’s called “cross stitch” because the stitches form tiny crosses on the fabric.
This craft has been practiced for centuries and is popular worldwide. A special fabric called Aida cloth, which has evenly spaced holes, is used in cross-stitching.
The design is typically charted on a grid, with each square representing a stitch. The crafter follows the pattern, making individual stitches to replicate the design.
Cross stitch can range from simple, geometric patterns to intricate, detailed works of art. This craft is loved for its versatility and the ability to create a wide range of designs, from traditional to contemporary.
How to Cross Stitch for Kids?
Cross stitching is a wonderful craft that allows kids to create beautiful designs using a needle and thread. It’s a fun and creative activity that helps develop fine motor skills, patience, and attention to detail.
In this guide, we’ll provide step-by-step instructions on how to cross stitch for kids, making it easy and enjoyable for them to get started.
Materials Needed
Before you begin, gather the necessary materials:
- Aida Fabric.
- Embroidery Floss.
- Embroidery Needle.
- Embroidery Hoop.
- Scissors.
- Pattern.
Step-by-Step Instructions
Cutting the Fabric
Using a pair of scissors, carefully cut a piece of Aida fabric that’s slightly larger than your chosen design. Ensure that there’s enough space around the edges to fit within the embroidery hoop comfortably.
Securing in Hoop
Separate the two parts of the embroidery hoop. Place the inner hoop on a flat surface, then lay the fabric over it. Center the design within the inner hoop, ensuring it’s straight.
Place the outer hoop over the fabric, sandwiching it between the two hoops. Gently tighten the screw to secure the fabric in place, making sure it’s taut but not overly stretched.
Separate Strands
Hold the embroidery floss at one end and gently pull two strands away from the others. As you do this, you’ll notice the threads naturally separate. Keep the remaining threads together for later use.
Thread the Needle
Take one end of the separated floss and carefully thread it through the eye of the embroidery needle. Pull it through until there’s a small tail, about an inch long, hanging from the needle. This tail will prevent the thread from slipping out during stitching.
Make the First Stitch
Position the fabric so you look at the front side (where the design is visible). Begin at the lower-left corner of the square you want to stitch.
Gently push the needle up from the back of the fabric, ensuring it passes through one of the holes in the Aida fabric. This brings the needle and thread to the front.
Next, insert the needle diagonally down into the upper-right corner of the square, ensuring it passes through the corresponding hole. This creates a diagonal stitch, forming an “X”.
Continue Stitching
To create a row, bring the needle up from the bottom-left of the next square and down from the upper-right, just as you did in the first stitch. This continues the pattern.
As you work, maintain a consistent tension on the thread to ensure your stitches lie flat against the fabric.
Read the Symbols
Look at the pattern and familiarize yourself with the symbols representing different colors. These symbols correspond to specific shades of embroidery floss. Refer to the key provided with the pattern to identify which colors correspond to which symbols.
Stitching the Design
Begin by working on one color at a time. Start with larger blocks of color before moving on to smaller details. This helps you establish the overall shape of the design.
Follow the pattern carefully, placing stitches according to the corresponding symbols. Take your time and enjoy the process of bringing the design to life.
Securing the Ends
When you reach the end of a thread, leave a small tail on the back of the fabric. Weave the needle through nearby stitches on the backside to secure it in place. This prevents the thread from coming loose over time.
Removing from the Hoop
To remove the fabric from the hoop, gently loosen the screw on the outer hoop. Take care not to pull or tug on the stitches. Once the fabric is free, inspect your work and admire your progress!
Troubleshooting of Cross Stitches for Kids

Cross stitching for kids can be a delightful and educational activity, but like any craft, it may have a few challenges.
Here are some common troubleshooting tips to help kids overcome potential hurdles:
Fabric Slipping in the Hoop
- Issue: The fabric keeps slipping in the embroidery hoop, making stitching difficult.
- Solution: Make sure the fabric is securely fastened in the hoop. Double-check that the hoop screw is tightened properly. If needed, reposition and retighten the fabric.
Tangled Threads
- Issue: The thread keeps getting tangled or knotted.
- Solution: Encourage kids to be mindful of how they handle the thread. Remind them to pull the thread smoothly and avoid abrupt movements. If a knot occurs, show them how to untangle it carefully or, if necessary, cut and re-thread the needle.
Uneven Stitches
- Issue: The stitches are not consistent in size or tension.
- Solution: Remind kids to maintain a consistent tension on the thread while stitching. Encourage them to take their time and practice even controlled movements.
Difficulty Following the Pattern
- Issue: Kids are struggling to follow the pattern.
- Solution: Provide guidance on how to read the symbols in the pattern. Point out the key or legend that matches symbols to colors. Encourage them to take it one symbol at a time and double-check their work as they go along.
Poking Fingers with the Needle
- Issue: Kids are accidentally poking their fingers with the needle.
- Solution: Stress the importance of being cautious while handling the needle. Show them how to grip the needle safely and advise them to keep their fingers away from the stitching area. If necessary, provide a thimble for added protection.
Running Out of Thread
- Issue: Kids frequently run out of thread and must reread the needle.
- Solution: Teach them how to estimate the amount of thread needed for a stitching section. Encourage them to cut a manageable length to avoid excessive tangling or waste.
Losing Interest or Frustration
- Issue: Kids are becoming bored or frustrated with the project.
- Solution: Offer positive reinforcement and praise for their efforts. If they’re losing interest, suggest taking breaks or switching to a different project briefly. Encourage them to choose patterns that genuinely interest them.
Stiff or Sore Hands
- Issue: Kids complain of stiff or sore hands after extended stitching sessions.
- Solution: Remind them to take breaks and stretch their hands and fingers regularly. Provide ergonomic support, such as a cushion or pillow to rest their arms on while stitching.
Difficulty with Counting and Placement
- Issue: Kids have trouble accurately counting the fabric threads and placing stitches.
- Solution: Use a lower count (larger holes) fabric for beginners. Encourage them to use their finger as a guide for counting threads. Provide extra guidance on starting and ending stitches in the correct places.
Safety Precautions

Safety is paramount when engaging in any craft, especially when working with children.
Here are some important safety precautions to keep in mind when kids are involved in cross-stitching or any other craft project:
Supervision
Always supervise children during crafting activities, especially when using sharp objects like needles and scissors. Be present to provide guidance and ensure they are following safety rules.
Needle Safety
Teach kids to handle needles with care and respect. Emphasize that needles should always point away from themselves and others.
Use blunt-tipped embroidery needles, especially for younger children, to reduce the risk of accidents. Show them how to thread a needle properly and how to hold it securely.
Scissor Safety
Provide age-appropriate, child-safe scissors. These have rounded tips and are less likely to cause injuries. Teach kids how to use scissors safely, emphasizing the importance of keeping fingers away from the blades.
Thread Safety
Keep embroidery floss and other small craft supplies out of the reach of younger children to prevent choking hazards. Teach kids not to put thread in their mouths or noses.
Fabric Safety
Ensure the fabric is clean and free of allergens. Some kids may be sensitive to certain fabrics, so be mindful of skin reactions.
When working with Aida fabric with a higher thread count (smaller holes), use a tapestry needle with a blunt tip to avoid pricking fingers.
Workspace Safety
Maintain a clean and organized workspace to reduce the risk of tripping over materials or tools. Use proper lighting to prevent eye strain and ensure kids can see their work clearly.
Allergen Awareness
Be aware of any allergies your child may have to materials used in cross-stitching, such as certain types of fabric or threads. When allergies are a concern, consider using hypoallergenic materials.
Breaks and Ergonomics:
- Encourage kids to take regular breaks to stretch their hands, arms, and shoulders to prevent discomfort or injury.
- Provide comfortable seating and use cushions or pillows to support their posture while stitching.
Cleanup:
- Teach children to clean up their workspace when they are finished with their craft. This includes removing needles, scissors, and other tools to prevent accidents.
- Dispose of used needles and thread scraps safely in a designated container.
Emergency Preparedness:
- Ensure that you have a basic first-aid kit on hand in case of minor injuries like small cuts or scrapes.
- Familiarize yourself with the location of the nearest medical facility in case of more serious accidents.
FAQs
What Age is Suitable for Kids to Start Cross Stitching?
Typically, children around the age of 7 or older have the fine motor skills required for basic cross-stitching.
Are There Kid-Friendly Patterns Available for Cross Stitching?
Yes, there are numerous websites and books that offer kid-friendly cross-stitch patterns. These often feature simple designs with clear, easy-to-follow instructions.
Can Kids Choose Their Own Colors for Cross-Sitching?
Absolutely! Allowing children to select their own thread colors encourages creativity and personalization in their projects.
How Can I Ensure Safety While Cross-Stitching with Kids?
Always supervise children during cross-stitching. Use blunt-tipped needles, provide child-friendly scissors, and emphasize safe materials handling.
What Are Some Tips for Keeping Kids Engaged and Interested in Cross Stitching?
Choose patterns that align with their interests, such as animals, simple shapes, or favorite characters. Offer positive reinforcement and praise for their progress.
Wrap Up
Embarking on the cross-stitching journey has opened a world of creativity for young crafters. Through careful guidance and practice, kids have learned to thread needles, master basic stitches, and create beautiful designs.
This newfound skill enhances their fine motor abilities and nurtures patience and attention to detail. A sense of accomplishment fills the air as they proudly display their finished projects.
Encouraging their creativity through cross-stitching has provided a productive pastime and a foundation for lifelong crafting enjoyment.
With each stitch, they’ve woven a tapestry of skills and memories, setting the stage for even more intricate and imaginative projects in the future.
Leave a Reply