Creating a quilt is a labor of love, and every step, from selecting fabrics to stitching the final seam, plays a crucial role. Among these, cutting the backing fabric is a pivotal task that demands precision and care.
The backing provides structural support and frames the quilt’s design. This guide outlines a systematic approach to cutting backing for a quilt, ensuring a smooth and gratifying process.
Each step contributes to a well-prepared foundation for the quilting journey ahead, from accurate measurements to joining multiple pieces seamlessly.
With attention to detail and these expert tips, you’ll embark on a quilting project showcasing skill and artistry.

What Is Backing in a Quilt?
Backing in a quilt refers to the fabric that forms the back layer of a quilt sandwich, which includes the quilt top, batting (inner layer), and backing fabric.
This layer is a protective and stabilizing element, supporting the quilt’s structure.
The backing fabric is typically chosen to complement the quilt’s design, although it is not always as intricate as the quilt top. It should be larger than the quilt top to allow for quilting and binding.
The backing fabric should also be durable, as it will be subject to wear and tear over time. Preparing the backing is a crucial step in the quilting process, as it ensures a stable foundation for the quilt’s overall construction.
How to Cut Backing for a Quilt?
Cutting the backing for a quilt is an essential step in the quilting process. The backing provides stability and a finishing touch to your quilt, and it’s important to approach this task with care and precision.
Here’s a step-by-step guide on how to cut backing for a quilt:
Materials Needed:
- Fabric for backing
- Rotary cutter or fabric scissors
- Cutting mat
- Quilt ruler
- Measuring tape or ruler
- Pins or clips
Measure Your Quilt Top
When measuring your quilt top, start at one corner and run the measuring tape along the edge. Use your other hand to hold the tape in place, ensuring it follows the contours of the quilt.
Take note of the measurements and double-check them to ensure accuracy. If your quilt has irregular shapes, measure the longest points.
Prepare the Fabric
Spread out your fabric on a large, clean surface. If you’re using a table, ensure it’s clean and free of any rough spots that might snag the fabric.
Gently smooth out any wrinkles with your hands before using an iron on a low-heat setting. Iron from the center towards the edges to prevent new wrinkles from forming.
Determine the Cutting Dimensions
Adding extra inches ensures that your backing fabric adequately covers the quilt top. Consider factors like borders or sashing and whether you’ll use a long-arm quilting machine. These extra inches give you room to work with and help prevent any accidental shortfalls.
Cut the Fabric
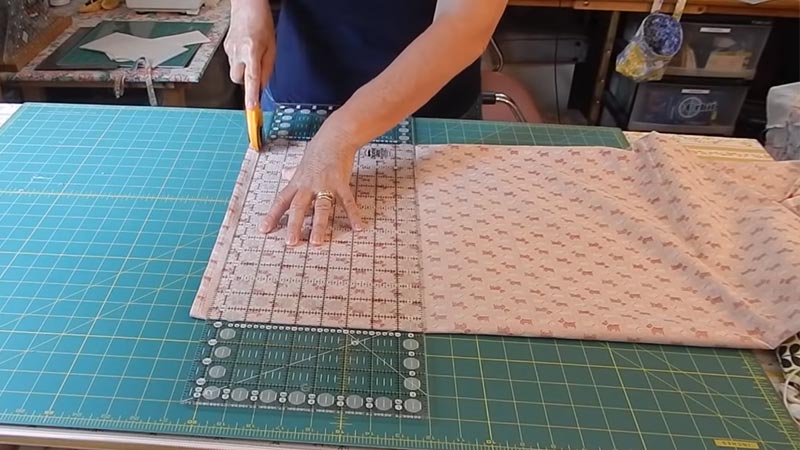
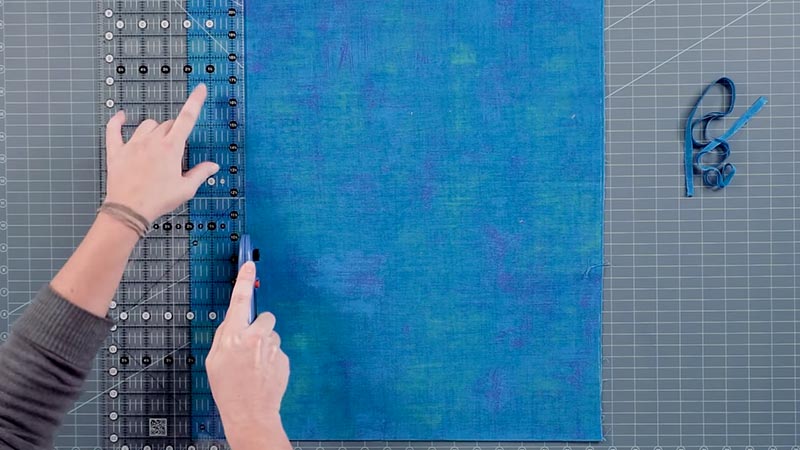
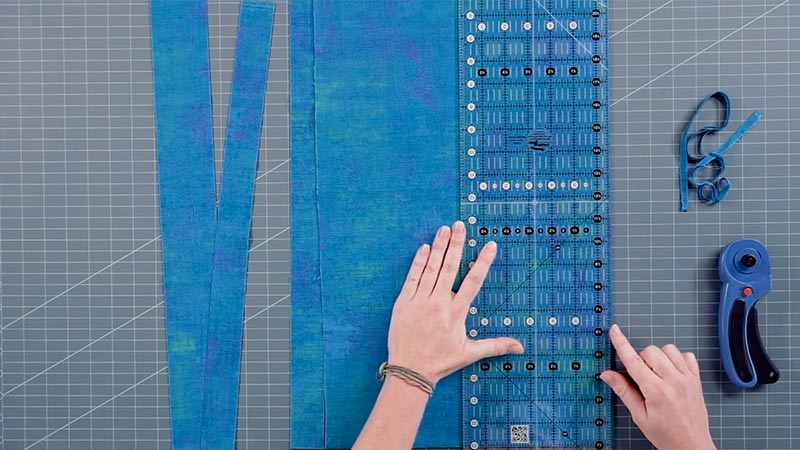
Position your fabric on a self-healing cutting mat. If using a rotary cutter, make sure the blade is sharp. Place the quilting ruler along the measured dimensions, double-checking that it’s straight.
Apply gentle, even pressure as you cut. If you’re using scissors, follow the ruler’s edge closely to maintain a straight line.
Joining Multiple Pieces
When you need to piece together your backing fabric, align the edges of the fabric pieces with precision. Pin them together to keep them aligned before sewing.
Use a 1/2-inch seam allowance, and ensure your stitches are secure and even. After sewing, press the seam open with an iron to reduce bulk.
Trim Excess Fabric
After piecing, trim any excess fabric to create a neat, even edge. This ensures that the backing will lie flat and smooth against the batting and quilt top, preventing any unwanted wrinkles or puckers.
Iron the Seams
Pressing the seams open creates a flatter surface for quilting and reduces bulk. Use a low heat setting on your iron and apply even pressure along the seam. Take care not to stretch the fabric while ironing.
Prepare for Quilting
Clear a large, flat area where you can lay out your backing, batting, and quilt top. Ensure the space is clean and free of debris that might transfer onto your quilt.
When you’re working on the floor, consider using a clean sheet or drop cloth to protect your fabrics.
Layer and Baste
Start by placing your backing fabric right side down, smoothing out any wrinkles. Add the batting layer on top, ensuring it’s centered and flat.
Then, carefully position your quilt top, right side up. Align all three layers’ edges, ensuring they’re straight and even. Use safety pins or basting spray to secure the layers together, creating a stable quilt sandwich.
Proceed with Quilting
Now that your layers are securely basted, you can begin quilting. Whether you’re hand quilting, machine quilting, or sending it to a professional quilter, your well-prepared backing will provide the stability and support needed for a successful quilting project.
Common Issues and How to Avoid Them

Several common issues can arise during the process in the quilting world, from fabric selection to the final stitches.
Here are some of these issues and tips on how to avoid them:
Inaccurate Measurements
- Issue: Mismeasured dimensions can lead to a backing that is too small for the quilt.
- Prevention: Double-check all measurements before cutting. Use a clear ruler and ensure it’s aligned properly.
Uneven Cuts
- Issue: Crooked cuts can result in a backing that doesn’t align well with the quilt top.
- Prevention: Use a quilting ruler and a sharp rotary cutter or fabric scissors. Take your time to cut along the edge of the ruler.
Insufficient Fabric
- Issue: Not having enough fabric can lead to a backing that’s too small, requiring piecing or purchasing additional material.
- Prevention: Always add extra inches to your measurements to ensure there’s ample fabric for the backing.
Fabric Stretching
- Issue: Pulling or tugging on the fabric while cutting can distort its shape.
- Prevention: Smooth out wrinkles before cutting, and handle the fabric gently. Avoid excessive tension.
Seam Allowance Errors
- Issue: Incorrect seam allowances when joining multiple pieces can affect the overall size and shape of the backing.
- Prevention: Use a consistent 1/2-inch seam allowance and press seams open to reduce bulk.
Unintended Fabric Shifts
- Issue: Fabric pieces move during cutting, resulting in misaligned edges.
- Prevention: Secure the fabric in place with pins or clips before cutting, especially when joining multiple pieces.
Overlooking Fabric Direction
- Issue: For fabrics with a directional print, not considering the orientation can lead to an upside-down or sideways design.
- Prevention: Pay attention to the print’s orientation when cutting and joining pieces.
Not Accounting for Shrinkage
- Issue: Failing to prewash the fabric can lead to shrinkage after the first wash, potentially distorting the quilt.
- Prevention: Always prewash the fabric before cutting to account for any potential shrinkage.
Tips for Successful Cutting

Successful cutting is crucial for various crafts, including quilting, sewing, and crafting.
Here are some tips to help you achieve precise and successful cuts:
Use High-Quality Tools
Investing in high-quality cutting tools is essential for achieving accurate and clean cuts. Sharp rotary cutters, fabric scissors, and well-constructed quilting rulers provide the foundation for successful cutting.
Measure Accurately
Precision starts with accurate measurements. Use a reliable measuring tape or ruler to ensure your dimensions are exact. Take your time and double-check before making any cuts.
Square Up Your Fabric
Before cutting, take a moment to ensure your fabric’s edges are straight and square. Aligning the fabric properly helps maintain accuracy throughout the cutting process.
Stabilize the Fabric
To prevent the fabric from shifting or stretching during cutting, secure it in place with pins, clips, or weights. This extra stability ensures clean and precise cuts.
Cut on a Flat Surface
Working on a flat surface, like a cutting mat or a spacious table, provides a stable foundation for accurate cutting. It helps prevent fabric distortion and ensures even cuts.
Cut in Well-Lit Conditions
Adequate lighting is crucial for seeing your cutting lines clearly. Natural daylight or good artificial lighting helps you make accurate cuts and reduces the risk of mistakes.
Practice Good Hand Placement
When using cutting tools, position your hands correctly. Hold the ruler securely and keep your fingers away from the cutting path to ensure safety and precision.
Cut with Steady Pressure
Apply consistent, gentle pressure when cutting. Let the tool do the work; avoid pushing or forcing it. This approach results in smooth and even cuts.
Consider Fabric Grain
Understanding and respecting the fabric’s grain is essential. Cutting along the grain (parallel to the selvages) prevents stretching and ensures the fabric retains its natural drape.
Use Cutting Mats
A self-healing cutting mat protects your work surface and prolongs the life of your cutting tools. It also provides a grid for accurate measurements and guides for straight cuts.
Maintain and Sharpen Tools
Regular maintenance of your cutting tools is crucial for consistent performance. Keep rotary cutter blades sharp, and periodically sharpen fabric scissors to ensure clean cuts.
Practice Cutting Techniques
When you’re new to cutting fabric, practice on scrap pieces first. This allows you to become familiar with the tools and develop a steady hand for accurate cutting.
Mark Fabric Carefully
Use fabric marking tools like chalk, washable markers, or tailor’s chalk to make clear and precise cutting lines. Take care to make your markings visible and easy to follow.
Plan Your Cuts
Before making any cuts, take a moment to strategize. Consider the most efficient way to use your fabric to minimize waste and ensure you have enough for your project.
Take Breaks
Cutting can be a repetitive task, and precision requires focus. Take short breaks to rest your hands and maintain your concentration, especially on larger projects.
FAQS
How much extra fabric should I add for the backing?
Adding at least 4-6 inches to the length and width of your quilt top’s measurements is recommended.
Can I use directional fabric for the backing?
Yes, you can use directional fabric, but be mindful of its orientation when cutting and joining pieces to ensure the design is positioned correctly.
Should I wash the backing fabric before cutting?
It’s advisable to prewash the fabric to account for any potential shrinkage in the future.
What’s the best way to prevent fabric from stretching while cutting?
Smooth out wrinkles before cutting, and handle the fabric gently. Avoid pulling or tugging on it during the cutting process.
How do I join multiple pieces of fabric for a larger backing?
Align the edges of the fabric pieces with the right sides together, pin or clip them in place, and sew using a 1/2-inch seam allowance. Press the seam open for a flatter finish.
To Recap
In crafting a quilt, every aspect contributes to its final beauty, no matter how seemingly small. Cutting the backing, as explored in this guide, is a pivotal step in this intricate process.
It provides the quilt with structure, stability, and a finishing touch that complements the artistry of the quilt top.
Attention to measurements, precise cuts, and thoughtful joining of fabric pieces all culminate in a well-prepared foundation for the quilting journey.
With these skills in hand, you’re poised to create quilts that not only envelop in warmth but also dazzle with their meticulous craftsmanship. Embrace this art, and let your quilts tell stories for generations to come.
Leave a Reply