Knitting is a timeless craft that allows you to create beautiful, cozy textiles with just a pair of needles and some yarn. At the heart of knitting lies the foundational technique known as the knit stitch.
This versatile stitch forms the basis for countless knitting patterns, making it essential for both beginners and seasoned knitters. In this guide, we will take you through a step-by-step journey on how to master the art of knitting the knit stitch.
Whether you’re just starting your knitting adventure or looking to refine your skills, understanding this fundamental stitch is the first step towards creating intricate patterns and crafting handmade treasures.

What Is the Knit Stitch?
The knit stitch is one of the foundational techniques in knitting, forming the basis for numerous intricate patterns and designs. It involves pulling a loop of yarn through an existing loop on the needle, creating a new stitch.
This stitch creates a smooth, V-shaped pattern on the fabric’s surface. When combined with purl stitches, it forms the stockinette stitch, which is the most basic and widely used knit fabric.
The knit stitch is versatile, allowing for the creation of various textures and patterns by manipulating stitch placement and yarn types.
It’s an essential skill for knitters, opening up a world of possibilities for crafting garments, accessories, and decorative items.
How to Knit the Knit Stitch? 12 Steps
Knitting is a wonderful craft that allows you to create a wide range of beautiful and functional items. The knit stitch is one of the foundational stitches in knitting, and it forms the basis for many knitting projects.
Here is a step-by-step guide on how to knit the knit stitch:
What You Need:
- Knitting needles
- Yarn of your choice
- Comfortable, well-lit workspace
Step 1: Cast On Stitches
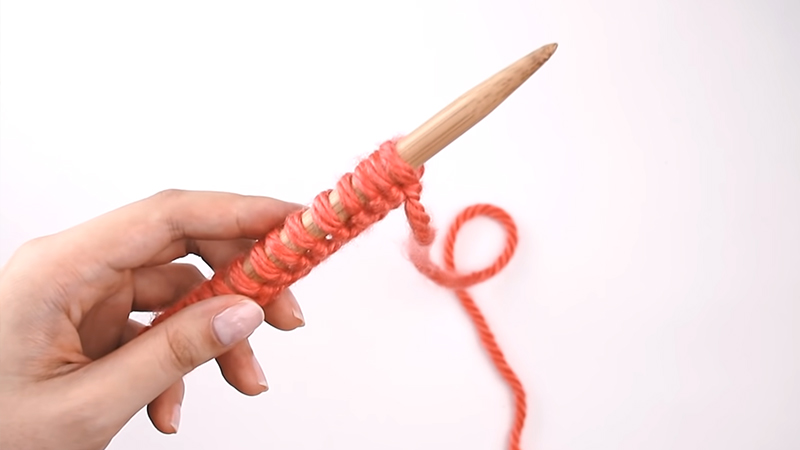
Begin by making a slipknot in your yarn, leaving a tail of about 6 inches. Place the slipknot onto the left needle and hold both needles in your right hand. With your left hand, hold the yarn tail and working yarn.
Use the right needle to go under the yarn and over the tail, then draw the loop through, placing it onto the left needle. Repeat until you have the desired number of stitches.
Step 2: Hold the Needles
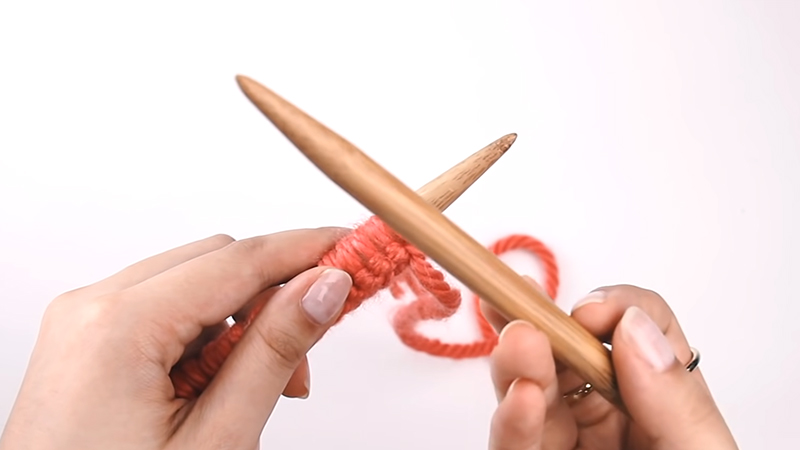
Hold the needle with the cast-on stitches in your left hand and the empty needle in your right. Ensure that the working yarn is at the back of your work and the tail end is hanging down.
Step 3: Insert the Right Needle
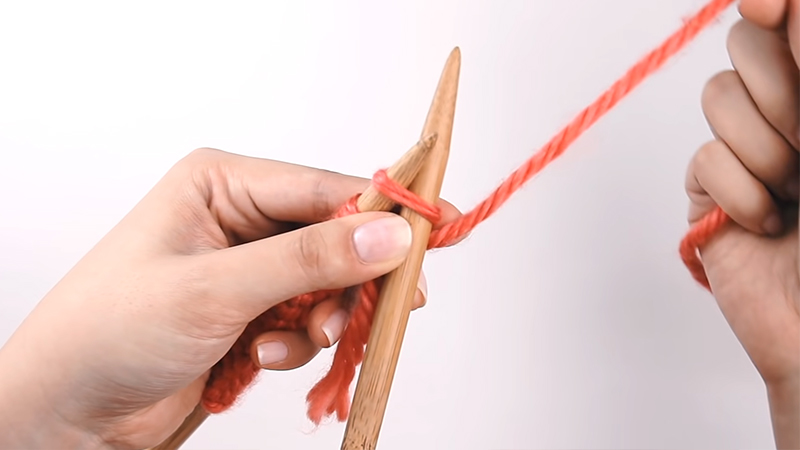
Hold the right knitting needle like a pencil or a chopstick. Gently insert the right needle into the first stitch on the left needle, ensuring that the right needle goes from left to right and underneath the left needle. It’s essential to keep the needles close together to prevent loose stitches.
Step 4: Yarn Over
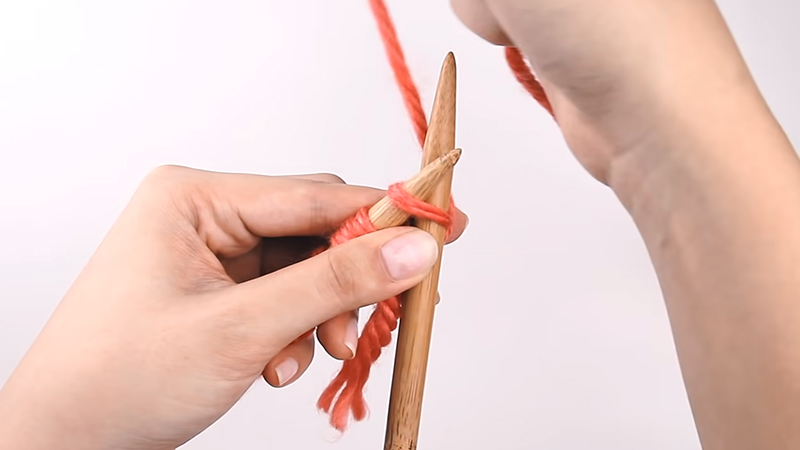
With your right hand, bring the working yarn (the yarn attached to your skein) from the back to the front, wrapping it around the right needle in a counterclockwise direction. Imagine it as if you’re making a small loop around the right needle.
Step 5: Pull Through
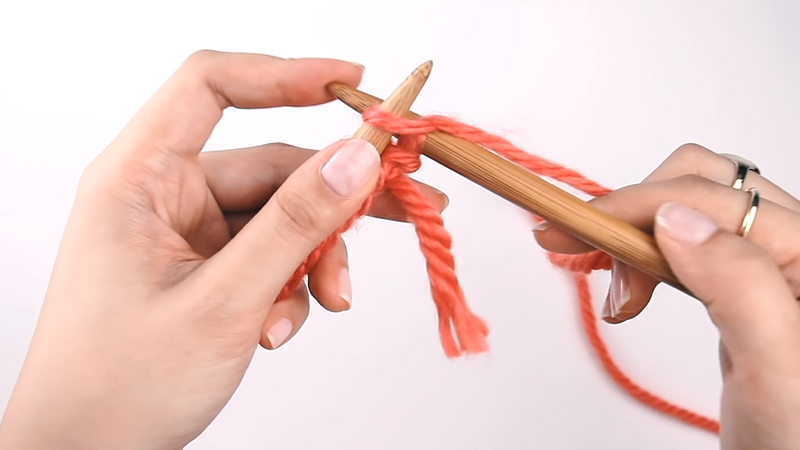
Using the right needle, carefully draw the wrapped yarn through the first stitch on the left needle.
As you do this, ensure that you’re maintaining a consistent tension on the yarn. The right needle should now hold the new loop, while the old stitch remains on the left needle.
Step 6: Slip Off the Stitch
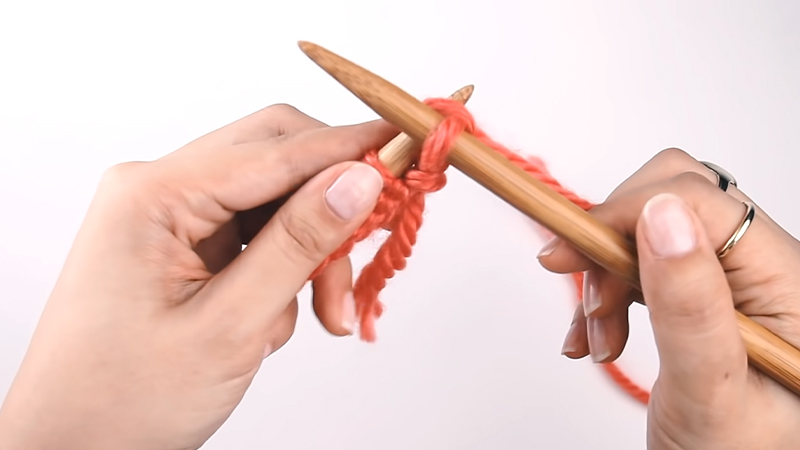
Once the new loop is securely on the right needle, gently slide the old stitch off the left needle. You’ve successfully completed one knit stitch! The new stitch is now on the right needle.
Step 7: Repeat Steps 3-6
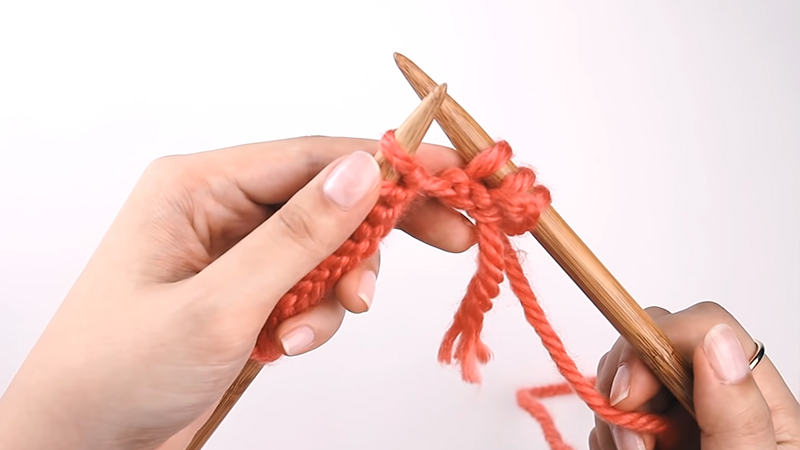
Continue steps 3 through 6 for each stitch across the row. Insert the right needle into the next stitch, yarn over, pull through, and slip off the stitch.
Repeat until you’ve knitted all the stitches on the left needle. This repetitive process creates a beautiful pattern of knit stitches.
Step 8: Turning Your Work
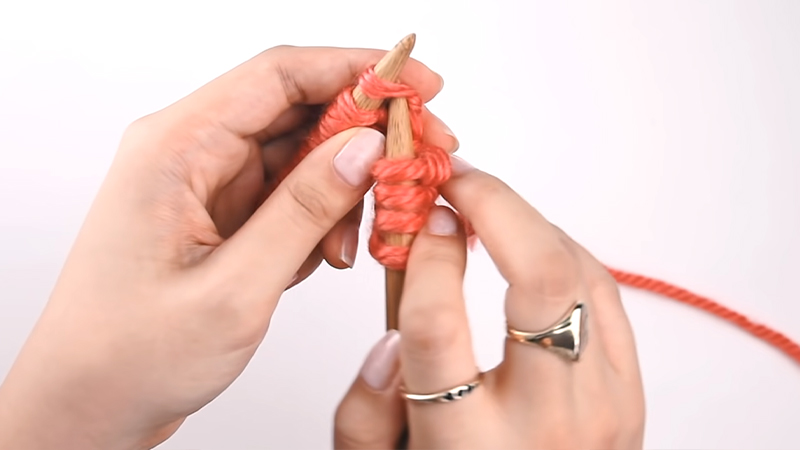
After completing a row, your stitches will be on the right-hand needle. Hold the needle with the completed row in your left hand and the empty needle in your right hand.
Position the empty needle to start the next row, ensuring that the working yarn is at the back of your work.
Step 9: Knit Across
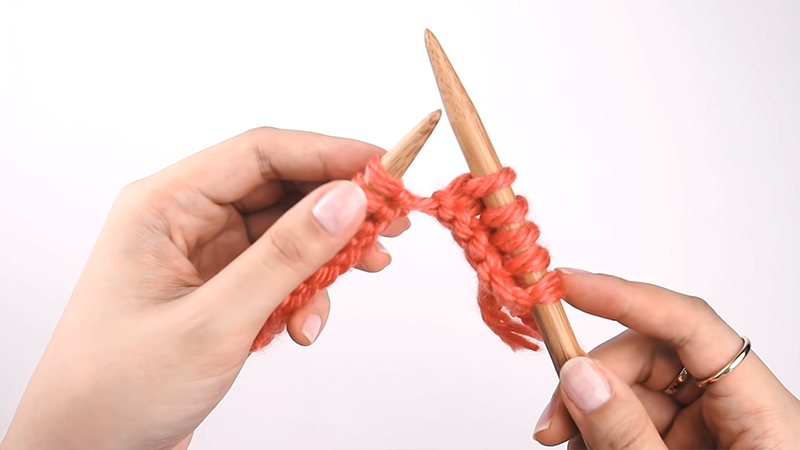
With the stitches now on the right-hand needle, repeat steps 3 through 6 for each stitch across the row, just as you did before.
This forms the foundation of all knitting, and as you continue, your fabric will grow.
Step 10: Practice, Practice, Practice
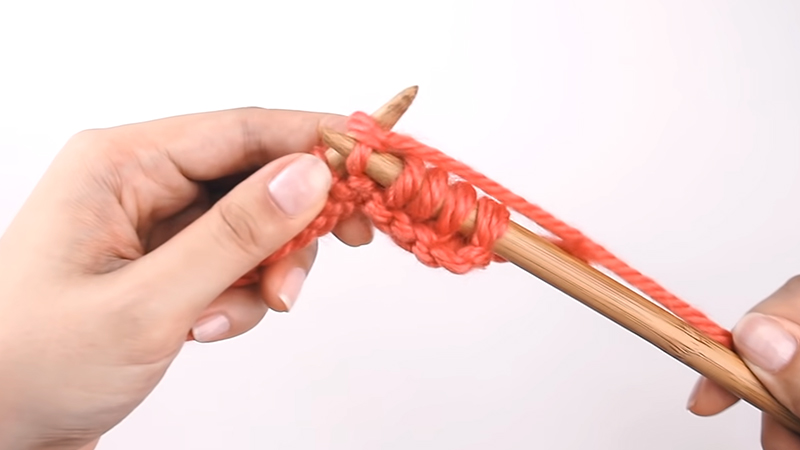
Knitting is a skill that improves with practice. Spend time knitting rows and rows of the knit stitch to build muscle memory and confidence.
As you practice, your tension will become more consistent, resulting in neater stitches.
Step 11: Count Your Stitches
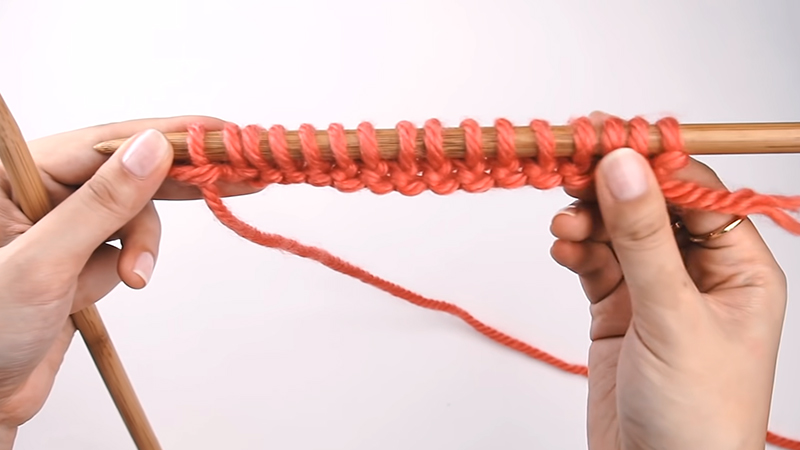
It’s essential to periodically count your stitches to ensure you have the correct number, especially when working on patterns or projects that require a specific stitch count. Count them on your right needle to avoid confusion.
Step 12: Bind Off
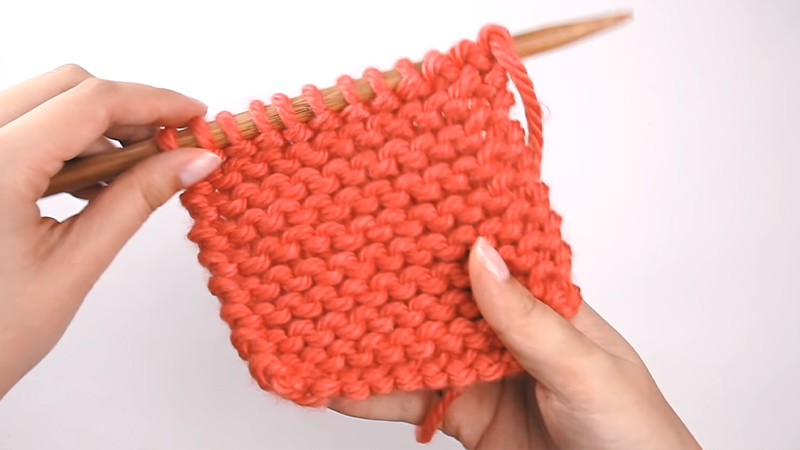
When you’ve reached your desired length, it’s time to bind off. Knit the first two stitches, then use the left needle to lift the first stitch over the second stitch and off the needle.
Continue this process until only one stitch remains. Cut the yarn, leaving a tail, and pull it through the final loop to secure your work.
Common Mistakes When Knitting the Knit Stitch
Embarking on a knitting project can be an exciting endeavor, but like any craft, it comes with its fair share of challenges. Understanding the potential stumbling blocks can help you navigate through them more effectively.
Here are some common mistakes to be mindful of when working on the knit stitch:
Uneven Tension
Maintaining consistent tension in your yarn is vital for achieving a uniform and aesthetically pleasing fabric. Tension that is too tight can lead to stiff, unyielding work, while overly loose tension results in floppy, loose stitches.
Dropped Stitches
A dropped stitch occurs when a stitch slips off the needle accidentally. If not corrected promptly, it can lead to unraveling rows of work. Learning how to pick up dropped stitches is an essential skill for any knitter.
Twisted Stitches
When a stitch is mounted on the needle incorrectly, it can result in a twisted appearance. This often happens when the needle is inserted incorrectly. Twisted stitches can disrupt the pattern and affect the overall look of your project.
Not Counting Stitches
Failing to keep track of your stitch count can lead to uneven rows and patterns that don’t align correctly. Regularly checking your stitch count at the end of each row can save you from having to undo and redo large sections.
Splitting Yarn
Inserting the needle into the wrong part of the yarn can cause it to split. This results in uneven stitches and a less polished finish. Pay attention to where you’re inserting the needle to avoid this issue.
Not Reading Patterns Carefully
Misinterpreting or overlooking instructions in a pattern can lead to mistakes. Take the time to thoroughly read and understand the pattern before you begin. This will prevent unnecessary backtracking.
Inconsistent Stitch Size
Ensuring that each stitch is the same size is crucial for creating a uniform fabric. Variations in stitch size can result in an uneven texture, which may not be aesthetically pleasing.
Incorrect Needle Size
Using the wrong size needles for your yarn can lead to a fabric that’s either too tight and dense or too loose and open. Always check the recommended needle size on the yarn label and adjust accordingly.
Not Checking Gauge
Neglecting to check your gauge (the number of stitches and rows per inch) can lead to a project that’s the wrong size. Take the time to knit a gauge swatch and adjust your needle size if needed.
How Do You Fix a Mistake in Your Knit Stitch?
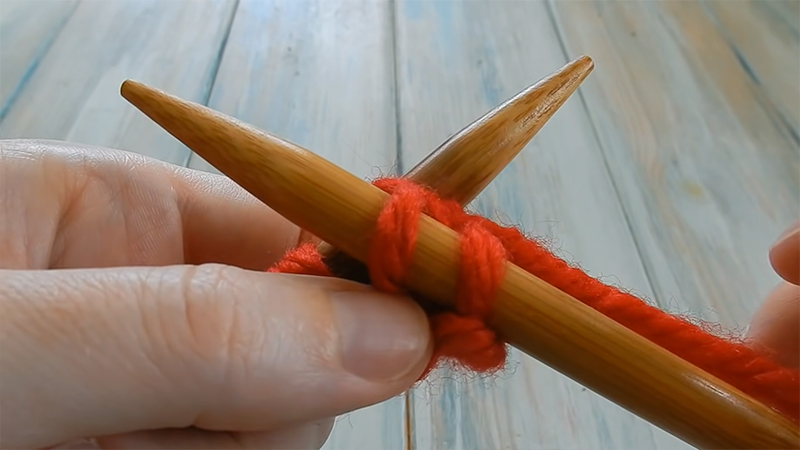
Fixing a mistake in your knit stitch is a common skill every knitter should have. There are a few methods you can use, depending on the nature and location of the mistake.
Here’s how to fix some common errors in your knit stitch:
Fixing a Dropped Stitch
- Step 1: Identify the dropped stitch. It will look like a “ladder” running down your work.
- Step 2: Use a crochet hook or your knitting needle to pick up the dropped stitch. Insert the hook or needle from front to back through the loop of the dropped stitch.
- Step 3: Hook the dropped stitch onto the crochet hook or knitting needle.
- Step 4: Pull the dropped stitch through the loop, bringing it back onto the needle.
Fixing Twisted Stitches
- Step 1: Identify the twisted stitch. It will look like it’s sitting on the needle in an unusual way.
- Step 2: Insert the tip of the right needle into the front of the twisted stitch from left to right.
- Step 3: Slip the twisted stitch off the left needle.
- Step 4: Place it back onto the left needle with the leading leg in front. This corrects the orientation of the stitch.
Fixing Uneven Tension
When you notice that your tension is too tight or too loose, you can correct it by paying extra attention to how you hold the yarn. Practice maintaining a consistent tension by adjusting how you wrap the yarn around your fingers.
Tinking (Unknitting)
When you’ve made a mistake a few rows back, you might need to “tink” or unknit to correct it.
Insert the left needle into the stitch below the next stitch on the right needle, then slide the right needle out. This unravels the last stitch. Repeat this process until you’ve reached the mistake.
Frogging (Ripping Back)
When the mistake is too complex to fix by thinking, you might need to unravel your work back to the point of the error. This is called “frogging.” Carefully pull out the yarn, stitch by stitch, until you’ve reached the problem area.
Adding a Stitch
When you realize you’ve accidentally skipped a stitch, you can use a crochet hook or knitting needle to pick up the bar between the stitches and create a new stitch.
Tips for Success
Learning to knit can be a rewarding and creative endeavor, and one of the foundational skills you’ll need is mastering the knit stitch. Whether you’re a beginner or looking to refine your technique.
Here are some valuable tips for success when knitting the knit stitch:
Start with the Basics
Before you venture into intricate patterns, dedicate time to master the knit stitch. Practice creating even, uniform stitches until you feel confident in your technique. This solid foundation will serve as the cornerstone of your knitting endeavors.
Choose the Right Yarn and Needles
Consider the project you have in mind when selecting your yarn and needles. Thicker yarns work well for cozy blankets and scarves, while finer yarns are ideal for delicate shawls or baby items.
Match the yarn weight with the recommended needle size on the label for best results.
Maintain Consistent Tension
Finding the right tension in your knitting is an art in itself. Avoid pulling the yarn too tightly, as this can lead to cramped hands and uneven stitches.
Likewise, too loose a tension can result in sloppy-looking work. Practice finding a comfortable middle ground and strive for uniformity.
Practice Patience
In the world of knitting, patience is truly a virtue. Rushing can lead to mistakes and frustration. Remember, knitting is a meditative craft that rewards a calm and steady approach. Enjoy the process as much as the finished product.
Count Your Stitches
It’s easy to lose track of stitches, especially in intricate patterns. At the end of each row, take a moment to count your stitches to ensure they match the pattern’s requirements. This small habit can save you from having to unravel rows later.
Fix Mistakes Promptly
Mistakes are inevitable, even for experienced knitters. Learning how to correct them is an essential skill.
Familiarize yourself with “tinking” (unknitting) to reverse stitches, or use a crochet hook to pick up dropped stitches. These techniques will save you from starting over.
Read Patterns Carefully
Before you start knitting a pattern, thoroughly read through the instructions. Understand any abbreviations or special techniques mentioned. This prevents misunderstandings and ensures a smoother knitting experience.
Take Breaks
Extended knitting sessions can lead to hand fatigue and strain. Regular breaks help prevent discomfort. Stretch your fingers, wrists, and shoulders periodically. Consider using ergonomic knitting needles to reduce strain.
Experiment with Different Stitches
Once you’ve mastered the basics, don’t hesitate to explore new stitches and patterns. Try your hand at purling, ribbing, or even more advanced techniques like cables and lacework. This experimentation keeps knitting exciting and helps you grow as a knitter.
Don’t Fear Unraveling
Unraveling or “frogging” your work is a normal part of knitting. If you encounter a mistake that’s beyond quick-fixing, bravely undo your stitches and start again. Remember, it’s all part of the learning process.
Embrace Mistakes as Learning Opportunities
Mistakes aren’t setbacks; they’re lessons. Analyze what went wrong, and use it as an opportunity to deepen your understanding of knitting. Over time, you’ll find that your skills improve as a result.
Join a Knitting Community
Being part of a knitting community, whether online or in person, provides invaluable support and camaraderie.
You can share ideas, seek advice, and learn from fellow knitters. This sense of community adds an enriching dimension to your knitting journey.
FAQs
What is the Knit Stitch?
The knit stitch is a fundamental knitting technique that creates a smooth, v-shaped pattern on the fabric. It’s one of the first stitches beginners learn in knitting.
How Do I Hold the Needles for Knitting?
Hold one knitting needle in each hand. The needle with the stitches on it is the left needle, and the empty one is the right needle.
What is Yarn Over in the Knit Stitch?
Yarn over involves bringing the yarn over the right needle to create a new loop in the stitch. This action is crucial in forming the knit stitch.
How Do I Fix Mistakes in the Knit Stitch?
Common mistakes like dropped stitches or twisted stitches can be fixed using techniques like picking up the dropped stitch with a crochet hook or reorienting twisted stitches.
What’s the Importance of Tension in Knitting?
Tension refers to the evenness of your stitches. Maintaining consistent tension ensures that your fabric will have a uniform texture.
Wrap Up
Mastering the knit stitch is an essential milestone in your knitting journey. This foundational technique opens the door to a world of creative possibilities, allowing you to craft warm blankets, stylish scarves, and intricate garments.
As you practice and become more comfortable with the knit stitch, you’ll find that it’s not just a skill but a form of therapeutic artistry. Knitting enables you to express your creativity while creating functional and beautiful items.
Remember, patience and practice are key to honing your knitting skills. With each stitch, you’ll gain confidence, and soon, you’ll be knitting your way to a world of handcrafted wonders.
Leave a Reply