Embarking on a sewing project is an exciting journey, where attention to detail is paramount. Central to this process is the art of tracing a sewing pattern onto fabric a critical step that bridges design and execution.
This skill ensures the faithful reproduction of a chosen pattern onto your chosen textile, setting the stage for a well-fitting, professionally finished garment. From selecting the right materials to adding precise seam allowances, each step plays a vital role.
In this guide, we’ll delve into the intricacies of this process, providing you with the knowledge and techniques needed to master the art of pattern tracing and elevate your sewing projects to new heights.
What Is Tracing a Sewing Pattern?
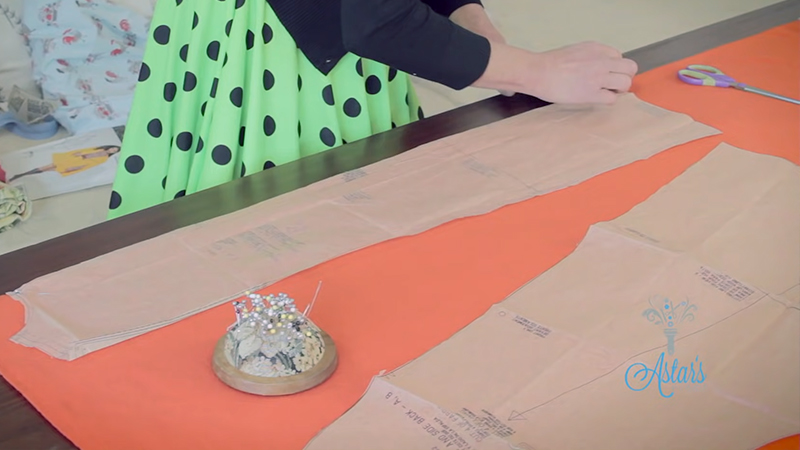
Tracing a sewing pattern is the process of transferring the design, shape, and markings from a paper pattern onto fabric. It involves creating an exact replica of the pattern’s outlines and details on the chosen textile, ensuring accurate cutting and assembly.
This step is crucial in garment-making as it serves as a blueprint for creating a well-fitted and professionally finished piece. Tracing is typically done using specialized tools like tracing paper, tracing wheels, or tailor’s chalk.
It allows the sewer to preserve the original pattern for future use and customization. Additionally, it enables adjustments for individual body measurements, facilitating a personalized and tailored fit.
Overall, tracing a sewing pattern is a fundamental skill that lays the foundation for successful and beautifully crafted garments.
How to Trace a Sewing Pattern Onto Fabric?
Tracing a sewing pattern onto fabric is a crucial step in the garment-making process.
It allows you to transfer the pattern’s design and markings onto your fabric, ensuring accurate cutting and assembly.
Here’s a step-by-step guide on how to trace a sewing pattern onto fabric:
Materials You’ll Need:
- Sewing pattern.
- Fabric.
- Tracing paper.
- Weights or pins.
- Pencil or pen.
- Ruler or measuring tape.
- Scissors.
Steps to Trace a Sewing Pattern Onto Fabric:
Prepare Your Workspace
Before you start, make sure your workspace is clean and clutter-free. Lay down a clean, flat surface, like a table or a cutting mat.
Good lighting is crucial for accuracy, so position yourself near a natural light source or use a bright lamp. Check that your fabric is smooth and free of wrinkles by pressing it with an iron.
Position the Pattern
Take care to align the pattern with any specific markings on the fabric (such as grainlines, selvages, or design details).
Use weights or pins to secure the pattern in place, especially around curved or intricate areas. Ensure the pattern lies flat and is not skewed or folded.
Transfer Pattern Lines
Begin tracing the pattern’s outline onto the fabric. If using a pencil, apply consistent pressure to create clear lines.
When using a fabric pen, ensure it is appropriate for your fabric type and color. Pay extra attention to corners, curves, and intricate details to maintain accuracy.
Mark Important Information
Notches, grainlines, darts, and other markings are crucial for proper assembly. Use small, distinct symbols like triangles, circles, or lines to denote these points.
Clearly marked notches help you match pieces correctly during sewing, ensuring a well-fitted garment.
Label the Pieces
On each fabric piece, write the corresponding pattern piece number or name using a fine-tip fabric marker or a fine-tipped pencil.
This labeling ensures that you can quickly identify pieces during the sewing process, especially if you have multiple pattern pieces for your project.
Add Seam Allowance
When your pattern doesn’t include seam allowances, this step is crucial. Measure and mark the desired seam allowance around each traced pattern piece.
Use a ruler or measuring tape for precision. Consistent seam allowances are key to achieving professional-looking seams.
Cut Out the Fabric Pieces
Using sharp fabric scissors, carefully cut along the marked lines. Take your time to ensure accurate cutting. Smooth, clean edges will make the sewing process much smoother and result in a well-finished garment.
Store the Pattern
After you’ve finished tracing and cutting, gently remove the pattern from the fabric. Store it in a designated pattern envelope or a plastic bag to keep it safe from damage or misplacement. Label the envelope with the pattern’s name or number for easy identification.
Proceed with Sewing
With your fabric pieces accurately traced and cut, follow the sewing instructions provided with your pattern. Use the markings, notches, and other transferred information to guide you through the assembly process.
Take your time, referring to the pattern instructions as needed, and enjoy the process of bringing your garment to life.
Importance of Accurate Pattern Tracing
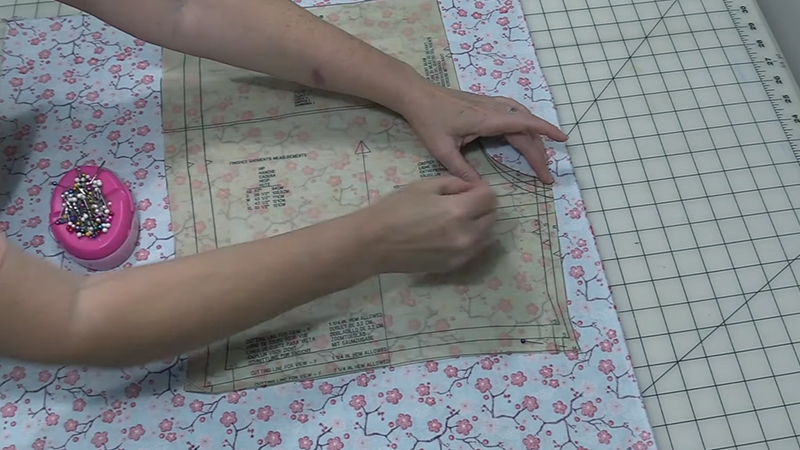
paper pattern and the fabric that will ultimately form a beautifully crafted piece of clothing. This process involves transferring intricate details, such as seam lines, notches, and darts, from the pattern onto the fabric.
Let’s explore the key reasons why precision in pattern tracing is paramount:
Ensures Proper Fit
Accurate tracing guarantees that the fabric pieces are an exact replica of the original pattern. This means that when sewn together, they will align perfectly, resulting in a garment that fits precisely as intended.
Facilitates Efficient Sewing
Well-traced patterns provide clear guidelines for cutting and assembly. This efficiency not only saves time but also minimizes the risk of errors during the sewing process.
Maintains Design Integrity
Intricate design elements, like pleats, gathers, and intricate seams, are meticulously marked on the pattern.
By transferring these details accurately, you ensure that the finished garment faithfully reflects the designer’s intent.
Enables Pattern Alterations
Accurate tracing makes it easier to adjust the pattern for customizations like lengthening or shortening, grading between sizes, or accommodating individual body measurements. This precision ensures alterations are made consistently across all pattern pieces.
Facilitates Pattern Reuse
A well-traced pattern can be used multiple times for different projects. It becomes a valuable template, especially if you plan to create variations of the same garment in the future.
Aids in Pattern Matching
Fabrics with prints, plaids, or stripes require precise pattern matching to achieve a polished look.
Accurate tracing ensures that pattern pieces align seamlessly, creating a cohesive and visually appealing finished product.
Enhances Attention to Detail
Pattern tracing encourages a meticulous approach to garment construction. It prompts careful consideration of notches, grainlines, and other markings that are crucial for accurate assembly.
Different Tracing Methods of Sewing Pattern Onto Fabric
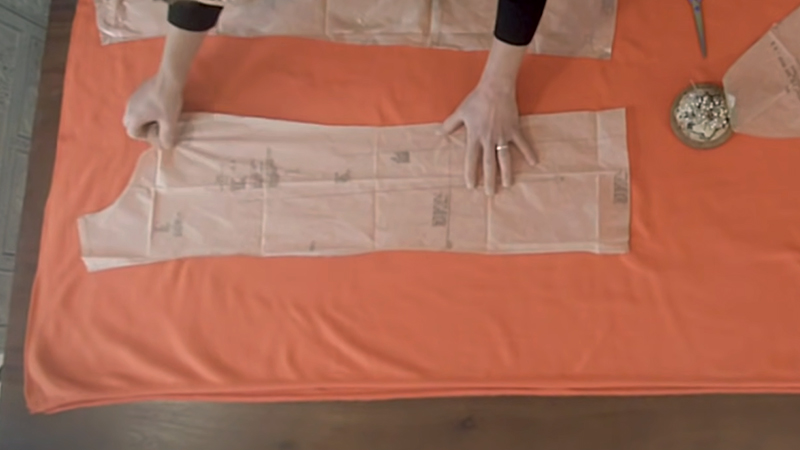
There are several methods for tracing a sewing pattern onto fabric, each with its own advantages and best-use scenarios.
Depending on your preferences, the type of fabric you’re working with, and the pattern you’re using, you may choose one of the following tracing methods:
Tracing Paper and Wheel
- How it works: Place tracing paper (usually specialized sewing pattern paper) between the pattern and the fabric. Then, use a tracing wheel with serrated edges to trace the pattern lines. The wheel transfers the markings onto the fabric.
- Best for This method is great for delicate or lightweight fabrics where traditional tracing might damage the fabric. It’s also useful when working with intricate patterns or detailed designs.
Tailor’s Tacks
- How it works: Lay the pattern on the fabric and pin it in place. Then, use a contrasting thread and a hand-sewing needle to create tacks through the pattern and fabric. These tracks mark the pattern lines and notches.
- Best for Tailor’s tacks are particularly useful for fabrics that are difficult to mark with traditional methods, such as silk or chiffon. They also provide clear notches and marks for accurate sewing.
Chalk or Wax Paper
- How it works: Place a piece of chalk or wax paper between the pattern and fabric. Then, use a tracing wheel or a hard-pointed tool to trace the pattern lines. The chalk or wax transfers onto the fabric.
- Best for: This method works well on fabrics that won’t be damaged by chalk or wax and is effective for medium-weight materials. It provides a visible, temporary mark.
Tracing with Carbon Paper
- How it works: Place carbon paper (usually a specialized sewing tool) between the pattern and fabric. Then, use a stylus or a ballpoint pen to trace the pattern lines. The carbon paper transfers the markings onto the fabric.
- Best for Carbon paper is suitable for marking patterns on a variety of fabric types and provides clear lines. However, it may leave a slightly greasy residue that needs to be removed after sewing.
Freezer Paper Method
- How it works: Trace the pattern onto freezer paper (a type of paper with a wax coating on one side). Iron the freezer paper, wax-side down, onto the fabric. The wax adheres temporarily to the fabric and can be used as a guide for cutting and sewing.
- Best for: This method is suitable for cotton and other natural fibers. It provides a firm, non-permanent template for cutting and sewing.
Transfer Pens and Markers
- How it works: Use specialized transfer pens or markers to trace the pattern lines directly onto the fabric. These pens typically create markings that can be removed with water or heat.
- Best for: Transfer pens are convenient for precise marking on a variety of fabrics. They allow for easy customization and removal of markings.
Cut-and-Trace Method
- How it works: Cut the pattern pieces along the lines, then pin or tape them to the fabric. Trace around the pattern edges with chalk or a pencil, and mark notches and other key points.
- Best for: This method is straightforward and suitable for beginners. It works well with sturdier fabrics and patterns with simple shapes.
Difference Between Tracing and Cutting in Sewing Pattern
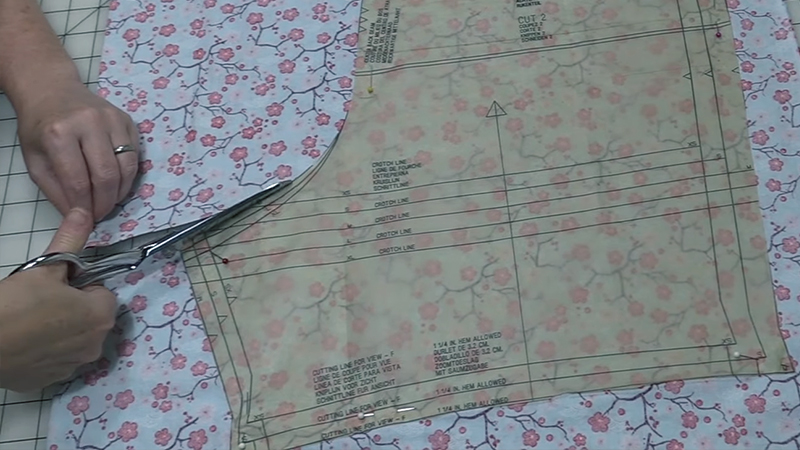
In sewing, tracing, and cutting are two distinct steps in the process of transferring a sewing pattern onto the fabric.
Each step serves a specific purpose, and understanding the difference between them is essential for accurate and successful garment construction.
Here’s a breakdown of the key differences between tracing and cutting in sewing patterns:
Definition
- Tracing: Tracing involves duplicating the lines and markings of a sewing pattern onto fabric or another medium.
- Cutting: Cutting involves using scissors or a cutting tool to remove the fabric along the traced lines of the sewing pattern.
Purpose
- Tracing: Tracing involves transferring the design and markings of a sewing pattern onto your fabric. It is primarily a marking and layout step, allowing you to duplicate the pattern’s shape and details on the fabric.
- Cutting: Cutting is the step where you use scissors or a rotary cutter to remove the excess fabric along the traced lines on your fabric pieces. It shapes the fabric to match the pattern pieces.
Materials
- Tracing: During tracing, you use tools like tracing paper, carbon paper, tailor’s tacks, or transfer pens to transfer pattern lines and markings onto the fabric.
- Cutting: For cutting, you use sharp fabric scissors, a rotary cutter, or specialized cutting tools to trim the fabric precisely along the traced lines.
Accuracy
- Tracing: Tracing requires precision to ensure that all pattern lines, notches, darts, and other crucial details are accurately transferred to the fabric. It’s essential for maintaining the correct shape and alignment of the garment pieces.
- Cutting: Cutting requires careful attention to the traced lines to ensure that the fabric pieces are cut accurately. Accurate cutting is crucial for achieving a well-fitting garment and clean seams.
Permanence
- Tracing: Tracing marks are typically temporary or semi-permanent, depending on the method used. They are meant to guide you during cutting and sewing but are often removed or covered during the construction process.
- Cutting: Cutting is a permanent action, as it shapes the fabric pieces for sewing. Once you cut the fabric, there’s no going back, so it’s essential to be confident in your cutting accuracy.
Tips for Success
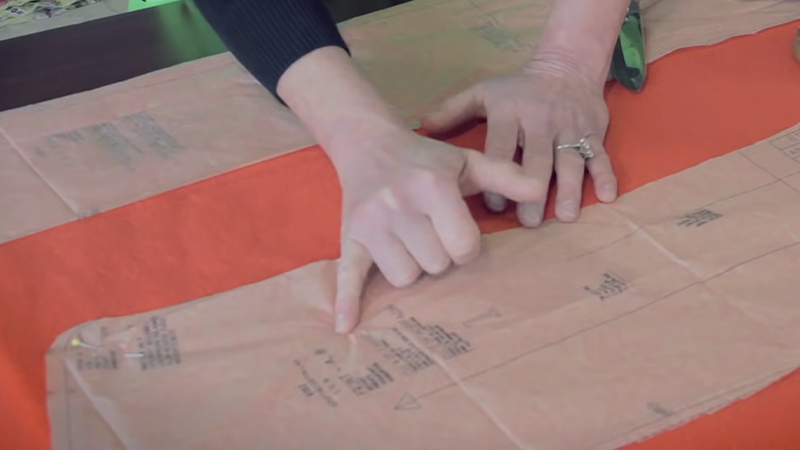
Embarking on a sewing project can be a rewarding endeavor, but it comes with its own set of challenges.
To ensure a successful outcome, it’s important to approach your project with care, attention to detail, and a few essential tips in mind.
Here are some valuable tips for success in your sewing endeavors:
Select the Right Fabric
The choice of fabric can make or break a sewing project. Consider factors like drape, weight, and stretch when selecting fabric. Also, pre-wash and press your fabric before cutting to prevent shrinkage or distortion.
Invest in Quality Tools and Notions
Good quality sewing tools, such as sharp scissors, a reliable sewing machine, and quality thread, can greatly impact the outcome of your project.
Invest in the best tools you can afford, as they will make your sewing experience smoother and more enjoyable.
Take Accurate Measurements
Precise measurements are crucial for a well-fitting garment. Use a flexible tape measure and follow a comprehensive measurement guide to ensure accuracy.
Take your measurements in undergarments or the type of clothing you’ll be wearing with the finished garment.
Test Your Stitches and Tension
Before starting your project, test your sewing machine’s stitches and tension on a scrap piece of fabric. This ensures that the machine is set up correctly for the type of fabric you’re using.
Practice Proper Seam Allowances
Consistent seam allowances are essential for a professional finish. Use a seam guide or special presser foot to help maintain an even allowance.
Pay Attention to Pattern Matching
When your fabric has a pattern, ensure that it lines up correctly at seams and other key points. This attention to detail elevates the overall look of your finished garment.
Clip and Notch Curves and Corners
Clipping and notching help reduce bulk in curved and cornered areas, allowing the fabric to lie flat and the seams to be smooth. Be careful not to clip too close to the stitching to avoid fraying.
Press, Don’t Iron
Pressing is a critical step in sewing. Use an iron to set seams, open seams, and give your project a professional finish. Avoid dragging the iron, as this can distort the fabric.
Check for Fit as You Go
Don’t wait until the end to check the fit of your garment. Try it on at various stages of construction, especially before adding closures like zippers or buttons. This allows for adjustments before it’s too late.
Practice Patience and Perseverance
Sewing can be a challenging skill to master, so don’t be discouraged by mistakes.
Take your time, and if something doesn’t turn out right, don’t hesitate to unpick and redo it. Each project is a learning experience.
FAQs
What is the purpose of tracing a sewing pattern onto fabric?
Tracing a sewing pattern onto fabric allows you to transfer the design and markings from the pattern to the fabric accurately.
What materials do I need for tracing a sewing pattern onto fabric?
You’ll need a sewing pattern, fabric, tracing paper, weights or pins, a fine-tipped pencil or fabric pen, ruler or measuring tape, and scissors for cutting out the traced pieces.
Is it necessary to wash the fabric before tracing the pattern?
Yes, it’s recommended to wash and press the fabric before tracing the pattern. This removes any sizing or shrinkage from the fabric, ensuring accurate measurements and fit.
Can I use regular paper for tracing sewing patterns if I don’t have tracing paper?
While it’s possible to use regular paper, specialized sewing pattern tracing paper is preferred because it’s semi-transparent and designed for this purpose.
Should I trace the seam allowances onto the fabric as well?
If the pattern doesn’t include seam allowances, it’s important to add them while tracing.
To Recap
Tracing a sewing pattern onto fabric is a foundational skill in garment-making, ensuring precision and accuracy in every project.
By carefully aligning the pattern, using suitable tracing materials, and adding necessary seam allowances, you create a reliable template for cutting and sewing.
Paying attention to details like notches and grainlines further enhances the final outcome. Remember to test on scrap fabric and double-check measurements for a flawless result.
With practice and patience, this process becomes second nature, enabling you to bring your creative visions to life with confidence. Mastering this skill is a pivotal step towards crafting beautifully tailored garments that fit seamlessly.
Leave a Reply