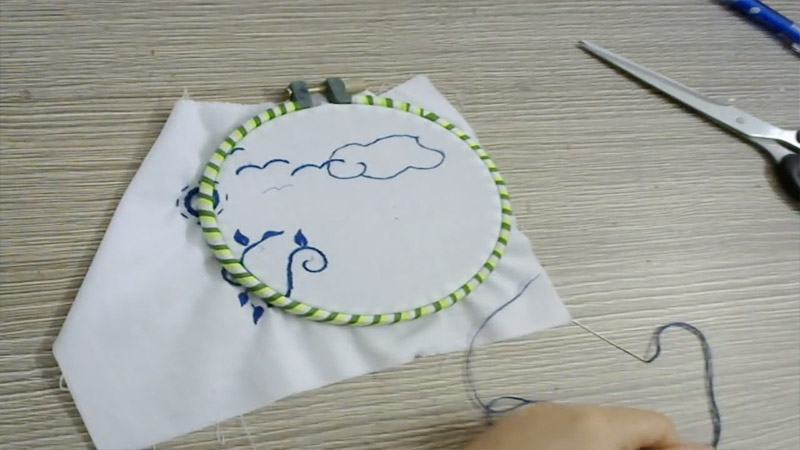
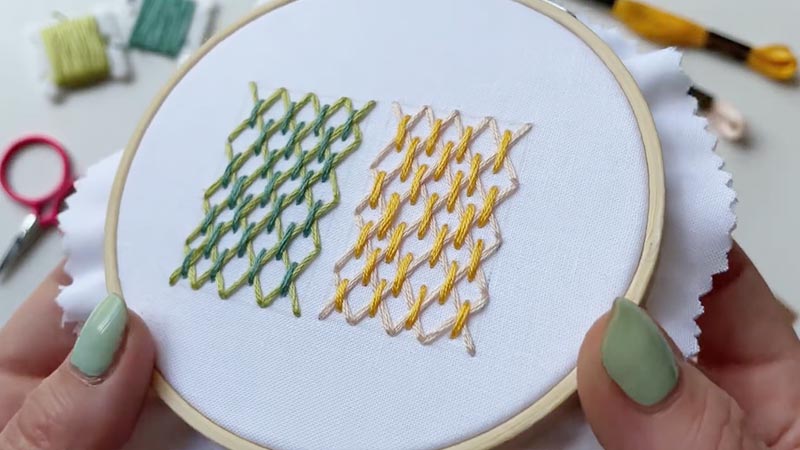
Cloud cover in embroidery is a captivating technique that adds depth and texture to the fabric, simulating the soft, billowy appearance of clouds in the sky.
This artful embroidery style involves layering stitches to create a three-dimensional effect, enhancing the visual appeal and realism of designs.
Whether hand-stitched or executed with a machine, cloud cover embroidery requires precision and creativity.
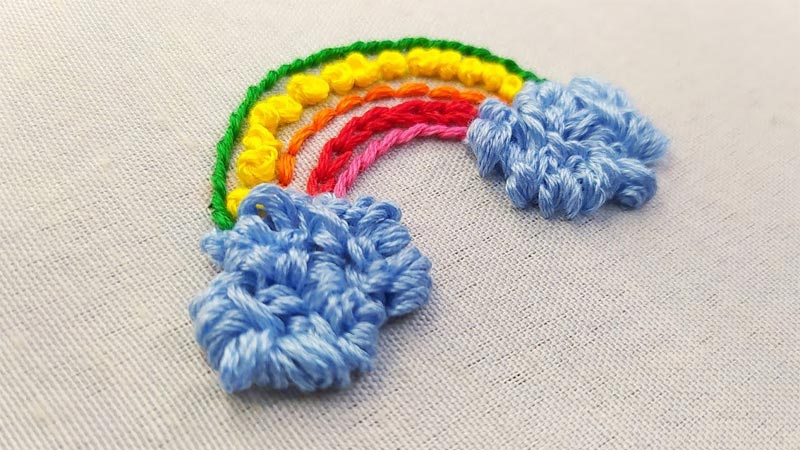
It begins with a smooth satin stitch base, followed by the addition of textured knots or stitches, such as French knots or turkey work, which mimic the fluffy nature of clouds. Shading and highlights further accentuate the dimension.
Cloud cover embroidery allows for artistic expression, offering a unique way to bring nature’s beauty to textile art.

What Is Cloud Cover in Embroidery? How Does it Work?
Cloud cover in embroidery refers to a specific technique used to create a three-dimensional and textured effect on fabric by layering stitches in a way that mimics the appearance of fluffy clouds in the sky.
This technique can be employed in various types of embroidery, including hand embroidery and machine embroidery.
Cloud cover embroidery adds depth and dimension to designs, making them more visually appealing and realistic.
Here’s a breakdown of how cloud cover embroidery works:
Selection of Stitches
Cloud cover embroidery typically involves using specific types of stitches that are suited for creating a soft and fluffy appearance.
Common stitches used for this technique include the satin stitch, French knots, bullion knots, and the turkey work stitch.
Layering Stitches
The key to creating a cloud-like effect is to layer stitches in a way that builds up the desired texture. Start by selecting a base fabric color for the sky or background.
Then, choose a thread color that matches the clouds you want to create. For white, fluffy clouds, white or off-white thread is commonly used.
Satin Stitch for the Base
Begin by covering the area where the clouds will be with a satin stitch. This creates a smooth foundation for the textured clouds. The satin stitch should be tight and even to provide a solid base.
Adding Texture with Knots
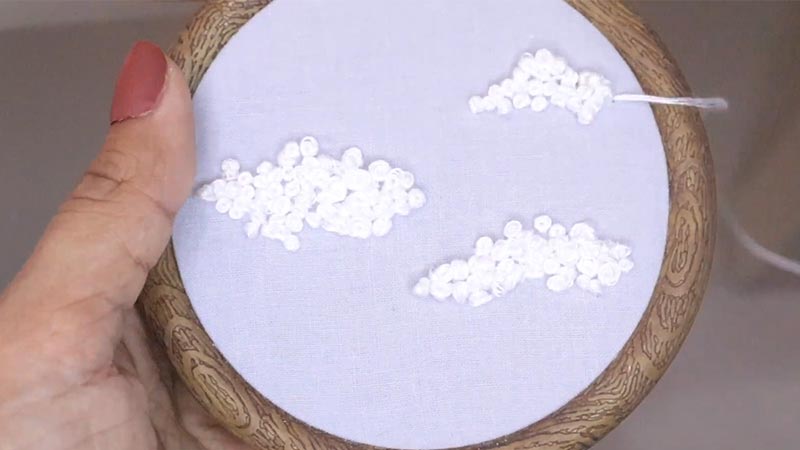
To give the clouds their fluffy appearance, you’ll use knots or other textured stitches. French knots are often used for small, scattered clouds, while larger knots or turkey work stitches can be employed for more substantial cloud formations.
These knots or stitches are added on top of the satin-stitched base, with variations in size and spacing to create a natural look.
Shading and Highlights
To add depth and dimension to the clouds, you can use different shades of thread or additional stitches to create shadows and highlights. These subtle variations help make the clouds look more realistic.
Experimentation
Cloud cover embroidery allows for creativity and experimentation. You can play with different stitch lengths, thread types, and colors to achieve the desired cloud-like effect.
The technique is not limited to white clouds; you can embroider stormy gray clouds, golden sunset clouds, or any other type you envision.
Finishing
Once your cloud cover embroidery is complete, you can frame it, incorporate it into a larger design, or use it in various textile projects such as clothing, quilts, or wall hangings.
Uses of Cloud Cover in Embroidery

Cloud cover in embroidery is a technique with a wide range of applications that can enhance various textile projects.
Here are some of the common uses of cloud cover in embroidery:
Scenic Landscapes
Cloud cover embroidery is often employed to create stunning scenic landscapes. It can add a realistic and picturesque touch to scenes that feature skies, such as sunsets, sunrises, countryside vistas, and seascapes.
Nature-Themed Artwork
Embroiderers use cloud cover techniques to depict elements of nature in their artwork, including mountains, forests, and bodies of water. Cloudy skies can lend depth and mood to these designs.
Home Decor
Cloud cover embroidery can be used to embellish home decor items such as throw pillows, wall hangings, and curtains. It can give these items a whimsical and tranquil aesthetic.
Apparel
Clothing items can be customized with cloud cover embroidery, providing a unique and artistic touch to garments. It’s particularly popular on denim jackets, sweaters, and t-shirts.
Children’s Clothing
Cloud cover embroidery is commonly used in children’s clothing, especially on items like baby blankets, onesies, and children’s accessories. The soft and fluffy appearance of cloud cover stitches appeals to younger audiences.
Quilts
Quilters often incorporate cloud cover embroidery into their designs to create realistic outdoor scenes, like starry night skies or sun-drenched landscapes. This technique adds an extra layer of artistry to quilting projects.
Accessories
Accessories such as tote bags, scarves, and hats can be adorned with cloud cover embroidery to make them unique and eye-catching.
Seasonal Decorations
Cloud cover embroidery is used in seasonal decorations. For instance, it can add a wintery, snow-covered look to holiday decorations or create the feeling of a bright, sunny day in spring or summer-themed designs.
Custom Art Pieces
Many artists and crafters use cloud cover embroidery to create custom art pieces. Whether as standalone artworks or as elements within larger compositions, it brings depth and texture to their creations.
Textile Art and Exhibits
Textile artists and embroidery enthusiasts often use cloud cover techniques in their work for exhibitions and galleries. It’s a way to showcase their skills and creativity on a larger platform.
Storytelling
Cloud cover embroidery can be used to narrate stories and convey emotions within an artwork. It can capture the changing moods of the sky and help convey a sense of time and place in storytelling embroidery projects.
Personal Expression
Individuals use cloud cover embroidery as a means of personal expression and creative outlet. It allows them to infuse their unique perspectives and emotions into their textile projects.
Cover a Stitch Embroidery Backing

Cover-a-stitch embroidery backing, also known as stitch cover backing, is a specialized type of material used in machine embroidery to provide a clean and finished look to the backside of the embroidered design.
It serves several important purposes in machine embroidery, helping to maintain the integrity of the design and protect the wearer from discomfort due to exposed stitches on the fabric’s reverse side.
Here’s an overview of cover-a-stitch embroidery backing:
Purpose
- Clean Finish: The primary purpose of cover-a-stitch backing is to give the back of the embroidered design a neat and polished appearance. Without it, the back of the embroidery might have exposed thread ends, jump stitches, and a messy appearance, which can be undesirable, especially when the embroidery is visible on both sides of the fabric.
- Comfort: Exposed embroidery stitches on the reverse side can sometimes cause discomfort, itching, or irritation when they come into contact with the skin. Cover-a-stitch backing prevents this by providing a barrier between the stitches and the wearer.
Material
- Fusible Material: Cover-a-stitch backing is typically made of fusible material. This means that it has an adhesive side that can be activated by heat, allowing it to bond securely with the fabric.
- Thin and Lightweight: The backing is designed to be thin and lightweight, so it does not add significant bulk to the fabric.
Application
- Backing Placement: Cover-a-stitch backing is placed on the reverse side of the fabric, directly under the embroidered design.
- Fusing Process: To apply the backing, it is first cut to the appropriate size and shape and then positioned on the back of the fabric. It is then heated using an iron or heat press, which activates the adhesive, causing it to bond with the fabric.
- Coverage: The backing is typically cut slightly larger than the embroidered area to ensure complete coverage and a secure bond.
Benefits
- Stitch Reinforcement: Cover-a-stitch backing provides extra support to the stitches, reducing the risk of them becoming loose or damaged over time.
- Prevents Show-Through: It prevents the stitches on the back from showing through to the front of the fabric, which can be a concern when using thin or delicate fabrics.
- Enhances Durability: By securing the stitches and reducing friction on the reverse side, the backing helps the embroidery withstand wear and washing.
Variations
- Tear-Away and Cut-Away: While fusible cover-a-stitch backing is the most common type, there are also tear-away and cut-away variations available, depending on the desired level of stability and ease of removal.
- Different Weights: Cover-a-stitch backings come in various weights, allowing you to choose the right one for your specific embroidery project.
Tips for Achieving Realistic Sky Background Using Cloud Cover Embroidery

Achieving a realistic sky background using cloud cover embroidery can be a creative and rewarding endeavor.
Here are some tips to help you create a lifelike sky in your embroidery:
Choose the Right Colors
When selecting your thread colors for the sky, consider the time of day and weather conditions you want to depict.
A bright, clear blue works well for a sunny day, while deeper blues can convey a more dramatic or overcast sky.
Vary Stitch Density
Think about the depth and thickness of the clouds in your scene. For cumulus clouds, use dense, puffy stitches.
For cirrus clouds, use more delicate, scattered stitches. The variation in stitch density is key to creating a convincing sky.
Pay Attention to Perspective
Imagine where the viewer is positioned in relation to the sky. If you’re embroidering a scene with a low horizon, the clouds at the top of the design should be smaller and less detailed, creating a sense of distance and depth.
Incorporate Textured Stitches
Textured stitches, such as French knots for small, fluffy clouds or turkey work for larger, billowy clouds, add depth and realism.
Experiment with different stitches to see which ones best capture the appearance of clouds in your design.
Layer Your Stitches
Start by creating a smooth satin stitch base for the sky background. Then, add the textured cloud cover stitches on top.
The combination of a smooth base and fluffy clouds on the surface creates a dynamic and natural look.
Observe Real Clouds
To create authentic cloud patterns, study photographs of actual clouds. Pay attention to the various shapes, sizes, and patterns clouds can take. This observation will help you replicate natural cloud formations more accurately.
Use Translucent Threads
Translucent or opalescent embroidery threads can add a beautiful, ethereal quality to your clouds. They catch and reflect light in a way that mirrors the soft, radiant appearance of real clouds.
Blend and Gradient Techniques
Blending colors and stitches together creates a seamless transition between the sky and the clouds. Gradually change the colors you’re using and the density of your stitches to achieve a realistic gradient effect.
Practice and Experiment
Cloud cover embroidery is an art that benefits from practice and creative experimentation. Try different combinations of stitches, thread colors, and densities to see what works best for the specific sky and cloud effects you want to achieve.
Step Back and Assess
Regularly step away from your embroidery work to gain a fresh perspective. Assess how the clouds and sky are coming together.
This critical evaluation helps you make adjustments and refinements to create the desired realistic appearance in your embroidery project.
FAQS
Can cloud cover embroidery be used to create other natural textures, like water ripples or grassy fields?
Yes, cloud cover embroidery techniques can be adapted to create a variety of natural textures, making it a versatile choice for adding depth and realism to landscape and nature-themed embroidery.
What type of fabric works best for cloud cover embroidery?
For cloud cover embroidery, it’s ideal to use a sturdy, tightly woven fabric like cotton or linen.
These fabrics provide a solid foundation for the stitches and maintain the desired three-dimensional effect.
Are there any specific needle or thread requirements for cloud cover embroidery?
While there are no strict rules, using an embroidery needle with a sharp point for precision and quality embroidery thread that complements your design’s color scheme is often recommended.
Can cloud cover embroidery be combined with other embroidery techniques, such as cross-stitch or appliqué?
Yes, cloud cover embroidery can be integrated with other techniques to create intricate and detailed designs, adding depth and dimension to various elements of your project.
Wrap Up
Cloud cover embroidery is a captivating and versatile technique that allows artists to infuse their textile creations with the soft, billowy essence of natural clouds.
By skillfully layering stitches, varying stitch densities, and paying attention to color gradations, embroiderers can bring realistic and three-dimensional skies to life on fabric.
Cloud cover embroidery offers a unique opportunity for creative expression, enabling the depiction of different weather conditions, times of day, and moods in embroidery projects.
Whether portraying a sunny, clear sky or a stormy overcast atmosphere, this art form brings a touch of the natural world into the realm of textiles, turning everyday fabric into a canvas for the imagination.
Leave a Reply