Embarking on a hand embroidery project often involves meticulous decisions, especially when replicating the lushness of grass.
Choosing stitching techniques is pivotal in bringing your embroidered grass to life. So, what stitch do you use for hand embroidery grass?
In this guide, we delve into the world of hand embroidery, focusing specifically on the art of crafting vibrant and realistic grass.
Whether you’re a novice or an experienced embroiderer, understanding the nuances of stitches can elevate your project to new heights.
Each technique contributes to your embroidered grass’s texture and visual appeal, from the classic satin stitch to the intricate seed stitch.
Join us on a journey through the stitches that breathe life into your needlework, ensuring that every strand of grass is a testament to your skill and creativity.
Mastering the right stitch is the key to achieving the verdant beauty of nature in your hand embroidery creations.
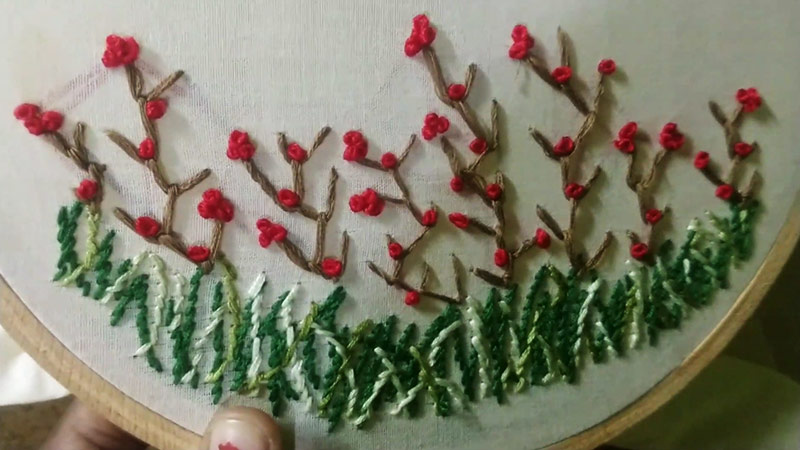
What Stitch Do You Use for Hand Embroidery Grass?
The choice of stitches significantly influences your grassy landscapes’ texture, appearance, and overall realism. Let’s explore various stitches suitable for hand embroidery grass, providing insights into their techniques and applications.
Satin Stitch
Execute this stitch by making long, parallel stitches placed closely together. Keep the tension even for a smooth surface. Satin stitch is your go-to for achieving a lush, dense, grassy texture.
Vary the stitch length to capture the natural variations in height, bringing your embroidered meadow to life with a velvety finish. Experiment with different shades of green to enhance the vibrancy and realism of your grass.
Seed Stitch
Create small, scattered stitches randomly across the fabric. Keep the stitches irregular for a natural appearance. The charm of seed stitch lies in its ability to emulate the organic chaos of grass blades.
Perfect for adding an uneven and textured look to your embroidered landscape, this stitch is excellent for capturing the intricate details of a meadow floor. Consider blending various greens to mimic the nuanced shades found in nature.
Back Stitch
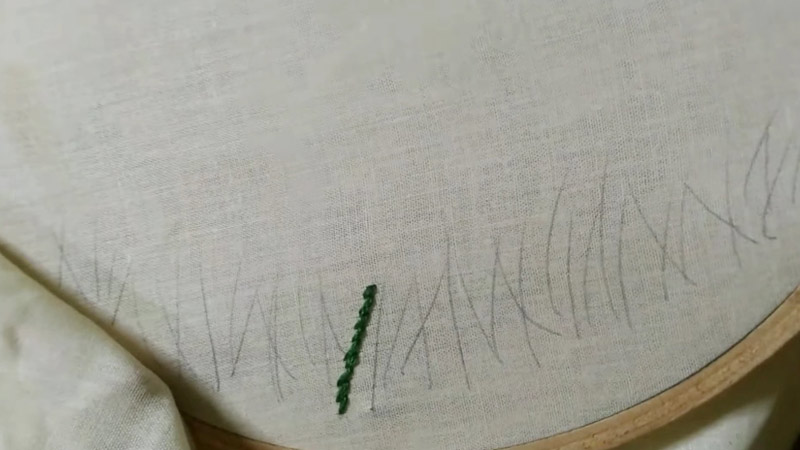
Work individual stitches consecutively to form a continuous line. Keep the stitches close together for a solid outline. It is ideal for outlining individual grass blades or defining the contours of a grassy area.
The precision of the back stitch brings clarity to your design, allowing you to emphasize specific features within your embroidered scene. Experiment with darker thread for defining shadows and lighter thread for highlights.
French Knots
Wrap the thread around the needle to create a textured knot. Adjust the number of wraps for varying knot sizes. French knots add a delightful three-dimensional touch, resembling individual grass tufts.
Perfect for accentuating finer details in your grass embroidery designs, such as tufts of wild grass or small flowers. Experiment with different densities and sizes of French knots to achieve a realistic and dynamic effect.
Long and Short Stitch (Thread Painting)
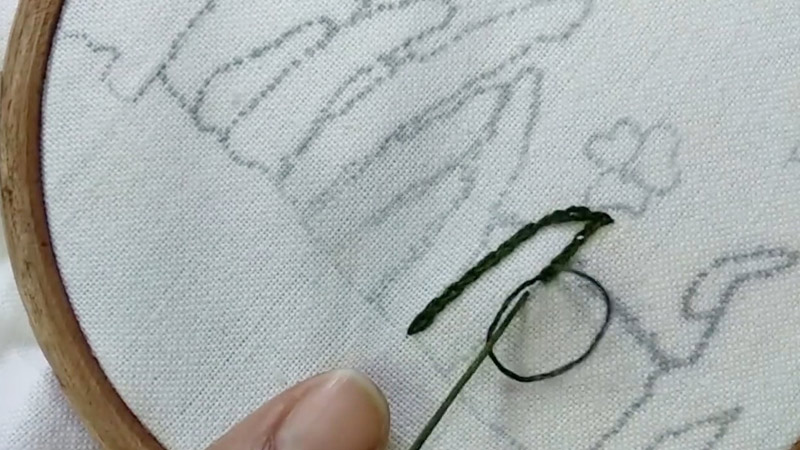
Gradate stitch lengths to create a painterly effect. Blend colors seamlessly for a natural transition. Thread painting with long and short stitches allows you to replicate the intricate variations in grass height and color.
This technique lends a painterly quality to your embroidery, making it an ideal choice for realistic landscapes. Experiment with different color combinations to capture the ever-changing hues of grass under sunlight.
Fly Stitch
Create V-shaped stitches with a central point. Experiment with spacing for different effects. Fly stitch brings a jagged and natural look to your grass blades. Use it individually for sporadic blades or in rows for a textured effect.
This versatile stitch allows you to convey wild and manicured grass in your embroidered scenes. Adjust the angle and density for varied results.
Couching
Attach one thread (the laid thread) onto the fabric with small securing stitches. Couching creates the illusion of longer grass by laying down a contrasting thread and securing it with small stitches.
This technique provides a subtle yet effective way to add depth and dimension to your embroidered grassy areas. Experiment with different thread combinations for unique visual effects.
Chain Stitch
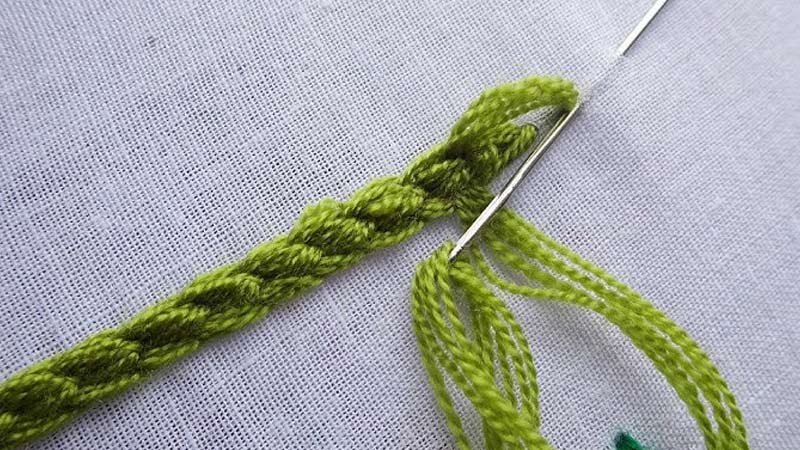
Form a series of looped stitches, creating a chain-like pattern. Experiment with loop size and spacing. Chain stitch introduces a whimsical and textured grassy effect. Varying the thickness of the thread adds an extra layer of dimension to your embroidered landscape.
Play with the density of the loops to achieve different levels of texture, making this stitch suitable for conveying both playful and realistic grassy scenes.
Bullion Knots
Craft long and twisted stitches to form a coiled knot. Adjust the length and tightness for varying effects. Bullion knots are perfect for mimicking tall, wispy grass.
Adding height and movement to your embroidered landscape, these knots contribute a dynamic and natural element. Experiment with different lengths and spacings to create a varied and realistic grassy texture.
Feather Stitch
Form open, feather-like stitches along a central line. Experiment with spacing for a more open or dense appearance. Feather stitch is ideal for creating the illusion of wind-swept grass.
The open and flowing stitches bring a dynamic quality to your embroidery, making it perfect for capturing the movement of grass in the breeze. Adjust the length and angle of the stitches to convey the intensity of the wind.
Tips for Hand Embroidery Grass
Embarking on a hand embroidery project featuring grass opens a world of creative expression. The choice of stitches can transform a simple fabric into a vibrant landscape. Here are some essential tips to elevate your hand embroidery grass and infuse it with depth and realism.
Color Variation
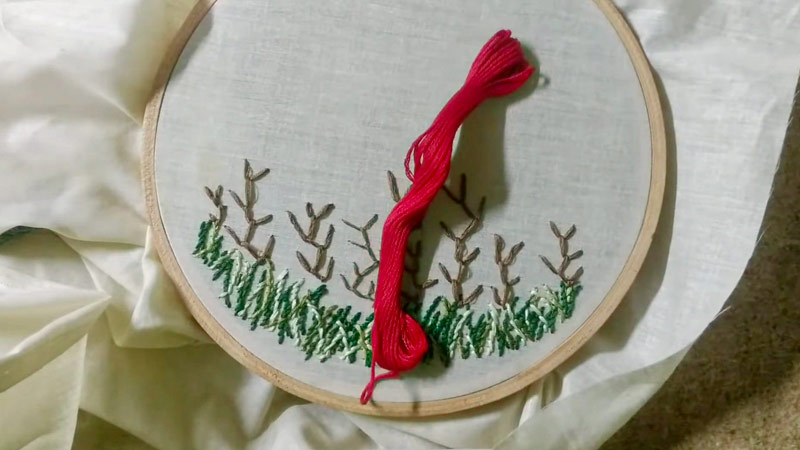
Experimentation with various shades of green is key to capturing the dynamic hues of grass. Introduce subtle browns or yellows to create highlights and shadows, enhancing the overall authenticity of your embroidered meadow.
Consider blending different green tones within individual stitches. This nuanced approach mimics the natural color variations found in real grass.
Texture
Achieving a natural grass texture involves more than just selecting the right shades. Combine multiple stitches to add depth and visual interest to your grassy landscape.
A combination of satin stitch, fly stitch, and French knots, strategically placed, can simulate the intricate texture of grass blades.
For a more detailed approach, experiment with thread thickness.
Directionality
The direction in which your stitches are placed plays a crucial role in stimulating the natural growth pattern of grass. Pay attention to the angle and length of your stitches while embroidering grass, ensuring they follow the organic flow of grass blades.
Consider creating patches of grass with varying directions to emulate the diverse growth patterns found in nature.
Layering
Adding depth to your hand embroidery grass involves a thoughtful approach to layering stitches. Strategically place shorter stitches in the foreground, representing closer grass, and use longer stitches in the background for a sense of perspective and distance.
How to Embroider Grass Stitch? 13 Steps
Hand embroidery grass brings a touch of nature to your needlework, creating vibrant and textured landscapes.
One of the fundamental aspects of embroidering grass is selecting the right stitch. In this guide, we’ll delve into the step-by-step process of embroidering grass using a basic and versatile stitch – the Back Stitch. This stitch is excellent for outlining individual grass blades or defining the contours of a grassy area.
Step 1: Prepare Your Fabric and Hoop
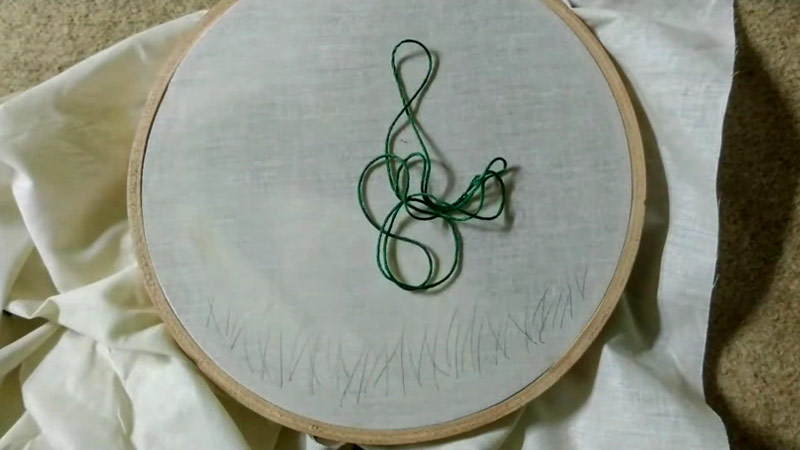
Begin by selecting your fabric. A tightly woven fabric like cotton or linen works well for embroidery. Secure the fabric in the embroidery hoop, ensuring it is taut but not overly stretched. This provides a stable surface for your stitches.
Step 2: Choose Your Colors
Select shades of green embroidery floss for your grass. Consider using a variety of greens to add depth and realism to your design. You might choose a darker shade for shadows and a lighter one for highlights.
Step 3: Thread Your Needle
Separate a strand of embroidery floss (typically, embroidery floss comes with six strands). Thread your needle with a single strand and tie a small knot at the end.
Step 4: Start with a Back Stitch
Begin by bringing the needle up through the back of the fabric, starting at the base of where you want your grass to be. Pull the needle through, leaving the knot at the back.
Step 5: First Stitch
Now, take your needle back down into the fabric a short distance away from the starting point. Pull the needle through until the floss is taut but not too tight. This is how you make the first embroidery grass stitch.
Step 6: Second Stitch
Bring the needle up again, this time a short distance ahead, forming the desired length of your grass blade. Ensure that the needle emerges slightly behind the ending point of the previous grass embroidery stitch.
Step 7: Repeat the Back Stitch
Continue this process, creating a series of back stitches to form the outline of your grass. Experiment with the spacing between stitches to achieve a natural and varied look.
Step 8: Vary the Stitch Length
Adjust the length of your stitches to add realism and variation to your embroidered grass. Some blades of grass can be shorter, while others can be longer. This variability creates a dynamic and natural appearance.
Step 9: Experiment with Angles
Grass doesn’t grow uniformly, so feel free to change the angles of your stitches. Some grass blades can slant to the left, while others may slant to the right. This variation contributes to the organic and lifelike quality of your embroidered grass.
Step 10: Incorporate Texture
To enhance your grass’s texture, consider mixing shades of green within individual stitches. This creates a nuanced and realistic effect, mimicking the natural color variations found in grass.
Step 11: Add Depth with Layers
To create depth in your grassy landscape, layer your back stitches. Place shorter stitches in the foreground and longer ones in the background. This simple technique adds a sense of perspective to your embroidered scene.
Step 12: Fill in the Grassy Area
Continue the back stitch to fill in the entire grassy area, adjusting the length and direction of your stitches as needed. This method provides a solid foundation for your grass, creating a well-defined and textured surface.
Step 13: Experiment with Shadows and Highlights
To add dimension to your embroidery grass, experiment with shades of green. Use a slightly darker shade for shadows and a lighter one for highlights. Integrate these variations strategically within your back stitches to evoke the play of light on the grass.
Once your grassy area is complete, secure the end of the embroidery floss at the back of the fabric with a small knot. Trim any excess floss.
FAQs
What is the best stitch for embroidering grass?
The choice of the best stitch depends on the desired effect. For a versatile and commonly used stitch, consider the Back Stitch. It is excellent for outlining individual grass blades and defining the contours of a grassy area.
How do I achieve a natural look when embroidering grass?
To achieve a natural look, vary the length and direction of your stitches. Experiment with angles, adjust the spacing between stitches and use shades of green. Layering shorter stitches in the foreground and longer ones in the background adds depth and realism.
Can I use multiple shades of green for embroidering grass?
Yes, using multiple shades of green enhances the realism of your embroidered grass. Experiment with darker shades for shadows and lighter ones for highlights. Mixing different greens within individual stitches adds texture and mimics the natural color variations found in grass.
Are there other stitches besides the Back Stitch for embroidering grass?
Absolutely. Various stitches can be used for embroidering grass, each with its unique effect. Consider exploring the Satin Stitch for a dense and smooth surface, the Seed Stitch for a scattered and uneven texture, or the Fly Stitch for a jagged, natural look.
How can I add dimension to my embroidered grass?
To add dimension, experiment with layering. Place shorter stitches in the foreground and longer ones in the background to create perspective.
Additionally, varying stitch lengths, incorporating shadows and highlights, and using contrasting thread colors contribute to a more dynamic and three-dimensional appearance in your embroidered grass.
Conclusion
The world of hand embroidery grass is rich with possibilities, and the choice of stitching techniques adds a layer of artistry to your creations.
You can infuse your embroidered grass with character and depth by exploring various stitches, such as the long and short stitch for realistic texture or the chain stitch for a whimsical effect.
Remember, the key lies in experimentation and finding the stitch that resonates with your artistic vision. Whether you’re creating a serene landscape or a vibrant garden scene, each stitch contributes to the narrative of your embroidery.
So, let your needle dance across the fabric and bring the beauty of nature to life through the carefully chosen stitches in your hand embroidery grass.
With this guide as your companion, may your future projects bloom with creativity and showcase the incredible versatility of hand embroidery.
Leave a Reply