Crafts made with wooden rolling pins are a delightful blend of functionality and artistic expression.
These versatile kitchen tools, traditionally used for flattening dough, have evolved into creative pieces of craftsmanship that enhance both culinary experiences and aesthetic appeal.
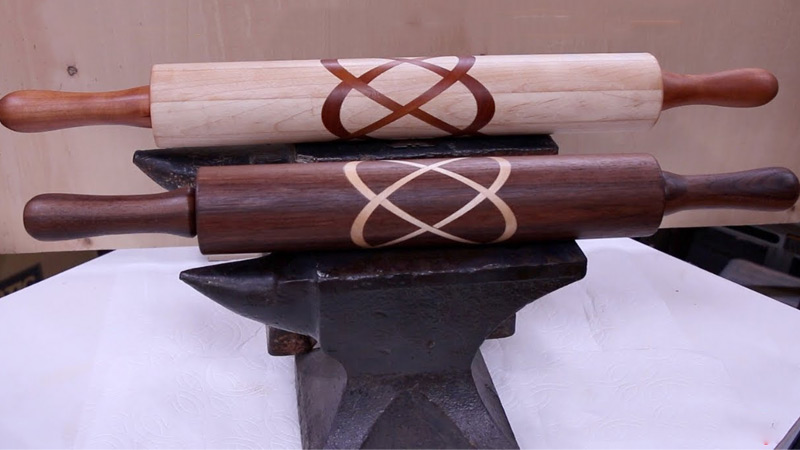
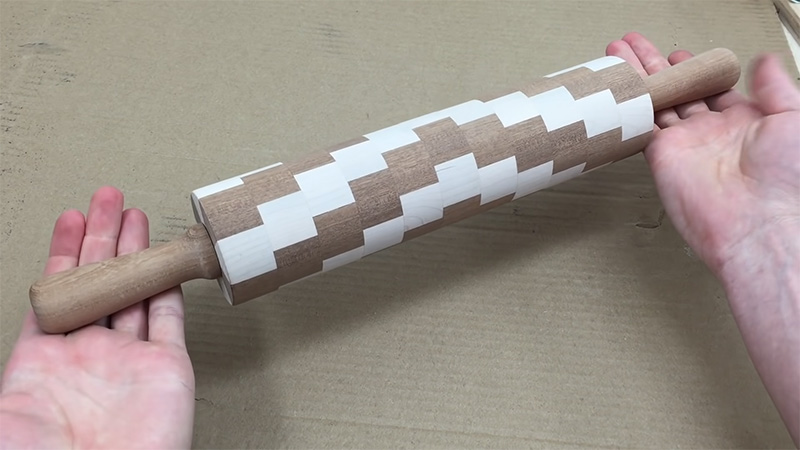
Woodworkers and artisans transform humble rolling pins into unique works of art, showcasing intricate carvings, intricate inlays, and exquisite finishes.
From elegantly engraved patterns that imprint cookies with delicate designs to hand-painted rolling pins that infuse character into pasta and pastry making, these wooden creations elevate kitchen rituals into artisanal experiences.
In this exploration, we delve into the world of crafts made with wooden rolling pins, celebrating their timeless beauty and practical charm.

Rolling Pin Crafts
Rolling pin crafts refer to the creative and artistic use of rolling pins as a medium for crafting various decorative items and designs.
While rolling pins are primarily known for their culinary purpose in flattening dough, many artisans and craft enthusiasts have discovered their potential as tools for creating unique and intricate patterns on various materials.
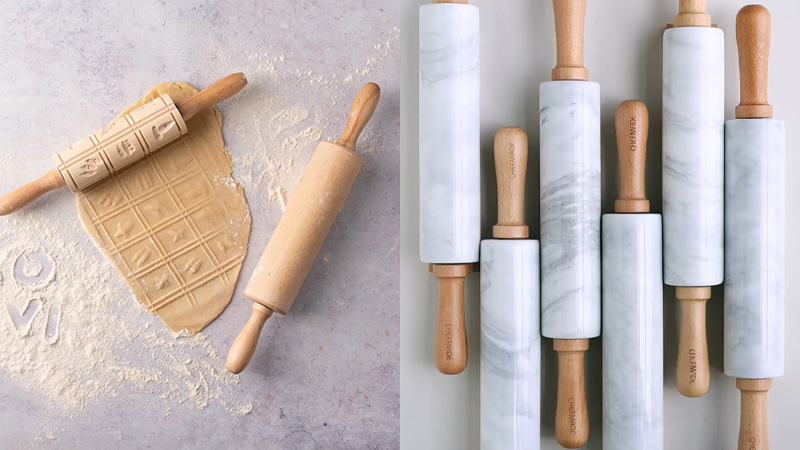
In rolling pin crafts, individuals often use specially designed rolling pins that feature patterns, textures, or designs engraved or embossed onto the rolling surface.
These patterns can be used to imprint designs onto clay, fabric, paper, or other materials. Common rolling pin craft projects include making patterned textiles, pottery, decorative paper, and even custom-designed wrapping paper or wall art.
Rolling pin crafts allow for a blend of functionality and artistic expression, making it a versatile and enjoyable form of creative expression.
What Crafts Made With Wood Rolling Pin for Adults?

Crafts made with wooden rolling pins for adults encompass a wide range of creative projects that harness the versatility and aesthetic appeal of these traditional kitchen tools.
Here are some exciting ideas for adults looking to explore rolling pin crafts:
Patterned Textiles
Wooden rolling pins with intricate designs can be used to imprint patterns on fabric. This technique is excellent for making custom tablecloths, napkins, or even decorative throw pillows.
Consider experimenting with different fabrics and color combinations to create unique home textiles that reflect your personal style.
Pottery and Ceramics
Roll out clay or pottery with a patterned rolling pin to create beautifully textured surfaces on vases, bowls, or other ceramic pieces.
These unique textures can add depth and visual interest to your pottery projects, making each piece a work of art. You can then glaze and fire your creations for a stunning finish.
Decorative Paper
Customize your own decorative paper for scrapbooking, card-making, or gift wrapping by rolling the rolling pin over sheets of plain paper with ink or paint.
This can result in stunning, one-of-a-kind designs that add a personal touch to your paper crafts. Consider combining different patterns and colors for a layered effect.
Embossed Leather
Craft leather items like belts, wallets, or journal covers by using rolling pins with deep patterns to emboss intricate designs onto the leather’s surface.
This technique can give your leather creations a luxurious and unique appearance. Be sure to use high-quality leather for the best results.
Woodblock Printing
Wooden rolling pins can be carved with designs to create custom woodblock stamps. These can be used for printing on paper, fabric, or other surfaces, allowing for personalized arts and crafts projects.
Experiment with various carving techniques and ink colors to achieve the desired effect.
Home Decor
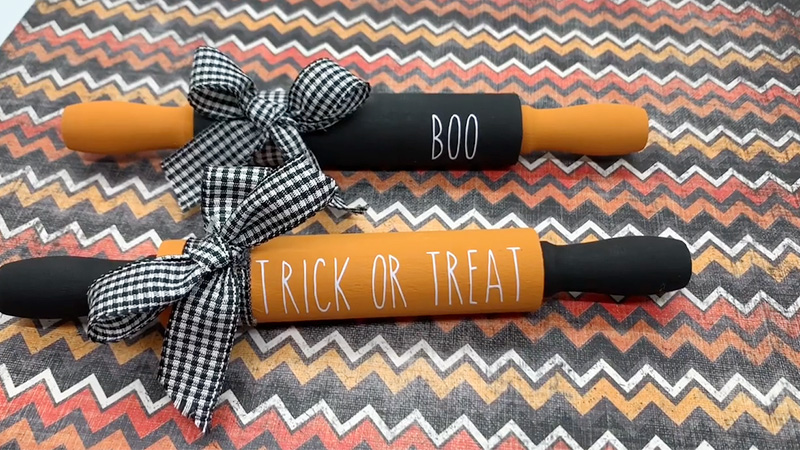
Transform wooden rolling pins into decorative pieces for your home. Paint or carve them to match your home’s aesthetic and hang them on the wall, or use them as curtain rods for a rustic touch.
You can also repurpose old rolling pins by giving them a fresh coat of paint and incorporating them into your interior design.
Custom Kitchenware
Personalize wooden kitchenware items like cutting boards, serving trays, or utensils by using a rolling pin to add unique patterns or designs.
These customized pieces not only enhance your kitchen’s functionality but also make for thoughtful and artistic gifts for friends and family.
DIY Artwork
Roll out polymer clay and use it as a canvas for your artistic creations. The rolling pin can create textured backgrounds for your sculptures or jewelry.
This technique allows you to experiment with different shapes and forms, turning clay into miniature works of art.
Customized Furniture
Give furniture pieces a makeover by rolling patterns onto tabletops, cabinet doors, or chair backs. This can add a touch of elegance or whimsy to your home decor.
Consider using stencils or freehand designs to achieve the desired look, and finish with appropriate sealants to protect your creations.
Gardening Projects
Use rolling pins to imprint decorative patterns on garden stepping stones or clay plant pots, adding an artistic flair to your outdoor space.
These personalized garden accents can make your garden stand out and reflect your creative style.
What Can I Use Instead of a Rolling Pin?

If you don’t have a rolling pin on hand, there are several creative alternatives you can use to flatten dough or roll out various materials.
Here are some common household items you can use instead of a rolling pin:
Wine Bottle
A wine bottle is an excellent makeshift rolling pin. Choose one with a smooth glass surface, free from any labels or residue.
To use it, thoroughly clean and dry the bottle, then flour it lightly to prevent sticking. It’s particularly useful for rolling out larger quantities of dough for items like pizza crusts or pie dough.
Glass Jar
Like a wine bottle, a glass jar with a smooth surface can work as a rolling pin substitute. Make sure the jar is clean and doesn’t have any rough edges.
Depending on the size of the jar, it can be useful for rolling out both large and small portions of dough.
Tall Drinking Glass
A tall drinking glass is handy for rolling out smaller portions of dough or pastry. It’s especially suitable for tasks like flattening individual pie crusts or pastry rounds for turnovers. Make sure the glass is clean and dry.
Heavy Frying Pan
A heavy-bottomed frying pan or skillet can be used for pressing down and flattening dough or pastry.
Place the dough between sheets of parchment paper or plastic wrap to prevent sticking, and then use the weight of the pan to achieve the desired thickness. This method works well for flatbreads and pizza crusts.
Dowel Rod
A wooden dowel rod or a clean broomstick handle can be an excellent rolling pin alternative. Ensure that it’s clean and sanitized, and lightly flour the surface to prevent sticking. It’s versatile and can handle a wide range of rolling tasks.
Silicone Baking Mat
Silicone baking mats are non-stick and can be used to roll out dough effectively. Place the dough between two silicone mats and use your hands to press and flatten it. This method is ideal for tasks like rolling out pie crusts or cookie dough.
Plastic Wrap and Hands
For smaller tasks, such as flattening cookie dough or working with fondant, place the dough between two sheets of plastic wrap and use your hands to gently press it to the desired thickness. The plastic wrap prevents sticking and allows for easy cleanup.
Pizza Cutter
A pizza cutter can be handy for shaping and flattening dough, especially when working with pizza dough or pasta.
Use it to roll and shape the dough as needed, adjusting the thickness as required for your recipe.
Pasta Machine
If you have a pasta machine, it can be a valuable tool for rolling out dough for pasta, noodles, or flatbreads. Simply adjust the thickness setting on the machine to achieve the desired thickness for your specific recipe.
Offset Spatula
An offset spatula is an excellent choice for tasks that require precision, such as making tart crusts or spreading icing.
Use it to gently press and shape small amounts of dough or frosting, providing fine control over your work.
How to Clean Wooden Rolling Pin

Cleaning a wooden rolling pin is a simple process, but it’s important to do it correctly to ensure that it remains in good condition and safe for use.
Here are step-by-step instructions on how to clean a wooden rolling pin:
Materials You’ll Need:
- Mild dish soap
- Warm water
- Soft sponge or cloth
- Toothbrush (optional)
- Towel or dishcloth
- Food-safe mineral oil or beeswax (for maintenance, if needed)
Steps:
Gather Materials
To clean your wooden rolling pin, you’ll need mild dish soap, warm water, a soft sponge or cloth, and a towel or dishcloth. For optional maintenance, you may also need food-safe mineral oil or beeswax.
Remove Residue
Start by gently removing any excess dough or residue from the rolling pin. You can use a spatula or your hands for this task. Be careful not to scratch the wood.
Prepare a Soapy Solution
Fill a basin or sink with warm water and add a small amount of mild dish soap. Avoid harsh or abrasive cleaners that can damage the wood.
Soak the Rolling Pin
Submerge the wooden rolling pin in the soapy water and let it soak for a few minutes. This helps to loosen any stuck-on particles.
Clean the Surface
Using a soft sponge or cloth, gently scrub the entire surface of the rolling pin. Pay special attention to areas with stubborn residue. For intricate patterns or hard-to-reach crevices, you can use a soft toothbrush.
Rinse Thoroughly
After cleaning, rinse the rolling pin thoroughly under warm, running water to remove any soap residue. Ensure that it’s completely clean.
Dry Completely
Pat the rolling pin dry with a clean towel or dishcloth. You can also leave it out on a countertop to air dry for a few hours to ensure it’s completely dry.
Optional Maintenance
If desired, you can apply a small amount of food-safe mineral oil or beeswax to the rolling pin’s surface.
Use a soft cloth to rub it in, which helps maintain the wood’s moisture and prevents it from drying out or cracking. Wipe off any excess oil or wax.
Storage
Store your clean and dry wooden rolling pin in a cool, dry place. Avoid exposing it to extreme temperatures or moisture, as these conditions can cause the wood to warp or crack.
Wood vs Marble Rolling Pin

When it comes to rolling pins, choosing the right one can significantly impact your baking and culinary experience.
Two popular options are wood and marble rolling pins, each with its own set of advantages and considerations.
Let’s explore the key differences between these two types of rolling pins, helping you make an informed choice for your kitchen needs.
Here’s a table summarizing the main differences between wood and marble rolling pins:
| Aspect | Wood Rolling Pin | Marble Rolling Pin |
| Material | Typically made from hardwoods like maple, cherry, or beech. | Crafted from heavy, cool-to-the-touch marble. |
| Weight | Lighter in weight, making them easier to maneuver. | Heavier due to the density of marble, which can aid in flattening dough. |
| Heat Conductivity | Poor heat conductivity, making them suitable for pastry and cookie dough. | Excellent heat conductivity, which can slightly cool or chill dough. |
| Maintenance | Require regular oiling to prevent drying and cracking. | Low maintenance; needs periodic cleaning and may require resealing. |
| Surface Texture | Smooth surface; may have patterns or carvings for decorative purposes. | Naturally smooth, with minimal surface texture. |
| Versatility | Versatile for general baking tasks and crafting due to custom designs. | Primarily used for rolling out pastry and dough. |
| Aesthetic Appeal | Offers a rustic and warm appearance that adds character to the kitchen. | Provides a sleek and elegant look with a touch of sophistication. |
| Price Range | Generally more affordable. | Tends to be more expensive due to the cost of marble. |
How to Flatten Dough Without a Rolling Pin
If you don’t have a rolling pin, there are still several effective ways to flatten dough for various recipes.
Here are some alternative methods:
Use a Wine Bottle
A clean and dry wine bottle can serve as a makeshift rolling pin. Make sure it’s smooth and free from any residue. Flour the bottle lightly to prevent sticking, and then use it to roll out the dough.
Glass Jar
A glass jar with a smooth surface can also work well for rolling out dough. Ensure the jar is clean and free of rough edges. Flour it lightly and use it just like you would a rolling pin.
Tall Drinking Glass
A tall drinking glass can be used for rolling out smaller portions of dough. It’s ideal for tasks like flattening individual pie crusts or pastry rounds for turnovers. Ensure the glass is clean and dry before using it.
Heavy Frying Pan
A heavy-bottomed frying pan or skillet can be used to press down and flatten dough. Place the dough between sheets of parchment paper or plastic wrap to prevent sticking.
Then, use the weight of the pan to achieve the desired thickness. This method is suitable for flatbreads and pizza crusts.
Dowel Rod or Broomstick Handle
If you have a wooden dowel rod or a clean broomstick handle, these can be excellent rolling pin alternatives.
Make sure they’re clean and sanitized, then lightly flour the surface to prevent sticking. Roll out the dough using the dowel rod or handle.
Silicone Baking Mat
Place your dough between two silicone baking mats and use your hands to press and flatten it evenly. This method works well for pie crusts and cookies. Silicone mats are non-stick, which makes them a convenient option.
Plastic Wrap and Hands
For smaller tasks like flattening cookie dough or working with fondant, place the dough between two sheets of plastic wrap.
Use your hands to gently press the dough into the desired thickness. The plastic wrap prevents sticking and allows for easy cleanup.
Pasta Machine
If you have a pasta machine, it can be used to roll out dough for pasta, noodles, or flatbreads. Adjust the thickness setting on the machine to achieve the desired thickness for your recipe.
Use Your Hands
For certain doughs, such as pizza dough or rustic bread, you can simply use your hands to press and shape the dough. Start by gently stretching and pressing it into the desired shape and thickness.
FAQS
Can I make custom designs on a wooden rolling pin myself?
Yes, if you’re skilled in woodworking, you can create custom designs on a wooden rolling pin.
Are there any safety considerations when using a carved wooden rolling pin for crafts?
When working with a carved wooden rolling pin, be cautious of sharp edges or deep patterns that could potentially injure your hands. It’s advisable to wear protective gloves and handle the rolling pin with care.
Can I use a wooden rolling pin for crafts with children?
While wooden rolling pins can be used for crafts with children, adult supervision is recommended, especially when carving, painting, or using tools.
What types of wood are commonly used for crafting rolling pins?
Hardwoods like maple, cherry, and beech are popular choices for crafting rolling pins due to their durability and smooth grain.
How do I maintain the wooden rolling pin’s finish in craft projects?
To maintain the finish on a wooden rolling pin used for crafts, you can apply food-safe mineral oil or beeswax periodically.
This helps preserve the wood, prevent drying, and maintain the appearance of the rolling pin.
Wrap Up
Crafts made with wooden rolling pins are a captivating fusion of artistry and practicality. These versatile kitchen tools, once relegated to dough-flattening duties, have evolved into canvases for creative expression.
Artisans and craft enthusiasts craft rolling pins into unique works of art, each bearing intricate carvings, patterns, and finishes.
From embossed textiles to clay imprints, these wooden creations elevate everyday activities into artistic endeavors.
They breathe life into kitchen rituals, imprinting memories onto cookies, pastries, and textiles.
These crafts demonstrate that even the most humble of tools can transcend their utilitarian origins, becoming sources of inspiration and beauty that enhance our daily lives.
Leave a Reply