In the realm of sewing, the term “RST” holds a pivotal role, representing a fundamental concept that can make or break the quality of your creations.
Standing for “Right Sides Together,” RST guides the meticulous alignment of fabric pieces, ensuring that the finished seams remain concealed within the project’s interior while presenting the aesthetically pleasing right side on the exterior.
This seemingly simple principle is a cornerstone of sewing expertise, regardless of whether you’re crafting garments, quilts, or home decor items.
In this concise guide, we delve into the significance of RST, elucidating its essential role in achieving clean, polished, and professional results in your sewing endeavors.

What Is RST in Sewing?
RST, or “Right Sides Together,” is a common term used in sewing to instruct you on how to position fabric pieces before stitching them together.
This simple but crucial concept ensures that when you sew your pieces together, the finished seam appears on the inside of the project, leaving the right side of the fabric visible on the outside.
Understanding and correctly following the RST principle is fundamental to achieving a clean and professional-looking result in your sewing projects.
Here’s how RST works in sewing:
Identify the Right Side of the Fabric
Fabrics usually have a right side (the side with the print or texture) and a wrong side (the plain or less attractive side).
It’s essential to determine which is which before starting your project. Some fabrics are reversible, so this may not apply in all cases.
Align the Right Sides Together
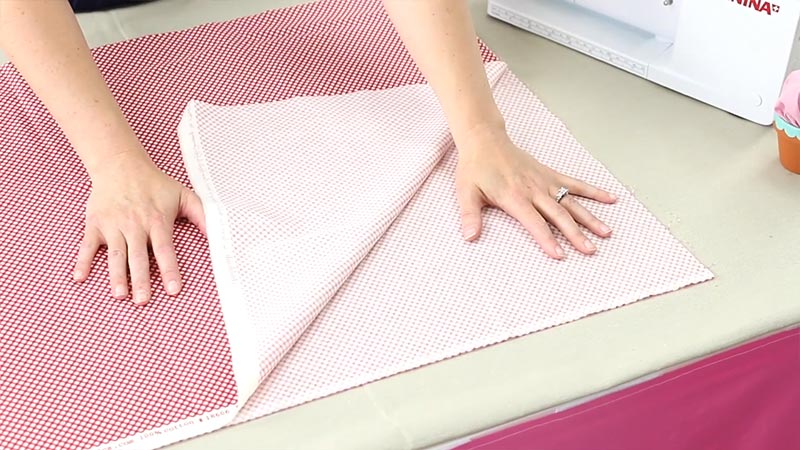
Once you’ve identified the right side of your fabric pieces, you’ll want to align them so that these right sides are facing each other. In other words, you’re placing the two attractive sides of the fabric together.
Pin or Clip the Pieces
To keep your fabric pieces in place and prevent them from shifting during sewing, you can use pins or clips to secure them.
It’s a good practice to pin perpendicular to the seam allowance, as this allows you to remove the pins easily as you sew.
Sew Along the Seam Line
With the right sides together and your fabric pieces secured, you can start sewing along the designated seam line, making sure to maintain the correct seam allowance.
The seam allowance is the distance between the seam and the edge of the fabric and is specified in your sewing pattern or project instructions.
Press the Seam
After sewing, it’s important to press the seam open or to one side, depending on your project’s instructions. This step helps set the seam and gives your project a crisp, professional finish.
How to Identify the Right and Wrong Side of Fabric?

Identifying the right and wrong sides of fabric is an important skill in sewing and crafting. The right side is the more attractive, finished side of the fabric, while the wrong side is typically less polished and may have markings or manufacturer information.
Here’s how to identify the right and wrong sides of fabric:
Visual Inspection
The most common way to distinguish between the right and wrong sides is through visual inspection.
The right side often features the printed pattern, design, or texture and is generally smoother and more vibrant in color.
Conversely, the wrong side is often plainer, less colorful, and may have a slightly rougher texture.
Manufacturer’s Information
Sometimes, you can identify the wrong side by looking for manufacturer information or care labels. These are usually printed on the wrong side of the fabric.
Selvage Edge
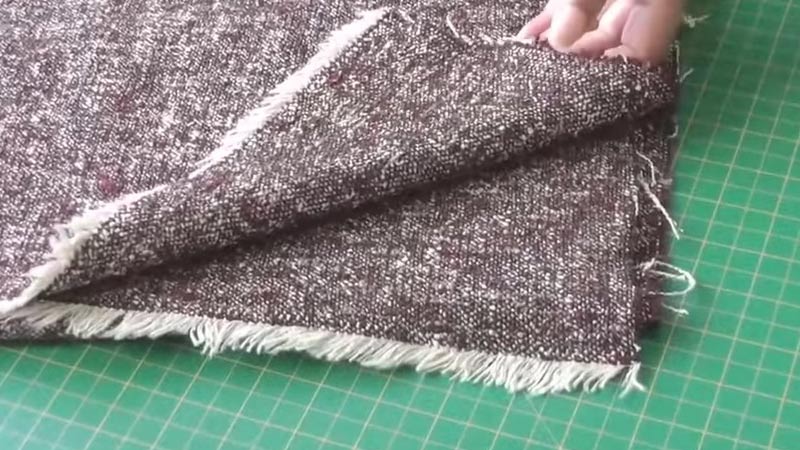
Examine the selvage edge of the fabric. The selvage is the tightly woven edge that runs parallel to the length of the fabric, and it often contains information about the fabric, including the manufacturer’s name and fabric content. The side of the selvage with this information is usually the wrong side.
Texture or Nap
In some fabrics, like velvet or corduroy, the right side may have a distinct texture or nap, while the wrong side is smoother. You can run your hand along the fabric to feel for these differences.
Test with Water
For some fabrics, like silk or satin, the wrong side may absorb water differently than the right side.
You can place a drop of water on the fabric and observe how it behaves. The side that absorbs the water more quickly is likely the wrong side.
Sample or Swatch
If you have a sample or swatch of the fabric, it can be easier to identify the right and wrong sides before you start working with a larger piece. Often, fabric stores provide swatches for customers to take home.
Use a Light Source
In some cases, holding the fabric up to a strong light source can help you see the differences between the right and wrong sides more clearly. The right side may appear brighter or more translucent in the light.
Mark the Right Side
If you have trouble remembering which side is which, you can use a removable fabric marker or a piece of masking tape to mark the right side of the fabric. Just be sure to remove any markings before finishing your project.
How to Tell Right Side of Fleece?
Fleece fabric, often used for cozy blankets, jackets, and accessories, typically has a right and wrong side, although the difference can be subtle.
Here are some methods to help you identify the right side of fleece:
Visual Inspection
Take a close look at the fleece fabric. The right side often exhibits a smoother appearance with a slightly shinier surface, especially when compared to the wrong side.
If you’re working with patterned fleece, the right side typically showcases the pattern more vividly and with greater clarity than the wrong side.
Check the Nap
Fleece usually has a nap, which is the direction in which the fibers lie. Gently run your hand along the surface in different directions.
The right side often feels smoother and softer when you stroke it in the direction of the nap, while the wrong side might feel slightly rougher or different when you rub against the nap.
Pattern or Design
If your fleece has a printed pattern, closely examine it. The right side is where the pattern appears most vibrant and well-defined. The wrong side, in contrast, may display the pattern more faintly or with less clarity.
Selvage Edge
Look at the selvage edge, which runs parallel to the length of the fabric. This edge often contains manufacturer information and may have a different texture or appearance compared to the rest of the fabric.
The side with the selvage and any fabric content details is often considered the wrong side.
Fabric Markings
Occasionally, the wrong side of fleece may have manufacturer labels or markings, such as barcodes or washing instructions, which are typically absent on the right side.
Water Test
As fleece is typically made from synthetic fibers, it tends to repel water. To perform the water test, place a small drop of water on both sides of the fabric.
The side where the water beads up rather than soaking in is likely the right side. Synthetic fleece is designed to resist moisture, so it won’t readily absorb water.
Light Source
Hold the fleece fabric up to a strong light source, such as a window or lamp. This technique can reveal subtle differences in texture or color that may be harder to discern in regular lighting conditions. It can help you identify the right side more confidently.
Consult a Sample
If you have a swatch or a smaller piece of the same fleece fabric, use it as a reference. By comparing the sample to the larger piece, you can more easily identify the right side, especially if the differences in texture or appearance are subtle.
FAQS
Why is RST sewing important?
RST is crucial in sewing to create concealed seams on the inside of the project, resulting in a polished and professional finish.
What Does RST Mean in Sewing?
RST stands for “Right Sides Together” in sewing. It’s a common instruction to align the attractive or right sides of fabric pieces facing each other before sewing to create concealed seams on the inside of the project.
What is RST Gallery known for?
RST Gallery is known for its dedication to showcasing contemporary art and emerging artists in its exhibitions.
Is RST applicable to all types of fabric?
Yes, the RST technique can be used with most types of fabric, including woven and knit fabrics. However, exceptions may apply, such as reversible fabrics or unique specialty textiles.
Can RST be used for sewing curved seams?
Yes, RST is a versatile technique that can be used for both straight and curved seams.
To Recap
In sewing, mastering the art of RST, or “Right Sides Together,” is akin to uncovering a hidden treasure trove of precision and elegance.
This simple yet indispensable technique ensures that the attractive side of fabric faces outward, concealing seams within, resulting in a polished, professional finish.
Whether you’re fashioning clothing, quilts, or home decor, the RST principle is your steadfast guide to tidy and seamless creations.
It’s a universal language among seamstresses, bridging novice and expert alike, leading to garments that fit flawlessly and quilts with impeccably aligned blocks.
So, embrace RST in your sewing journey, for it is the secret to transforming fabric into works of artistry and craftsmanship.
Leave a Reply