Cleaning your sewing machine is a vital aspect of its upkeep, ensuring it operates at peak performance and durability. To achieve this, knowing what to use when cleaning your machine is paramount.
This guide explores the essential tools and supplies required for effective sewing machine maintenance.
From brushes to lubricants, we will delve into each item’s significance and usage, providing comprehensive insights into preserving your machine’s longevity and stitch quality.
Whether you’re a seasoned seamstress or just starting, understanding these cleaning essentials will not only enhance your sewing experience but also save you from costly repairs and ensure your creations are consistently impeccable.

10 Things to Use to Clean a Sewing Machine
Cleaning your sewing machine is an essential part of maintaining its performance and prolonging its lifespan.
A well-maintained machine will produce better stitches and help you avoid costly repairs. To clean a sewing machine effectively, you’ll need a few basic tools and supplies.
Here 10 things to use to clean a sewing machine:
1. Lint Brush or Small Brush
A lint brush or a small brush with soft bristles is a must-have tool for cleaning your sewing machine. Lint and dust tend to accumulate in various parts of the machine over time.
Use the brush to gently sweep away lint and dust from critical areas like the bobbin area, feed dogs, and the thread path. It’s essential to keep these areas clean to prevent stitching problems and ensure smooth fabric feeding.
2. Compressed Air Canister
A compressed air canister is a valuable tool for reaching and cleaning those hard-to-access areas of your sewing machine. These areas often accumulate stubborn lint and dust that a brush alone may not remove.
Use the narrow nozzle of the canister to direct bursts of compressed air into places like the tension disks, bobbin case, and other crevices. This helps dislodge and remove debris effectively.
3. Soft Lint-Free Cloth or Microfiber Cloth
A lint-free cloth or microfiber cloth is perfect for wiping down the exterior of your sewing machine. Surface dust and dirt can accumulate over time, affecting the machine’s appearance and functionality.
You can lightly dampen the cloth with water or a mild sewing machine cleaner to tackle more stubborn spots, but ensure that the machine is unplugged and the cloth isn’t excessively wet.
4. Sewing Machine Oil
Sewing machine oil is a critical component of maintenance. It’s designed to lubricate the moving parts of your machine, reducing friction and preventing wear and tear.
Refer to your inside of sewing machine’s manual to identify the specific points that require lubrication.
Always apply the recommended oil sparingly to avoid excess buildup, which can attract more lint and debris.
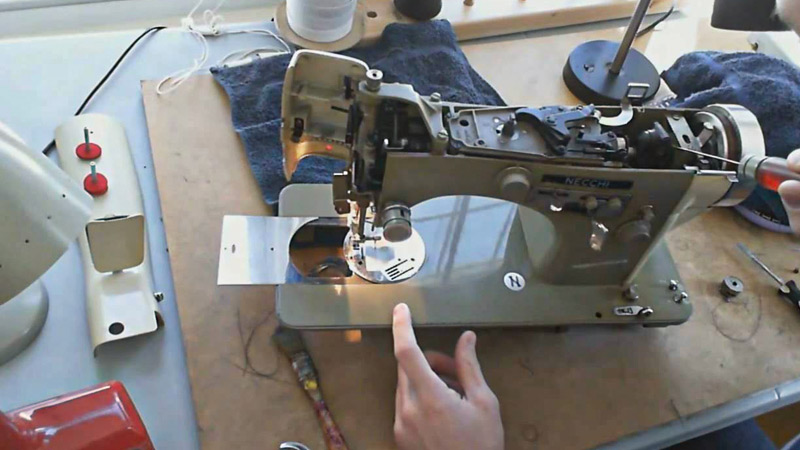
5. Screwdriver Set
A set of screwdrivers with various sizes and types of heads is essential for safely accessing internal parts of your sewing machine.
You may need to remove screws to open panels or access specific components for thorough cleaning or maintenance.
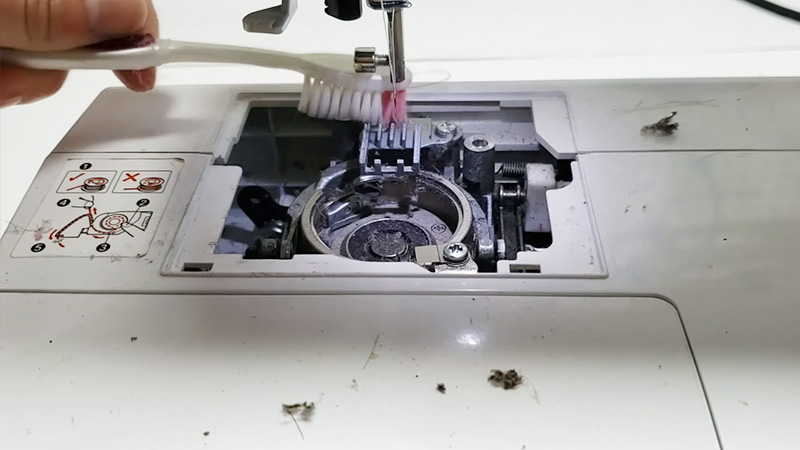
6. Small, Soft Brush or Toothbrush
A small brush or an old toothbrush is handy for detailed cleaning in tight spaces and for removing debris from crevices that are difficult to reach with larger brushes. Gently brush away dust and lint from intricate areas, ensuring a thorough clean.
7. Lint Roller or Adhesive Putty
For quick lint removal from your fabric and thread, keep a lint roller or adhesive putty on hand. This helps maintain a clean sewing environment, preventing lint from accumulating on your materials.
8. Q-Tips or Cotton Swabs
Q-Tips or cotton swabs are useful for precision cleaning in small and delicate areas of your machine, such as the tension discs or around the presser foot.
9. Sewing Machine Manual
Your sewing machine’s manual is a valuable resource. It provides detailed instructions on specific cleaning and maintenance tasks tailored to your machine’s make and model.
Consult the manual to understand which parts need cleaning and for safe disassembly and reassembly guidelines.
10. Soft, Dry Cloth or Paper Towels
After applying sewing machine oil, use a soft, dry cloth or paper towel to wipe away any excess oil, ensuring that only the necessary lubrication remains in place.
How to Clean Old Oil From Sewing Machine?

Cleaning old oil from a sewing machine is crucial for maintaining its functionality and preventing potential damage.
Over time, oil can become thick, sticky, or contaminated with dust and lint, hindering the machine’s smooth operation.
Here’s a step-by-step guide on how to clean old oil from a sewing machine:
Step 1: Prepare Your Workspace
Ensure your sewing machine is unplugged and turned off to prevent accidents during the cleaning process.
Place a clean, lint-free cloth or paper towels under and around the machine to catch any drips or debris.
Step 2: Access the Sewing Machine’s Interior
Consult your sewing machine’s manual to identify the screws and panels that need to be removed to access the interior.
Typically, a screwdriver is necessary for this step. Carefully remove the required screws and panels while keeping track of them for reassembly.
Step 3: Remove Old Oil and Grease
Use a lint-free cloth or paper towels to wipe away old, sticky oil and grease from the machine’s internal parts.
Pay close attention to areas that require lubrication, such as the hook race, gears, and other moving components. Q-tips or cotton swabs can be useful for reaching tight spots and corners.
Step 4: Apply New Sewing Machine Oil
After thorough cleaning, apply fresh sewing machine oil to the areas that require lubrication. Refer to your machine’s manual for specific lubrication points. Apply the oil sparingly, as excess oil can attract lint and dust, potentially causing more issues.
Step 5: Reassemble the Machine
Carefully reassemble the sewing machine by replacing the screws and panels you removed in step 2. Ensure that everything is securely fastened.
Step 6: Clean the Exterior
Wipe down the exterior of the sewing machine using a lint-free cloth or paper towels to remove any dust or dirt that may have accumulated on the surface.
Step 7: Test the Machine
Plug in and power on your sewing machine. Run it through a few stitches on a piece of scrap fabric to ensure that it’s operating smoothly and that the old oil and grease residue have been successfully removed.
Step 8: Regular Maintenance
To prevent the buildup of old oil in the future, establish a regular cleaning and lubrication schedule as recommended in your sewing machine’s manual.
How to clean the outside of a sewing machine?

Cleaning the outside of a sewing machine is a straightforward process that helps maintain its appearance and functionality.
Here’s a step-by-step guide on how to clean the exterior of a sewing machine:
Power Off and Unplug
Before starting any cleaning, ensure the sewing machine is powered off and disconnected from the electrical outlet. This is crucial for safety to avoid accidental activation of the machine during cleaning.
Gather Supplies
Gather the necessary cleaning supplies, which typically include a lint-free cloth, mild dish soap, and access to warm water. Prepare a small bowl of soapy water by mixing a few drops of dish soap into warm water.
Dampen the Cloth
Take the lint-free cloth and dip it into the soapy water mixture. Wring out excess liquid so that the cloth is damp but not dripping. It’s important not to saturate the cloth to prevent water from seeping into the machine’s internal components.
Wipe Down the Exterior
Begin by gently wiping down the entire exterior of the sewing machine. Pay special attention to areas where dust, lint, or sewing residue tend to accumulate, such as around the feed dogs, thread tension dials, and the presser foot.
Ensure that you clean any knobs, buttons, and the machine’s body thoroughly.
Remove Stubborn Stains
For stubborn stains or sticky residue on the machine’s surface, apply a small amount of the soapy water solution directly to the cloth and gently rub the affected area.
Use a gentle, circular motion to lift off the stain. Avoid using excessive force, as you don’t want to scratch the machine’s finish.
Dry Thoroughly
After cleaning, use a separate dry lint-free cloth to wipe down the machine once more. Ensure that all surfaces are dry, especially around the control panel and any electrical components. Moisture inside the machine can lead to electrical issues.
Polish
If you want to give your sewing machine a polished finish, consider using a dedicated sewing machine polish or silicone-free automotive wax.
Apply a small amount to a clean cloth and buff the machine’s exterior in a gentle, circular motion. This step is optional but can enhance the machine’s appearance.
Regular Maintenance
To keep your sewing machine looking its best, make it a routine to clean the exterior regularly, especially after extended use or when you notice dust accumulation.
Maintaining a clean exterior not only keeps your machine looking nice but also helps prevent dust from migrating into the internal parts of the sewing machine, which can affect its performance.
FAQS
Where can I find cleaners supplies for my sewing machine?
You can find cleaners supply for sewing machines at sewing supply stores, fabric shops, or online retailers specializing in sewing and crafting supplies.
Is it okay to use dish soap to clean the sewing machine’s exterior?
Yes, dish soap can be used to clean the exterior of your sewing machine.
Can a feather duster be used for cleaning a sewing machine?
Yes, a feather duster can be used in wiping dust when cleaning the sewing machine.
It is used in wiping dust in cleaning the sewing machine- What is it?
It Could be a brush, a soft cloth, or compressed air to effectively wipe away dust for cleaning a sewing machine.
Last Words
Knowing what to use to clean a sewing machine is essential for its longevity and optimal performance.
The right tools and materials, such as a lint brush, soft cloth, or compressed air, can help you effectively remove dust and debris from both the exterior and interior of your machine.
Regular maintenance not only extends the life of your sewing machine but also ensures smoother sewing operations.
However, always consult your sewing machine’s manual for manufacturer-recommended cleaning methods and products to avoid damaging delicate components.
With proper care and the right cleaning practices, your sewing machine will continue to be a reliable and indispensable tool for your creative endeavors.
Leave a Reply