Sewing a buttonhole may seem like a small task, but it’s a fundamental skill that every sewing enthusiast should master. Whether you’re creating garments, crafting accessories, or mending your favorite clothing items, knowing how to sew a buttonhole is a valuable skill.
In this comprehensive guide, we will discuss how to sew a buttonhole, ensuring that you achieve flawless and professional-looking results every time. Whether you’re using a traditional sewing machine or a modern computerized one, our instructions will be your trusted companion.
Buttonholes come in various shapes and sizes, and we’ll cover them all. From simple, straight buttonholes to keyhole and bound buttonholes, you’ll have the knowledge and confidence to tackle any project.
So, dust off your sewing machine, gather your fabric and buttons, and let’s dive into the world of buttonhole sewing. Your sewing creations are about to get a whole lot more polished!

How to Sew a Buttonhole?
Sewing a buttonhole may seem like a small detail in a sewing project, but it’s a crucial skill that can make a big difference in the functionality and aesthetics of your garments and crafts.
Buttonholes are used not only for fastening buttons but also for adding decorative touches to your creations. Let’s get started on your journey to becoming a buttonhole pro!
Materials Needed
You’ll need a sewing machine with a buttonhole foot. Collect the fabric to which you want to add a buttonhole. Use threads matching or contrasting, depending on your design.
You’ll also need sharp scissors, straight pins, a seam gauge or ruler, and a button that will fit through your buttonhole.
Select Your Button and Placement
First, choose the button you want to use for your project. The size of the button will determine the size of your buttonhole. Measure the button’s diameter and add a small allowance for ease of use.
This will be the approximate length of your buttonhole. Decide where you want to place the button and mark its position on your fabric with a fabric marker or pins.
Set Up Your Sewing Machine
Attach the buttonhole foot to your sewing machine. This foot is designed for creating buttonholes and will have a lever or knob to adjust the buttonhole size.
Select the buttonhole stitch on your machine. Many modern sewing machines have an automatic buttonhole setting that will handle most of the work for you.
Mark the Buttonhole Length
On your fabric, use a fabric marker or pins to mark the starting and ending points of your buttonhole. These marks should align with your button placement. Position your fabric under the buttonhole foot, aligning the starting mark with the center of the buttonhole foot.
Begin Sewing the Buttonhole
Lower the presser foot to secure the fabric. Start the sewing machine. It will automatically create the buttonhole based on the button’s size and the settings you’ve chosen.
The machine will typically stitch a straight line, a bar tack (a horizontal stitch), and then another straight line. This combination reinforces the buttonhole for durability.
Finish the Buttonhole
When the machine has finished sewing the buttonhole, it will stop automatically. Carefully trim any loose threads with sharp scissors.
If your machine didn’t automatically lock the stitches at the beginning and end of the buttonhole, you can reinforce them manually by sewing a few extra stitches in place.
Open the Buttonhole
To open the buttonhole, place a pin at one end of the buttonhole (the bar tack end) and use your seam ripper to carefully cut through the fabric in the center. Be cautious not to cut through the bar tack or any surrounding stitches.
Test the Buttonhole
Before attaching the button, insert it through the newly created buttonhole to ensure it fits comfortably. Adjust the size if necessary.
To reinforce the buttonhole for extra durability, you can add a line of stitching along the inside edge of the buttonhole. This is especially useful for heavy fabrics or items that will receive a lot of wear and tear.
Attach the Button
Position your button over the buttonhole and mark the placement points. Thread a hand-sewing needle with a double strand of thread, and secure it with a knot.
From the underside of the fabric, bring the needle up through one of the marked placement points, then thread it through one of the button’s holes.
Bring the needle back down through the opposite hole and through the marked placement point. Repeat this process several times to ensure the button is securely attached. Finally, knot the thread on the underside of the fabric and trim any excess.
Congratulations! You’ve successfully sewn a buttonhole and attached a button. With practice, you’ll become more confident in creating buttonholes of different sizes and styles to suit your sewing projects.
Buttonholes are a versatile skill that will enhance the functionality and aesthetics of your garments and crafts. Now, go ahead and incorporate beautiful button closures into your sewing creations!
How to Sew a Buttonhole without a Sewing Machine?

Sewing a buttonhole by hand is a useful skill, especially when you don’t have access to a sewing machine or when you want to add a handmade touch to your projects.
In this step-by-step guide, we’ll walk you through the process of sewing a buttonhole without a sewing machine.
Materials Needed
Fabric to which you want to add a buttonhole, button, hand-sewing needle, thread (matching or contrasting, depending on your design), straight pins, fabric marker or chalk, ruler or seam gauge, and sharp scissors. Gather all the necessary items to smoothly get the job done.
Choose Your Button and Placement
Begin by selecting the button you intend to use for your project. The size of the button will determine the size of your buttonhole.
Measure the button’s diameter and add a small allowance for ease of use. This will be the approximate length of your buttonhole.
Decide where you want to place the button and mark its position on your fabric with a fabric marker or chalk.
Mark the Buttonhole Length
Use a fabric marker or chalk to draw a straight line on your fabric, marking the starting and ending points of your buttonhole. These marks should align with your button placement.
Place your fabric on a flat, stable surface, and ensure it’s taut and well-positioned. You can use straight pins to secure it in place if needed.
Begin Stitching
Thread a hand-sewing needle with a length of thread, and knot the end securely. Position the needle at the starting point of your buttonhole, with the knot on the underside of the fabric.
Create Blanket Stitches
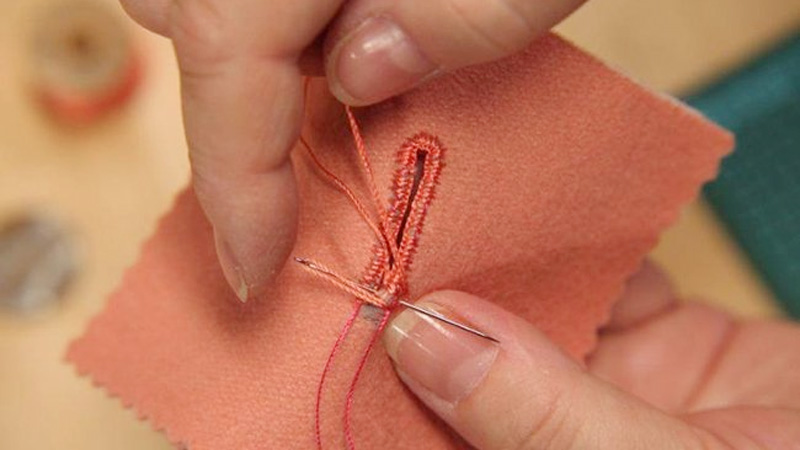
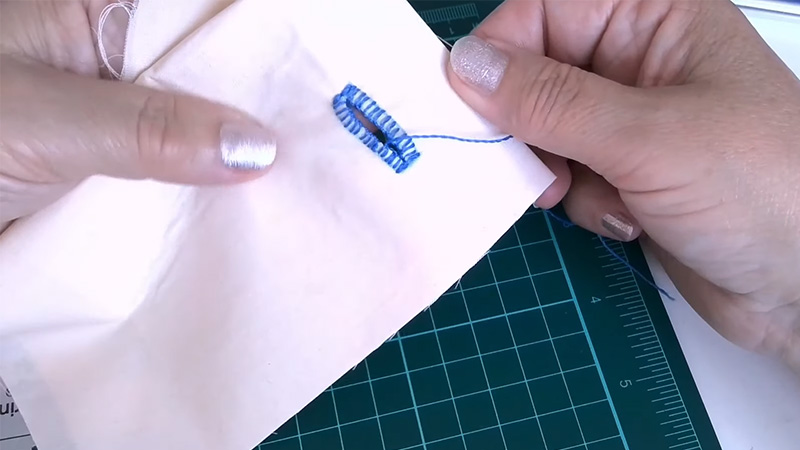
Start sewing blanket stitches along the marked line for the buttonhole. Here’s how to do it: Bring the needle up from the underside to the top of the fabric, near the starting point.
Insert the needle back down to the underside, close to the point where you started but not through the same hole. Pull the thread tight to create a small loop or “blanket” on the top of the fabric.
Repeat these steps, spacing your stitches evenly along the marked line. Ensure that the loops on top of the fabric are consistent in size.
Continue Blanket Stitching
Keep stitching until you reach the ending point of the buttonhole. The number of stitches will depend on the size of your button and the desired width of the buttonhole.
A typical buttonhole might have about 6-10 blanket stitches. When you reach the ending point, make a small, tight stitch without creating a loop on top of the fabric. This will secure the last stitch in place.
Reinforce the Buttonhole
To strengthen the buttonhole, you can add a second row of blanket stitches parallel to the first row. This is optional but recommended for durability, especially if the buttonhole will receive a lot of wear.
Trim any loose threads with sharp scissors, leaving only the thread tails at the starting and ending points of the buttonhole.
Open the Buttonhole
Use a seam ripper or small scissors to carefully cut through the center of the buttonhole, between the rows of blanket stitches. Be cautious not to cut the stitches themselves.
Before attaching the button, insert it through the newly created buttonhole to ensure it fits comfortably. Adjust the size if necessary.
Attach the Button
Position your button over the buttonhole and mark the placement points. Thread a hand-sewing needle with a double strand of thread, and secure it with a knot.
From the underside of the fabric, bring the needle up through one of the marked placement points, then thread it through one of the button’s holes. Bring the needle back down through the opposite hole and through the marked placement point.
Repeat this process several times to ensure the button is securely attached. Finally, knot the thread on the underside of the fabric and trim any excess.
Congratulations! You’ve successfully sewn a buttonhole by hand. This skill opens up a world of creative possibilities for adding closures and decorative elements to your sewing projects, even without a sewing machine.
With practice, you’ll become more confident in creating hand-sewn buttonholes of different sizes and styles to suit your needs. Now, go ahead and incorporate beautiful, handcrafted button closures into your sewing creations!
FAQs
What’s the difference between machine-sewn and hand-sewn buttonholes?
Machine-sewn buttonholes are created using a sewing machine and are known for their precision and speed. Hand-sewn buttonholes, on the other hand, are created manually with a needle and thread, offering more control and a handmade, artisanal look.
Are hand-sewn buttonholes as strong as machine-sewn ones?
Hand-sewn buttonholes can be just as strong as machine-sewn ones when done correctly. Reinforcing the buttonhole with additional stitches and using high-quality thread can ensure durability.
Can I sew buttonholes by hand on delicate fabrics?
Yes, hand-sewn buttonholes are particularly suitable for delicate and lightweight fabrics, as they allow for more control and reduce the risk of fabric damage compared to machine-sewn buttonholes.
Do I need specialized tools for hand-sewn buttonholes?
While specialized buttonhole scissors and a buttonhole gauge can be helpful, they are not strictly necessary. You can create hand-sewn buttonholes with basic sewing tools like a hand-sewing needle, thread, and sharp scissors.
Can I add decorative elements to hand-sewn buttonholes?
Absolutely! Hand-sewn buttonholes offer a lot of creative possibilities. You can experiment with different thread colors, embroidery stitches, or even add decorative beads or buttons to enhance the look of your buttonholes and make them unique to your project.
Conclusion
With practice and patience, you can create buttonholes that not only serve their practical purpose but also add a touch of professionalism to your sewing projects. Remember, buttonholes come in various styles and can be adapted to suit the unique needs of your sewing creations.
Whether you’re sewing a button-up shirt, a stylish coat, or a decorative accessory, the knowledge you’ve gained in this guide will empower you to confidently tackle any buttonhole project.
As you continue to hone your sewing skills, don’t forget that practice makes perfect. Experiment with different fabrics, threads, and buttonhole styles to expand your expertise. With each new project, you’ll become more skilled and confident in your ability to sew beautiful, functional buttonholes.
Now, armed with the knowledge from this guide, it’s time to unleash your creativity and embark on exciting sewing projects that will showcase your newfound buttonhole mastery.
Leave a Reply