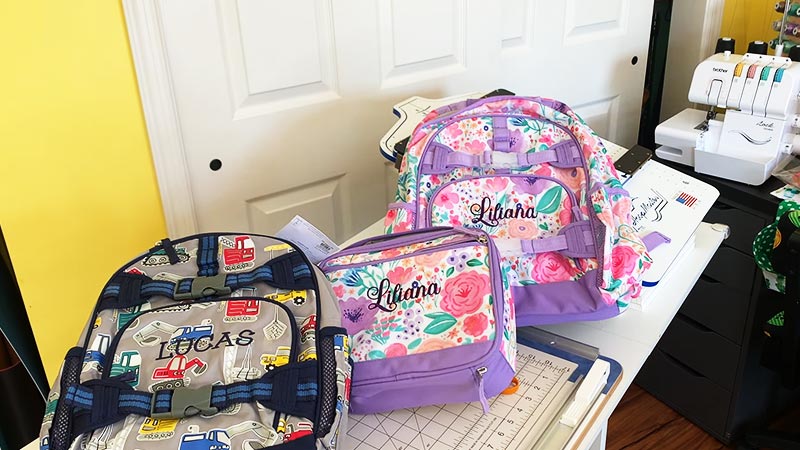
Discover the exciting world of backpack customization as we delve into the art of embroidery. If you’ve ever wondered whether you can add a touch of personal flair to your trusty backpack, the answer is a resounding yes!
Embroidering on backpacks opens up a realm of possibilities, allowing you to express your unique style, showcase your creativity, and make a bold statement wherever you go.
This comprehensive guide will explore the answer to ‘Can you embroider on a backpack?’. We’ll explore all the essentials you need to know about backpack embroidery, from selecting the right materials to choosing captivating designs.
Whether you’re a seasoned crafter or a curious beginner, join us on this journey to transform your backpack into a canvas of self-expression. Get ready to embark on a creative adventure and make your backpack unique.

Can You Embroider on Backpack?
Embroidering on a backpack is a fantastic way to infuse your personal style and creativity into a utilitarian accessory. In this comprehensive guide, we will walk you through the step-by-step process of how to embroider a backpack.
Design Planning
Selecting the right design is crucial for a harmonious result. Consider the dimensions and contours of your backpack – a symmetrical design may suit a structured backpack, while a more organic pattern may enhance a slouchier style.
Tailoring your design to your backpack’s features ensures a cohesive and visually appealing outcome.
Preparing the Backpack
Ensure the backpack is clean and free of any dirt or dust. A clean canvas is essential for successful embroidery. Wipe down the backpack with a damp cloth to remove any surface dirt or dust that could interfere with the stitching process.
This step ensures a smooth and even application of your chosen design. If the backpack is new, consider washing it. New backpacks may have sizing or chemicals that hinder the adhesion of embroidery.
Hooping the Backpack

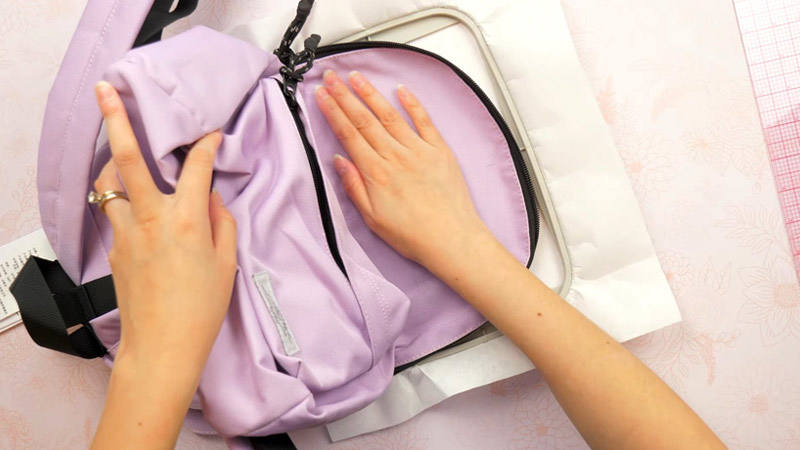
To avoid unintended stitching through both layers of the backpack, carefully separate the inner and outer layers before hooping.
This meticulous step ensures that your embroidery remains on the designated surface, preventing any interference with the backpack’s functionality. Place the embroidery hoop under the marked area.
Proper hooping is essential for maintaining tension and achieving clean, uniform stitches.
Marking the Design to Embroider Backpack
Precision in marking is paramount for a well-executed design. Employing a water-erasable pen or fabric chalk allows for accurate tracing without leaving permanent marks on your backpack.
These tools provide a clear guide for your stitches and are easily removable once the embroidery is complete.
Take your time to ensure accuracy, and use a ruler or stencil if needed. Patience during the marking phase pays dividends in the final result.
Threading the Needle

Selecting the right amount of thread prevents tangling and ensures a smooth stitching process. Aim for approximately 18-24 inches of embroidery floss, threading it through the eye of the needle.
Adequate thread length minimizes interruptions and allows for a continuous and seamless embroidery experience.
Starting the Stitch
Securing your thread with a knot at the beginning prevents unraveling and provides stability. Leave a tail at the back of the fabric, neatly concealed, to maintain a clean appearance. This ensures your embroidery starts with a solid foundation.
Bring the needle up from the back to the front of the fabric.
Embroidery Stitches
Choose stitches like backstitch, satin stitch, or French knots, depending on your design. The choice of stitches contributes to your embroidery’s visual appeal and texture.
Tailor your stitch selection to your design – backstitch for outlines, satin stitch for filling larger areas, or French knots for intricate details.
Color Changes
Multicolored designs add vibrancy and depth to your embroidered backpack. Ensure smooth transitions between colors by securing the thread at the back before starting a new color. This practice maintains the integrity of your design and prevents any unsightly knots or irregularities.
Ending the Stitch
At the completion of each section or color change, secure your stitches by tying a knot at the back of the fabric. This ensures the longevity of your embroidery, preventing unraveling and maintaining the integrity of your design.
Final Touches
With the embroidery finished, attend to any residual markings left on the fabric. Gently remove water-erasable pen traces or fabric chalk using a damp cloth or a fabric eraser. This step ensures your backpack showcases only the intended design, free from any temporary guidelines.
How to Remove Embroidery from Backpack?

If you want to remove embroidery from a backpack, it can be a delicate process to ensure minimal damage to the fabric. Whether you want to update the design, repurpose the backpack, or undo a stitching mistake,
here’s a step-by-step guide on safely removing embroidery from the backpack.
Assess the Embroidery
Before starting the removal process, carefully examine the embroidery on a backpack. Note the types of stitches used, the embroidery thread, and any backing material. This assessment helps in determining the best approach for removal.
Prepare the Workspace
Choose a well-lit and clean workspace to get rid of embroidery on backpacks. Lay the backpack flat to make the removal process more manageable. Identify the backing material beneath the embroidery.
Some embroideries may have stabilizers, interfacing, or adhesive backings. If accessible, carefully cut or peel away these layers to expose the stitches.
Use the Seam Ripper
Begin by gently inserting the pointed end of the seam ripper under a stitch just above the knot. Carefully lift the stitch with the seam ripper and cut the thread. Repeat this process, working one stitch at a time. Take your time to avoid snags or tears in the fabric.
Trim Loose Threads
Periodically trim loose threads with small scissors to prevent tangling or confusion during removal. Use tweezers to pick out individual stitches for intricate designs or stubborn threads. This method allows for more precise control, especially in areas with dense embroidery.
Check Fabric Integrity
Periodically check the fabric to ensure it is not damaged or frayed during removal. If you notice any signs of stress, adjust your technique or consider seeking professional assistance.
Rotate the backpack as needed to access different areas. This helps maintain a comfortable and controlled working position.
Be Patient and Gentle
Patience is key during embroidery removal. Avoid rushing the process to prevent unnecessary damage to the backpack fabric. Gently work through each stitch, ensuring a careful and precise approach.
If the embroidery had an adhesive backing, remnants may remain on the fabric. Following the product’s instructions, use a mild adhesive remover to dissolve and wipe away any residue. Test the remover on a small, inconspicuous area first to ensure it won’t harm the backpack material.
Final Check and Clean-Up
Once all stitches are removed, inspect the entire area for any remaining threads, backing material, or adhesive residue. Use a lint roller or tape to remove loose threads or fibers. Check for any marks left by the embroidery design and, if necessary, lightly dab with a damp cloth to clean the area.
Wash or Dry Clean if Applicable
Depending on the material of your backpack, consider washing or dry cleaning it after embroidery removal. Follow the manufacturer’s care instructions to ensure proper maintenance.
If the removal process leaves faint marks on the backpack, consider covering them with patches, fabric paint, or a new embroidery design.
Tips and Warnings on How to Remove Embroidery from a Backpack
Embroidery removal can be time-consuming. Take breaks to maintain focus and avoid fatigue. Before using any cleaning or adhesive removal products, test them on a small, inconspicuous area of the backpack to ensure they won’t cause damage.
If you encounter challenges or are unsure about the removal process, consider seeking professional embroidery or textile expert assistance. Some fabrics are more delicate than others.
Adjust your approach based on the material of your backpack to minimize the risk of damage.
FAQs
Can You Embroider on Any Backpack Material?
While embroidery is possible on various materials, it’s crucial to consider the fabric’s thickness and composition. Generally, backpacks made of canvas, cotton, or similar fabrics are ideal for embroidery.
What Type of Thread is Best for Backpack Embroidery?
Embroidery floss or thread specifically designed for embroidery projects is recommended. These threads come in various colors, are durable, and have a sheen that adds vibrancy to your designs. Ensure the thread is compatible with your chosen fabric to achieve the best results.
How Do I Remove Embroidery from a Backpack?
To remove embroidery, use a seam ripper to cut stitches, working one stitch at a time carefully. Be patient and gentle to avoid damaging the fabric. If there’s an adhesive backing, use a mild adhesive remover. Test any cleaning products on a small, inconspicuous area first.
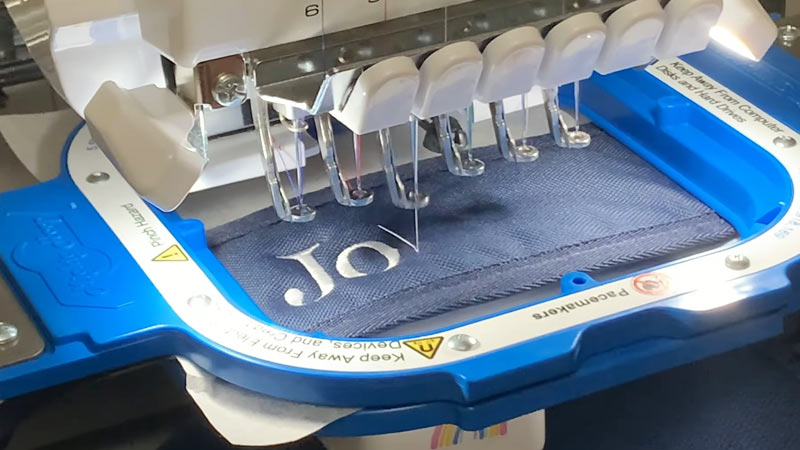
Can I Embroider Name on a Backpack?
Yes, you can! First, use a water-erasable pen or fabric chalk to mark the placement of your name. Select your desired font and stitch (e.g., backstitch for clarity). Start stitching your name, securing the thread at the beginning and end.
What Are Some Beginner-Friendly Embroidery Stitches for Backpacks?
If you’re new to embroidery, start with beginner-friendly stitches like the back stitch (outlining and creating clear, defined lines) and running stitch (versatile for various designs). A satin stitch and French knots are also perfect for adding small, textured details.
Conclusion
The world of backpack embroidery is a captivating avenue for self-expression and individuality. As we wrap up our exploration, remember that the key to creating a personalized masterpiece lies in your creativity and attention to detail.
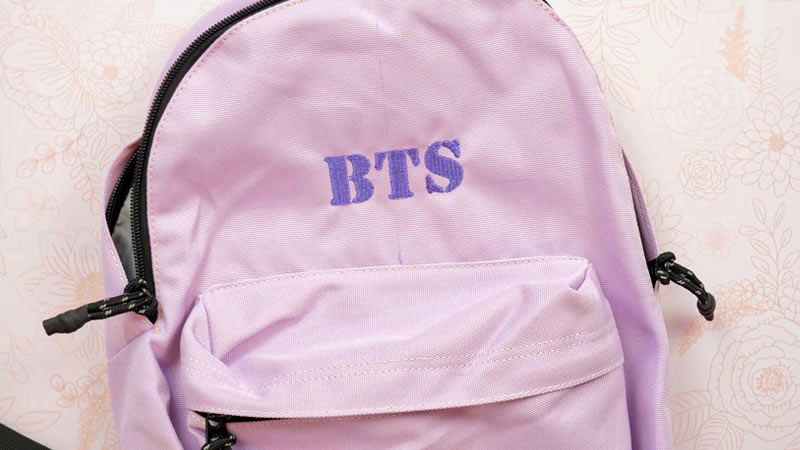
Whether you opt for intricate patterns, meaningful symbols, or your name in elegant script, each stitch tells a story. Embroidering on backpacks adds a unique touch to your daily essentials and allows you to stand out in a crowd.
As you embark on your own embroidery journey, consider experimenting with colors, textures, and embroidery techniques. The fusion of craftsmanship and personal style results in a backpack that carries your belongings and a piece of your identity.
So, seize the opportunity to transform a simple backpack into a statement piece that reflects who you are. Embrace the artistry of embroidery today!
Leave a Reply