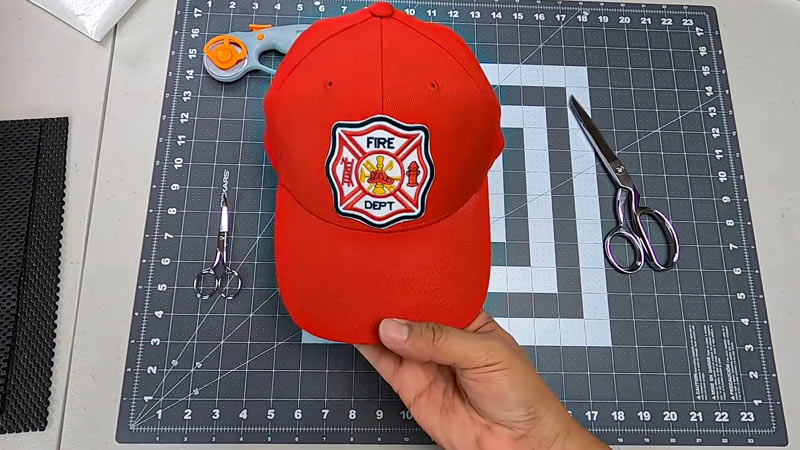
Delving into the world of embroidery brings forth myriad artistic possibilities, but applying embroidered patches often raises questions about the most efficient attachment method.
One intriguing option gaining popularity is heat pressing. The fusion of traditional craftsmanship with modern techniques prompts us to explore the compatibility of heat pressing with the intricate beauty of embroidery patches.
Can You Heat Press Embroidery Patches? This question unravels a realm where time efficiency meets the artistry of threadwork.
In this exploration, we’ll dissect the benefits, potential challenges, and best practices, uncovering whether heat pressing is the key to seamlessly affixing these detailed patches onto fabrics with precision and finesse.
As we embark on this journey, we’ll unravel the nuances and considerations involved, ensuring that your embroidered creations adhere flawlessly through the heat press method.

Can You Heat Press Embroidery Patches?
While heat pressing is a popular and efficient technique for applying patches, the compatibility of heat pressing with embroidery patches requires careful consideration.
Let’s delve into the nuances of this process, exploring the benefits, potential issues, and best practices.
Understanding Embroidery Patch Construction
Embroidery patches are crafted through the meticulous threads stitching onto a fabric base, resulting in raised, textured designs. The threads may include various materials such as cotton, polyester, or metallic blends.
The backing material is typically chosen for its stability and ability to withstand the embroidery process.
Benefits of Heat Pressing for Embroidery Patches
Here’s why you might want to heat-press iron on patches:
Time Efficiency
Heat pressing offers a quick and efficient application method for embroidery patches. Unlike traditional sewing, which requires careful stitching, heat pressing allows for a rapid application process, making it an attractive option for those with time constraints.
Uniform Adhesion
Heat press patches provide uniform pressure and heat distribution, ensuring consistent adhesion across the entire patch.
This is particularly crucial for intricate designs where each thread and detail must adhere securely to the desired surface.
Versatility
Heat pressing is versatile regarding the materials it can apply to. Whether you want to affix an embroidery patch to a cotton T-shirt, a polyester jacket, or even a bag made of a synthetic blend, a heat press for patches can accommodate a variety of fabrics.
Clean Finish

Heat pressing can result in a clean and professional finish. The patch adheres seamlessly to the fabric without needing visible stitches, providing a polished look that is often desired, especially in commercial or mass-production settings.
Potential Challenges and Considerations
It’s not always a good idea to heat-press embroidered patches. Here are some potential challenges:
Heat Sensitivity of Threads
Embroidery threads can be sensitive to high temperatures. Some threads, particularly metallic or specialty threads, may not withstand prolonged exposure to heat.
It’s essential to consider the thread material and any potential impact on colorfastness or texture during heat-pressing.
Patch Backing Material
The backing material of embroidery patches plays a crucial role in determining the success of heat pressing. Some backings are designed to withstand heat, while others may not adhere as effectively.
Additionally, patches with heat-activated adhesives may require specific temperature and pressure conditions for optimal results.
Texture Preservation
Heat pressing has the potential to alter the texture of embroidery patches. Raised areas may become flattened, impacting the three-dimensional quality of the design.
Careful consideration of the desired outcome is necessary to ensure that the texture of the embroidery is preserved.
Adhesion on Certain Fabrics
While heat pressing is generally versatile, adhesion can vary on certain fabrics. Fabrics with irregular textures or coatings may challenge achieving a secure bond between the patch and the surface. Testing the process in a small, inconspicuous area is advisable.
Best Practices for Heat Pressing Embroidery Patches
When learning how to heat press iron on patches, here’s what you need to consider:
Test with Scrap Fabric

Before applying embroidery patches to the final garment or item, conduct tests on scrap fabric using the same materials. This allows you to assess the impact of heat on the threads, backing material, and overall adhesion.
Choose the Right Temperature
Adjust the heat press to the appropriate temperature for the specific materials used in the embroidery patch. Refer to the patch manufacturer’s guidelines and consider the threads’ heat sensitivity.
Use a Protective Layer
Place a protective layer between the heat press and the embroidery patch, such as a Teflon sheet or parchment paper.
This layer helps distribute heat evenly and prevents direct contact between the patch and the press, minimizing the risk of texture alteration.
Apply Even Pressure
Ensure even pressure during the heat pressing process. Uneven pressure can lead to incomplete adhesion or distortion of the patch. Adjust the press settings to achieve uniform pressure across the entire patch.
Monitor Dwell Time
Control the dwell time, which is the duration the patch is exposed to heat and pressure. Overexposure can affect the threads and backing material. Follow the recommended dwell time provided by the patch manufacturer.
Consider Alternatives
In cases where the embroidery patch or fabric is highly sensitive to heat, consider alternative attachment methods, such as sewing or using fabric glue. These methods may provide a gentler application process without compromising the integrity of the patch.
How to Heat Press Patches? 10 Steps
To heat press embroidery patches, follow these steps for a successful and professional application:
Step 1: Prepare Your Heat Press Machine

Ensure your heat press machine is clean and in good working condition. Check the temperature settings and ensure it is set to the recommended temperature for your patches and fabric.
Step 2: Preheat the Machine
Allow the heat press machine to reach the desired temperature before applying. This ensures even heat distribution and better adhesion.
Step 3: Position Your Patches
Place your garment or fabric on the heat press machine, ensuring it’s smooth and flat. Position the embroidery patches on the desired locations, ensuring they are centered and aligned properly.
Step 4: Use a Teflon Sheet or Parchment Paper
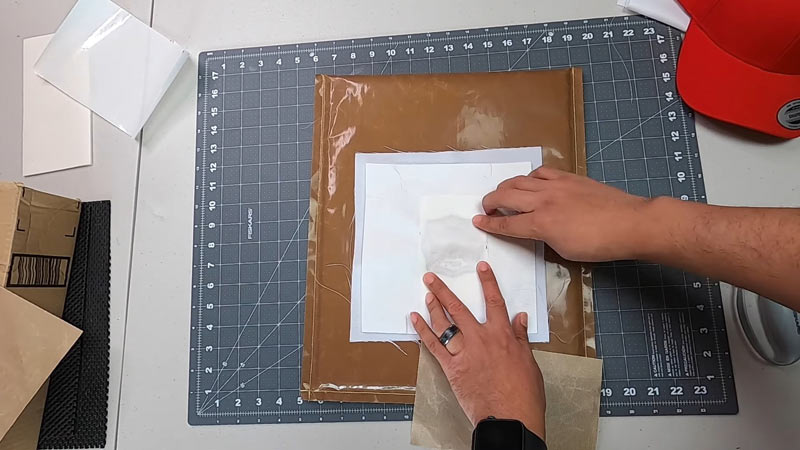
To protect both the patches and the garment, place a Teflon sheet or parchment paper over the patches before closing the heat press. This prevents the patches from sticking to the upper plate of the machine and ensures a smooth transfer.
Step 5: Adjust Pressure Settings
Adjust the pressure settings on your heat press machine according to the thickness of the fabric and patches. Having the right amount of pressure for a successful application is crucial.
Step 6: Heat Press Application
Close the heat press machine and apply firm, even pressure. The patches should be pressed for the recommended time, typically ranging from 10 to 20 seconds. Be sure to follow the guidelines provided with your patches and adjust the time accordingly.
Step 7: Wait for Cooling
After the pressing time is complete, open the heat press machine and carefully remove the Teflon sheet or parchment paper. Allow the patches to cool for a few seconds before handling them. This cooling process is essential for the adhesive to set properly.
Step 8: Peel Off Backing
Once the patches have cooled, peel off the backing carefully. If you notice any resistance or if the patch is not adhering well, reapply the Teflon sheet or parchment paper and press again.
Step 9: Test Adhesion
Check the adhesion of the patches by gently tugging on the edges. If the patches lift or don’t seem securely attached, reapply heat and pressure using the Teflon sheet or parchment paper.
Step 10: Final Inspection
Inspect the applied patches for any imperfections or areas needing additional attention. Repeat the heat press process on specific areas to ensure a consistent and durable application.
Tips for Success
Always follow the manufacturer’s guidelines for temperature, time, and pressure. Test a small, inconspicuous area of the fabric before applying patches to ensure compatibility.
Use a heat press machine with an even heat distribution across its platen. If applying multiple patches, ensure proper spacing to avoid overlap.
FAQs
Can you heat-press embroidery patches onto any fabric?
While heat-pressing embroidery patches are suitable for various fabrics, checking the fabric’s compatibility is essential. Delicate or heat-sensitive fabrics may require lower temperatures or shorter press times to prevent damage.
What temperature should I set my heat press for embroidery patches?
The recommended temperature for heat-pressing embroidery patches varies based on the patch material and fabric type.
.Refer to the instructions provided with your patches and adjust the heat press accordingly. Typically, temperatures range from 275°F to 375°F (135°C to 190°C).
Do I need to peel off the backing immediately after heat pressing?
It’s crucial to allow the patches to cool for a few seconds before peeling off the backing. Rushing this step may result in the patch not adhering correctly. Follow the specified cooling time to ensure a secure and durable application.
Can I reheat press a patch if it doesn’t adhere properly?
If you notice any areas where the patch isn’t adhering well, you can reapply heat and pressure. Cover the patches with a Teflon sheet or parchment paper and press again for the recommended time. This can often fix adhesion issues.
Can I wash garments with heat-pressed embroidery patches?
In most cases, garments with heat-pressed embroidery patches are washable. However, following specific care instructions provided with the patches is advisable.
Turn the garment inside out before washing, use a gentle cycle, and avoid high-heat drying to prolong the life of the patches.
Conclusion
The fusion of embroidery patches and heat pressing emerges as a viable and efficient technique, offering a streamlined approach to affixing intricate designs.
While the benefits of time efficiency, uniform adhesion, and a polished finish make it attractive, considerations such as thread sensitivity and texture preservation necessitate careful attention.
By following best practices, conducting tests, and adjusting heat press settings, one can unlock the full potential of this method.
Whether you’re a hobbyist or a seasoned embroiderer, the synergy of traditional craftsmanship with contemporary application techniques opens doors to a world where artistry meets efficiency, ensuring that every embroidered patch finds its place with precision and allure on various fabrics.
Embrace the fusion of heritage and technology, as heat pressing becomes a pivotal tool in bringing your embroidered creations to life with finesse and functionality. Let’s get started with the right heat press technique today!
Leave a Reply