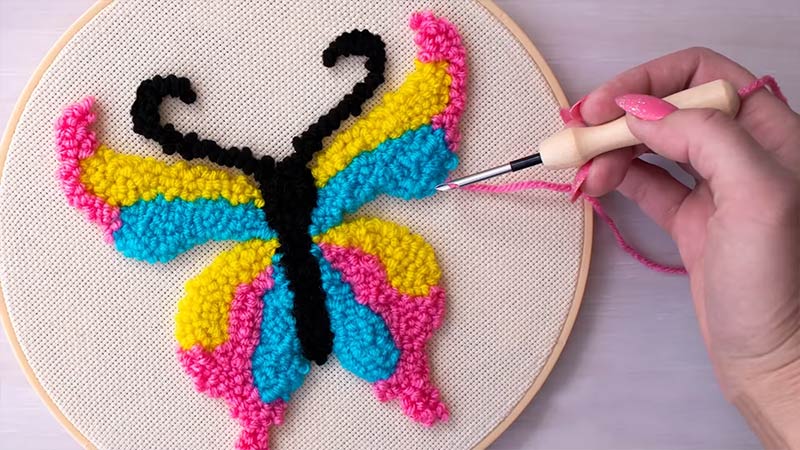
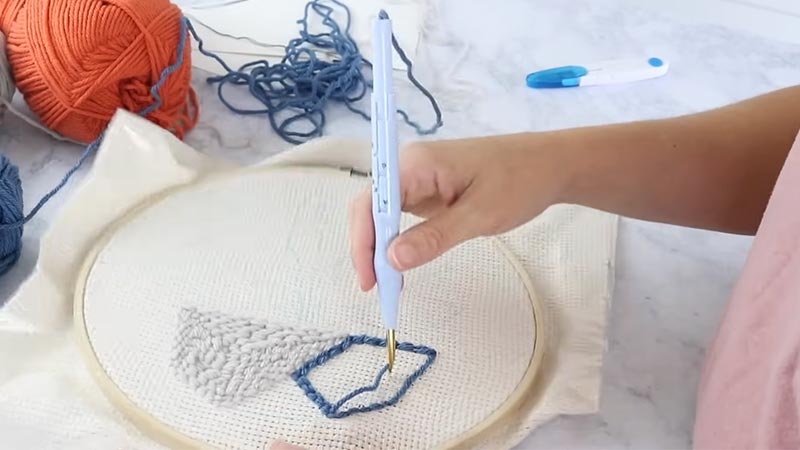
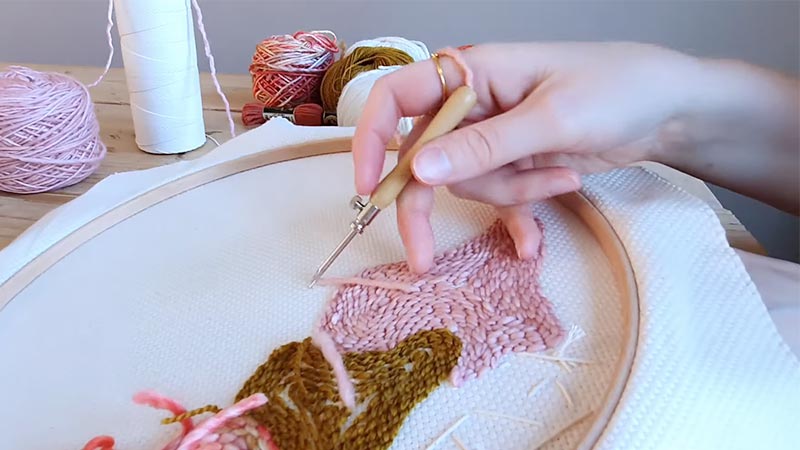
Punch needle, a beloved fiber art form, is celebrated for its capacity to transform ordinary fabrics into intricate, textured designs.
While it is commonly associated with embroidery and wall hangings, its versatility extends to the realm of interior decor.
In recent years, punch needle has found a new canvas – rugs. This innovative adaptation marries the art of traditional rug-making with the creative and therapeutic aspects of punch needles.
Crafting rugs using punch needles not only offers the freedom to design unique, personalized floor coverings but also results in durable, soft, and visually captivating pieces that can elevate any living space.

Can You Use a Punch Needle to Make Rugs?
Certainly! Punch needle is a versatile and popular craft technique that is traditionally used to create intricate, textured designs on fabric.
While it is commonly associated with embroidery and textile art, it can also be used to make rugs.
Punch needle rug making has gained popularity in recent years due to its ability to produce stunning, durable, and soft floor coverings.
Here’s a closer look at how you can use punch needles to make rugs:
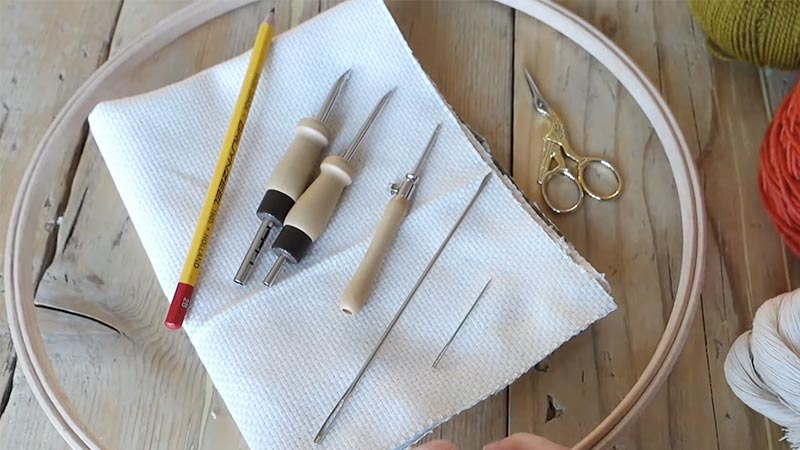
Materials and Tools:
- Punch Needle
- Monk’s Cloth or Rug Warp
- Yarn or Fabric Strips
- Embroidery Hoop or Frame
Steps to Make a Punch Needle Rug:
Design
Before starting your punch needle rug project, spend some time planning the design. Consider the size, shape, and style of rug you want to create.
You can draw your design on paper or directly onto the fabric if you prefer a freehand approach.
Beginners may find it helpful to start with simple geometric patterns or basic motifs and progress to more complex designs as they gain experience.
Prepare the Fabric
Choose a piece of monk’s cloth or rug warp that’s larger than your intended rug size. This extra fabric is essential for stretching and framing.
Secure the fabric onto an embroidery hoop or frame, ensuring it’s taut but not overly stretched to prevent distortion. The tightness of the fabric is crucial as it keeps the loops in place during punching.
Thread the Punch Needle
Thread your punch needle with the yarn or fabric strips of your choice. Ensure the material is the correct thickness for your selected needle.
You may need to separate strands of yarn or cut fabric strips to your preferred length. Be thoughtful in your selection of colors and textures, as they will contribute to the overall look of your rug.
Punching the Loops
Begin punching your design row by row. Adjust the depth setting of your punch needle to achieve your desired pile height.
For straight-line designs, you can use a ruler or straight-edge guide to maintain alignment. As you punch, you’ll notice loops forming on the front side, with the yarn or fabric strips being pulled through to the back of the fabric.
Finishing
To secure the loose ends of yarn or fabric strips, tie them off on the back side of the rug using a sturdy thread.
This prevents them from unraveling as you work on other areas. Carefully weave these ends into the fabric on the back to hide them and maintain a clean finish.
Backing
While not always necessary, adding a backing can enhance the durability and stability of your punch needle rug, especially for larger or more heavily used rugs.
You can sew or glue a piece of fabric or non-slip material to the back of your rug to protect the loops and provide additional support.
Trimming
After finishing the design, you may notice some loops that are longer than others, resulting in an uneven pile.
Use sharp scissors to carefully trim the loops to achieve a consistent pile height. Be cautious not to cut too close to the fabric, as this can cause the loops to unravel.
Final Touches
With your punch needle rug complete, carefully inspect it for any loose threads or irregularities. Make any necessary adjustments to ensure a finished and polished look.
To maintain your rug, gently vacuum or shake it to remove dust and debris. If it becomes soiled, spot-clean it with mild soap and water, avoiding aggressive scrubbing or machine washing.
Benefits of Using Punch Needle to Make Rugs

Using punch needles to make rugs offers several benefits, making it a popular choice for crafters and artists.
Here are some of the advantages:
Versatility
Punch needle rug-making is incredibly versatile. The technique accommodates various designs, from geometric patterns to intricate motifs and even pictorial representations.
It’s an open canvas for your creativity, allowing you to explore a wide range of possibilities.
Texture and Comfort
Punch needle rugs are known for their soft, plush texture. The loops created by the punch needle give the rug a comforting feel underfoot.
This makes them an excellent choice for areas where you want to add warmth and softness, such as bedrooms or cozy sitting areas.
Durability
When crafted with the right materials and techniques, punch needle rugs are remarkably durable.
They can withstand regular foot traffic, making them suitable for high-use areas like entryways or living rooms. Adding a sturdy backing or lining further enhances their resilience.
Customization
The punch needle allows for complete customization. You have control over the choice of colors, materials, and pile height, making it possible to create rugs that seamlessly match your home decor or serve as one-of-a-kind pieces, such as personalized gifts.
Artistic Expression
Punch needle rug-making is a form of artistic expression. Crafters can use it as a medium to bring their artistic designs to life.
The combination of color, texture, and design choices allows for unique, expressive creations.
Relaxation and Stress Relief
The rhythmic and repetitive nature of punch needle crafting can be therapeutic and relaxing. It provides a break from the demands of daily life and serves as a creative outlet, offering a sense of calm and stress relief.
Eco-Friendly Options
For those with sustainability in mind, punch needle can be an eco-friendly craft. It can be done using recycled or upcycled materials, minimizing waste and contributing to a more environmentally friendly approach to crafting.
Handmade Charm
Each punch needle rug is a handmade creation. This authenticity adds charm and character to your living space.
It stands in contrast to mass-produced alternatives, infusing a personal touch into your home decor.
Skill Development
Punch needle rug-making is a craft that encourages skill development. It hones skills in creativity, precision, and attention to detail. It’s a rewarding and challenging craft for those seeking to expand their abilities.
Home Decor Enhancement
Punch needle rugs serve as focal points in a room’s decor. They tie together design elements and introduce personality and warmth into your living spaces. They can instantly transform the ambiance and appearance of a room.
Community and Sharing
Engaging in punch needle crafting often leads to a sense of community among fellow crafters. It provides a platform for sharing knowledge, ideas, and completed projects with others who appreciate the art form, creating a sense of camaraderie.
Drawbacks of Using Punch Needle to Make Rugs

While punch needle is a popular and creative method for making rugs, it does come with some drawbacks that you should consider before starting a project.
Here are some of the drawbacks of using punch needles to make rugs:
Limited Durability
Punch needle rugs are generally less durable than traditional hooked or knotted rugs. The loops created by punch needles tend to be more delicate and can snag or unravel easily, especially in high-traffic areas.
Size Limitations
Creating large punch needle rugs can be quite time-consuming, and the process may become tedious for very large projects. Smaller to medium-sized rugs are more manageable.
Yarn Selection
The type of yarn you use can significantly impact the durability and longevity of the rug. It’s important to choose a strong and durable yarn, which may limit your color and texture options.
Cleaning Challenges
Cleaning punch needle rugs can be more difficult than traditional rugs. The loops can trap dirt and make vacuuming less effective. Cleaning a punch needle rug may require careful spot cleaning or professional cleaning services.
Uneven Pile
Achieving a perfectly even pile height can be challenging with a punch needle. Some areas of the rug may have longer or shorter loops, which can affect the overall appearance.
Not Ideal for All Designs
Punch needle is better suited for simple or abstract designs. Intricate or highly detailed patterns can be challenging to create, and the results may not be as precise as with other rug-making techniques.
Limited Pattern Variety
While there are punch needle patterns available, the variety may be more limited compared to other rug-making methods. This can restrict your creative options.
Expense
Quality punch needles, frames, and yarn can be expensive. When you add up the cost of materials and the time invested, punch needle rugs may not be the most cost-effective option.
Fraying Edges
The edges of a punch needle rug can be prone to fraying if not finished properly. You may need to add binding or other edge treatments to prevent this.
Skill and Patience Required
Punch needle rug making requires practice to master the technique, especially for achieving consistent pile height and tension. It can be frustrating for beginners.
Limited Versatility
Punch needle is primarily used for creating rugs, so it may not be the most versatile craft if you’re looking to make a wide range of textile items.
How to Make a Punch Needle Rug?

Making a punch needle rug is a creative and enjoyable craft project that allows you to create a beautiful and functional piece of home decor.
Punch needle rug making uses a special needle and fabric to create loops on a backing material.
Here’s a step-by-step guide on how to make a punch needle rug:
Materials and Tools:
- Punch Needle
- Monk’s Cloth or Rug Foundation Fabric
- Yarn
- Hoop or Frame
- Rug Gripper or Latex Rug Backing
- Sharp Scissors
- Pattern
Step-by-Step Instructions:
Prepare the Fabric
Begin by selecting a piece of fabric such as a monk’s cloth or rug warp. Ensure it’s larger than your intended rug size by a comfortable margin, usually a few inches on all sides. This extra fabric is essential for stretching and framing.
Once you have your fabric ready, secure it onto an embroidery hoop or frame. Make sure it’s taut but not overly stretched.
The goal is to maintain an even tension across the fabric to prevent distortion while punching the loops.
Thread the Punch Needle
Load your punch needle with the chosen yarn or fabric strips. Ensure the material is the appropriate thickness for the selected needle.
Depending on your design and the desired pile height, you may need to separate strands of yarn or cut fabric strips to the right length.
Be thoughtful about your color choices. The selection of colors and textures significantly contributes to the overall appearance of your rug.
Punching the Loops
To start creating your rug’s design, you’ll punch the loops row by row. Push the punch needle through the fabric while maintaining the desired pile height. Depending on your design, you can work in straight lines, curves, or other patterns.
You may find it helpful to use a ruler or straight-edge guide for straight-line designs to keep your loops neatly aligned.
As you punch, you’ll notice loops forming on the front side of the fabric, with the yarn or fabric strips being pulled through to the back.
Finishing
To prevent any loose ends of yarn or fabric strips from unraveling, secure them on the back of the rug using a sturdy thread. This step is essential to maintain the rug’s structural integrity.
Carefully weave these loose ends into the fabric on the back, ensuring they’re neatly hidden and won’t be visible from the front. This results in a clean and professional finish.
Backing
If you want to increase the durability and stability of your punch needle rug, especially for larger or high-traffic rugs, consider adding a backing.
You can attach a piece of fabric or non-slip material to the back of the rug using sewing or glue. This backing provides extra support and protects the loops.
Trimming
After you’ve completed your rug’s design, you might notice some loops that are longer than others, creating an uneven pile.
To achieve a consistent pile height, use sharp scissors to trim the loops carefully. Take your time with this step to ensure an even and professional appearance.
Be cautious not to cut too close to the fabric to avoid the risk of the loops unraveling.
Final Touches
With your punch needle rug now complete, give it a thorough inspection. Look for any loose threads or irregularities and make any necessary adjustments. This is your opportunity to ensure the rug is finished to your satisfaction and looks its best.
FAQS
Can I use recycled or upcycled materials for punch needle rugs?
Yes, you can use recycled materials like old T-shirts or fabric scraps to create eco-friendly punch needle rugs.
How do I avoid puckering or warping in my punch needle rug?
To prevent puckering or warping, make sure your base fabric is stretched evenly in the embroidery hoop or frame.
Maintain consistent tension while punching the loops, and periodically check for any distortions as you work.
What’s the best way to clean a punch needle rug?
Gently vacuum or shake your punch needle rug to remove loose dirt and debris. For deeper cleaning, spot-clean with a mixture of mild soap and water.
Can I make punch needle rugs with different pile heights in the same project?
Yes, you can vary the pile height in your punch needle rug by adjusting the depth setting of your punch needle.
Is it possible to incorporate mixed media into punch needle rug designs?
Absolutely! You can combine punch needles with other textile techniques like appliqué, embroidery, or fabric painting to add unique elements to your rug.
To Recap
Punch needle rug-making is a versatile and creative craft that allows individuals to transform their artistic visions into functional and decorative floor coverings.
With the right materials and technique, this method enables the creation of rugs with a unique texture and aesthetic.
Whether you’re a novice or an experienced crafter, the punch needle offers endless design possibilities, from simple geometric patterns to intricate motifs.
The process involves meticulous attention to detail, from fabric preparation and threading the needle to finishing touches.
By following these steps and honing your skills, you can craft stunning, custom punch needle rugs that add a personal and artistic flair to your living spaces.
Leave a Reply