Creating stunning reverse canvas wall art with a Cricut is a delightful fusion of traditional canvas work and modern technology. This inventive crafting technique involves transforming a conventional stretched canvas into a three-dimensional masterpiece.
By skillfully removing, decorating, and reattaching the canvas, you can produce a visually captivating piece that adds a unique flair to any space.
With the precision and versatility of a Cricut machine, intricate designs, personalized messages, and intricate patterns come to life, allowing you to express your creativity in a tangible form.
In this guide, we’ll walk you through the step-by-step process, revealing the secrets to crafting your own exquisite reverse canvas wall art.
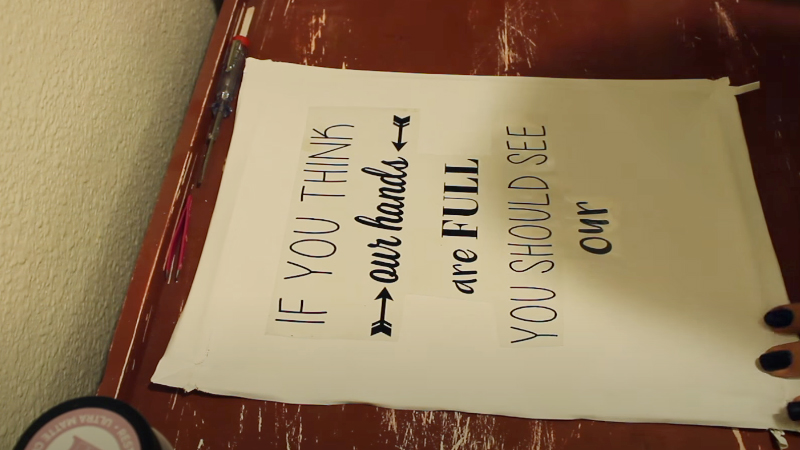
What Is Reverse Canvas Wall Art?
Reverse canvas wall art is a unique and creative crafting technique that involves repurposing a traditional stretched canvas. The process begins by removing the canvas fabric from the wooden frame, exposing the bare frame beneath.
The frame is then decorated, often through painting or applying vinyl designs, before reattaching the canvas in a way that conceals the staples, creating a polished finish.
The result is a visually striking piece of art with a dimensional quality, as the design is elevated above the frame. This technique provides ample room for personalization and customization, making it a popular choice for DIY home decor projects.
Reverse canvas wall art offers a blend of traditional canvas work with contemporary design, yielding a versatile and eye-catching display for any living space.
How to Make Reverse Canvas Wall Art With Cricut?
Reverse canvas wall art is a trendy and creative way to add a personal touch to your living space. It involves taking a pre-stretched canvas, removing the canvas fabric, and then decorating the wooden frame.
With the help of a Cricut machine, you can easily create intricate designs and phrases to make a unique piece of art.
Here’s a step-by-step guide on how to make reverse canvas wall art with a Cricut:
Materials Needed:
- Pre-stretched canvas
- Cricut cutting machine
- Adhesive vinyl or heat transfer vinyl
- Weeding tools
- Acrylic paint and brushes
- Staple gun and staples
- Sandpaper
- Design software compatible with Cricut
- Iron
Step-by-Step Guide:
Choose a Design
In Cricut Design Space, you have a plethora of options to choose from. Browse the extensive library of pre-made designs or unleash your creativity by designing your own.
When you’re using a custom design, ensure it’s appropriately sized for your canvas. Consider factors like the placement of your design – do you want it centered, off-center, or covering the entire frame?
Cut the Design
Load your chosen vinyl onto the cutting mat and feed it into your Cricut machine. Make sure the material is secured properly.
Set your machine to the appropriate material type, which will depend on the type of vinyl you’re using. Then, initiate the cutting process in the Cricut Design Space.
Weed the Vinyl
Weeding is a delicate process where you carefully remove the excess vinyl, leaving only your design intact on the backing paper.
Take your time and use the weeding tool to peel away any unwanted vinyl pieces. Pay special attention to fine details, ensuring they remain intact.
Prepare the Canvas
Turning the canvas over, you’ll find the back of the wooden frame. This is where you’ll remove the canvas fabric.
Using a staple remover or a flat-head screwdriver, gently pry out the staples holding the canvas in place. Be cautious not to damage the canvas if you wish to use it for future projects.
Paint the Frame
Here’s your opportunity to infuse your personal style into the piece. Select your acrylic paint colors and start applying them to the wooden frame. You might want to consider using a base coat if you’re going for a specific look.
Depending on your desired outcome, apply multiple coats and allow sufficient drying time between each coat. If you’re aiming for a distressed look, after the paint has dried, lightly sand the edges and corners.
Attach the vinyl
This step requires precision. Position your vinyl design on the canvas frame, adhesive side down. Take your time to ensure it’s centered and aligned properly.
Use a scraper tool to firmly adhere the vinyl to the wood. This ensures that the vinyl adheres securely and that there are no air bubbles or wrinkles.
When you’re using heat transfer vinyl, use an iron set to the appropriate temperature for the material. Apply even pressure over the entire design. Allow the vinyl to cool before gently peeling off the backing.
Secure the Canvas
With the vinyl design in place, trim any excess vinyl using sharp scissors or a craft knife. Once you’re satisfied with the placement, it’s time to reattach the canvas to the frame.
Use a staple gun to secure the canvas, pulling it taut to ensure a smooth finish. Staple along the edges of the frame, spacing them evenly.
Finish and Display
Inspect your artwork closely for any loose edges, air bubbles, or imperfections. Touch up any areas that need it.
Once you’re satisfied with the result, your reverse canvas wall art is ready to be proudly displayed in your living space. Consider your room’s decor and choose an appropriate location where it can truly shine.
Precautions for Attaching the Reverse Canvas Wall Art to the Frame
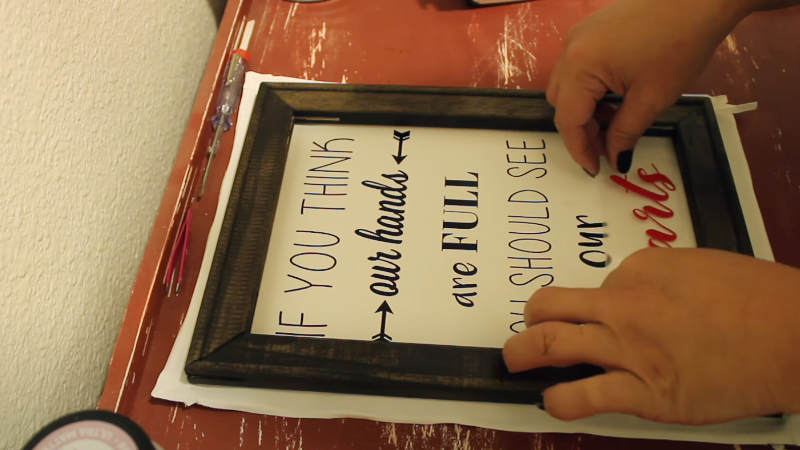
When attaching the reverse canvas to the frame, it’s important to take certain precautions to ensure a safe and successful process.
Here are some key precautions to keep in mind:
Use Safety Gear
Prioritize safety by wearing appropriate gear. Gloves protect your hands from potential staples or splinters, while safety glasses shield your eyes from any flying debris or accidental contact with the staple gun.
Secure Work Surface
A stable work surface is essential to prevent any unwanted movement or wobbling while attaching the canvas. Ensure your work area is level and secure to create a safe environment.
Mind the Staple Gun
Treat the staple gun with respect. Always maintain awareness of where it’s pointing and keep your fingers away from the trigger until you’re ready to staple. This minimizes the risk of accidental discharge.
Check Staple Length
Selecting the right staple length is crucial. Using staples that are too long may cause damage to the frame or create uneven tension in the canvas. Ensure the staple length is appropriate for the thickness of the wood.
Staple Away from Edges
Avoid stapling too close to the edges of the frame. Leaving a small margin helps maintain the structural integrity of the wood, preventing potential splintering or damage.
Pull Taut Carefully
When pulling the canvas fabric taut, do so gently. Avoid applying excessive force to prevent overstretching or tearing. Even pressure across the surface ensures a smooth and wrinkle-free finish.
Mind Your Fingers
Be cautious of your fingers’ placement while using the staple gun. Keep them well away from the area where the staples are being inserted to prevent accidental injuries.
Inspect for Sharp Edges
Before attaching the canvas, thoroughly inspect the frame for any sharp edges or splinters. Sand down any rough spots to ensure your fingers are protected during the attachment process.
Use a Flat Surface
Working on a flat surface is crucial for achieving even tension in the canvas. This prevents any warping or distortion during the attachment process, resulting in a professionally finished piece.
Check for Even Tension
Regularly assess the tension of the canvas fabric as you staple. This practice ensures that it’s stretched consistently across the frame, leading to a high-quality and polished end result.
Staple in a Well-Lit Area
Adequate lighting is essential to see clearly and prevent mistakes during the attachment process. Ensure your workspace is well-lit to maintain precision and accuracy.
Handle with Care
After attaching the reverse canvas, handle it with gentleness and care. Avoid putting undue pressure on the canvas or frame to prevent any accidental damage to the artwork or structure.
Different Types of Vinyl for Making Reverse Canvas Wall Art With Cricut
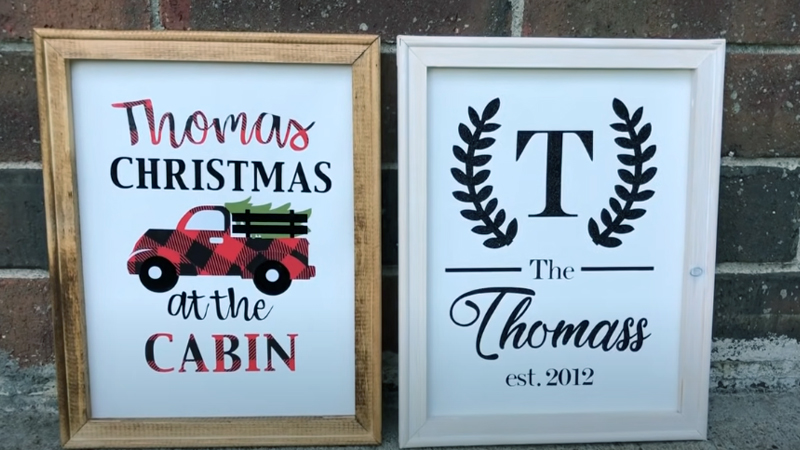
When making reverse canvas wall art with a Cricut, you have various types of vinyl to choose from, each with its unique characteristics and uses.
Here are some common types of vinyl for this crafting project:
Adhesive Vinyl
Adhesive vinyl is a versatile choice for reverse canvas projects. It comes in a wide range of colors and finishes, allowing you to create intricate designs and patterns.
With a sticky back, it adheres well to various surfaces when pressure is applied. This type of vinyl is ideal for adding detailed and colorful elements to your canvas artwork.
Heat Transfer Vinyl (HTV)
Heat Transfer Vinyl, also known as iron-on vinyl, is specially designed for fabric applications. It adheres to textiles using heat, making it perfect for creating custom designs on clothing, tote bags, and other fabric surfaces.
HTV comes in a variety of colors and finishes, giving you the flexibility to personalize your fabric projects with ease.
Permanent Vinyl
When you’re looking for a durable and long-lasting option, permanent vinyl is the way to go. It’s designed for outdoor use and can withstand exposure to the elements.
This type of vinyl is excellent for creating items like outdoor signs, car decals, and other applications that require a resilient adhesive.
Removable Vinyl
Removable vinyl is a temporary option that can be easily removed without leaving behind any residue or damaging surfaces. It’s a great choice for projects where you may want to change or update the design in the future.
This type of vinyl is often used for creating wall decals, seasonal decorations, or other temporary applications.
Patterned Vinyl
Patterned vinyl adds a unique and decorative element to your reverse canvas projects. It comes in various patterns, designs, and textures, allowing you to achieve a specific aesthetic without the need for additional painting or detailing.
This type of vinyl is perfect for creating eye-catching and intricate designs on your canvas artwork.
Glitter Vinyl
Glitter vinyl brings a touch of sparkle and glamour to your reverse canvas projects. It’s an excellent choice for adding a dazzling and festive element to your artwork.
Whether you want to create a statement piece or add a subtle glittery accent, this type of vinyl allows you to achieve a stunning and attention-grabbing effect.
Stencil Vinyl
Stencil vinyl is designed for creating reusable stencils. It provides precise and clean lines, making it an ideal choice for projects that involve painting or adding detailed designs to your canvas artwork.
With stencil vinyl, you can achieve professional-looking results without the need for freehand painting.
Chalkboard Vinyl
Chalkboard vinyl offers a writable surface that can be used with chalk or chalk markers. It’s a fun and interactive choice for creating customizable artwork.
Whether you want to display quotes, notes, or creative doodles, chalkboard vinyl provides a versatile and changeable canvas for your artistic expression.
Frosted Glass Vinyl
Frosted glass vinyl gives surfaces a translucent, frosted appearance. It’s often used for adding privacy to windows or creating a unique look on glass or acrylic sheets.
This type of vinyl provides a stylish and functional solution for enhancing the aesthetics of your canvas artwork.
Dry Erase Vinyl
Dry-erase vinyl features a writable surface that can be used with dry-erase markers. It’s perfect for creating interactive and functional artwork, such as calendars, to-do lists, or memo boards.
With dry-erase vinyl, you can add a practical and dynamic element to your canvas projects.
Glow-in-the-Dark Vinyl
Glow-in-the-dark vinyl has the unique ability to absorb light and emit a subtle glow in the dark.
It’s an imaginative choice for creating artwork that comes to life at night. This type of vinyl adds a whimsical and enchanting touch to your canvas artwork, making it stand out even in low-light conditions.
Troubleshooting Common Issues
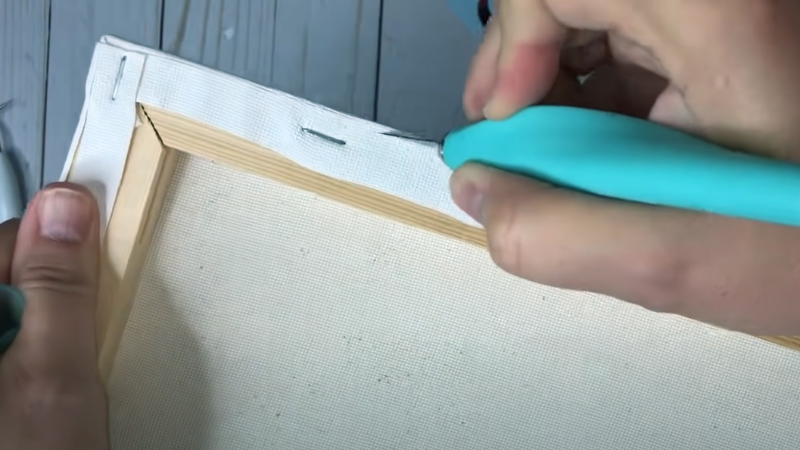
Creating reverse canvas wall art with a Cricut can be a fun and rewarding project, but like any DIY endeavor, you may encounter some common issues along the way.
Here are some troubleshooting tips for addressing these issues:
Vinyl Won’t Stick Properly
- Possible Cause: The surface of the wooden frame may not be clean or smooth enough.
- Troubleshooting: Clean the wooden frame thoroughly with a mild cleaner and allow it to dry completely. Sand any rough areas to create a smooth surface for better adhesion.
Vinyl is Peeling or Lifting
- Possible Cause: The vinyl may not have been applied with enough pressure or it might not have adhered properly during application.
- Troubleshooting: Use a scraper tool to apply more pressure when adhering the vinyl to the wood. Make sure to go over the entire design, paying extra attention to edges and fine details.
Air Bubbles Under the Vinyl
- Possible Cause: Air bubbles can occur if the vinyl isn’t applied smoothly or if there’s trapped air between the vinyl and the wood.
- Troubleshooting: Start from one end of the design and use a scraper tool to gently press out any air bubbles as you go. Work slowly and methodically to ensure a smooth application.
Design Isn’t Cutting Correctly
- Possible Cause: The cutting blade may be dull or not set to the correct depth.
- Troubleshooting: Check the blade for any signs of dullness and replace if necessary. Adjust the blade depth setting on your Cricut machine to ensure a clean cut.
Paint Bleeds Under the Vinyl
- Possible Cause: The paint may not have dried completely before applying the vinyl.
- Troubleshooting: Allow the paint to dry thoroughly before applying the vinyl. You can also use a light coat of clear sealant on the painted frame to create a barrier.
Vinyl Tears or Lifts During Weeding
- Possible Cause: The vinyl may be too intricate or the settings on the Cricut machine weren’t adjusted correctly.
- Troubleshooting: Choose a less intricate design or adjust the cut settings in Cricut Design Space to ensure the vinyl cuts cleanly.
The Canvas Fabric is Damaged
- Possible Cause: The canvas fabric may have been pulled or stretched too much during removal.
- Troubleshooting: Be gentle when removing the canvas fabric from the wooden frame. If it does get damaged, consider using a new piece of canvas or repurposing the frame for a different project.
Personalization and Creativity
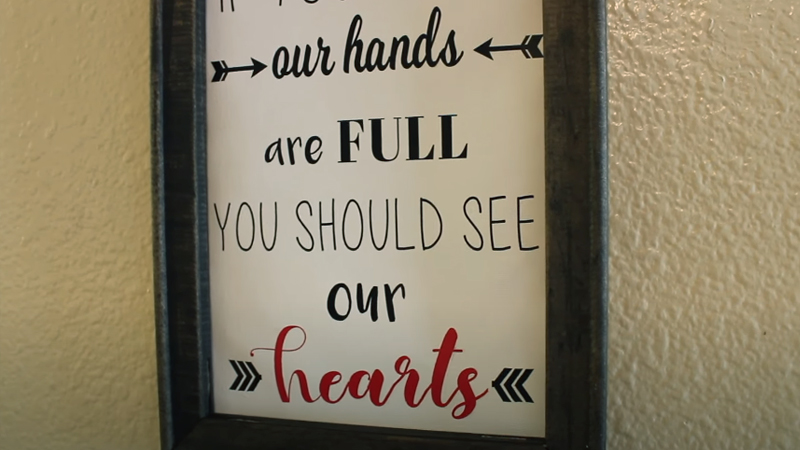
Making reverse canvas wall art with a Cricut offers a fantastic platform for personalization and creativity. It allows you to infuse your unique style and imagination into your home decor.
Here’s how personalization and creativity play a vital role in this craft:
Custom Designs
Creating reverse canvas wall art with a Cricut provides a canvas for your imagination.
Whether it’s a cherished quote, a favorite image, or a design that holds sentimental value, the possibilities are boundless. This process enables you to infuse your unique personality and style into your living space.
Color Palette
The selection of colors is a pivotal aspect of any artwork. With a Cricut, you have the autonomy to choose a palette that resonates with you.
You can opt for hues that harmonize with your existing decor or select shades that evoke specific emotions and atmospheres.
Mixed Media
One of the beauties of this craft lies in its versatility. In addition to vinyl designs, you can experiment with various artistic techniques. Consider incorporating hand-painted elements, stenciling, or even decoupage to add depth and texture to your canvas.
Typography Choices
Typography is a powerful design element that can convey messages, evoke emotions, and set the tone of a space.
With a Cricut, you have access to an array of fonts, sizes, and styles. This allows you to experiment and find the perfect typographic expression for your artwork.
Size and Shape
Reverse canvas art is incredibly adaptable. Whether you envision a grand statement piece or a series of smaller canvases, you have the freedom to choose the size and shape that best suits your vision.
This level of customization ensures that your artwork seamlessly integrates with your space.
Layered Designs
The Cricut’s layering capabilities open up a world of creative possibilities. You can layer different vinyl colors and materials to create intricate and multi-dimensional designs. This technique adds depth and visual interest to your artwork, making it truly captivating.
Seasonal and Themed Art
One of the joys of reverse canvas wall art is its ability to adapt to different seasons and occasions.
You can create themed pieces for holidays, birthdays, or special milestones. This dynamic aspect of the craft allows you to refresh and enliven your living space throughout the year.
Personalized Gifts
Reverse canvas art makes for exceptional and meaningful gifts. By tailoring your creations to the recipient’s interests, hobbies, or life events, you’re able to convey your love and appreciation in a tangible and enduring form. These personalized gifts become cherished keepsakes.
Embellishments
Small details can make a significant impact on the overall look and feel of your artwork. Consider adding embellishments like rhinestones, sequins, buttons, or ribbons. These elements introduce a touch of glamour, whimsy, or sophistication, depending on your artistic vision.
Experimentation
The creative process is all about exploration and discovery. Don’t hesitate to try out different techniques, such as distressing, splatter painting, or using textured backgrounds.
These experimental touches can yield surprising and delightful results, making your artwork truly one-of-a-kind.
Storytelling
Reverse canvas art provides a unique canvas for storytelling. You can create a series of canvases that weave together a narrative or convey a message that holds personal significance. Each piece becomes a chapter in the story you’re telling through your art.
Collaborative Art
Consider involving family members or friends in a collaborative reverse canvas project.
Each person can contribute their unique ideas and designs, resulting in a piece of art that reflects the collective creativity and shared experiences of the group.
Upcycling and Repurposing
An eco-conscious approach to this craft involves upcycling old or thrifted canvases.
By breathing new life into discarded or overlooked pieces, you not only add a personal touch but also contribute to sustainable and environmentally friendly practices.
Useful Tips for a Successful Project
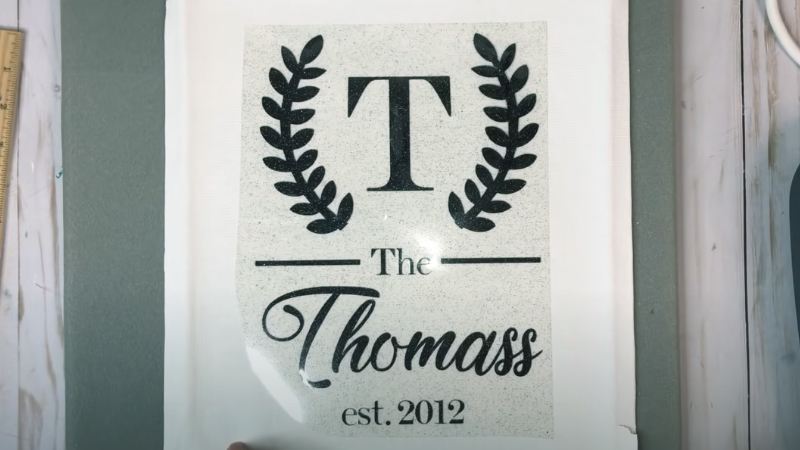
Creating reverse canvas wall art with a Cricut can be an enjoyable and rewarding DIY project.
To ensure a successful and satisfying outcome, here are some useful tips to guide you along the way:
Plan and Visualize
Start by sketching out your project or creating a mood board. Consider color schemes, textures, and overall layout. This planning phase helps solidify your vision and provides a clear roadmap for execution.
Gather Quality Materials
Invest in high-grade materials and tools specific to your project. Quality supplies not only enhance the final result but also make the process smoother and more enjoyable.
Read and Follow the Instructions
Whether it’s a new technique, a DIY kit, or a complex pattern, thoroughly read and understand the instructions before beginning. This prevents mistakes and ensures you’re on the right track.
Test and Experiment
Before committing to your main project, conduct small-scale tests. This allows you to familiarize yourself with techniques, troubleshoot potential issues, and refine your approach.
Take Your Time
Rushing through a project can lead to oversights and errors. Pay extra attention to details, especially during intricate or delicate steps. A patient approach results in a polished and professional finish.
Keep a Clean Workspace
Maintain an organized and clutter-free workspace. This not only promotes efficiency but also minimizes distractions and reduces the likelihood of accidents or mistakes.
Measure Twice, Cut Once
Double-check all measurements and placements before making any irreversible actions, such as cutting materials or attaching elements. Precision is crucial for a seamless and well-executed project.
Use Safety Gear
Depending on your project, ensure you’re equipped with the appropriate safety gear. Gloves, goggles, masks, and other protective equipment safeguard you from potential hazards.
Learn from Mistakes
Mistakes are a natural part of any creative process. Instead of becoming discouraged, view them as valuable learning opportunities. Analyze what went wrong and how you can improve in the future.
Embrace Creative Problem-Solving
Challenges and unexpected obstacles are common in creative projects. Approach them with an open mind and explore innovative solutions. Sometimes, thinking outside the box leads to the most ingenious outcomes.
FAQS
What is a reverse canvas wall art project with Cricut?
A reverse canvas wall art project involves repurposing a traditional stretched canvas by removing the canvas fabric from the wooden frame to create a visually striking piece of art.
Can I use any type of canvas for a reverse canvas project with Cricut?
Yes, you can use various types of canvases, including stretched canvases or canvas panels, for reverse canvas projects with Cricut.
What materials do I need for a reverse canvas project with Cricut?
You will need a canvas, vinyl for your design, paint or other decorative materials, a staple gun, safety gear, and a Cricut machine for cutting your design.
Is it necessary to seal the finished reverse canvas wall art?
Sealing the finished artwork with a clear sealant or varnish is optional but can help protect the art and enhance its longevity.
Do I need prior crafting experience to make reverse canvas wall art with Cricut?
No, you don’t need prior experience. Reverse canvas projects can be suitable for beginners with basic crafting skills.
To Recap
Creating reverse canvas wall art with a Cricut opens up a world of artistic possibilities. This innovative technique allows you to breathe new life into conventional canvases, transforming them into dynamic, three-dimensional pieces.
With careful planning, precision cutting, and creative flair, you can craft personalized artwork that reflects your unique style.
The combination of traditional craftsmanship and cutting-edge technology results in visually stunning and highly customizable pieces of decor. As you embark on your reverse canvas journey, remember that practice and experimentation are key to honing your skills.
Embrace the process, and let your imagination soar, for each creation is a testament to your creativity and craftsmanship.
Leave a Reply