Applying fabric glue on leather opens up a world of possibilities for repairs and crafting projects.
However, it’s crucial to approach this process with knowledge and care. This guide explores the compatibility of fabric glue with leather and outlines essential steps for successful bonding.
Each aspect is pivotal in achieving a durable bond, from surface preparation to choosing the right adhesive. Additionally, we address common mistakes to avoid and safety precautions to observe.
By following these expert recommendations, you’ll be equipped to execute leather gluing projects confidently and precisely, ensuring lasting and reliable results.
What Is Fabric Glue?
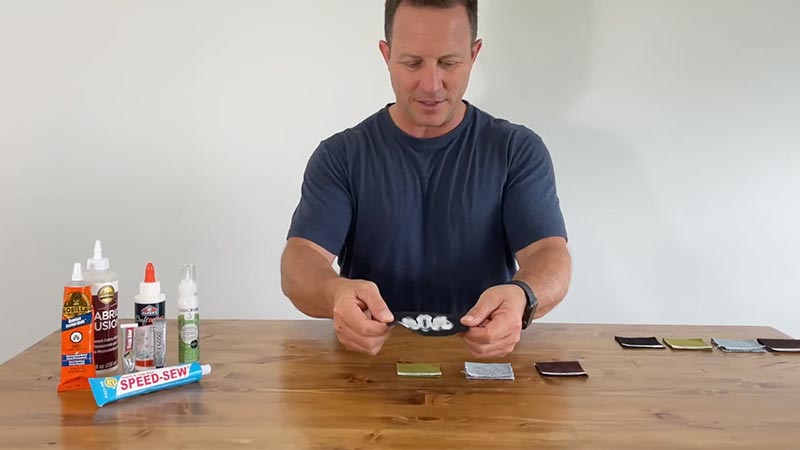
Fabric glue, also known as textile adhesive, is a specialized adhesive designed for bonding various types of fabrics together.
It is a flexible and versatile adhesive that can be used for various fabric-based projects, from clothing repairs to crafting endeavors.
Fabric glue is typically formulated to provide a strong and durable bond while remaining flexible, allowing the fabric to maintain its natural movement and drape.
Unlike traditional sewing methods, fabric glue offers a convenient and quick alternative for attaching fabric pieces without the need for needles and thread.
It is available in various formulations, including water-based, solvent-based, and heat-activated, catering to different fabric types and project requirements.
Does Fabric Glue Work on Leather?
Yes, fabric glue can work on leather, but some important considerations must be remembered.
Fabric glue can work on leather, but it may not be the most reliable or durable option compared to specialized leather adhesives.
Here’s a detailed explanation:
Suitability of Fabric Glue
Not all fabric glues are created equal. It’s essential to choose a fabric glue that is specifically designed to bond with leather. These formulations are engineered to adhere effectively to leather’s unique texture and composition.
Surface Preparation
Adequate preparation of the leather surface is pivotal for a successful bond. Before applying fabric glue, ensure the leather is clean and free from dirt, dust, or oils. Utilizing a leather cleaner or rubbing alcohol can help achieve this.
Preliminary Bond Test
As a precautionary measure, it’s advisable to test a small, inconspicuous area of the leather first.
Apply a small amount of fabric glue and allow it to dry. This will help confirm that the glue forms a secure bond without causing any harm or discoloration to the leather.
Application Technique
Apply the fabric glue sparingly to one of the leather surfaces you intend to bond. It’s crucial to adhere to the application guidelines provided by the manufacturer, as different fabric glues may have specific instructions. Generally, a thin, even layer of glue suffices.
Clamping or Pressing
After applying the glue, press the two leather surfaces together firmly. Use clamps or clips to maintain pressure on the pieces while the glue sets. This ensures a strong and uniform bond.
Drying Period
Fabric glues typically require some time to dry and reach their maximum bond strength. Adhere to the manufacturer’s recommended drying time, which can vary based on the type of glue. Avoid disturbing the bond during this phase.
Flexibility Consideration
Leather is inherently flexible and can undergo bending and stretching. Ensure that the fabric glue you choose can uphold its bond even when the leather is subjected to these movements. Some fabric glues are specially formulated for flexible materials like leather.
Durability Assessment
The bond’s longevity hinges on the fabric glue quality and the application process.
A well-executed fabric glue bond can be quite robust and long-lasting, although it may not match the durability of techniques like sewing or using dedicated leather adhesives in certain scenarios.
How to Glue Leather Guide?
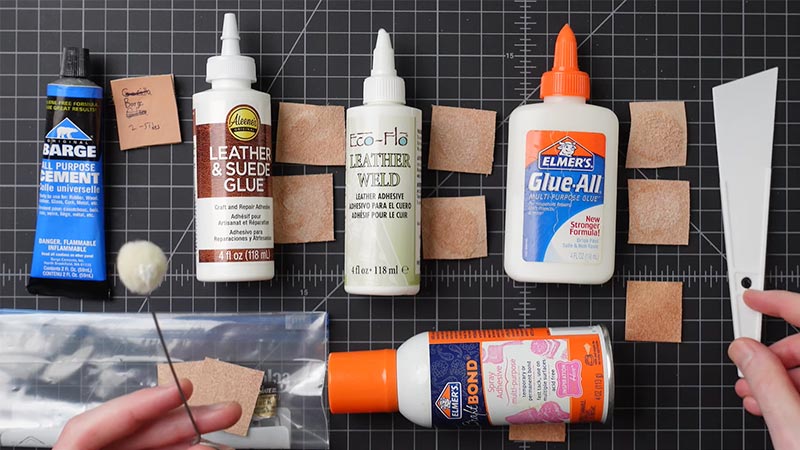
Gluing leather can be a practical solution for repairs or crafting projects, providing a strong and flexible bond when done correctly. However, it’s essential to use the right type of adhesive and follow proper techniques to ensure a successful outcome.
Here is a comprehensive guide on how to glue leather effectively:
Gather Your Materials:
Before you begin, make sure you have all the necessary materials on hand:
- Suitable leather glue
- Clean, dry leather pieces
- Clamps or clips
- Clean cloth or paper towels for any excess glue
Prepare the Leather Surface
Before applying any glue, it’s crucial to ensure the leather surface is clean and free from any contaminants. Begin by using a leather cleaner or a solution of rubbing alcohol and water (in equal parts) on a clean cloth.
Gently wipe down the entire area that will be glued, paying extra attention to seams or edges where dirt and oils tend to accumulate.
Select the Right Glue
Choosing the appropriate glue is paramount. For leather, opt for a high-quality adhesive that is explicitly designed for this material. Aleene’s Leather & Suede
Glue is a reliable choice, known for its compatibility with leather. Alternatively, polyurethane-based glues like Gorilla Glue or E6000 can also be effective, offering a strong, durable bond.
Perform a Test Bond
Prior to committing to the full application, conduct a test bond on a small, inconspicuous area of the leather. Apply a tiny amount of glue and press the surfaces together as you would in the actual project.
Allow it to dry according to the manufacturer’s instructions. This step is a precaution to ensure the glue adheres securely and does not cause any adverse effects to the leather.
Apply the Glue
With your chosen adhesive in hand, apply a thin, even layer to one of the leather surfaces you intend to bond. Take care to follow the specific instructions provided by the manufacturer.
In most cases, a small brush or applicator tip can assist in achieving a precise and controlled application.
Press the Leather Together
After applying the glue, promptly and firmly press the two leather surfaces together. This ensures the adhesive spreads evenly and maximizes contact with both surfaces.
When possible, utilize clamps or clips to hold the pieces in place during drying. This extra pressure enhances the strength and uniformity of the bond.
Allow for Drying Time
Different fabric glues have varying drying times, depending on their formulation and the materials being bonded.
Adhere strictly to the manufacturer’s recommended drying period. Avoid disturbing or manipulating the glued area during this time to allow the adhesive to set and achieve its optimal strength.
Check for Flexibility
After the glue has dried, carefully assess the flexibility of the bonded area. Gently bend and flex the leather to ensure the bond remains secure. High-quality fabric glues designed for leather should maintain their strength even under the stress of movement.
Clean Up Excess Glue
While the glue is still wet, use a clean cloth or paper towel to wipe away any excess adhesive. This step is crucial for achieving a clean, professional finish. Be meticulous in removing any visible traces of glue.
Final Inspection
Once the glue has fully dried, thoroughly inspect the bonded area. Ensure that the bond is strong and secure and meets your expectations regarding appearance and durability. This final inspection ensures that your leather project is ready for use or display.
Factors to Consider Before Using Fabric Glue on Leather
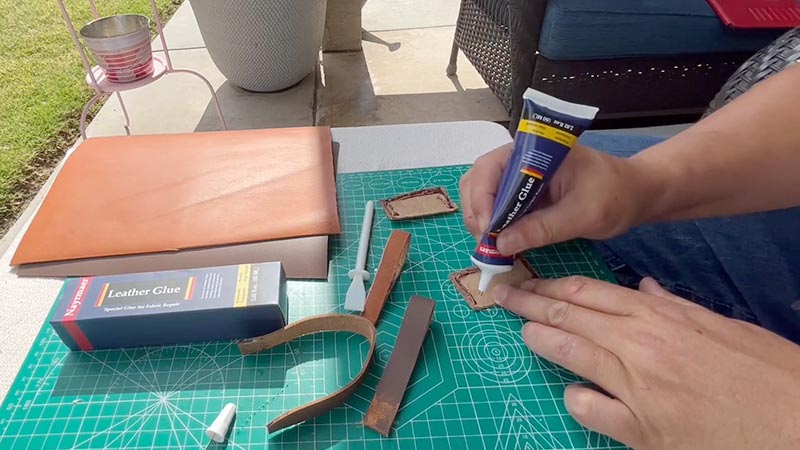
Before applying fabric glue on leather, it’s crucial to consider several factors to ensure a successful and durable bond.
Here are key aspects to keep in mind:
Type of Fabric Glue
Not all fabric glues are suitable for leather. It’s imperative to select a fabric glue specifically designed for bonding leather. These formulations are tailored to adhere effectively to leather’s unique texture and properties.
Surface Preparation
Adequate preparation of the leather surface is vital for a strong bond. Clean the leather thoroughly to remove any dirt, dust, or oils. This can be achieved using a leather cleaner or rubbing alcohol. Allow it to dry completely before applying the glue.
Test Bond
Perform a small-scale test on an inconspicuous area of the leather. Apply a small amount of fabric glue and allow it to dry to ensure that it bonds securely without causing any damage or discoloration to the leather.
Application Technique
Apply the fabric glue sparingly to one of the leather surfaces you intend to bond.
Follow the manufacturer’s instructions for application, as different fabric glues may have specific guidelines. Generally, a thin, even layer of glue is sufficient.
Clamping or Pressing
Press the two leather surfaces together firmly after applying the glue. Use clamps or clips to maintain pressure on the pieces while the glue dries. This ensures a strong and uniform bond.
Drying Time
Fabric glues have specific drying times to reach their maximum bond strength. Follow the manufacturer’s recommended drying time, which may vary depending on the type of glue used. Avoid disturbing the bond during this phase.
Flexibility
Leather is a flexible material that can bend and stretch. Ensure that the fabric glue you choose can maintain its bond even when the leather flexes. Some fabric glues are specially formulated for flexible materials like leather.
Durability
Consider the nature of your project and the expected wear and tear on the bonded area. While fabric glue can provide a strong bond, it may not be as durable as sewing or using specialized leather adhesives in high-stress applications.
Tips for Effective Leather Gluing
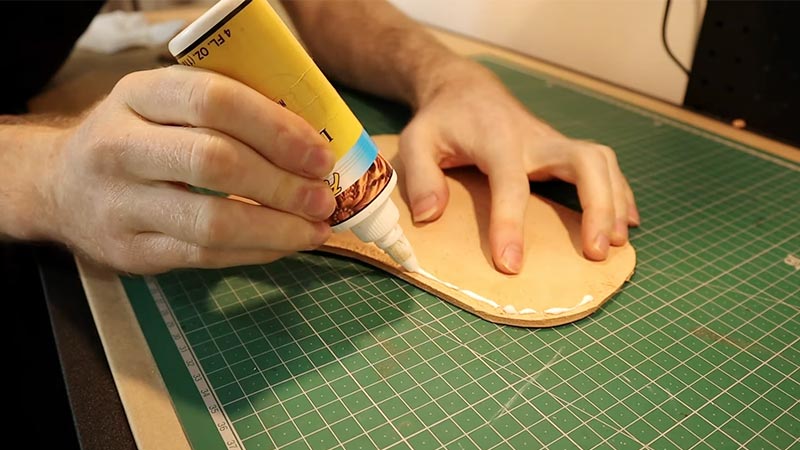
Achieving a strong and durable bond when gluing leather requires careful preparation and the right techniques.
Here are some essential tips to ensure effective leather gluing:
Select the Right Glue
Begin by choosing a high-quality adhesive specifically designed for leather. Opt for reputable brands like Aleene’s Leather & Suede Glue or polyurethane-based glues like Gorilla Glue. Ensure the glue suits the type of leather you are working with.
Proper Surface Preparation
Thoroughly clean the leather surface to remove any dirt, dust, or oils. Use a leather cleaner or a mixture of rubbing alcohol and water. Allow the leather to air dry completely before applying the glue.
Perform a Test Bond
Always conduct a small-scale test on a hidden area of the leather. Apply a small amount of glue and allow it to dry. This ensures the adhesive forms a secure bond without causing any harm or discoloration.
Apply a Thin, Even Layer
Use a brush or applicator to apply the glue in a thin, even layer on one of the leather surfaces. Follow the manufacturer’s instructions for application, ensuring not to use excessive amounts.
Press Firmly and Use Clamps:
After applying the glue, press the leather pieces together firmly. Utilize clamps or clips to maintain pressure while the glue sets. This promotes a strong and uniform bond.
Allow for Adequate Drying Time:
Different glues have varying drying times. Follow the manufacturer’s recommended period to allow the adhesive to reach its maximum strength. Avoid moving or manipulating the glued area during this time.
Check for Flexibility:
Ensure the bond remains secure even when the leather is bent or flexed. High-quality leather glue should maintain its strength under stress.
Clean Up Excess Glue:
Use a clean cloth or paper towel to remove any excess adhesive before dries. This ensures a clean and professional finish.
Common Mistakes How to Avoid Them
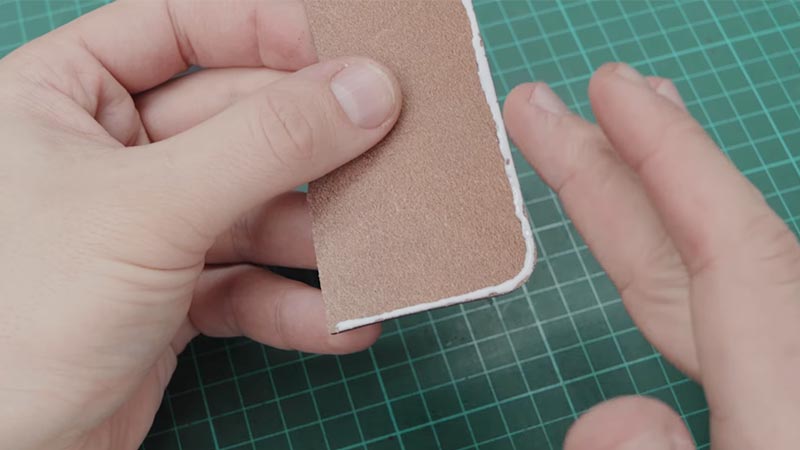
When working with leather and adhesive, there are several common mistakes that can occur.
Here’s how to avoid them:
Insufficient Surface Preparation
- Problem: Failing to clean the leather adequately can lead to poor adhesion. Dirt, dust, and oils on the surface can prevent the glue from bonding effectively.
- Solution: Thoroughly clean the leather with a leather cleaner or a mixture of rubbing alcohol and water. Allow it to dry completely before applying the glue.
Using the Wrong Type of Glue
- Problem: Using a fabric glue that is not designed for leather can result in a weak bond that may not withstand stress or wear.
- Solution: Choose a high-quality leather adhesive specifically formulated for bonding leather materials. Brands like Aleene’s Leather & Suede Glue or polyurethane-based glues like Gorilla Glue are suitable options.
Applying Too Much Glue
- Problem: Using excessive amounts of glue can lead to messy and uneven bonds. It may also take longer to dry, and excess glue may seep out, causing a messy finish.
- Solution: Apply a thin, even layer of glue using a brush or applicator. Follow the manufacturer’s instructions for application, and avoid using more glue than necessary.
Neglecting a Test Bond
- Problem: Skipping the test bond can lead to unexpected outcomes, such as poor adhesion, damage to the leather, or discoloration.
- Solution: Always test a bond on a hidden leather area before applying glue to the entire surface. This helps ensure the adhesive is suitable and won’t cause any harm.
Not Allowing Adequate Drying Time
- Problem: Rushing the drying process can result in a weaker bond. Moving or manipulating the glued area before it’s fully dried can compromise the strength of the adhesive.
- Solution: Follow the manufacturer’s recommended drying time. Avoid handling the glued area until it has dried completely.
Ignoring Flexibility Considerations
- Problem: Using a glue that doesn’t maintain its bond when the leather flexes can lead to the bond breaking over time.
- Solution: Ensure the fabric glue you choose is formulated to remain flexible, allowing the leather to bend and stretch without compromising the bond.
Safety Precautions When Using Fabric Glue
It’s important to follow safety precautions when using fabric glue to ensure a safe and effective application.
Here are some key safety measures to keep in mind:
Work in a Well-Ventilated Area
Ensure there is proper ventilation in the workspace. Open windows or use a fan to improve air circulation. This helps in minimizing exposure to fumes and ensures fresh air.
Wear Protective Gear
Consider wearing gloves to protect your skin from direct contact with the glue. Additionally, safety glasses can help shield your eyes from accidental splashes.
Avoid Ingestion and Contact with Eyes
Fabric glue should never be ingested. In case of accidental ingestion, seek medical attention immediately. Also, avoid direct contact with eyes. If contact occurs, rinse your eyes thoroughly with water and seek medical attention.
Keep Out of Reach of Children and Pets
Store fabric glue in a safe place, away from the reach of children and pets. Ensure that the container is tightly sealed when not in use.
Do Not Inhale Fumes
Some fabric glues may produce fumes, especially when applied in large quantities or in confined spaces. Avoid inhaling these fumes by working in a well-ventilated area.
Use in a Controlled Environment
Only use fabric glue in a controlled and organized workspace. Avoid working near open flames, heat sources, or any potential ignition hazards.
Clean Up Spills Immediately
In case of spills or accidental drips, clean them up promptly using a clean cloth or paper towel. Dispose of contaminated materials properly.
Avoid Overexposure
Prolonged or repeated exposure to certain types of fabric glue may lead to skin sensitization or irritation. If you notice any skin discomfort, wash the affected area thoroughly with soap and water.
Follow the Manufacturer’s Instructions
Always read and follow the instructions provided by the fabric glue manufacturer. This includes application guidelines, recommended drying times, and any specific safety precautions mentioned on the label.
FAQs
Can I use any fabric glue on leather?
No, choosing a fabric glue specifically designed for leather is essential. This ensures a strong and durable bond.
Do I need to prepare the leather surface before applying fabric glue?
Yes, proper surface preparation is crucial. Clean the leather thoroughly to remove dirt, dust, and oils using a leather cleaner or rubbing alcohol.
Should I perform a test bond before gluing leather?
Conducting a test bond on a small, inconspicuous area of the leather is recommended to ensure the glue adheres securely without causing any harm or discoloration.
How much fabric glue should I apply to leather?
Apply a thin, even layer of glue to one of the leather surfaces. Avoid using excessive amounts, as this can lead to messy and uneven bonds.
Can I reinforce the glued area with stitching for added strength?
For high-stress areas or projects that will face significant wear, consider reinforcing the bond with stitching. This provides extra strength and durability.
Wrap Up
Fabric glue can indeed work effectively on leather when used with careful consideration and proper technique.
Choosing the right type of fabric glue designed for leather is crucial. Surface preparation, including thorough cleaning and a test bond, ensures a strong adhesion.
The key steps include applying the glue in a thin, even layer and allowing sufficient drying time.
Clamping and maintaining flexibility in the bonded area enhance the durability of the bond. Additionally, considering stitching for reinforcement in high-stress areas is a valuable technique.
By adhering to these guidelines, one can successfully utilize fabric glue for various leather projects, from repairs to crafting endeavors.
Leave a Reply