Sewing, whether you’re a novice or an experienced seamstress, is a craft where precision and attention to detail can make all the difference. Among the essential techniques every sewist should have in their repertoire are seam trimming and grading.
These skills not only enhance the appearance of your creations but also contribute to a comfortable and durable finish.
In this guide, we’ll unravel how to trim and grade seams, breaking down the process step by step. Whether you’re working on a delicate silk blouse or a sturdy denim jacket, understanding how to trim and grade seams properly can elevate your sewing projects.
We’ll explore the tools you need, and the types of seams best suited for this technique, and provide practical tips to ensure your seams lie flat, feel comfortable against the skin, and withstand the test of time.

How To Trim and Grade Seams?
Trimming and grading seams is an essential skill in sewing and garment construction. These techniques help improve the overall appearance and fit of a garment while reducing bulk in seam allowances.
In this guide, we’ll walk you through the process of trimming and grading seams step by step.
Understand the Difference Between Trimming and Grading
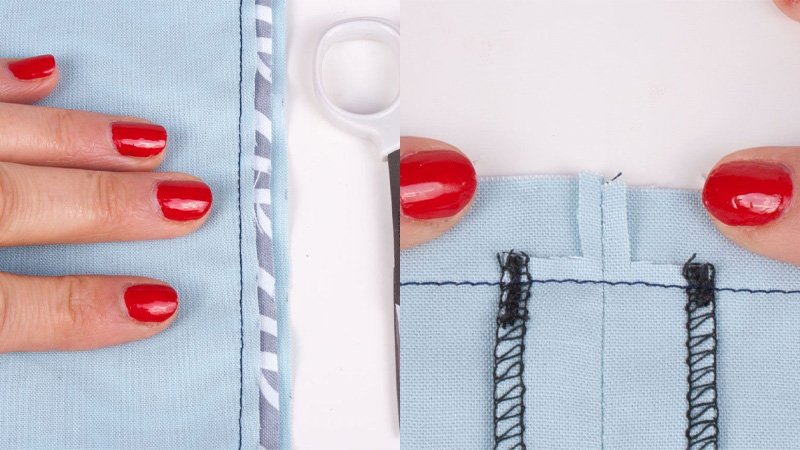
Trimming involves cutting away excess seam allowance to reduce bulk and achieve a smoother, flatter seam. It is typically done on curved seams or areas that require a neat finish.
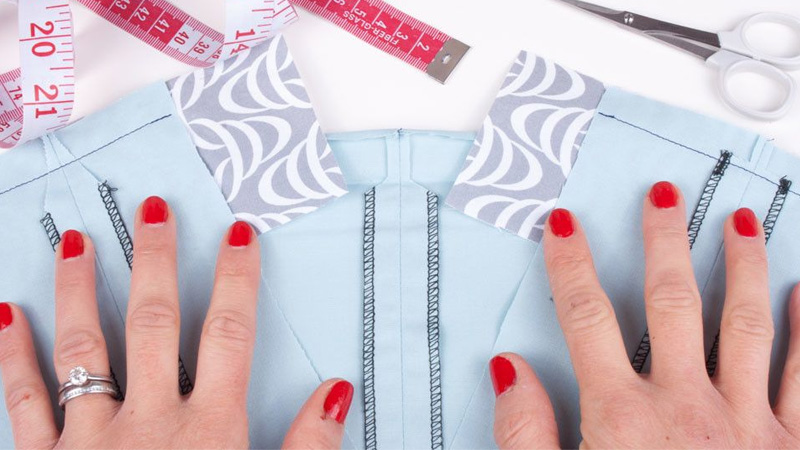
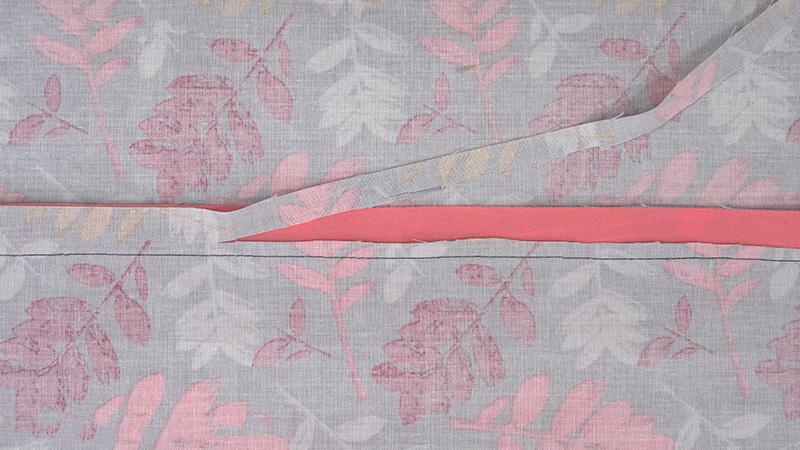
Grading involves reducing the width of seam allowances to create a smooth, even transition between layers of fabric. It is often used in areas where multiple seams intersect, like collars or cuffs.
Prepare Your Seams
After sewing your seam, press it flat with an iron to set the stitches and make the fabric lie flat. This will make it easier to trim and grade. Examine your seam allowance. If it’s too wide or if there are curves or corners, you’ll need to trim it.
Trimming Seams
Use your fabric scissors or rotary cutter to carefully trim away the excess fabric, leaving a seam allowance of about 1/4 inch (6mm) for lightweight fabrics and 1/2 inch (12mm) for heavier fabrics. Be careful not to cut into the stitches or the main fabric.
Grading Seams
Grading is typically done on curved or intersecting seams. It reduces bulk and creates a smoother finish. Identify the layers of fabric in your seam. Usually, you’ll have a main fabric and one or more lining or interfacing layers.
Using your fabric marker or chalk, mark the seam allowances at different widths. For example, if your main fabric has a 1/2 inch seam allowance, mark it at 1/4 inch for the first layer, and 1/8 inch for the next layer.
Carefully trim along the marked lines, ensuring you don’t cut through the main fabric layer. Repeat this process for all layers in the seam.
Press the Seams Again
After trimming and grading, press the seams once more to set everything in place. Use a pressing cloth if necessary to protect delicate fabrics. Depending on your project and fabric, you may want to finish the raw edges of the seam allowances to prevent fraying.
Tips to Follow
Take your time when trimming and grading seams, especially if you’re working with delicate or expensive fabrics. Use sharp fabric scissors or a rotary cutter to ensure clean cuts.
Practice on scrap fabric before working on your project to get a feel for the technique. Be consistent in your seam allowance widths to maintain a professional finish.
Common Mistakes to Avoid
Cutting too close to the stitching line can weaken the seam. Neglecting to grade seams in areas where it’s necessary, resulting in bulky, uneven layers. Rushing the process without pressing the seams, can lead to a less polished look.
By following these steps and practicing the techniques, you can enhance the fit, comfort, and overall quality of your garments. Remember to be patient and precise, as attention to detail is key in sewing.
What Are the Reasons for Trimming and Grading Seams?

Trimming and grading seams are important techniques in sewing and garment construction for several reasons:
Reducing Bulk
Trimming involves cutting away excess fabric from seam allowances, which helps reduce bulk in those areas.
This is especially crucial in tight-fitting garments or areas where multiple seams intersect, such as collars, cuffs, and princess seams. Reducing bulk ensures a smoother and more comfortable fit.
Enhancing Fit
Trimming and grading can improve the fit of a garment by reducing the thickness of seam allowances. This is particularly beneficial in areas like curved seams, where bulky allowances can distort the shape and fit of the garment.
Creating a Neat Finish
Trimming seams result in a cleaner, more polished appearance on both the inside and outside of the garment. This is especially important for visible seams in tailored clothing, where a neat finish contributes to a professional look.
Preventing Seam Impression
In some cases, bulky seam allowances can leave impressions on the right side of the fabric, especially when working with delicate or lightweight fabrics. Trimming the seams helps prevent these impressions and maintains a smooth surface.
Reducing Friction and Irritation
Excessive seam allowance bulk can cause discomfort or chafing when the garment is worn. Trimming and grading alleviate this issue, making the garment more comfortable to wear.
Achieving a Flatter Seam
Grading, in particular, involves reducing the width of seam allowances on multiple layers of fabric, creating a smoother transition between layers. This is crucial for areas like collars, cuffs, and lapels, where a seamless, flat appearance is desired.
Improving Durability
Trimming and grading can also contribute to the longevity of a garment. By reducing bulk, there is less strain on the seams, reducing the risk of seam failure or fabric damage over time.
Creating a Professional Finish
When sewing for yourself or others, achieving a professional finish is often a goal. Properly trimmed and graded seams contribute to this goal by giving your garments a polished, high-quality appearance.
Sewing Precision
Trimming and grading require attention to detail and precision, which are valuable skills in sewing. These techniques teach you to pay close attention to seam allowances, ensuring that your sewing is accurate and consistent.
Trimming and grading seams are essential techniques that serve both functional and aesthetic purposes in sewing. They help reduce bulk, improve fit, create a neat finish, and enhance the overall quality and comfort of garments.
By mastering these techniques, you can elevate your sewing projects to a more professional level.
How to Fix Uneven Layers While Trimming and Grading Seams?

Fixing uneven layers while trimming and grading seams is important to ensure a smooth and polished finish in your sewing projects. Here’s how you can address this issue:
Identify the Problem
To identify the issue, carefully inspect your seam allowances to identify areas where the layers are uneven. Uneven layers can result from inaccurate cutting or sewing.
Unpick Stitches (if necessary)
If you notice that the uneven layers are a result of incorrect stitching or misalignment, you may need to unpick the stitches in that area. Use a seam ripper to carefully remove the stitches, allowing you to reposition the fabric layers correctly.
Realign the Layers
Once you’ve unpicked the stitches in the problematic area, realign the fabric layers so that they match up accurately. Pay attention to any notches, markings, or seam lines on your pattern as guides.
To secure the layers in place and prevent further shifting, use pins or temporary basting stitches. Make sure the layers are aligned properly and that there are no wrinkles or folds between them.
Adjust Your Trimming and Grading
If you have already trimmed or graded the seam allowances in the uneven area, you may need to adjust them to match the corrected alignment of the layers.
This may involve trimming or grading a bit more in some spots or leaving more fabric in others to achieve even seam allowances.
Re-Press the Seams
After making the necessary adjustments, re-press the seams to set the stitches and ensure the layers lie flat. Use an iron with the appropriate heat setting for your fabric, and consider using a pressing cloth to protect delicate fabrics.
Check for Smoothness
Run your fingers along the seam to check for any remaining unevenness or bumps. If you feel any, go back and make additional adjustments, either by trimming, grading, or repositioning the layers.
Depending on your project, you may want to finish the raw edges of the seam allowances to prevent fraying. This step can also help secure the layers and maintain evenness.
Double-Check Your Work
Once you’re satisfied with the correction, double-check the entire seam to ensure that the layers are even and the seam allowances are consistent. This thorough inspection will help you catch any potential issues before moving on to the next steps of your project.
Practice and Patience
Keep in mind that achieving even layers during trimming and grading takes practice and patience. Don’t be discouraged if it doesn’t go perfectly the first time. With experience, you’ll become more skilled at identifying and correcting unevenness in your seams.
Fixing uneven layers while trimming and grading seams involves careful inspection, realignment of fabric layers, adjustments to your trimming and grading, and thorough quality control.
By following these steps and practicing your sewing skills, you’ll be better equipped to achieve a smooth and professional finish in your projects.
FAQs
What is the purpose of seam allowances in sewing?
Seam allowances are the extra fabric between the stitching line and the raw edge of the fabric. They serve several purposes, including providing structural integrity to seams, allowing for adjustments, and reducing fraying.
How do I choose the right seam allowance width for my sewing project?
The choice of seam allowance width depends on your specific project and the pattern you’re using. In general, 5/8 inch (1.5 cm) is a standard seam allowance for most sewing patterns. However, it can vary, so always refer to your pattern’s instructions.
What are some common seam finishes to prevent fraying?
There are various seam finishing techniques to prevent fraying, including serging (overlocking), zigzag stitching, pinking shears, and French seams. The choice of finish depends on your fabric type and the look you want to achieve.
When is it necessary to use interfacing in sewing projects?
Interfacing is a stabilizing material used to provide structure, support, and shape to certain areas of a garment, such as collars, cuffs, and waistbands. It’s especially important in projects where you need added rigidity or reinforcement.
What’s the difference between trimming and clipping seams?
Trimming involves cutting away excess seam allowance fabric to reduce bulk. Clipping refers to making small cuts into seam allowances, typically on curved seams, to allow the fabric to lie flat without puckering.
Conclusion
In the world of sewing, the devil truly is in the details, and mastering the art of seam trimming and grading can transform your creations from good to exceptional. As we conclude our journey through this comprehensive guide, it’s essential to recap the key takeaways.
Seam trimming involves reducing bulk and eliminating excess fabric, while grading ensures that the seam allowances are staggered, creating a smoother, more comfortable finish.
By choosing the right tools, selecting appropriate seams, and following our step-by-step instructions, you can achieve polished, professional results every time.
Remember, practice makes perfect. Don’t be discouraged if your first attempts aren’t flawless. With dedication and patience, you’ll soon find yourself confidently trimming and grading seams with precision.
Now armed with this knowledge, go forth and elevate your sewing projects. Whether you’re fashioning garments, crafting home decor, or tackling any sewing endeavor, the techniques you’ve learned here will be invaluable.
Leave a Reply