The art of appliqué, a timeless and versatile fabric embellishment technique, entails layering one piece of fabric onto another to create intricate designs and patterns.
Yet, a critical step in perfecting this craft lies in finishing the edges of the appliqué. This process not only ensures the durability of the piece but also significantly contributes to its visual appeal.
The approach you choose for edge finishing can range from meticulously folding and hand-stitching the edges to create a seamless look, to opting for a more relaxed, raw edge finish with machine-stitched embellishments.
In this exploration, we’ll delve into the various methods and techniques used to achieve that polished and professional finish for your appliqué creations.
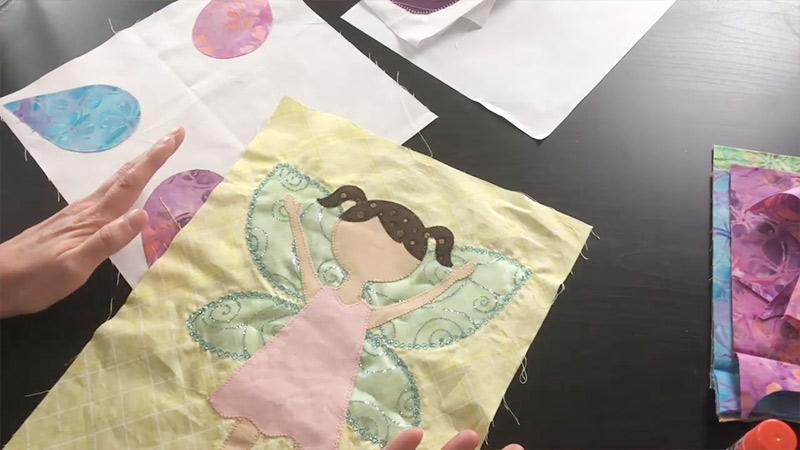
How Do You Finish the Edges of an Appliqué?
Finishing the edges of an appliqué is an essential step in creating a polished and professional-looking piece of fabric art.
Appliqué is a decorative technique in which one piece of fabric is layered onto another to create a design or pattern.
Whether you’re working on a quilt, clothing, or any other fabric project, there are several methods you can use to finish the edges of your appliqué, ensuring that they are secure, neat, and aesthetically pleasing.
Here are some common techniques on how to finish applique edges:
Turned Edge Appliqué
Turned edge appliqué is a meticulous technique that involves folding the raw edges of the appliqué fabric under and then stitching it to the base fabric.
This method creates a clean and seamless look. For hand appliqué, you’ll need to use a needle-turn technique, where you carefully fold and stitch the fabric by hand.
On the other hand, machine appliqué utilizes a sewing machine to stitch the folded edges neatly. This method is often preferred for intricate designs and delicate fabrics, ensuring a crisp, tailored finish.
Raw Edge Appliqué
Raw edge appliqué takes a more relaxed approach, leaving the edges of the appliqué fabric intentionally unfinished for a textured look.
After placing the appliqué in position, you can secure the raw edges using various stitching methods on your sewing machine.
A zigzag stitch is commonly used, but a satin stitch or a decorative stitch can provide added flair.
Raw edge appliqué is ideal for modern or artistic projects and is relatively quicker than turned edge appliqué.
Fusible Appliqué
Fusible appliqué involves using fusible web or interfacing to adhere the appliqué piece to the base fabric.
The edges are typically left raw in this method. After fusing, you can add decorative stitching using your sewing machine to both secure the edges and enhance the design. It’s a convenient method, especially for projects where a quick, no-sew solution is desired.
Blanket Stitch or Satin Stitch
These stitches are common choices for securing the edges of appliqué pieces. A blanket stitch features a series of closely spaced stitches, often forming a scalloped appearance. It adds a rustic and decorative touch.
On the other hand, a satin stitch involves closely spaced parallel stitches that cover the raw edge completely, providing a smoother and polished appearance. The choice between these stitches depends on the desired look for your project.
Invisible Appliqué
Invisible appliqué, or needle-turn appliqué, is a labor-intensive technique that requires precision and patience.
In this method, you fold the raw edges of the appliqué fabric so that they are completely hidden. You then hand-stitch the folded edge in place.
This meticulous process results in a clean, seamless look, making the stitches virtually “invisible.” It’s a preferred technique for traditional and heirloom-quality projects.
Reverse Appliqué
Reverse appliqué involves creating a design by cutting through the top layer of fabric to reveal the contrasting fabric underneath.
The raw edges are typically left exposed to add an intentionally frayed or distressed appearance. Alternatively, you can finish the raw edges with decorative stitching to enhance the design and provide extra durability.
Pinking Shears
Pinking shears have serrated blades that can be used to cut the edges of the appliqué fabric. While this doesn’t secure the edges, it helps prevent fraying and adds a decorative touch.
Pinking shears work well for projects that have a more casual or vintage aesthetic and where you want to reduce fraying without applying additional stitching.
Hand Embroidery
Hand embroidery offers a creative and unique way to secure the edges of your appliqué pieces. You can use various embroidery stitches, such as the blanket stitch, whipstitch, or running stitch, to both secure the edges and add decorative elements to your project.
Hand embroidery allows for personalization and customization, giving your appliqué a distinctive, handmade touch.
How to Hand Sew Applique Onto Fabric?
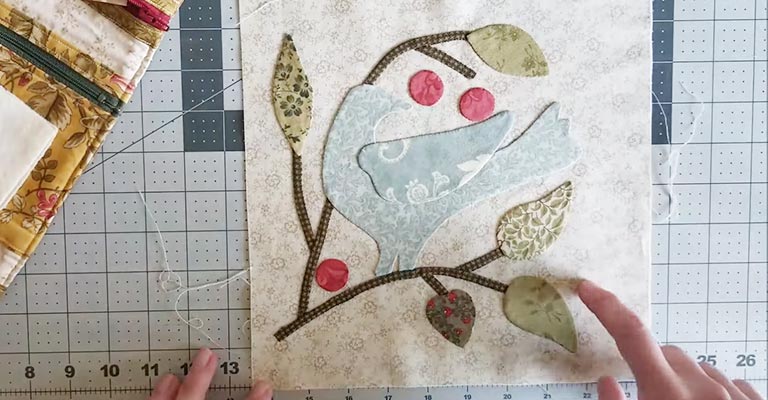
Hand sewing appliqué onto fabric is a traditional and creative technique that allows you to add intricate and decorative designs to various projects like quilts, clothing, or home decor items.
Here’s a step-by-step guide on how to hand sew appliqué onto fabric:
Materials You’ll Need:
- Fabric
- Thread
- Needles
- Scissors
- Pins
- Thimble
- Fabric Marker or Chalk
Steps to Hand Sew Appliqué:
Prepare Your Materials
Start by cutting out the appliqué pieces from your chosen fabric. Arrange these pieces on the base fabric to determine their exact placement and ensure the design layout is to your satisfaction.
Mark the outlines of the appliqué pieces on the base fabric using a fabric marker or chalk. This step provides you with a clear guide for your stitching.
Pin the Appliqué Pieces
Carefully secure the appliqué pieces onto the base fabric using straight pins. Ensure that the pieces are aligned with the marked outlines and are positioned exactly as you’d like them to appear in the final design. Pinning helps keep the pieces in place as you sew.
Thread Your Needle
Cut a length of thread (usually around 18 inches) and thread it through the eye of your needle. Tie a knot at the end of the thread to prevent it from pulling through the fabric as you sew. The knot should be secure but not too bulky.
Begin Stitching
Start your stitching journey on the edge of one of the appliqué pieces. Insert the needle from the backside of the base fabric to the front, ensuring that the knot is hidden underneath and doesn’t show on the right side of the fabric.
Then, gently bring the needle up to the front, catching a tiny bit of the edge of the appliqué piece. Pull the thread through, being careful not to pierce the top layer of the appliqué fabric.
Continue stitching along the edge of the appliqué piece using your chosen stitch, whether it’s a basic running stitch or a more decorative one like a blanket stitch or a whip stitch.
Stitch Around the Appliqué
As you progress, keep your stitches even and secure. Maintain a consistent distance between stitches for a tidy finish. If you’re using a decorative stitch, make sure the stitches are uniform in size and evenly spaced.
Corners and Curves
Adjust your stitching technique when you encounter corners or curves. When reaching a corner, take a few small backstitches at the turn to secure the thread. For curves, create smaller, closely spaced stitches to follow the shape smoothly.
Finishing the Stitching
To secure your thread and prevent it from unraveling, either make a small knot on the backside of the fabric or take a few backstitches in the same spot. Trim any excess thread, making sure it’s neat and inconspicuous.
Repeat for All Appliqué Pieces
Following the same process, continue sewing all the appliqué pieces onto the base fabric. This may involve repeating steps 4 to 7 for each piece. Take your time to ensure each piece is securely and neatly attached.
Final Touches
Once all the appliqué pieces are sewn onto the base fabric and you’re satisfied with the design, remove the straight pins that were securing the pieces in place.
To give your project a professional finish, press it with an iron, using a pressing cloth to protect delicate fabrics. This will help flatten and set the stitches.
How to Keep Raw Edge Applique From Fraying?
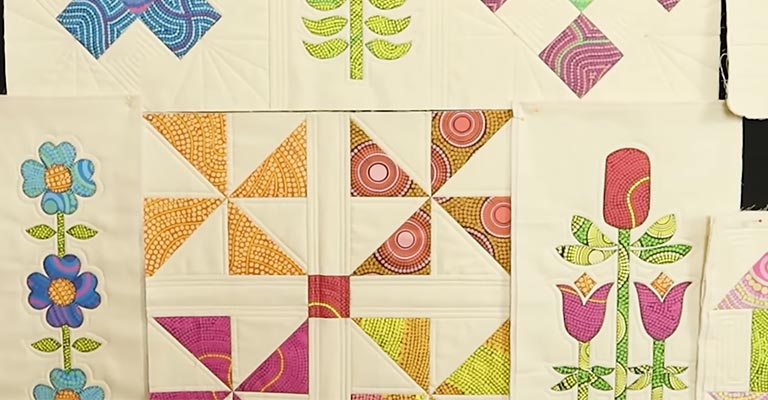
Raw edge appliqué is a technique that leaves the edges of the fabric exposed for a textured and casual look.
To prevent the raw edges from fraying and ensure the longevity of your appliqué design, you can follow these methods:
Use Pinking Shears
Pinking shears have zigzag or scalloped blades that can be used to cut the edges of your appliqué fabric.
This type of cut helps prevent fraying by limiting the length of exposed threads. Be sure to cut the fabric with pinking shears before applying it to your project.
Apply Fray Check or Fray Block
Fray Check and Fray Block are liquid seam sealants that can be applied to the raw edges of your fabric. Simply run a thin bead of the product along the edge of the fabric, and it will dry clear and flexible. This helps to bond the fibers and reduce fraying. Allow it to dry completely before using the fabric.
Use Fabric Glue
A small amount of fabric glue, like washable fabric glue, can be applied along the raw edges. Be careful not to use too much, as it might seep through the fabric or create stiffness. Allow the glue to dry completely before working with the fabric.
Machine Stitch with a Zigzag Stitch
You can use a sewing machine to stitch around the raw edges with a zigzag stitch. The zigzag stitch helps secure the fabric’s threads and minimizes fraying.
Adjust the stitch width and length according to your preference, but a slightly wider and shorter zigzag usually works well for this purpose.
Use an Overcasting Stitch
Some sewing machines have an overcasting or serger stitch option. This stitch type is designed to encase and secure the raw edges, preventing fraying. If your sewing machine has this feature, it’s an effective way to finish raw edge appliqué.
Apply Heat-Bonding Interfacing
Another method to prevent fraying is to apply heat-bonding interfacing to the back of the fabric before cutting out your appliqué pieces.
This extra layer will help stabilize the fabric and minimize fraying when you’re working with raw edge appliqué.
Wash and Dry
After you’ve applied one of the above methods, washing and drying your project can further help secure the raw edges. The agitation in the washing machine and the heat from the dryer can help seal the edges.
How to Do Raw Edge Applique?
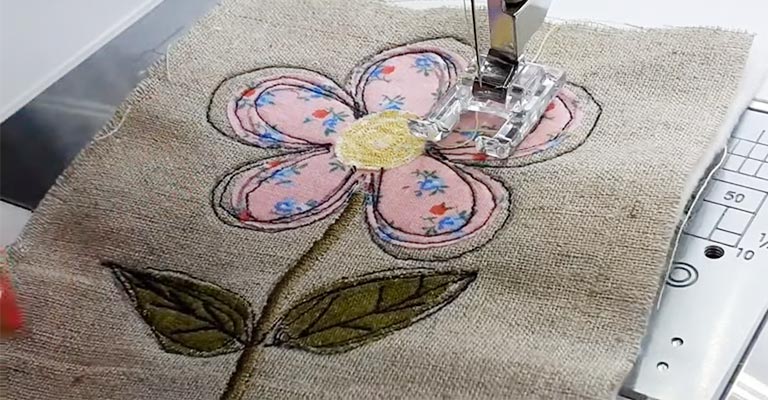
Raw edge appliqué is a fabric embellishment technique that leaves the edges of the fabric exposed for a textured and casual look.
Here’s a step-by-step guide on how to do raw edge appliqué:
Materials You’ll Need:
- Base Fabric
- Appliqué Fabric
- Thread
- Needles
- Scissors
- Pins
- Fabric Marker or Chalk
Steps to Do Raw Edge Appliqué:
Design Planning
Determine your appliqué design and decide where you want to place it on the base fabric. Mark the design’s outline on the base fabric using a fabric marker or chalk.
Prepare Appliqué Fabric:
Cut out the shapes or pieces you need for your design from the appliqué fabric. These pieces will be the raw edge appliqué elements.
Pin Appliqué Pieces
Secure the appliqué pieces on the marked design areas of the base fabric using straight pins. Ensure the pieces are aligned with the marked outlines and positioned as desired.
Stitching Method
Choose your preferred method of stitching. Raw edge appliqué can be done with either hand-stitching or machine stitching.
- Hand Stitching: If hand-stitching, use a basic running stitch or a decorative stitch (such as a blanket stitch or a whipstitch) to secure the appliqué pieces to the base fabric. You’ll be sewing along the edges of the appliqué pieces, keeping the stitches relatively close together.
- Machine Stitching: If machine stitching, set your sewing machine to a straight or zigzag stitch, and carefully sew along the edges of the appliqué pieces. Adjust the stitch length and width to your preference.
Stitch Around Appliqué Pieces
Start at one end of an appliqué piece and begin stitching along its edge. Ensure that your stitches are close to the raw edge to secure it. Continue stitching around each appliqué piece.
Corners and Curves
Adjust your stitching technique when you come to corners or curves. For corners, take a few small backstitches to secure the thread. For curves, make smaller stitches to follow the shape smoothly.
Secure and Finish Stitching
To secure your stitching, either make a small knot on the backside of the fabric or take a few backstitches. Trim any excess thread, ensuring a neat and concealed finish.
Repeat for All Appliqué Pieces
Continue sewing all the appliqué pieces onto the base fabric, following the same process. Remove the pins as you go.
Final Touches
Give your project a final press with an iron to flatten and set the stitches. This also helps bond the raw edges of the appliqué pieces and minimizes fraying.
Applique and Embroidery Originals
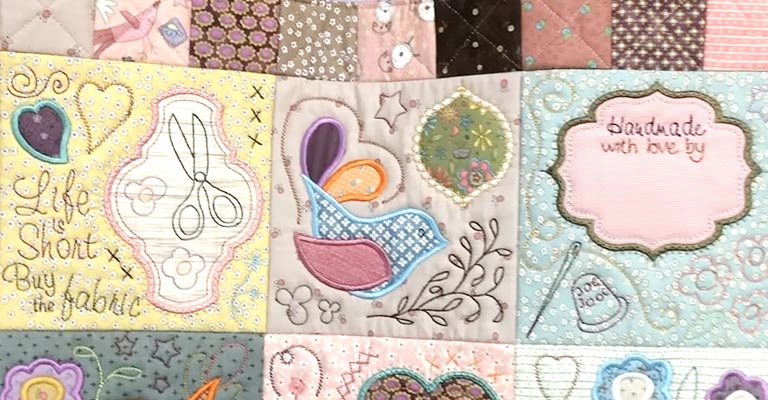
“Appliqué and Embroidery Originals” is a creative and artistic technique that combines two distinct forms of textile embellishment to produce stunning and unique designs.
Appliqué involves attaching small pieces of fabric onto a larger fabric background to create decorative patterns, while embroidery encompasses the art of stitching intricate designs with colored threads.
When these two techniques are harmoniously integrated, they result in visually captivating and distinctive works of art.
The term “originals” in “Appliqué and Embroidery Originals” signifies the uniqueness and creativity that artisans bring to their work.
These crafts are not merely about copying existing designs but rather about expressing one’s individuality and imagination.
Here’s an overview of each component:
Appliqué
Appliqué is a versatile method that enables artisans to incorporate a wide range of fabrics, colors, and textures into their work.
This technique can be traced back to ancient civilizations, where it was used to decorate clothing, accessories, and home textiles. Today, it remains popular in various cultures worldwide.
Appliqué involves cutting out fabric shapes, such as flowers, animals, or geometric designs, and sewing them onto a base fabric.
These fabric shapes can be layered, overlapped, or arranged in patterns to create a three-dimensional effect. The result is a visually striking piece that adds depth and dimension to the fabric.
Embroidery
Embroidery, on the other hand, is an art form where intricate designs are created by hand or machine using various stitching techniques.
Embroidery can add rich detail and texture to the fabric, enhancing its aesthetic appeal. Different types of stitches, such as satin stitch, chain stitch, and cross-stitch, can be used to create everything from simple monograms to complex, multi-colored scenes.
Embroidery is often used to enhance appliqué designs by adding fine details and ornamentation. This can include outlining the appliquéd shapes, filling them with intricate patterns, or adding personalized elements.
When these two techniques are combined, the possibilities for artistic expression are virtually limitless.
Appliqué and embroidery originals can take various forms, including:
- Clothing: Appliqué and embroidery are frequently used to adorn garments like jeans, t-shirts, jackets, and dresses. These customized pieces can reflect the wearer’s personality and style.
- Home Décor: From decorative throw pillows to bed linens and wall hangings, appliqué and embroidery can transform the ambiance of living space by adding personalized and artistic touches.
- Accessories: Bags, hats, and scarves can be transformed into unique fashion statements through the integration of these techniques.
- Art Pieces: Many artisans create original works of art using appliqué and embroidery, pushing the boundaries of traditional textile art.
- Quilts: Quilting often combines appliqué and embroidery to create intricate and beautiful designs on quilted blankets.
Frequently Asked Questions
What is an appliqué quilt?
An appliqué quilt is a type of quilt that features fabric shapes or designs sewn onto a quilt top. These shapes are typically cut from different fabrics and then stitched onto a background fabric, creating decorative patterns and images.
What is turned edge appliqué?
Turned edge appliqué is a technique used in fabric art where the raw edges of fabric pieces are carefully folded under and then stitched to a base fabric, creating a neat and seamless look. This method is often employed in quilting and fabric projects for precise, intricate designs.
Can I use regular fabric scissors to finish the edges of my appliqué?
While regular fabric scissors can work, it’s recommended to use pinking shears or apply a finishing technique to prevent fraying, especially in raw edge appliqué.
Are there specific thread types or weights that work best for edge finishing in appliqué?
It’s best to use a thread that matches your fabric. For edge finishing, a standard 50 or 60-weight cotton or polyester thread is often a good choice.
Last Words
The art of finishing the edges of an appliqué is a crucial step in fabric design and crafting. Whether you opt for the precise elegance of turned-edge appliqué, the casual charm of raw edge appliqué, or any other method, each choice contributes to the character and durability of your project.
The technique you select should align with the project’s purpose and your creative vision. Attention to detail, practice, and patience are your allies in creating professional, polished, and long-lasting fabric art.
Ultimately, the method you employ to finish the edges of your appliqué will not only enhance the aesthetic appeal but also stand as a testament to your craftsmanship and creativity.
Leave a Reply