Creating bias tape at home is a valuable skill for sewers and crafters, allowing for customization and versatility in various projects. Bias tape, a narrow strip of fabric cut on a diagonal angle (bias grain), possesses unique properties, making it ideal for finishing edges, binding seams, and adding decorative accents.
In this guide, we will explore the step-by-step process of making bias tape at home, from selecting the right fabric and determining the width to sewing, folding, and pressing techniques.
Whether you’re a sewing enthusiast or a novice crafter, learning how to make bias tape provides you with a valuable tool for enhancing the quality and aesthetic appeal of your creations.
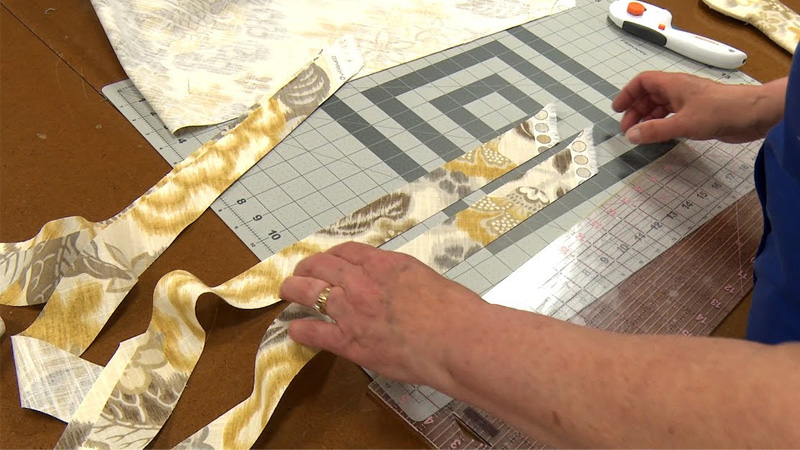
What is Bias Tape?
Bias tape is a narrow strip of fabric cut on a diagonal angle (bias grain) from the selvage. Its unique diagonal orientation provides flexibility and allows it to bend smoothly around curves.
Bias tape is often used in sewing and quilting to finish fabric edges, bind seams, and add decorative accents. It comes in various widths, colors, and patterns, making it a versatile tool for adding both functional and aesthetic touches to garments, quilts, and other fabric projects.
How Do You Make Bias Tape at Home?
Creating bias tape at home is a practical and versatile skill for sewing enthusiasts. Bias tape, or bias binding, is a fabric strip cut at a 45-degree angle to the fabric’s grain, allowing it to have stretch and flexibility.
It serves multiple purposes in sewing, from finishing edges to adding decorative touches.
Here’s a step-by-step guide on how to make bias tape at home:
Materials You’ll Need
- Fabric of your choice
- Ruler or measuring tape
- Rotary cutter or scissors
- Sewing machine
- Iron and ironing board
- Chalk or fabric marker
Select Your Fabric
Begin by choosing the fabric that best suits your project. Cotton is a popular choice due to its ease of handling and versatility. Consider the color, pattern, and texture that align with your design concept.
Determine the Width and Length
Decide on the finished width of your bias tape. For single-fold bias tape, it should be half the desired width, while for double-fold bias tape, it should be a quarter of the desired width.
Calculate the length needed, adding a bit extra for seam allowances and potential overlap.
Mark and Cut Strips
Lay your chosen fabric flat on a clean, level surface. Using a chalk pencil or dressmaker’s pen, mark cutting lines on the fabric. These lines should run diagonally at a 45-degree angle to the selvage (finished edge) of the fabric.
Carefully cut along these marked lines to create strips of fabric.
Square Off the Ends
To ensure your bias tape has neat and even ends, trim the squared ends of your fabric strips, creating straight edges. This step will contribute to the overall polished look of your bias tape.
Attach Strips Together
Take two fabric strips, placing them right sides together at a right angle, aligning the square ends. Sew a diagonal seam from one corner to the opposite corner, joining the two strips together.
Repeat this process as needed, attaching more strips to create a continuous length of bias tape.
Trim Seam Allowances
After sewing the strips together, trim the excess fabric from the seam allowances, leaving approximately 1/4 inch (6mm). This trimming minimizes bulk and ensures your bias tape lays flat and flexible.
Open Seams and Press
Open up the seams by pressing them open with an iron. This step helps reduce any remaining bulk and ensures a flat, even finish. It’s essential to press the entire strip to eliminate wrinkles or creases.
Fold in Half Lengthwise
Fold the strip in half lengthwise, right side out, and press it with an iron to create a central crease. This central fold will serve as a guideline for further folding.
Create Single-fold Bias Tape
Open up the strip again, and this time, fold both raw edges into the center crease. Press the folded edges into place. This creates single-fold bias tape, with the raw edges neatly enclosed within the tape.
Create Double-fold Bias Tape
For double-fold bias tape, fold the strip in half once more, aligning the folded edges. Give it a firm press with your iron. Now, you have double-fold bias tape, with the raw edges entirely enclosed within the tape.
It’s ready to be used in your sewing or crafting projects, adding a professional touch to your creations.
What is Bias Tape Used for?
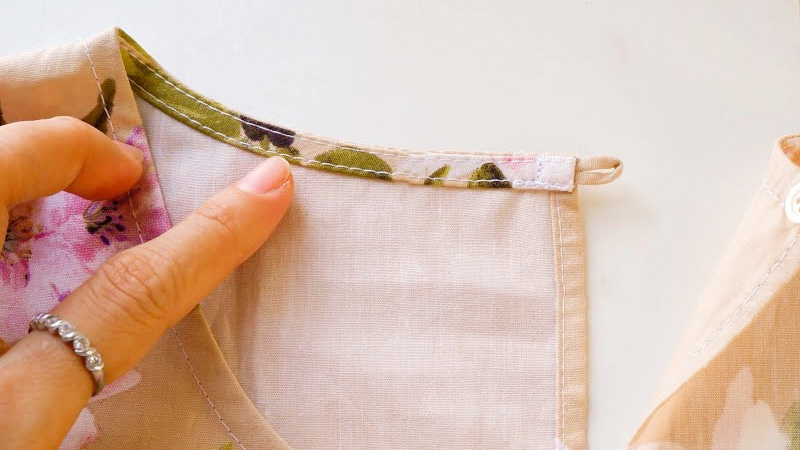
Bias tape, also known as bias binding or bias binding tape, is a versatile and indispensable sewing and crafting material with a wide range of applications.
Edge Finishing
Bias tape is primarily used to finish the raw edges of fabric. It neatly encases the edges, preventing fraying and giving a clean, professional appearance to clothing, linens, and various fabric items.
This is especially useful for delicate fabrics.
Seam Binding
It’s often employed to bind the edges of seams, enhancing their strength and durability. In quilting, bias tape is used to secure the layers of a quilt together, providing both structural support and an attractive border.
Curved Edges
Bias tape’s unique characteristic is its flexibility. Cut on a diagonal (bias grain), it easily conforms to curved edges, making it an ideal choice for finishing armholes, necklines, and curved hems.
This ensures a smooth and polished finish on garments.
Decoration and Contrast
Available in a wide array of colors, patterns, and materials, bias tape is a popular choice for adding decorative accents and contrast to sewing and crafting projects.
It can be used to create striking details, highlights, and visual interest in various designs.
Straps and Ties
Bias tape is often transformed into straps, ties, drawstrings, or belts, offering both functionality and a stylish finish to garments, bags, aprons, and other items.
It adds a decorative touch while serving a practical purpose.
Hemming
When working with lightweight fabrics or circular hems, bias tape can be utilized for hemming. It provides a delicate and flexible edge finish, making it an excellent option for achieving a polished look on curved or uneven hems.
Customization
Making bias tape at home allows crafters to select the fabric, color, and design elements, ensuring their projects align with their creative vision. This customization adds a unique and personal touch to handmade creations.
Sustainability
Crafting bias tape from fabric scraps or remnants promotes sustainable sewing practices by reducing waste and repurposing materials. It aligns with eco-friendly principles and minimizes the environmental impact of sewing projects.
What is the Difference Between Single Fold and Double Fold Bias Tape?
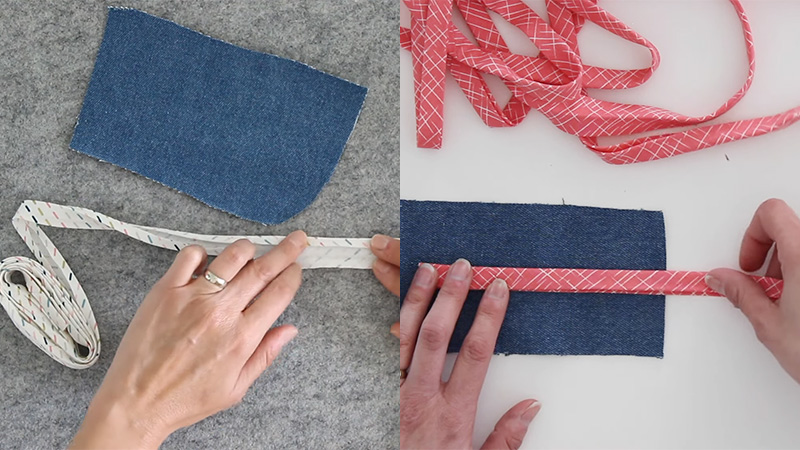
Single fold bias tape and double fold bias tape are both sewing notions used to finish and bind fabric edges, but they differ in their construction, appearance, and applications:
Construction
- Single Fold Bias Tape: Single fold bias tape is created by folding a strip of fabric in half along its length, resulting in a tape with a single fold along one edge. The other edge remains raw.
- Double Fold Bias Tape: Double fold bias tape begins with the same initial folding process as single fold bias tape, but it goes one step further. After folding in half along its length, double fold bias tape is folded in half again, enclosing both raw edges within the tape.
Raw Edge
- Single Fold Bias Tape: In single fold bias tape, one of the fabric’s raw edges is exposed and not enclosed within the tape.
- Double Fold Bias Tape: In double fold bias tape, both of the fabric’s raw edges are completely enclosed within the tape, resulting in a more robust and tidy finish.
Use
- Single Fold Bias Tape: Single fold bias tape is typically used for finishing straight edges, such as necklines, armholes, and other areas where a simple binding is needed.
- Double Fold Bias Tape: Double fold bias tape is primarily used for finishing curved edges, such as hems on clothing or quilts, and for neatly encasing the raw edges of projects like bags.
Application
- Single Fold Bias Tape: To apply single fold bias tape, you align the unfolded edge of the tape with the fabric’s raw edge and stitch it in place. This hides the raw edge within the tape, providing a clean and finished appearance.
- Double Fold Bias Tape: When using double fold bias tape, you sandwich the fabric edge between the two folded edges of the tape and stitch it in place. This ensures that both raw edges are fully concealed, creating a durable and polished appearance.
Tips for Making Bias Tape at Home
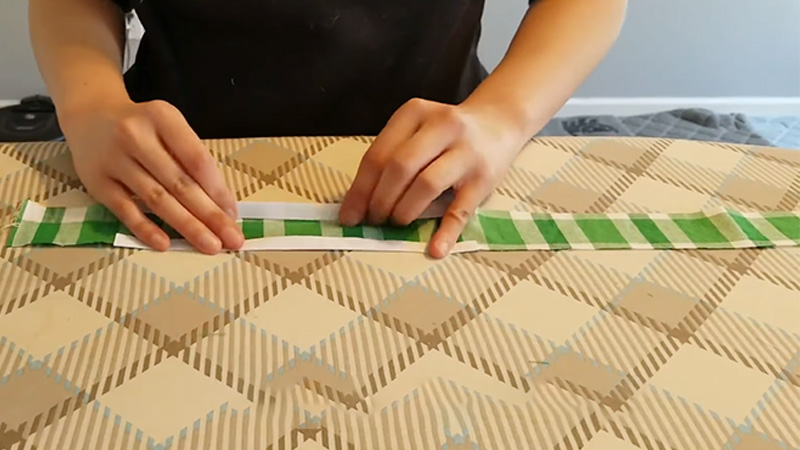
Making bias tape at home can be a rewarding and cost-effective way to customize your sewing projects.
Here are some additional tips to help you make bias tape successfully:
Select the Right Fabric
Choosing the appropriate fabric is crucial. Opt for lightweight to medium-weight materials like cotton, which are easier to work with and fold neatly.
Ensure the fabric complements or matches your project, as bias tape is often visible.
Determine the Width
Decide on the desired width of your bias tape. Common widths include 1/2 inch (12mm) or 1 inch (25mm). Keep in mind that the finished width will be half the initial width, so cut your fabric strips accordingly.
Cut Accurate Strips
Use a rotary cutter, quilting ruler, and self-healing cutting mat to cut your fabric into precise bias strips. Cutting on the bias, at a 45-degree angle to the fabric grain, ensures flexibility and stretch.
Sew Strips Together Neatly
If you need longer bias tape, sew the bias strips together at a 90-degree angle with a diagonal seam. Press the seam open to reduce bulk and create a smooth finish.
Press as You Go
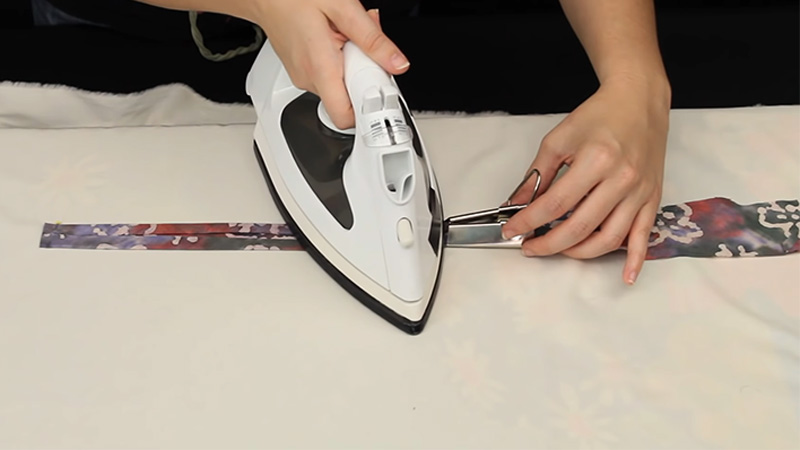
As you fold the fabric strips to create the bias tape, press them with an iron. A bias tape maker tool can be very helpful for this step, as it assists in folding and pressing evenly.
Ensure your iron is set to the appropriate temperature for your fabric.
Consider Contrast or Coordination
For added visual interest, think about using a contrasting or coordinating fabric for your bias tape. This can make your project stand out and add a decorative touch.
Prevent Stretching
When sewing the bias tape onto your project, use a walking foot attachment on your sewing machine. This helps prevent the fabric from stretching, especially when working with bias tape on curved edges.
Practice on Scrap Fabric
If you’re new to making bias tape, practice on scrap fabric first. This allows you to get a feel for the process, test the width and appearance of your tape, and gain confidence in your skills.
Customize Bias Tape Length
You can create bias tape as long as needed for your project. Whether you make a continuous strip by folding and sewing your fabric or create shorter segments, tailor the length to your specific requirements.
Take Your Time
Making bias tape can be intricate, particularly during the folding and pressing stages. Take your time to ensure even folding, precise measurements, and a professional finish.
Label Your Bias Tape Rolls
If you make bias tape in advance or for future use, label your rolls with the width and any other pertinent information. This makes it easy to identify the tape you need for future projects.
Common Mistakes to Avoid When Making Bias Tape at Home?
Making bias tape at home can be a valuable skill for sewers and crafters, but it’s important to be aware of common mistakes to ensure your bias tape turns out well.
Here are some common mistakes to avoid:
Inaccurate Width
Cutting strips that are too narrow or too wide can be problematic. Strips that are too narrow may not provide adequate coverage, while strips that are too wide can create bulk and make it difficult to fold neatly.
Be sure to measure and cut your bias strips accurately according to your project’s requirements.
Wrong Bias Direction
Cutting strips that are not on the true bias (a 45-degree angle to the fabric grain) can result in bias tape that lacks the necessary flexibility and stretch.
Always ensure your strips are cut on the true bias to achieve the desired properties.
Unsquared Ends
Neglecting to square off the ends of your bias strips can lead to uneven and difficult-to-join strips. Before sewing bias strips together, make sure the ends are squared off with clean, straight edges to create a seamless connection.
Failure to Press Seams Open
When joining bias strips to create longer lengths, not pressing the seams open can result in unnecessary bulk and affect the tape’s appearance. After sewing the seams to connect bias strips, press the seam allowances open with an iron to reduce bulk.
Neglecting to Press Seam Allowances Flat
Skipping the step of pressing the seam allowances flat on the bias tape can result in uneven folds and a less polished finish. Prior to folding and pressing the bias tape, ensure the seam allowances are pressed flat with an iron to facilitate even folding.
Incorrect Folding and Pressing
Incorrectly folding and pressing the bias strip can lead to uneven and twisted tape. If you’re using a bias tape maker tool, follow the manufacturer’s instructions for proper use.
Take your time to fold and press the strip evenly to avoid irregularities.
Rushing the Process
Trying to rush through the bias tape-making process can result in inaccuracies and a less-than-professional finish. Precision and patience are essential for successful bias tape making.
Take your time, especially during the folding and pressing steps, to ensure a high-quality outcome.
Inadequate Fabric Choice
Choosing the wrong fabric can affect the functionality and appearance of your bias tape. Ensure you select a fabric that is appropriate for your project, as not all fabrics are suitable for bias tape due to their weight and flexibility.
Using Dull Tools
Using dull cutting tools or an iron that isn’t properly heated can make the bias tape-making process more difficult and less precise. Ensure your rotary cutter is sharp, and your iron is set to the correct temperature for your fabric.
Skipping Practice
If you’re new to making bias tape, not practicing on scrap fabric before tackling your main project can lead to errors and frustrations. Practice helps you get a feel for the process and allows you to refine your skills.
FAQs
Can I use bias tape on curved edges?
Yes, bias tape is ideal for finishing curved edges, as its diagonal cut allows it to bend smoothly around curves.
Can I use any fabric scraps to make bias tape?
While many fabrics work for bias tape, it’s best to choose fabrics that are lightweight to medium-weight and have some flexibility. Avoid heavy or stiff fabrics for bias tape.
Do I need a bias tape maker tool?
A bias tape maker tool is helpful for folding and pressing bias tape evenly, but it’s not essential. You can fold and press bias tape manually with an iron.
Can I make bias tape in advance for future projects?
Yes, you can make bias tape ahead of time and store it for future use. Just ensure it’s labeled with its width and material for easy identification.
What can I do with leftover bias tape strips?
Leftover bias tape strips can be used for smaller projects, patchwork, or decorative accents on other items. Don’t let them go to waste!
To Recap
Mastering the art of making bias tape at home empowers crafters and sewers to elevate their projects with precision and personalization. Bias tape, with its flexibility and diverse applications, is a versatile addition to any sewing toolkit.
By carefully selecting the fabric, cutting precise strips on the true bias, and employing proper folding and pressing techniques, you can create bias tape tailored to your project’s unique needs.
Whether you’re embellishing clothing, quilting, or adding a decorative touch to various fabric items, the ability to craft your bias tape ensures a polished, professional finish.
As you hone this skill, you’ll discover the creative freedom and satisfaction that come with producing high-quality bias tape for your handmade creations.
Leave a Reply