Embroidery placement rulers are indispensable tools in embroidery, providing precision and accuracy in positioning designs on fabric.
These rulers streamline the process by serving as guides for aligning and centering embroidery projects, ensuring professional and polished results.
By leveraging the ruler’s markings and measurements, embroiderers can achieve consistent spacing, avoid misalignments, and expedite the setup phase.
From identifying the fabric’s center point to planning intricate designs, the embroidery placement ruler enhances efficiency and creativity.
This introduction encapsulates the significance of these rulers in achieving meticulous embroidery placements and setting the stage for successful and visually appealing projects.
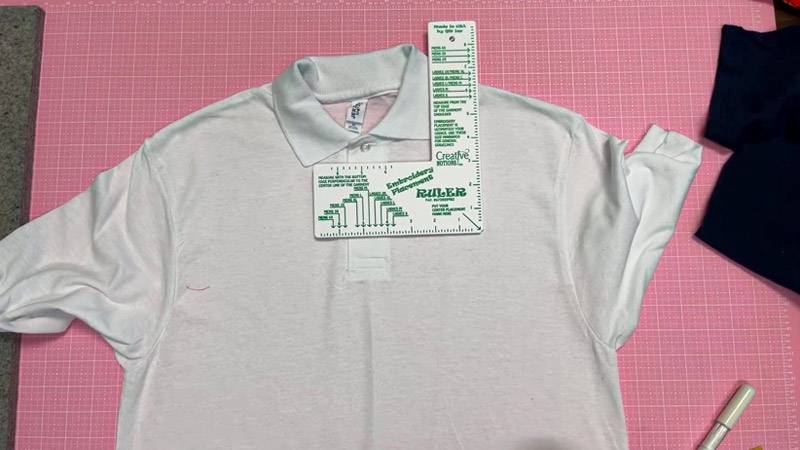
What Is an Embroidery Placement Ruler?
An embroidery placement ruler is a specialized tool designed to assist in positioning embroidery designs accurately on fabric.
Typically featuring horizontal and vertical guidelines intersecting at the center, the ruler aids in finding precise placement points.
This ensures symmetry and balance in embroidery projects. Using the ruler’s measurements, users can identify key reference points on the fabric, such as the center or edges of a design.
Crafters achieve consistent and professional results by aligning these points with corresponding marks on the ruler.
Embroidery placement rulers contribute to enhanced precision, making them valuable accessories for embroiderers seeking optimal design placement and overall aesthetic appeal in their projects.
Step-By-Step Guide on How to Use an Embroidery Placement Ruler?
An embroidery placement ruler is a valuable tool for ensuring precise and accurate placement of embroidery designs on fabric or garments.
It helps embroiderers achieve symmetry, proper alignment, and consistent design spacing.
Here’s a step-by-step guide on how to use an embroidery placement ruler:
Select Your Design
Choosing the right embroidery design is a crucial first step. Consider the size and shape of the design of your fabric and the intended project.
Keep in mind factors such as the fabric’s texture and thickness, as they can impact the overall appearance of the embroidery.
The selected design should complement the garment or item you embellish, ensuring a harmonious and visually appealing result.
Prepare Your Fabric
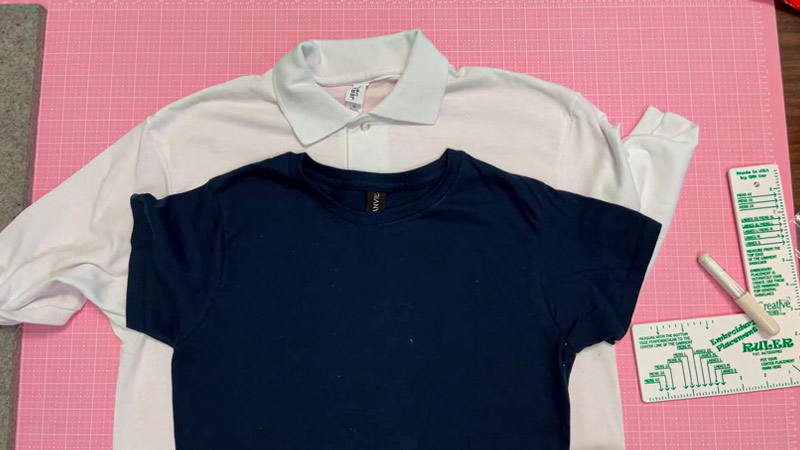
Before placing your fabric in the embroidery hoop or machine, ensure it is adequately stabilized. Stabilizing your fabric is essential to prevent stretching, puckering, or distortion during embroidery.
Depending on the type of fabric and design, you may use different stabilizers, such as tear-away or cut-away stabilizers, to provide the necessary support. Properly stabilized fabric sets the foundation for a successful embroidery project.
Identify the Center Point
Locating the center of your fabric is vital to achieving balanced and centered embroidery. Folding the fabric in half vertically and horizontally is a standard method to find the center.
Alternatively, you can use measuring tools to accurately determine the fabric’s midpoint. Marking this intersection point ensures that your embroidery design will be placed precisely where you intend it to be.
Place the Ruler

The embroidery placement ruler serves as a guide to position your design accurately. Lay the ruler on your fabric, ensuring that its center lines align with the center point you marked.
The ruler’s horizontal and vertical lines, often intersecting at the center, help establish a reference for proper placement. This step is crucial for achieving symmetry and balance in your embroidery work.
Choose the Desired Placement
Take advantage of the guidelines and measurements the embroidery placement ruler provides to determine the optimal placement for your design.
Some rulers feature additional lines that help align the embroidery with specific features, such as necklines or hems.
Consider these guidelines while making decisions about the placement to ensure your embroidery enhances the overall aesthetics of your project.
Mark Your Placement
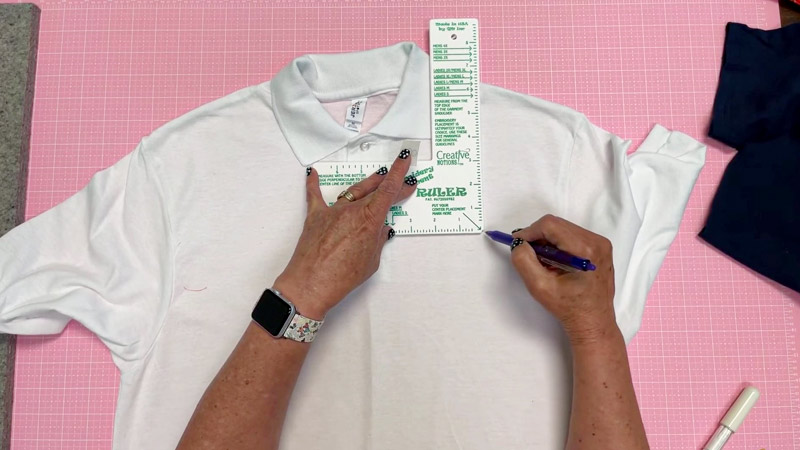
Once you’ve finalized the desired placement of your embroidery design, use fabric-friendly marking tools to create minor, precise reference points on the fabric.
These markings could be in the form of dots, short lines, or other indicators highlighting the edges or center of your chosen design.
Selecting a marking method suitable for your fabric type is crucial, ensuring easy visibility during the embroidery process without causing any permanent damage or staining.
Hoop Your Fabric
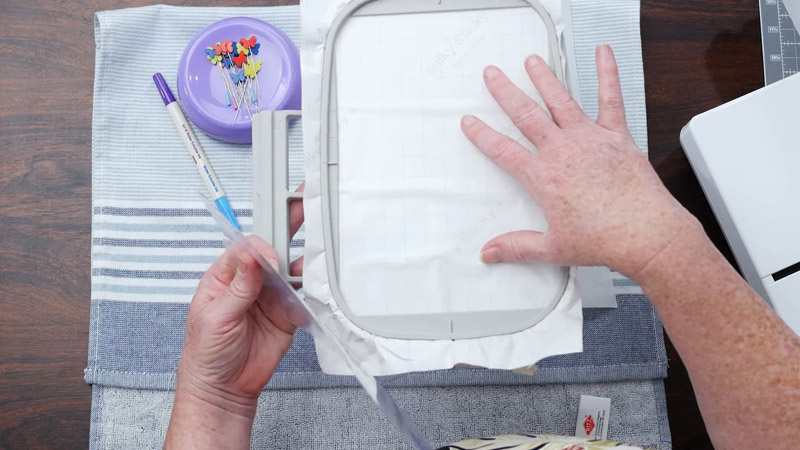
If you’re utilizing an embroidery hoop, carefully position your fabric within the hoop, ensuring that the marked reference points align precisely with the center of the hoop.
Take care to maintain the fabric’s tautness without overstretching, ensuring a stable surface for embroidery.
The alignment between your fabric and the hoop’s center is critical for maintaining accuracy throughout the stitching process.
Load the Design
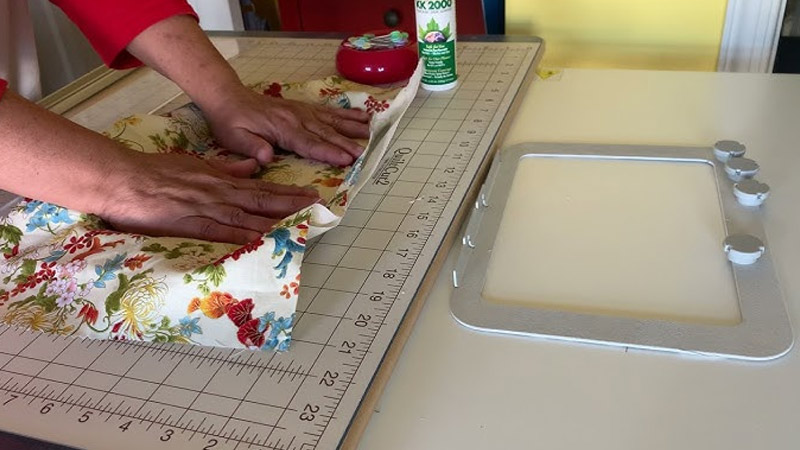
After hooping your fabric, it’s time to load the selected embroidery design into your embroidery machine.
Pay attention to any adjustments needed for the design, such as resizing, rotating, or modifying orientation, to match your placement preferences.
This step ensures that the embroidery machine will stitch the design exactly where you’ve planned on the fabric.
Align with Markings
Before initiating the embroidery process, ensure the loaded design aligns perfectly with the reference points you marked on the fabric.
If any adjustments are necessary, such as shifting the design slightly, take the time to make these corrections.
This attention to detail during the alignment stage contributes significantly to the overall precision of your embroidery.
Embroider
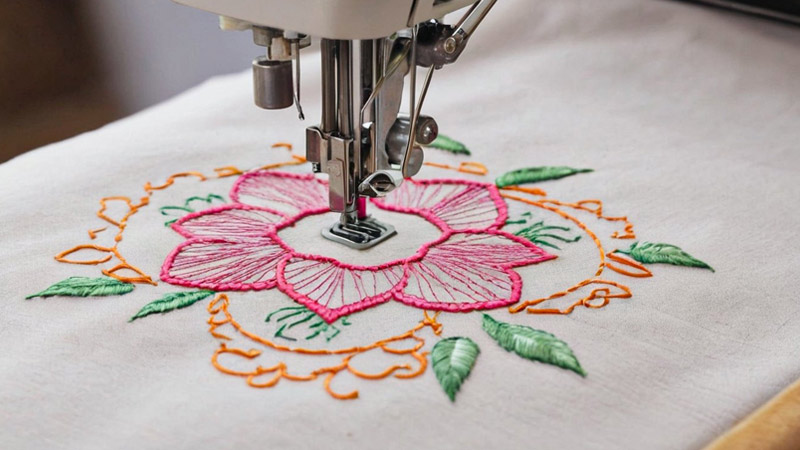
With the fabric properly hooped, the design loaded, and alignment verified, you can now initiate the embroidery process following the instructions provided by your machine.
Monitor the stitching carefully to ensure the design accurately follows the planned placement.
The combination of the embroidery placement ruler and your careful marking and hooping efforts should result in a professionally finished design that enhances the aesthetic appeal of your project.
Benefits of Using an Embroidery Placement Ruler
Using an embroidery placement ruler offers several benefits for novice and experienced embroiderers.
This tool serves as a guide to ensure accurate and precise placement of embroidery designs on fabric or garments.
Here are some key advantages of incorporating an embroidery placement ruler into your embroidery workflow:
Precision and Accuracy
An embroidery placement ruler serves as a beacon for precision and accuracy in embroidery.
By aligning your chosen design with the ruler’s meticulously marked guidelines, you gain the ability to achieve pinpoint accuracy.
This ensures that your embroidery is centered and maintains a symmetrical and balanced position on the fabric.
The ruler acts as a reliable reference point, minimizing the risk of misplacement and contributing to the overall professional appearance of the finished product.
Consistent Spacing
One of the critical advantages of utilizing an embroidery placement ruler lies in its ability to facilitate consistent spacing between design elements.
The ruler’s grid lines and measurements act as steadfast guides, ensuring that patterns with multiple elements or repeating motifs maintain uniformity.
Consistent spacing is vital for creating a cohesive and polished final result, enhancing the visual appeal of the embroidery and providing a sense of harmony across the design.
Time Efficiency
Efficiency is a paramount benefit when employing an embroidery placement ruler. The tool significantly streamlines the setup process by eliminating the need for constant adjustments and rehooping.
The precision offered by the ruler minimizes the likelihood of errors, saving valuable time, which is especially beneficial when working on larger projects or in a production setting.
This time efficiency allows embroiderers to focus more on the creative aspects of their work rather than wrestling with alignment challenges.
Ease of Centering
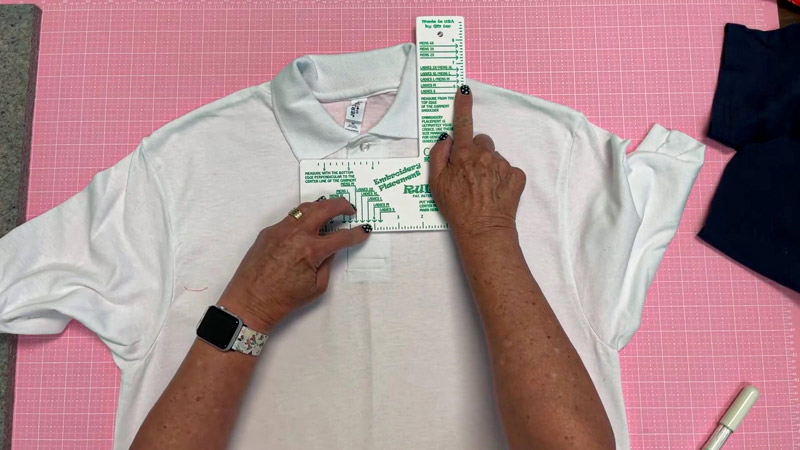
Identifying and marking the center point of your fabric becomes an effortless task with the assistance of an embroidery placement ruler.
The ruler’s center marks and clear guidelines simplify the process, allowing you to swiftly and accurately locate the fabric’s central axis.
This ease of centering expedites the setup phase and ensures that your embroidery design starts from a well-balanced and visually appealing focal point.
Enhanced Design Planning
Beyond its role in execution, an embroidery placement ruler is a valuable tool during the design planning phase.
Its grid lines and visual guides offer a tangible reference for assessing the size and positioning of your design relative to the fabric dimensions.
This aids in making informed decisions about the layout, ensuring that the embroidery is technically sound and aesthetically pleasing.
The ruler becomes an indispensable companion for designers seeking both precision and artistic integrity in their embroidery projects.
Reduced Wastage
Applying an embroidery placement ruler directly translates into reduced wastage of precious materials.
Precise placement, facilitated by the ruler’s accurate guidelines, means fewer mistakes and minimized fabric wastage.
The risk of misaligned designs or errors in positioning is significantly reduced, mitigating the need to discard or rework garments due to flaws.
This conserves materials and contributes to cost savings, making the embroidery process more efficient and sustainable.
Professional Results
Using an embroidery placement ruler elevates the professionalism of the final product. The tool’s role in achieving accurate placement and symmetry enhances the overall quality of the embroidered piece.
Accurate alignment contributes to a visually appealing and marketable finished product, reinforcing the impression of craftsmanship and attention to detail.
The resulting professionalism is aesthetically pleasing and builds a reputation for high-quality work.
Versatility
Embroidery placement rulers showcase their versatility by adapting seamlessly to various fabric types and garment styles.
Whether you’re working on a casual T-shirt, a structured hat, or a more intricate project, the ruler is a versatile companion.
Its adaptability ensures that embroiderers maintain consistent precision across different materials and design requirements, expanding the range of projects that benefit from this valuable tool.
Ease of Use
Most embroidery placement rulers are designed with user-friendliness in mind. They offer a straightforward and accessible approach, making them suitable for embroiderers of all skill levels.
Even beginners can quickly grasp the concept and incorporate the ruler into their workflow, improving the accuracy of their embroidery projects.
The ease of use enhances the efficiency of the embroidery process and empowers embroiderers to focus on their creative expression rather than grappling with complex alignment challenges.
Reduced Stress and Frustration
Incorporating an embroidery placement ruler alleviates the stress and frustration commonly associated with manual alignment and centering of designs.
The ruler ensures proper alignment with minimal effort by eliminating guesswork and providing a reliable guide.
This reduction in stress levels contributes to a more enjoyable and satisfying embroidery experience and allows embroiderers to approach their projects with greater confidence and creativity.
The ruler becomes a reliable ally, transforming what could be a daunting task into a seamless and enjoyable process.
Mistakes to Avoid When Using an Embroidery Placement Ruler
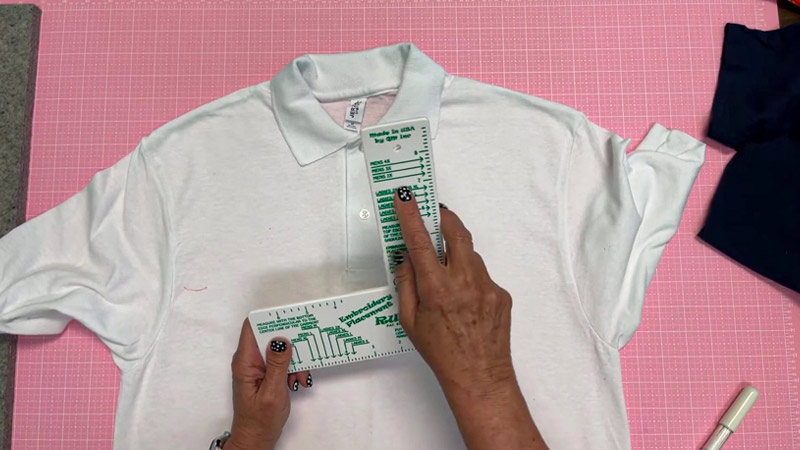
While embroidery placement rulers are beneficial tools, there are certain mistakes that embroiderers should be mindful of to ensure optimal results.
Here are some common mistakes to avoid when using an embroidery placement ruler:
Ignoring Fabric Characteristics
Fabric type plays a crucial role in the success of an embroidery project. Ignoring the characteristics of the fabric, such as stretchiness or thickness, can result in misalignment.
Before using an embroidery placement ruler, consider the fabric’s specific properties.
Adjustments may be necessary to accommodate different fabrics and ensure the ruler’s guidelines align appropriately.
Neglecting Stabilization
Stabilizing the fabric is a critical step often overlooked. Inadequate stabilization can lead to distortion during the embroidery process, impacting the accuracy of the placement.
Choose the appropriate stabilizer based on the fabric type and complexity of the design. Proper stabilization provides a solid foundation for precise embroidery.
Not Checking Hoop Size
The size of the embroidery hoop must match the design and fabric dimensions. Using the wrong hoop size or failing to adjust it properly can lead to misalignment issues.
Oversized or undersized hoops may cause the embroidery machine to hit the edges, affecting the placement and potentially causing damage.
Relying Solely on Visual Inspection
While visual inspection is essential, relying solely on it without measuring and double-checking can be a pitfall.
The precision of an embroidery placement ruler lies in its markings and measurements. Trusting the naked eye alone may result in misjudgments, especially when dealing with intricate or detailed designs.
Forgetting to Secure the Ruler
Failing to secure the embroidery placement ruler in place is a common oversight. The ruler may shift or slip during hooping without proper securing using removable adhesive or tape.
This movement can lead to misalignment, rendering the ruler ineffective. Ensure a secure attachment to prevent any disturbances during the setup process.
Skipping Test Runs
Skipping test runs before the actual embroidery is a risky shortcut. Conducting a test stitch allows you to verify the placement and alignment of the design.
This proactive approach helps identify any issues early on, allowing adjustments to be made before committing to the final embroidery. A test run can save both time and materials.
Ignoring Design Dimensions
Overlooking the dimensions of the embroidery design about the ruler’s markings is a common mistake. Ensure that the design fits within the designated guidelines of the ruler.
Consider any variations in design size when working on multiple projects to prevent off-center placements and maintain overall consistency.
Not Cleaning the Ruler
A clean ruler is crucial for optimal performance. Adhesive residue or debris on the ruler’s surface can affect its adherence to the fabric, leading to misplacement.
Regularly clean the ruler to maintain effectiveness and prevent unintended shifts during embroidery.
Overlooking Machine Settings
Ignoring or incorrectly setting the parameters of the embroidery machine can result in misalignment issues.
Check and adjust needle position, stitch speed, and thread tension to align with the chosen design and fabric. Proper machine settings are essential for achieving precise and accurate embroidery.
Ignoring Tension Issues
Tension problems with the embroidery machine can cause puckering or distortion of the fabric. Neglecting to address tension issues compromises the quality of the embroidery.
Regularly check and adjust the tension settings to ensure smooth stitching and proper placement, minimizing the risk of imperfections in the final product.
FAQs
How can a ruler be useful in sewing projects?
A ruler is a versatile tool in sewing, aiding in precise measurements, straight lines, and accurate cuts.
It ensures the uniformity of fabric pieces, contributing to well-fitted and professional-looking garments.
What is the recommended placement for left chest embroidery on garments?
Left chest embroidery is typically positioned near the heart on the wearer’s left side.
The embroidery placement guidelines for the left chest often suggest aligning the design with the center of the chest and a few inches below the collarbone.
How does an embroidery placement tool enhance stitching accuracy?
An embroidery placement tool, like a ruler designed for embroidery, assists in achieving precise design placement on fabric.
It helps in centering, aligning, and spacing embroidery motifs, ensuring a professional finish to the embroidered piece.
To Recap
The utilization of an embroidery placement ruler emerges as an indispensable ally in the world of embroidery, offering a pathway to precision, consistency, and enhanced design execution.
From centering the fabric to ensuring accurate spacing, this tool empowers embroiderers to achieve professional results quickly.
Its versatility across various fabric types and user-friendly nature make it accessible to beginners and seasoned artisans.
As a time-saving device that minimizes wastage, the embroidery placement ruler is a beacon of efficiency.
By reducing stress, eliminating guesswork, and contributing to the overall professionalism of the craft, this ruler becomes a cornerstone for elevating the quality and enjoyment of every embroidery project.
Leave a Reply