Transforming a dress into a stunning masterpiece is just a few steps away! Adding a lace-up back not only brings a touch of elegance but also allows for a personalized fit.
But how to add a lace-up back to a dress? Whether you want to revamp an old favorite or enhance a new creation, this DIY guide will walk you through the process with ease.
No need for advanced sewing skills – just a bit of patience and creativity. Picture yourself in a dress that perfectly complements your style, showcasing a delicately laced back.
In this tutorial, we’ll provide clear instructions, valuable tips, and the confidence you need to embark on this stylish journey.
Get ready to turn heads and make a fashion statement as you learn how to add a lace-up back to any dress. Let’s dive into the world of dress customization together.
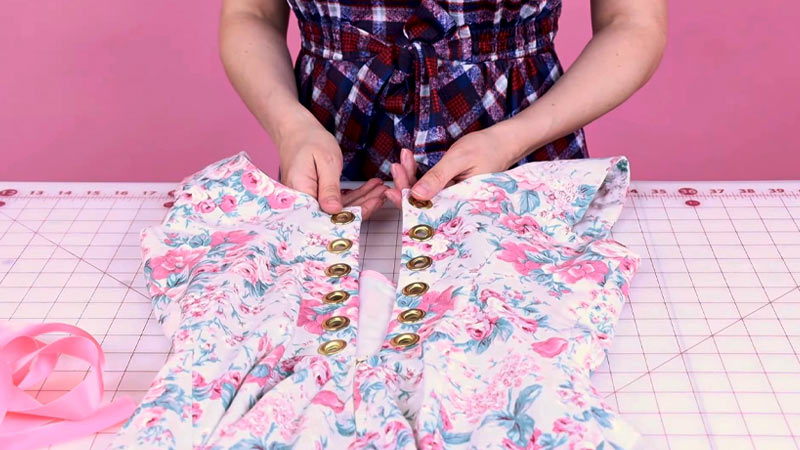
How to Add Lace Up Back to a Dress?
Adding a lace-up back to a dress is a creative and rewarding DIY project that allows you to customize your wardrobe.
Whether you’re revamping an old dress or adding a unique touch to a new one, this step-by-step guide will walk you through the process of how to lace the back of a dress.
Step 1: Choose Your Dress
Select a dress with a back seam that serves as the canvas for your creative endeavor. While simple, straight-backed dresses are ideal for beginners, keep in mind that this modification can be adapted for various dress styles, allowing you to explore your personal fashion preferences.
Step 2: Plan the Design
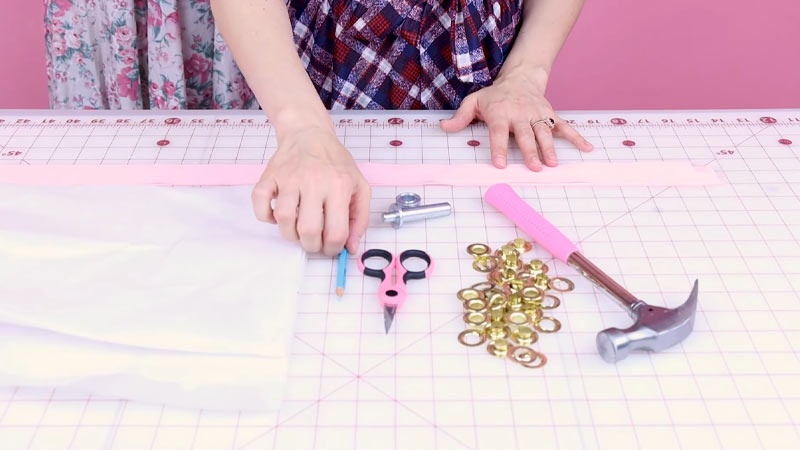
The second step of exploring how to make lace-up back dress is planning. This is where your artistic vision takes center stage.
Decide on the lace-up pattern that resonates with your style – whether it’s a chic single vertical line, a captivating crisscross pattern, or a more intricate design.
Use a fabric marker or chalk to delicately outline the intended lace-up area, ensuring precision in your design.
Step 3: Mark and Cut
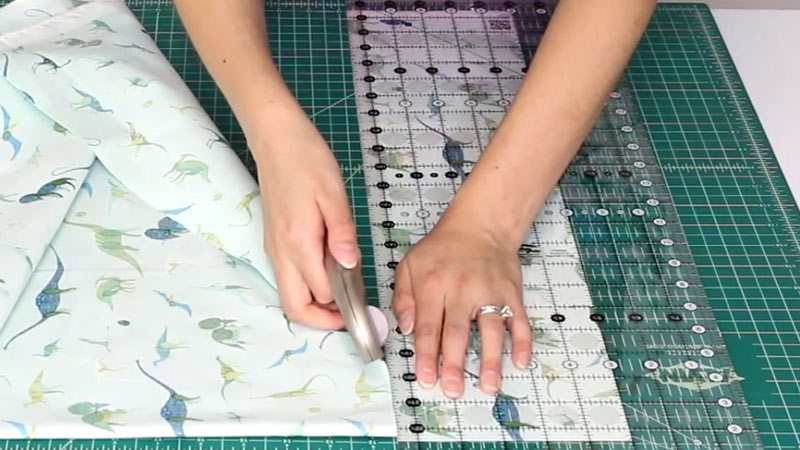
With a meticulous eye, mark strategic points along the outlined area where you’ll add eyelets or grommets. Even spacing is crucial for achieving a balanced aesthetic.
Employ fabric scissors to cut a straight line between the marked points, unveiling the canvas for your lace-up transformation.
Step 4: Add Eyelets or Grommets
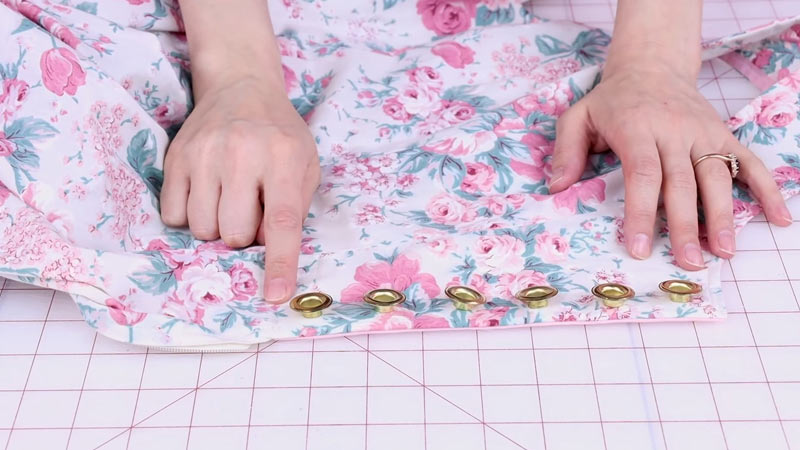
Follow the instructions on the eyelet or grommet packaging, bringing a touch of professionalism to your DIY project.
A grommet press or an eyelet setter tool can simplify this step, ensuring that these hardware elements are not just attached securely but also evenly spaced and aligned on both sides of the newly created opening.
Step 5: Prepare the Lace
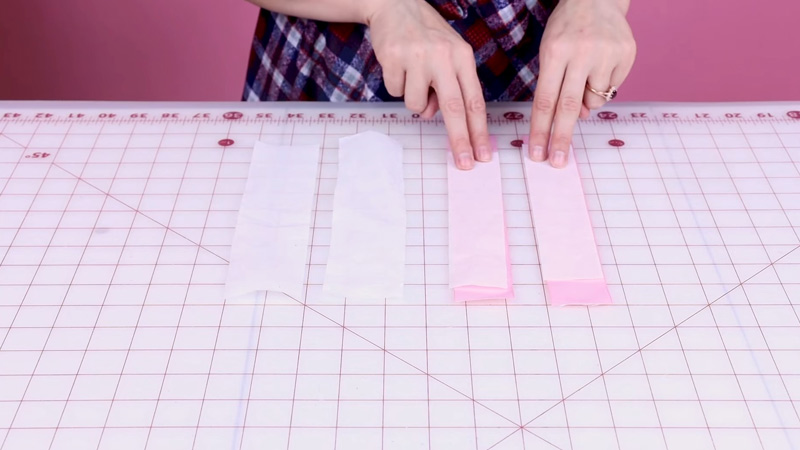
The choice of lace is where you infuse your unique flair. Cut the lace into two equal pieces, considering both the length required to gracefully weave through the entire back opening and the aesthetic impact.
Whether you opt for matching or contrasting lace, let it reflect your style and complement the dress’s color.
Step 6: Sew Reinforcement
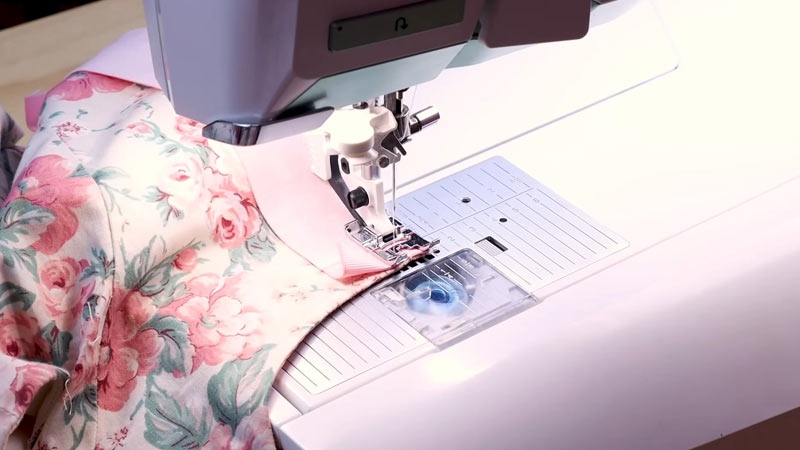
To elevate the longevity of your lace-up back, sew a narrow hem along the edges of the back opening. This not only prevents fraying but also adds a touch of sophistication, ensuring a polished finish to your modified dress.
Step 7: Lace It Up
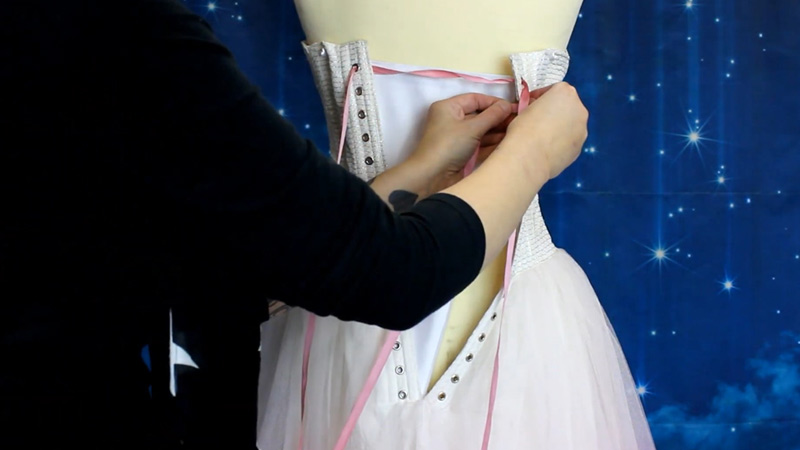
Now, the magic of adding lace to a dress begins. Starting from the bottom or top, delicately thread one end of the lace through the first set of eyelets or grommets. Continue the lacing process, weaving through your chosen pattern.
Once you reach the top or bottom, secure the lace with a knot, ensuring it stands the test of time and movement.
Step 8: Test the Fit
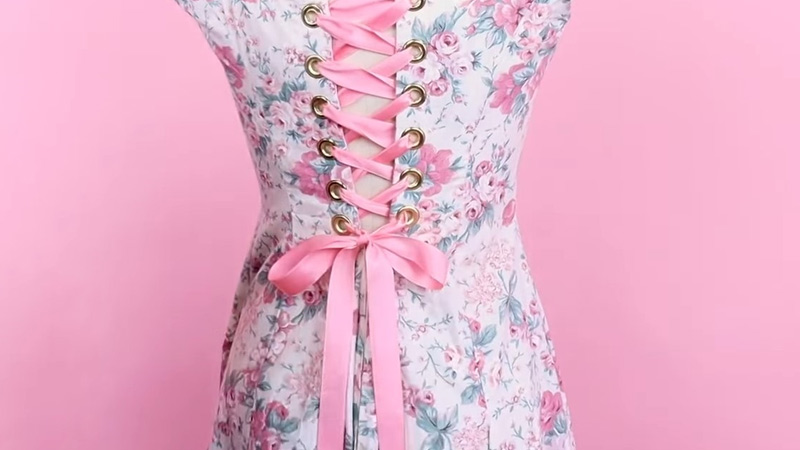
One of the final steps of learning how to add lace to a dress is to check the fit. Put on the dress and revel in the beauty of your creation.
Adjust the tightness to your liking, experiencing firsthand the allure of a lace-up back – its inherent adjustability allows you to achieve a fit that is both comfortable and flattering.
Step 9: Customize Further (Optional)
Feel the freedom to embellish further and make the design uniquely yours. Add decorative elements to the laces or incorporate additional details that resonate with your style, transforming the dress into a true reflection of your creativity.
Step 10: Final Touches
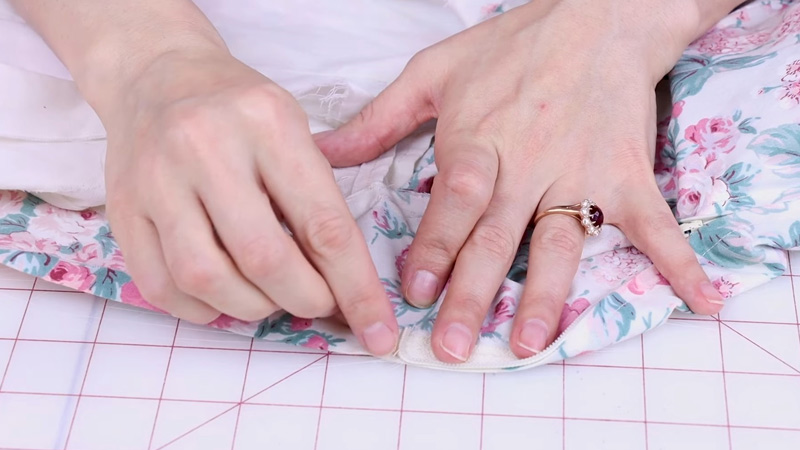
Trim any excess lace with precision and secure the ends with knots or perhaps opt for decorative bows. Take a final, appreciative look, ensuring every element is secure and aligned.
And now you know how to add lace to the dress. Your dress has undergone a remarkable metamorphosis, now boasting a stylish and personalized lace-up back that’s ready to make a statement wherever you go!
Why Add Lace Up Back to Dress?
Adding a lace-up back to a dress isn’t just a DIY project; it’s a transformative process that enhances both the aesthetics and functionality of a garment. Here are several compelling reasons why you might add lace-up back to dress.
Personalized Style
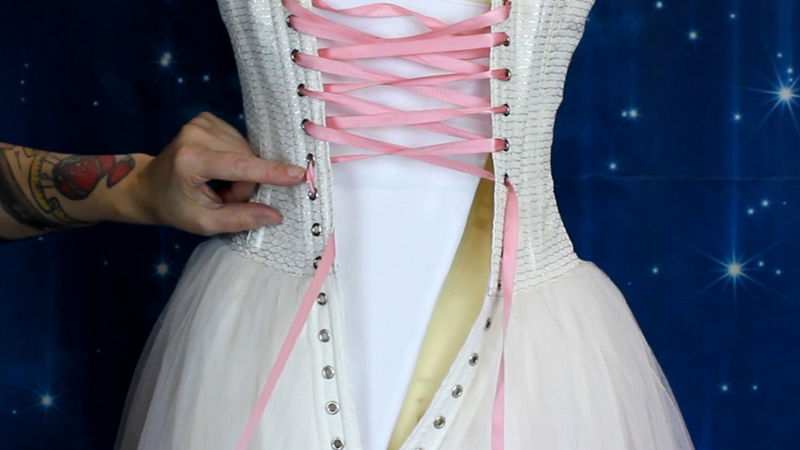
A lace-up back offers a unique and personalized touch to your dress. It allows you to express your style, turning a simple garment into a fashion statement that reflects your personality.
The choice of lace, the pattern, and the overall design are entirely in your hands, giving you creative freedom.
Custom Fit
One of the most significant advantages of a lace-up back is the custom fit it provides. Unlike traditional zippers or buttons, a lace-up back allows for adjustable tightness.
This feature ensures that the dress contours to your body shape, offering a comfortable and flattering fit. Whether you’re working on a vintage piece or a modern creation, the adjustability factor adds both style and comfort.
Revamping Old Favorites
Have a dress that’s been sitting in your closet, slightly outdated, or no longer fitting perfectly? Adding a lace-up back breathes new life into old favorites.
It’s a sustainable and creative way to refresh your wardrobe without the need for an entirely new set of clothes. The transformation can be so dramatic that it feels like you have an entirely new dress.
Versatility
Lace-up backs are versatile and suit various dress styles. Whether you’re modifying a casual sundress, a formal gown, or something in between, the lace-up back adapts seamlessly.
This versatility extends to different occasions – from casual outings to special events, a lace-up back can be both chic and functional.
DIY Satisfaction
Engaging in a lace-up back project provides a sense of accomplishment and satisfaction. You become the designer, the seamstress, and the curator of your fashion piece.
It’s a rewarding experience to witness a dress transform under your hands, making it uniquely yours. The hands-on nature of this project allows you to connect with your wardrobe on a deeper level.
Budget-Friendly Upgrade
Customizing your dress with a lace-up back is a budget-friendly way to upgrade your wardrobe. Instead of splurging on a brand-new dress, you can invest your time and creativity to breathe new life into existing garments.
This not only saves money but also encourages a more sustainable approach to fashion.
Attention-Grabbing Detail
The lace-up back adds an attention-grabbing detail to your dress. Whether you choose a subtle pattern or an elaborate design, the back becomes a focal point that draws eyes and compliments. It’s a subtle yet effective way to make a statement without being overly ostentatious.
Empowerment Through DIY
Taking control of the design and modification process empowers you to experiment with fashion. It allows you to break free from conventional styles and create something uniquely yours.
The skills acquired during a lace-up back project might inspire you to tackle more DIY fashion ventures in the future.
On-Trend Appeal
Lace-up details are often seen on the runways and in fashion-forward collections. By adding a lace-up back to your dress, you bring an on-trend element to your wardrobe. This timeless feature ensures that your dress remains stylish and relevant season after season.
Unleash Creativity
Lastly, adding a lace-up back is an opportunity to unleash your creativity. Experiment with different lace textures, colors, and patterns.
Play with unique lacing techniques or combine materials to create a truly distinctive look. The process itself becomes a canvas for your imagination.
FAQs
How difficult is it to add a lace-up back to a dress?
Adding a lace-up back to a dress can range from beginner to intermediate difficulty. With clear instructions, patience, and basic sewing skills, it’s an achievable DIY project. Start with a simple design and gradually progress to more intricate patterns as your confidence grows.
Can I add a lace-up back to any type of dress?
Yes, you can adapt the lace-up back modification to various dress styles. While straight-backed dresses are ideal for beginners, the process can be applied to different designs, from casual sundresses to formal gowns. Customization options make it versatile for different occasions.
What materials do I need to add a lace-up back to my dress?
You’ll need the dress, matching or contrasting lace, eyelets or grommets, fabric scissors, fabric marker or chalk, a sewing machine or needle and thread, and ribbon or cord for lacing. Additionally, having a grommet press or an eyelet setter tool can simplify the process.
How long does it take to add a lace-up back to a dress?
The time required depends on your experience, the complexity of the design, and the tools available. A straightforward lace-up back can be completed in a few hours, while more intricate patterns may take longer.
Can I still wear the dress if I add a lace-up back?
Absolutely! The beauty of a lace-up back lies in its adjustability. After lacing up, you can put on the dress and adjust the tightness to your liking. The custom fit ensures that the dress remains comfortable and flattering, making it not only stylish but also practical for various occasions.
Conclusion
You’ve embarked on a creative journey to enhance your dresses with a captivating lace-up back. By following this step-by-step guide, you’ve gained the skills to infuse your personal touch into any garment, turning it into a unique fashion statement.
Embrace the satisfaction of witnessing your vision come to life, as the laced back adds a touch of sophistication and individuality to your wardrobe.
Remember, beauty lies not only in the final result but also in the process of transforming a simple dress into a work of art.
As you showcase your newfound sewing prowess, revel in the admiration and inquiries your customized dresses will undoubtedly attract.
Your ability to modify and personalize garments opens doors to endless possibilities, empowering you to express your style with confidence.
Now, go ahead and enjoy your upgraded wardrobe, proudly adorned with your signature lace-up creations!
Leave a Reply