Adding cotton balls to fabric can infuse your projects with a delightful tactile quality and a touch of whimsy. This simple yet versatile technique allows you to create unique and textured designs that are perfect for crafts, costumes, home decor, and more.
Whether you’re looking to embellish a piece of clothing, make a decorative wall hanging, or craft a creative DIY project, attaching cotton balls to fabric is an accessible and enjoyable process.
In this guide, we’ll walk you through the steps to successfully attach cotton balls to fabric, helping you unleash your creativity and achieve stunning results that elevate your projects to a whole new level.

How to Attach Cotton Balls to Fabric?
Attaching cotton balls to fabric can be a fun and creative way to add texture and dimension to your projects.
Whether you’re working on a craft, costume, or decorative piece, this simple technique can yield impressive results.
Here’s a step-by-step guide on how to attach cotton balls to fabric:
Materials Needed:
- Fabric.
- Cotton Balls.
- Adhesive.
- Scissors.
- Pen or Pencil.
- Paint or Dye.
Steps:
Plan Your Design
Before you start attaching cotton balls, take a moment to envision your design. Consider the placement, spacing, and overall aesthetic you want to achieve.
Use a pen or pencil to mark the areas on the fabric where you intend to attach the cotton balls. This step helps ensure a balanced and visually appealing result.
Prepare the Cotton Balls
When you want to add color to your cotton balls, now is the time to do it. Dilute fabric dye or mix acrylic paint with water to create the desired shade. Gently dip or paint the cotton balls, ensuring they are evenly coated.
Allow them to air dry completely on a clean surface. This step allows you to customize the appearance of your project.
Apply Adhesive
Take your fabric glue or hot glue gun and apply a small amount of adhesive to the marked areas on the fabric.
Using a conservative amount of glue is important to prevent any excess from seeping through the cotton balls. Remember, a little goes a long way. If you’re using hot glue, work quickly but carefully, as it sets fast.
Attach the Cotton Balls
With the adhesive applied, gently press the cotton balls onto the glue spots. Hold them in place for a few seconds to ensure they adhere securely.
Don’t press too hard; this can flatten the cotton and alter the desired texture. Work methodically, following your design plan, and continue attaching the cotton balls until you’ve achieved the desired look.
Secure Edges
When your design involves overlapping cotton balls or if they’re positioned near the edge of the fabric, it’s a good idea to reinforce the edges.
Apply a bit of extra adhesive to ensure these areas are securely attached. This extra step helps prevent any potential lifting or unraveling over time.
Trim Excess Fabric or Cotton
After attaching the cotton balls, you may notice that some edges or fibers are longer than others.
Use a pair of sharp scissors to trim any excess fabric or cotton carefully. Pay attention to details and aim for a uniform appearance. This step adds a polished finish to your project.
Allow to Dry
Give your fabric some time to dry completely. This ensures that the cotton balls are securely attached and won’t shift or come loose.
Be patient and allow for adequate drying time before moving on to any additional steps or handling the fabric.
Seal the Cotton Balls
Depending on the nature of your project and how it will be used, you may want to consider applying a clear fabric sealer or a coat of Mod Podge.
This extra step helps protect the cotton balls from fraying or coming loose over time. It’s particularly useful for projects that will undergo regular handling or washing.
Alternative Ways to Attach Cotton Balls to Fabric Without Glue

Attaching cotton balls to fabric without glue can be accomplished through alternative methods that provide a temporary or more versatile attachment.
Here are some creative alternatives:
Sewing
Use a needle and thread to stitch the cotton balls onto the fabric. You can create decorative patterns or secure them along the edges of the cotton balls. This method provides a secure attachment and allows for easy removal if needed.
Velcro or Hook-and-Loop Tape
Sew small pieces of hook-and-loop tape (Velcro) onto the fabric and the back of the cotton balls.
This way, you can attach and detach the cotton balls as desired. It’s an excellent option for projects requiring frequent washing or seasonal decorations.
Snap Buttons
Sew snap buttons onto the fabric and the cotton balls. You can snap the cotton balls in place, ensuring they stay securely attached. This method works well for costumes and clothing embellishments.
Safety Pins
Attach cotton balls to the fabric using small safety pins. Pin the cotton balls in place through the fabric. This approach is suitable for temporary or easily adjustable applications.
Stitch Witchery
Cut small pieces of fusible webbing or Stitch Witchery to the size of your cotton balls. Place them between the cotton ball and the fabric, then use an iron to heat and fuse them together. This provides a no-sew, fabric-safe attachment.
Double-Sided Tape
Apply double-sided fabric tape to the back of the cotton balls and press them onto the fabric. This method is quick and easy but may not be suitable for long-term use or frequent washing.
Thread Loops
Create small fabric loops on the fabric surface and thread the cotton balls through them. This method is especially useful for making decorative garlands or bunting.
Elastic Bands
Sew or glue small elastic bands onto the fabric and slide the cotton balls into these bands. This technique is ideal for projects where you want the cotton balls to move or bounce.
Magnetic Attachments
Glue small magnets to the back of the cotton balls and attach corresponding magnets beneath the fabric. This is a unique way to add detachable cotton ball embellishments to your project.
7 Fun Projects in Cotton Balls and Fabric

Embrace your creative side and dive into these seven fun and imaginative projects using cotton balls and fabric.
These versatile materials can be transformed into delightful creations that make for engaging DIY endeavors and fantastic finished products.
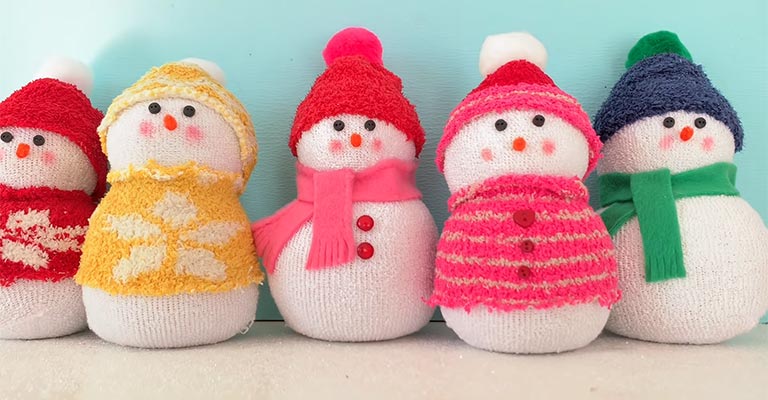
1. Cotton Ball Snowman Ornaments
Embrace the winter season by crafting charming snowman ornaments. Use fabric circles to create the body, stuff them with fluffy cotton balls, and add fabric scraps for scarves and hats. Paint on the facial features for a delightful holiday decoration.
2. Fabric and Cotton Ball Flowers
Craft a bouquet of everlasting fabric and cotton ball flowers. Cut and layer fabric petals, then secure a cotton ball in the center with a button or bead. These vibrant blossoms are perfect for home decor or as heartfelt gifts.
3. Fabric-Wrapped Cotton Ball Jewelry
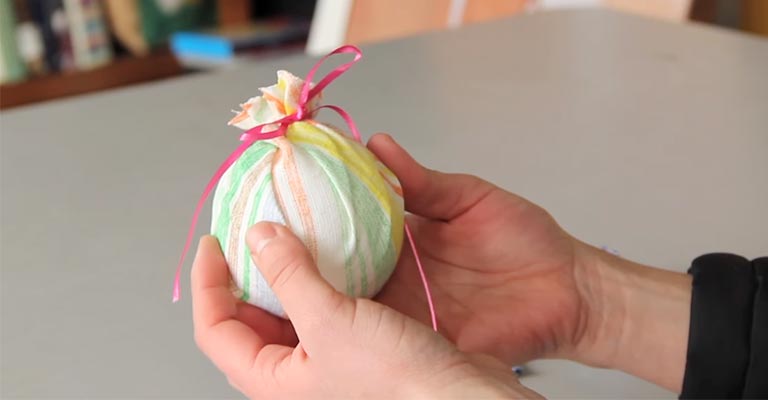
Design unique fabric-wrapped cotton ball jewelry pieces. Wrap fabric tightly around a cotton ball and secure it with glue or by sewing.
Attach these fabric-covered balls to earring hooks, necklaces, or bracelets for one-of-a-kind accessories.
4. Cotton Ball Puppies and Kittens
Turn cotton balls into adorable puppies or kittens. Wrap them in fabric and sculpt them into your chosen animal shape. Add fabric scraps for ears and facial features, creating lovable furry friends.
5. Cotton Ball Cloud Mobile
Craft a dreamy cloud mobile by shaping cotton balls into fluffy clouds and covering them with white fabric.
Attach these cloud clusters to a fabric-covered hoop or wooden frame and hang it from the ceiling for a whimsical addition to a nursery or playroom.
6. Cotton Ball Dot Art on Fabric
Explore textile art by using cotton balls as stamps with fabric paint. Dip the cotton balls in paint and create patterns or designs on fabric. This technique can be applied to clothing, accessories, and home decor for a unique and personalized touch.
7. Fabric-Wrapped Cotton Ball Letters
Spell out names or inspirational words with fabric-wrapped cotton ball letters. Cut out cardboard letters, wrap them in fabric, and glue or stitch cotton balls to their surface. These customized letters make charming room decor or personalized gifts.
Common Mistakes When Attaching Cotton Balls to Fabric

When attaching cotton balls to fabric, several common mistakes can occur. Awareness of these pitfalls and taking precautions can help you achieve better results.
Here are some common mistakes and how to avoid them:
Using Too Much Glue
- Mistake: Applying excessive glue can lead to it seeping through the cotton balls, creating a messy appearance.
- Avoidance: Use a small, controlled amount of glue. Apply it sparingly and evenly to the fabric to prevent excess from seeping through.
Not Allowing Enough Drying Time
- Mistake: Rushing the process by not allowing sufficient time for the glue or adhesive to dry can result in the cotton balls not adhering properly.
- Avoidance: Be patient and give ample time for the glue to dry completely before handling or moving the fabric.
Placing Cotton Balls Too Close Together
- Mistake: Crowding cotton balls too closely together can lead to a cluttered and uneven appearance, detracting from the overall design.
- Avoidance: Maintain a consistent spacing between cotton balls. This ensures a balanced and visually appealing result.
Ignoring Fabric Compatibility
- Mistake: Using the wrong fabric or fabric glue type can result in poor adhesion or damage to the fabric.
- Avoidance: Choose a suitable fabric for your project and ensure that the glue or adhesive is compatible with the fabric and cotton balls.
Not Securing Edges and Corners
- Mistake: Neglecting to reinforce the edges and corners of cotton balls can lead to them coming loose over time.
- Avoidance: Apply some extra adhesive to the edges and corners of cotton balls to ensure they are securely attached.
Ignoring Fabric Prep
- Mistake: Failing to clean or prepare the fabric before attaching cotton balls can lead to poor adhesion or the fabric not holding up over time.
- Avoidance: Ensure the fabric is clean, dry, and free of any debris or residues before beginning the attachment process.
Post-care After Attaching Cotton Balls to the Fabric
After attaching cotton balls to the fabric, it’s important to take some post-care steps to ensure the longevity and integrity of your project.
Avoid Washing
When the fabric with cotton balls is part of a decorative or craft project, it’s best to avoid washing it. Cotton balls attached with glue or other adhesives may not hold up well in water, and washing could cause them to come loose or lose shape.
Spot Clean Gently
When cleaning the fabric, spot-clean the area carefully using a mild detergent or fabric cleaner. Dab the affected area with a clean cloth, avoiding excessive rubbing or scrubbing. Allow it to air dry.
Handle with Care
Treat the fabric with cotton balls attached delicately. Avoid excessive pulling, tugging, or twisting, as this could potentially dislodge the cotton balls or damage the fabric.
Store Properly
Store items with cotton ball embellishments in a cool, dry place away from direct sunlight. Avoid folding or compressing the fabric to prevent any potential damage to the attached cotton balls.
Reinforce as Needed
Periodically check the cotton ball attachments, especially if the fabric is regularly handled. If you notice any loose cotton balls, reattach them using the original method or a suitable alternative.
Consider a Fabric Sealant
When the project is likely to be handled frequently or if it’s subjected to wear and tear, consider using a fabric sealant or Mod Podge to reinforce the attachment. This will help prevent fraying or loosening over time.
Seek Professional Cleaning
When the fabric requires professional cleaning, inform the cleaner about the cotton ball attachments so they can take appropriate precautions.
Documentation for Future Reference
Record the materials and methods used to attach the cotton balls. This documentation will be helpful if you need to make repairs or replicate the project in the future.
FAQs
Can I use regular white glue to attach cotton balls to the fabric?
Yes, you can use regular white glue, but it’s important to apply it sparingly to avoid any excess seeping through the cotton. Fabric glue or hot glue may provide more secure and durable results.
Is it possible to remove cotton balls attached to fabric glue?
Yes, cotton balls attached with fabric glue can be removed, but it may leave behind residue on the fabric. Gently peel off the cotton and use a fabric-safe adhesive remover if needed.
Can I wash fabric with cotton balls attached?
It’s best to avoid washing the fabric with cotton balls attached, especially if you’ve used regular glue.
What’s the best way to color cotton balls for a project?
You can use fabric dye or diluted acrylic paint to color cotton balls. Ensure they’re completely dry before attaching them to the fabric.
Can I use double-sided tape for attaching cotton balls?
While double-sided tape can provide a quick and easy attachment, it may not be as durable or long-lasting as other methods.
Wrap Up
Incorporating cotton balls into fabric projects adds a touch of creativity and dimensionality that can truly elevate your creations.
By following the techniques outlined in this guide, you’ll learn diverse methods to attach cotton balls to fabric, from traditional gluing to sewing and innovative alternatives like Velcro or magnetic attachments.
Each method offers its unique benefits, providing flexibility for different projects. Whether you’re crafting costumes, decor, or clothing, these techniques empower you to bring your imaginative visions to life.
So, armed with this knowledge, let your creativity flourish as you embark on a journey of crafting with cotton balls and fabric, turning your ideas into tactile works of art.
Leave a Reply