Soft pastels, renowned for their vibrant pigments and velvety texture, offer artists a unique medium to create stunning, tactile artworks.
Mastering the art of blending in soft pastel work is akin to wielding a magic wand, allowing for seamless transitions, depth, and dimension.
This guide unveils the secrets to achieving these effects, from selecting the right subject to choosing a harmonious color palette. We’ll delve into techniques like layering, cross-hatching, and employing various blending tools.
You’ll learn to balance highlights and shadows with patience and practice, infusing your creations with a lifelike quality. Join us on this journey of unleashing the full potential of soft pastels.
What Are Soft Pastels?
Soft pastels are a versatile and vibrant medium in the world of visual art. Comprising pure pigment, a minimal binder, and no liquid, they are known for their rich, powdery texture.
Unlike oil or acrylic paints, soft pastels don’t require brushes or solvents; artists apply them directly onto the surface. This allows for immediate, intense color application.
The medium is characterized by its vivid hues and exceptional blending capabilities, making it ideal for creating smooth gradients, fine details, and intricate textures
Soft pastels are commonly used on specialized textured paper, which provides tooth and grip for the pastel particles. They are favored by artists for their immediacy, ease of use, and ability to produce luminous, expressive works of art.
A Guide on How to Blend Soft Pastels?
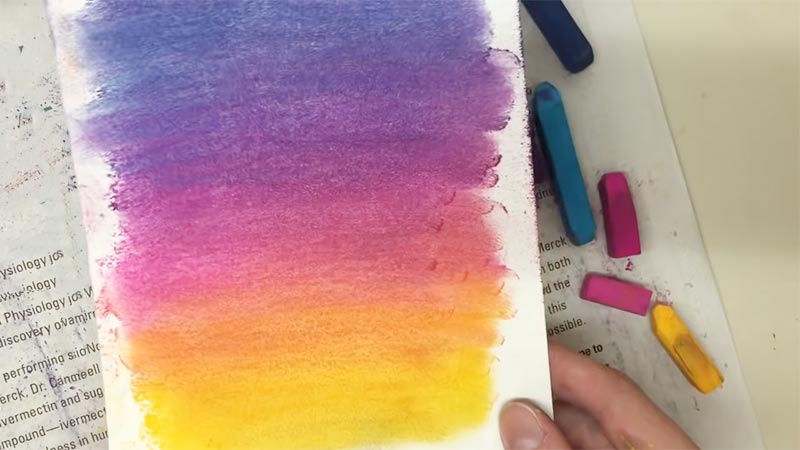
Blending soft pastels is a fundamental technique in the world of pastel art. Soft pastels are known for their vibrant colors and rich textures, and blending helps artists achieve smooth transitions, create depth, and add dimension to their artwork.
Whether you’re a beginner or an experienced pastel artist, mastering the art of blending is essential.
Here’s a step-by-step guide on how to blend soft pastels effectively:
Materials You’ll Need:
- Soft Pastels.
- Pastel Paper.
- Fingers.
- Blending Stumps/Tortillons.
- Soft Brushes.
- Soft Cloth/Tissue.
Blending Techniques:
Layering
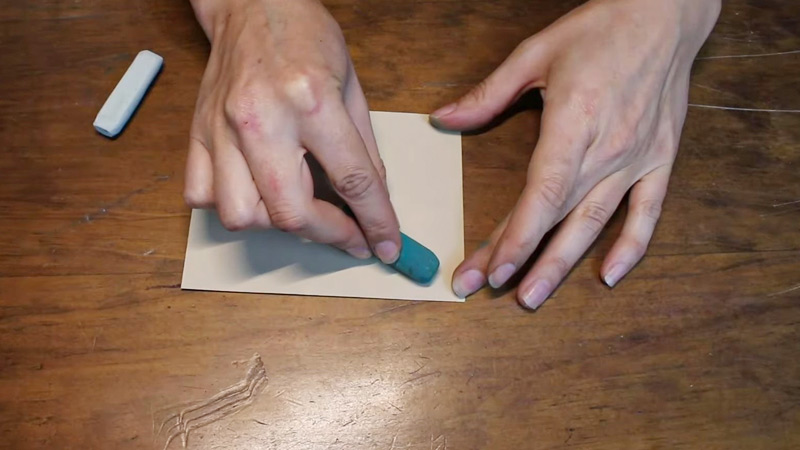
Begin by selecting a color palette that complements your subject. Start with a light application of pastel on the paper.
You can apply it directly or use a blending stump or your finger for a smoother, more controlled application. This initial layer provides a base for building up depth and intensity in your artwork.
Cross-Hatching
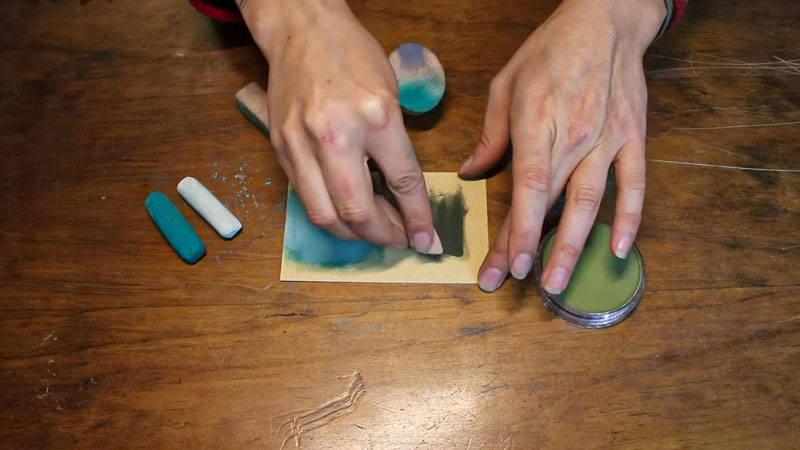
Employ cross-hatching techniques to add dimension and texture. Using different colors, create fine lines or hatching marks in areas that require shading or detail.
Overlap these lines to blend colors and establish depth. Remember, the closer the lines are together, the darker and more intense the color will appear.
Smudging
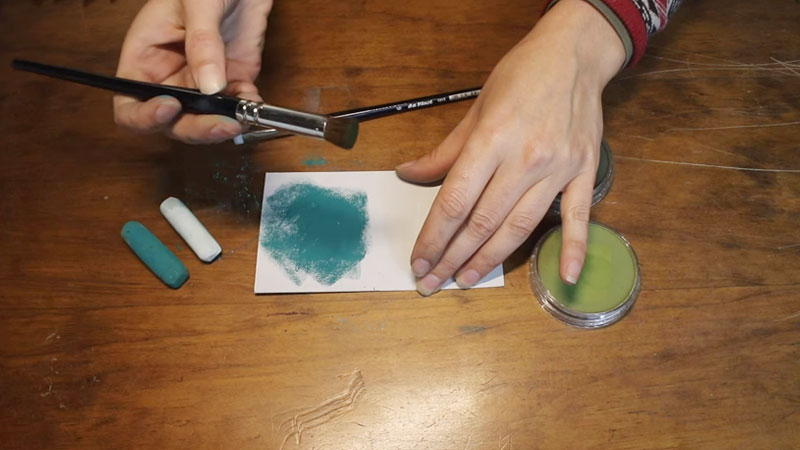
This step involves using your chosen blending tool to smudge and blend the pastel on the paper gently. You can use your fingers, blending stumps, or soft brushes for this purpose.
Experiment with circular or back-and-forth motions to achieve the desired level of blending. Be cautious not to apply too much pressure to prevent damaging the paper’s surface.
Layer and Repeat
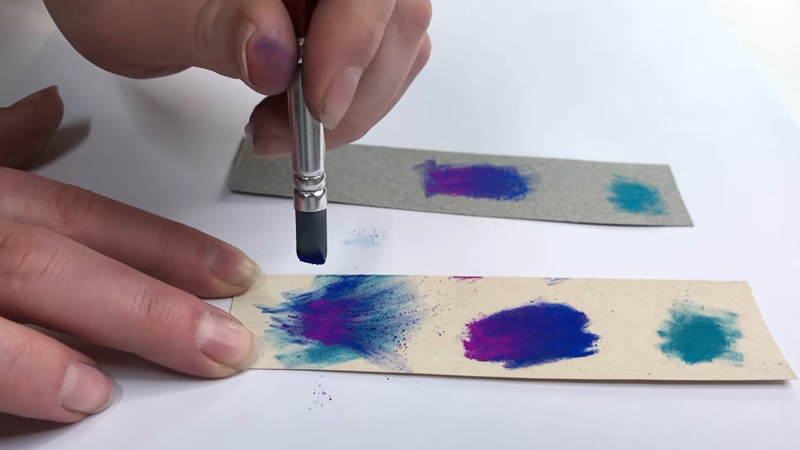
Gradually build up your artwork by adding layers of pastel. Apply additional colors over the base layers to create depth and complexity. For instance, layering lighter colors over darker ones can create highlights and a sense of luminosity.
Conversely, layering darker colors over lighter ones can deepen shadows and add richness to your composition.
Erase and Define
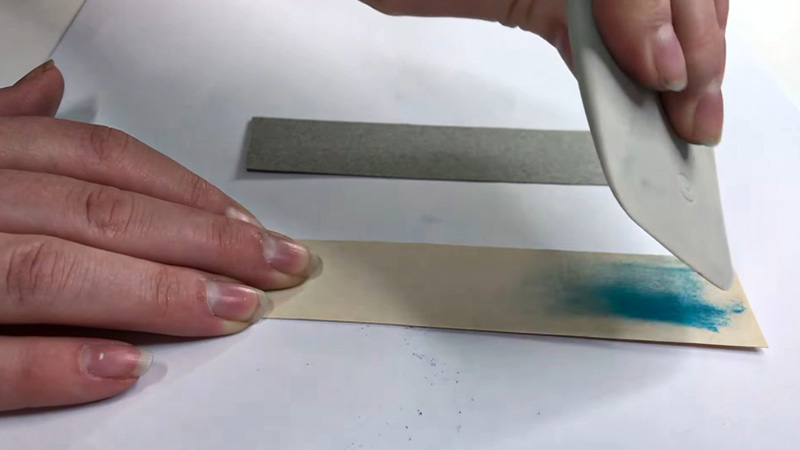
When you need to adjust or highlight specific areas, utilize a kneaded or pastel eraser.
Gently lift off some of the pastels to lighten the area. Once adjusted, redefine the area with a lighter color or a white pastel. This technique allows for precision and control in fine-tuning your artwork.
Fixative
To protect your artwork and prevent smudging, consider using a fixative spray. Follow the manufacturer’s instructions and apply the fixative in a well-ventilated area.
Hold the spray at a suitable distance from your artwork and apply it evenly. Allow it to dry completely before further work.
Practice
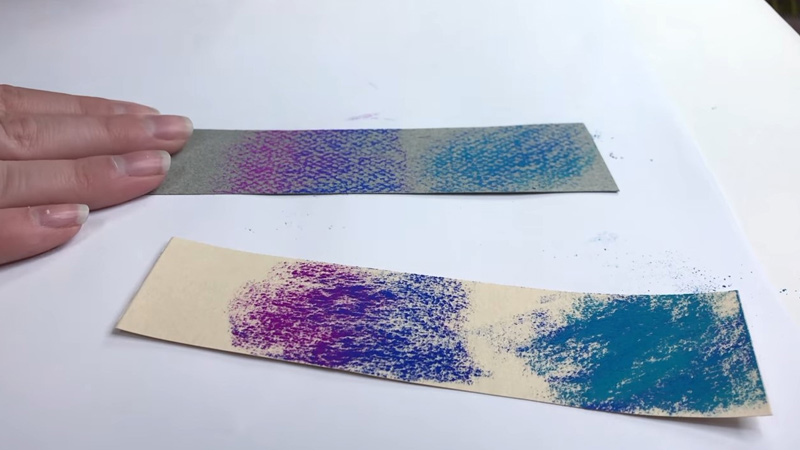
Blending with soft pastels is a skill that improves with practice. Experiment with different blending tools, techniques, and color combinations.
Explore various subjects and styles to develop your unique artistic voice. Embrace the learning process, and don’t be afraid to make mistakes – they’re a natural part of artistic growth.
Why Blending Soft Pastels Is Essential?
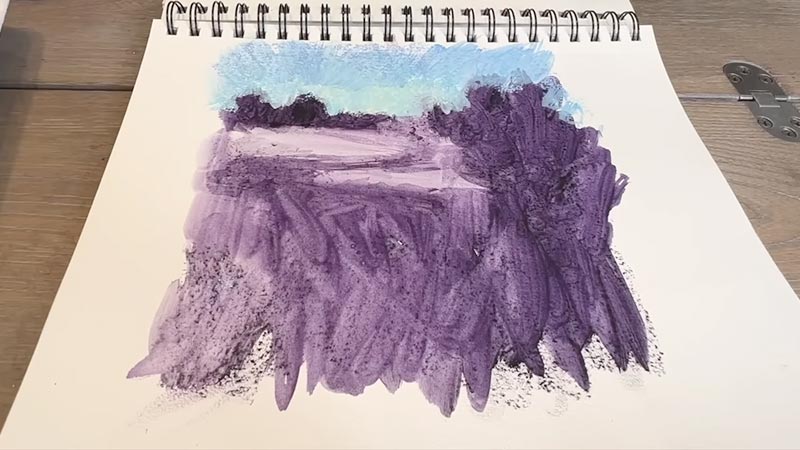
Blending soft pastels is a crucial technique in the realm of pastel art, serving several essential purposes that enhance the quality and visual appeal of artworks:
Smooth Transitions
Blending helps create seamless transitions between different colors and tones. It allows artists to eliminate harsh edges and create gradual shifts in color, making the artwork appear more harmonious and realistic.
Depth and Dimension
Blending soft pastels adds depth and dimension to a piece. By layering and blending colors, artists can create the illusion of three-dimensional forms, giving objects a more lifelike and tactile quality.
Textural Effects
Soft pastels possess a unique texture, and blending can enhance or modify this texture. It enables artists to create various surface effects, from the softness of fur to the roughness of tree bark, adding realism and visual interest to their artwork.
Highlighting and Shading
Blending helps achieve precise highlighting and shading effects. By selectively blending or smudging areas of the artwork, artists can make certain elements stand out while pushing others into the background, thereby directing the viewer’s attention.
Color Variation
Blending allows for the subtle mixing of colors to produce new and unique hues.
Artists can layer and blend different colors to achieve a wide range of shades and tones, enabling them to capture the complexity and richness of their subjects.
Correcting Mistakes
Blending can be an effective tool for correcting mistakes or adjusting areas needing refinement. It allows artists to lift off or adjust pastel layers, providing flexibility and precision in the creative process.
Visual Harmony
Ultimately, blending soft pastels helps achieve visual harmony within an artwork. It ensures that all elements of the composition work together cohesively, creating a balanced and aesthetically pleasing result.
Creating Art with Blended Pastels
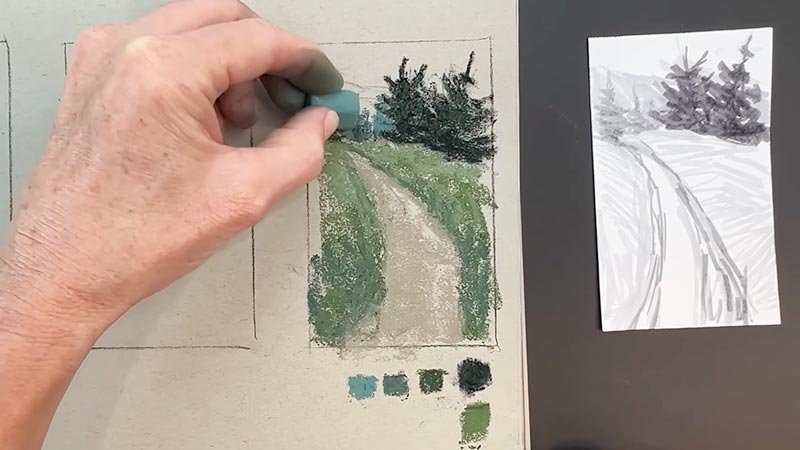
Creating art with blended pastels is a delightful and versatile endeavor. This technique allows for vibrant colors and soft transitions, creating visually striking and textured artwork.
Here’s a guide to help you make the most of blending soft pastels in your artistic creations:
Selecting Your Subject
Begin your artistic journey by selecting a subject that speaks to you. Soft pastels capture nature’s beauty, portraits’ depth, and still-life compositions’ intricacies. Choose a subject that inspires your creativity and resonates with your artistic vision.
Choosing Your Colors
Soft pastels come in rich colors, providing endless possibilities for your artwork.
Think carefully about the color palette that best conveys the mood and emotions you want to evoke. Experiment with combinations to discover the perfect hues for your piece.
Preparing Your Workspace
A well-organized workspace is essential for a productive art session. Gather your soft pastels, pastel paper, blending tools such as stumps and brushes, and fixatives. Ensure you have ample, well-diffused lighting to see the colors accurately.
Establishing the Base Layer
To create a foundation for your artwork, apply a light base layer of pastel on your paper. This initial layer is a starting point for building depth and intensity. Use gentle strokes to cover the paper evenly.
Layering and Building Color
Soft pastels thrive on layering. Gradually build up your artwork by adding layers of pastel. Experiment with various blending techniques to achieve the desired effect.
Cross-hatching, stippling, and scumbling can all be employed to create texture and depth in your piece.
Blending Techniques
Blending is the heart of working with soft pastels. Here’s how to do it effectively:
- Use your fingers for broad strokes and soft transitions. The warmth of your hand can help smudge the pastels smoothly.
- Blending stumps or trillions are excellent for more precise blending and detailing.
- Soft brushes, such as sable or goat hair, can be employed to gently sweep and blend pastel particles, creating delicate gradients and soft transitions.
Creating Highlights and Shadows
Highlights and shadows are essential for defining the form of your subject. Use erasers, like kneaded or gum erasers, to gently lift off pastels in areas where you want highlights.
Then, apply lighter colors or white pastels to redefine those areas, creating a three-dimensional effect.
Focusing on Texture
Soft pastels inherently possess a textured quality. Leverage this to convey different surfaces convincingly. Experiment with techniques like stippling, feathering, or cross-hatching to mimic textures like fur, foliage, or fabric.
Balancing Contrast and Value
Pay close attention to the contrast between light and dark areas within your artwork.
This interplay between values adds depth, drama, and realism to your composition. Make deliberate choices to enhance the visual impact.
Fixative Application
When you wish to preserve your artwork and prevent smudging, consider using a fixative spray.
Follow the manufacturer’s instructions carefully, applying it in a well-ventilated area. Fixative helps set your pastel layers in place.
Practicing Patience and Experimenting
Creating art with blended pastels is a journey of patience and experimentation. Allow yourself the freedom to explore and make mistakes. Each piece you create will contribute to your growth as an artist.
Reflecting and Refining
Periodically step back from your artwork to assess it from a distance. This perspective can reveal areas that may need refinement or adjustment. Take your time to make these refinements and bring your artistic vision to life.
Common Mistakes and How to Avoid Them?
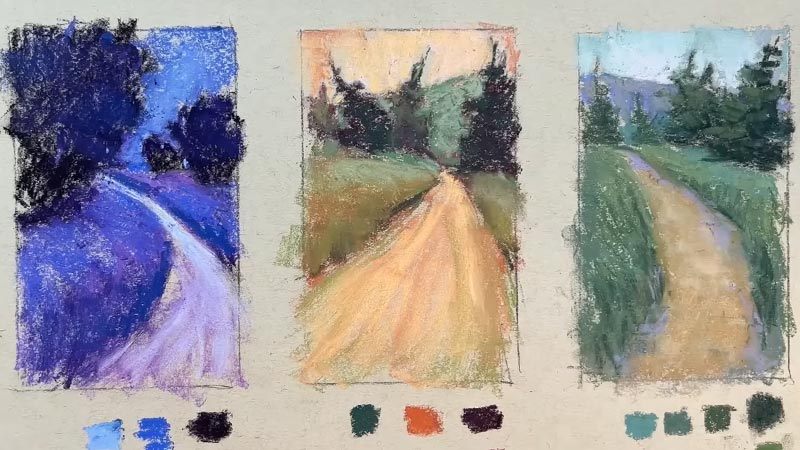
When working with soft pastels, artists often encounter several common mistakes. Being aware of these pitfalls can help you navigate the medium more effectively.
Here are some common mistakes and tips on how to avoid them:
Using the Wrong Paper
- Mistake: Using smooth paper without enough tooth can lead to difficulty in layering and blending pastels.
- Solution: Use specialized pastel paper with a textured surface. It provides the necessary grip for the pastel particles.
Neglecting Underdrawings
- Mistake: Skipping the underdrawing can result in inaccurate proportions and misplaced elements.
- Solution: Start with a light, accurate sketch to establish the composition and proportions before applying pastels.
Overworking the Paper
- Mistake: Applying too much pressure or excessive layers of pastel can cause the paper to become saturated or damaged.
- Solution: Apply pastels with a gentle touch and build up layers gradually. Avoid pressing too hard to preserve the paper’s integrity.
Neglecting Blending Techniques
- Mistake: Ignoring blending techniques can lead to harsh transitions and a lack of depth in the artwork.
- Solution: Experiment with blending tools like fingers, stumps, and brushes to achieve smooth transitions and create depth.
Using Dirty Tools
- Mistake: Using blending tools that are not clean can muddy the colors and affect the overall quality of the artwork.
- Solution: Regularly clean blending stumps, brushes, and other tools to ensure they don’t transfer unwanted colors.
Ignoring Value Contrast
- Mistake: Neglecting to establish strong contrasts between light and dark areas can result in a flat and less dynamic composition.
- Solution: Pay attention to the range of values in your artwork. Ensure there are distinct light, mid-tone, and dark areas to create depth and dimension.
Not Testing Colors
- Mistake: Applying colors directly without testing them first can lead to unexpected results and color clashes.
- Solution: Test colors on scrap paper to see how they interact before applying them to your main artwork.
Relying Solely on Blending
- Mistake: Depending solely on blending for transitions can sometimes result in over-smoothing and loss of texture.
- Solution: Use a combination of blending and layering techniques to maintain texture and achieve the desired level of smoothness.
FAQs
How do I start blending soft pastels?
Begin by applying a base layer of pastel on your paper. Use your fingers, blending stumps or soft brushes to smudge and blend the pastel gently.
Can I blend soft pastels with my fingers?
Yes, using your fingers is one of the most accessible and effective ways to blend soft pastels.
What are blending stumps or tortillons, and how do I use them?
Blending stumps or tortillions are cylindrical tools made of paper or felt. They are excellent for precise blending and adding fine details to your artwork.
Can I use brushes for blending soft pastels?
Yes, soft bristle brushes like sable or goat hair can gently sweep and blend pastel dust.
Should I use a fixative after blending soft pastels?
Using a fixative spray is optional but recommended to preserve your artwork and prevent smudging.
Wrap Up
Blending soft pastels is an art form that combines technique and creativity to produce stunning, textured artworks.
It begins with selecting the right subject and color palette, followed by layering, blending, and experimenting with various tools and techniques. Achieving smooth transitions, depth, and dimension is the essence of soft pastel blending.
Patience and practice are key as you refine your skills, learning to balance highlights, shadows, and values.
Whether you’re creating vivid landscapes, lifelike portraits, or intricate still-life compositions, blending soft pastels offers a captivating and versatile medium to express your unique artistic vision, making every creation a testament to your creativity and dedication.
Leave a Reply