In the face of unprecedented times, the humble face mask has emerged as an emblem of collective responsibility and safety.
Yet, for many, the discomfort of prolonged mask-wearing, particularly around the ears, has become a common challenge. Enter the art of crocheting ear savers—a simple, yet ingenious solution to this predicament.
With just a crochet hook, some yarn, and a dash of creativity, you can fashion these small, practical accessories that offer immense relief. This guide will walk you through the steps, enabling you to create your own ear savers.
Together, we’ll turn necessity into a craft, fostering comfort and resilience in the face of adversity.

What Are Ear Savers?
Ear savers are small, flexible devices designed to alleviate discomfort caused by prolonged mask-wearing. Typically made of soft, lightweight materials like fabric or silicone, they consist of a band with hooks or notches on each end.
These hooks or notches secure the ear loops of face masks, holding them in place at the back of the head rather than around the ears. By doing so, ear savers distribute the pressure evenly, reducing strain and irritation on the ears.
They are especially valuable for individuals who need to wear masks for extended periods, such as healthcare professionals, essential workers, and the general public.
Easy to use and customizable, ear savers provide a practical and comfortable solution in the battle against the COVID-19 pandemic.
How to Crochet Ear Savers for Face Masks?
As face masks have become an essential part of our daily lives, many people have experienced discomfort and irritation caused by the elastic bands that loop behind the ears.
Fortunately, there’s a simple and creative solution to this problem: crochet ear savers. These handy accessories can help relieve the pressure on your ears and make wearing a mask more comfortable.
In this step-by-step guide, we’ll show you how to crochet your own ear savers.
Materials You’ll Need:
- Yarn.
- Crochet Hook.
- Scissors.
- Button.
Choose Your Pattern
Before diving into crocheting, it’s important to select a pattern that suits your preferences and skill level.
You can find a wide range of patterns online, from simple rectangular designs to more intricate ones with decorative elements. For beginners, it’s often best to start with a straightforward pattern that focuses on basic stitches.
Begin Crocheting
To begin, create a slipknot by forming a loop with the yarn and pulling the end through. Slip this loop onto your crochet hook and tighten it gently. This is your starting point.
Then, chain the desired number of stitches. This initial chain will determine the length of your ear saver. A good starting range is typically between 10 to 15 chains, but feel free to adjust based on your preference.
Crochet Rows
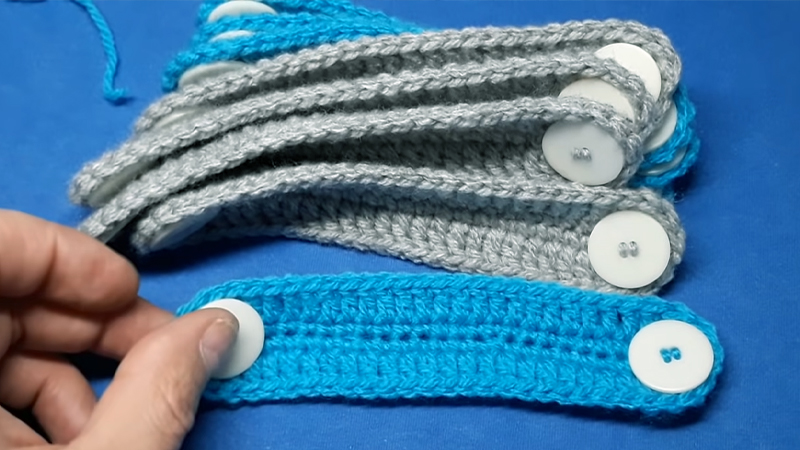
With your starting chain, turn your work and begin crocheting rows. If you’re a beginner, using the single crochet stitch is recommended. It creates a tight and stable fabric that works well for ear savers. Continue crocheting back and forth until your ear saver reaches the desired width, typically around 1.5 to 2 inches.
Add Buttonhole
Once you’ve reached the desired width, it’s time to create a buttonhole. This is essential for fastening your earsaver securely.
To make the buttonhole, crochet a few chains (usually 3-4) and then skip the same number of stitches. This creates a gap where the button can be fastened.
Finish Off
After creating the buttonhole, work a few more rows to ensure your ear saver has a neat edge.
This will provide a polished finish. When you’re satisfied with the length, cut the yarn, leaving a tail for weaving in later.
Attach the Button
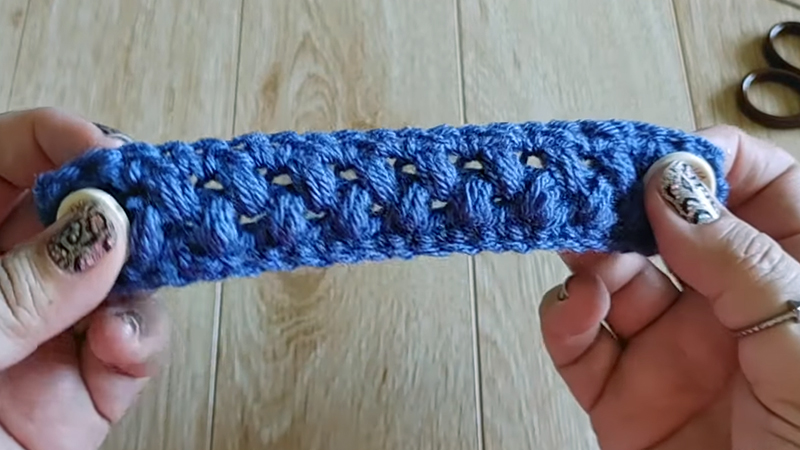
Thread the yarn tail through a yarn needle, and carefully sew the button to the opposite end of the ear saver from the buttonhole. Make sure it’s securely attached. This button will allow you to adjust the fit of the earsaver to your liking.
Weave in Ends
Using the yarn needle, weave in any loose ends. This not only ensures your work looks tidy but also prevents it from unraveling with use.
Try It On
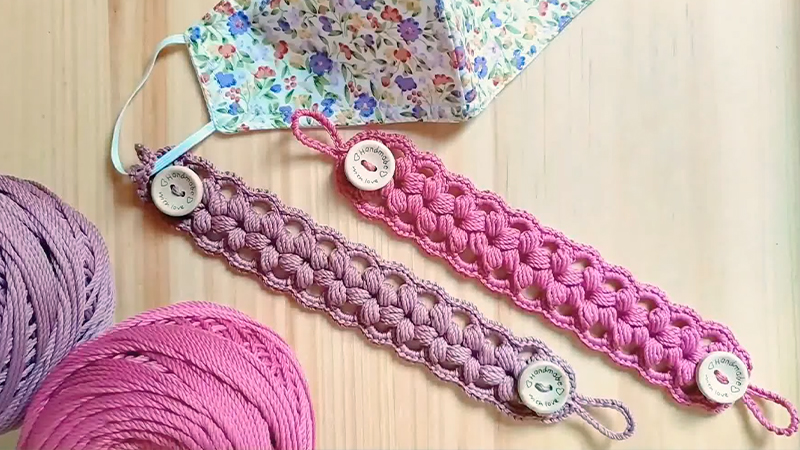
Your crochet ear saver is now ready to use. Loop the buttonhole around the elastic ear straps of your face mask and secure the mask by fastening the button. Make any necessary adjustments to ensure a comfortable fit.
How to Use Them Effectively?

Now that you’ve successfully crocheted your own ear savers for face masks, let’s explore how to use them effectively. Ear savers are simple yet invaluable accessories that can significantly enhance your comfort while wearing a mask for extended periods.
Here’s how to use them:
Prepare Your Ear Saver
Ensure your crocheted ear saver is complete, with buttons securely attached to each end. You can choose buttons that match your style or mask for a more personalized touch.
Put on Your Face Mask
First, put on your face mask as you normally would, ensuring that it covers your nose and mouth completely.
Position the Ear Savers
Hold the ear savers in your hands with the buttons facing outward. The single crocheted portion should be facing your neck.
Hook the Ear Loops
Take the ear loops of your face mask and hook them securely around the buttons on each end of the ear saver. The buttons provide anchor points for the ear loops, relieving the pressure from your ears.
Adjust for Comfort
Once the ear loops are securely fastened to the buttons, adjust the ear savers to your preferred tightness. This will ensure a snug and comfortable fit for your mask.
Wear with Comfort
You’re all set! With your ear savers in place, you can now wear your mask comfortably for extended periods without the discomfort and irritation that often accompanies mask-wearing.
Remove and Store
When you’re ready to remove your mask, simply unhook the ear loops from the buttons on the ear savers. You can then store your ear savers in a clean, safe place for future use.
Care for Ear Savers

Caring for your ear savers is essential to ensure their longevity and hygiene, especially since they come into contact with your face and mask regularly.
Here are some care tips for ear savers:
Regular Cleaning
Depending on the material, ear savers can be susceptible to dirt, oils, and germs over time. To maintain their cleanliness and effectiveness, it’s crucial to clean them regularly.
For plastic or silicone ear savers, a disinfecting wipe or a mild soap and water solution works well. Gently wipe down the surface and ensure all grooves and edges are thoroughly cleaned.
Disposable Ear Savers
Disposable ear savers, often made of paper or lightweight materials, are designed for single-use purposes.
After each use, it’s advisable to dispose of them responsibly. If they become soiled or damaged during use, it’s essential to replace them promptly.
Fabric Ear Savers
Fabric ear savers are a popular choice for their reusability and comfort. To maintain their effectiveness, machine-wash them in a mesh laundry bag or hand-wash with mild detergent.
Use cold or lukewarm water and avoid bleach or harsh chemicals. After washing, thoroughly rinse and allow them to air dry.
Inspect for Damage
Routine inspections of your ear savers are crucial to catch any signs of wear and tear. Look for fraying along fabric edges, cracks or splits in plastic or silicone, and loose or broken parts on adjustable ear savers. Damaged ear savers may not provide the necessary support and could potentially cause discomfort or irritation.
Store Properly
When not in use, store your ear savers in a clean, dry place. Avoid placing heavy objects on them, as this can lead to deformation, especially for adjustable ear savers.
A designated container or pouch can help protect them from dust and other contaminants, ensuring they remain in optimal condition for when you need them.
Personal Use Only
For hygiene reasons, it’s strongly recommended to avoid sharing ear savers with others. Since they come into close contact with your face, they can potentially carry germs. If you must share them, be sure to clean and disinfect them thoroughly between users.
Consider Having Extras
Having multiple ear savers on hand is a practical approach. This way, you can rotate them while others are being cleaned or dried.
This is particularly important for those who rely on ear savers for extended periods, such as healthcare professionals or essential workers.
FAQs
What is the purpose of crocheted ear savers for face masks?
Ear savers are designed to alleviate discomfort from mask straps by distributing the pressure behind the head, making mask-wearing more comfortable for extended periods.
What materials do I need to crochet earsavers?
You’ll need a crochet hook (size 4mm to 5mm), worsted-weight yarn, a yarn needle, and scissors.
How long should I make my crocheted ear savers?
A typical length for ear savers is 4-5 inches, but you can adjust it to your preference.
Are there specific crochet stitches to use for ear savers?
The most common stitch for ear savers is the single crochet stitch, as it creates a sturdy and comfortable texture.
How do I attach buttons to my crocheted earsavers?
After completing your ear savers, use a yarn needle to thread the yarn tail through a button and then sew the button securely to each end of the ear saver, making sure they align with the mask’s ear loops.
Wrap Up
In crafting these crocheted ear savers, you’ve not only created a functional accessory but a small act of care and comfort for yourself and others.
These little bands of yarn serve as a testament to our resilience and adaptability in these challenging times. With a touch of creativity and a few simple materials, you’ve transformed a utilitarian necessity into a personalized solution, offering relief during prolonged mask-wearing.
Whether you’ve made them for yourself, loved ones, or even to donate, your effort embodies the spirit of community and solidarity. May these ear savers serve as a reminder of our ability to find comfort and support, even in the most trying circumstances.
Leave a Reply