Mastering cross-stitching with multiple colors opens up a world of creative possibilities. Organizing your workspace and threads, planning color changes, and using techniques like blending and anchoring threads are crucial.
The parking method proves invaluable for intricate designs. Consistent tension and occasional breaks ensure quality work.
Embrace patience and experimentation; these lead to truly unique creations. Remember, every stitch contributes to a tapestry of artistry.
With practice, you’ll find joy in bringing vibrant, multicolored designs to life, and each finished piece will stand as a testament to your skill, dedication, and artistic flair in the world of cross-stitching.

How to Cross Stitch With Multiple Colors?
Cross-stitching with multiple colors is a delightful and creative craft that allows you to create intricate and vibrant designs on fabric.
Whether you’re a beginner or an experienced cross-stitcher, working with multiple colors can add depth and detail to your projects.
Here’s a step-by-step guide on how to cross-stitch with multiple colors:
Materials You’ll Need:
- Cross-stitch pattern.
- Aida fabric.
- Embroidery hoop or frame.
- Embroidery floss.
- Needle.
- Scissors.
Cross-Stitching with Multiple Colors:
Prepare Your Fabric
Before you start, it’s important to ensure your fabric is clean and wrinkle-free. If necessary, iron it on a low setting to remove any creases. Cut your
Aida fabric to the desired size, leaving some extra room around the edges for framing or finishing.
Place the fabric in the embroidery hoop or frame, ensuring it’s taut but not overly stretched. This will provide a stable surface for your stitches.
Thread Your Needle
Select the first color of embroidery floss you want to work with. Cut a length, usually between 18-24 inches, and separate the floss into the number of strands specified by your pattern. Most patterns indicate the recommended number of strands for each color.
Thread your needle with the appropriate number of strands, ensuring the ends are even and the floss is securely in the eye of the needle.
Start Stitching
Refer to your pattern and locate the starting point for your chosen color. This is often the center or a prominent point in the design.
Bring your needle up from the back of the fabric to the front, leaving a small tail on the back for anchoring. This tail will be secured later to prevent it from coming undone.
Cross-Stitch Technique
Mastering the cross-stitch technique is crucial. Insert your needle from the front to the back of the fabric, forming a diagonal stitch. Then, come up diagonally in the opposite direction to complete the “X.”
Make sure your stitches are consistent in size and direction, as this contributes to your project’s overall neatness and uniformity. Continue stitching, following the pattern’s instructions.
Changing Colors
When it’s time to switch colors, complete your last stitch with the current color and secure the thread on the back of the fabric by making a small knot or weaving it through existing stitches.
Trim any excess thread. Thread your needle with the next color and start the new stitching section. Remember to anchor the thread on the back as you did with the previous color.
Managing Multiple Colors
Consider using small bobbins or floss organizers to keep your work organized and prevent tangles. Wind each color of floss onto a separate bobbin and label it with the corresponding color code or name.
This will make finding and using the correct colors easier as you work through your pattern.
Finishing Your Project
Once you’ve completed your cross-stitch design, carefully remove it from the hoop or frame. Trim any excess fabric, leaving a border for framing or finishing.
Wash and iron your finished piece on a low setting to remove any remaining creases or dirt. This step is especially important if you plan to frame your cross-stitch.
Common Mistakes During Cross-Stitching With Multiple Colors

Cross-stitching with multiple colors can be a rewarding but intricate endeavor. To achieve a polished result, it’s important to avoid common mistakes.
Here are some of the most typical errors made during cross-stitching with multiple colors:
Miscounting Stitches
Losing track of the number of stitches or starting in the wrong place can throw off the entire pattern. Always double-check your counts and start from the correct position according to your pattern.
Tangling Threads
When working with multiple colors, it’s easy for threads to become tangled. Keep your floss organized using bobbins or floss organizers, and avoid pulling the thread too tightly, which can lead to knots.
Uneven Tension
Inconsistent tension results in uneven stitches. Try maintaining the same tension throughout your work to ensure uniformity in your stitches.
Ignoring Backside Care
Neglecting the back of your work can lead to messy finishes and potential snags. Secure threads properly, and avoid long jumps between areas of your design to keep the backside neat.
Not Reading the Pattern Carefully
Misinterpreting the pattern symbols or color codes can lead to incorrect stitching. Before starting, take your time to understand the pattern, and mark off completed sections to avoid confusion.
Skipping the Practice
Beginners might skip practicing basic stitches before tackling complex designs. Practice is key to improving your skills, even if it means creating small test swatches.
Overworking the Fabric
Pulling the stitches too tight or using a too-large needle for your fabric can distort the fabric or create visible holes. Choose an appropriate needle size and maintain a gentle tension.
Ignoring Color Changes
Failing to plan and execute smooth color transitions can result in abrupt shifts in your design. Blend colors when transitioning to achieve a more natural and gradual change.
Techniques to Prevent Your Colors From Getting Tangled in Cross Stitches

Preventing tangled threads is crucial for smooth and enjoyable cross-stitching.
Here are some effective techniques to keep your colors from getting tangled:
Use Thread Organizers
Investing in thread organizers, such as bobbins or floss cards, can greatly assist in keeping your threads organized. Not only do they provide separate compartments for each color, but they also often come with spaces to label the colors.
This ensures that your threads stay neat, tidy, and easily accessible during your project.
Thread Conditioner
Thread conditioners like beeswax or Thread Heaven are valuable tools for preventing thread tangles.
By running your floss through a conditioner before stitching, you reduce friction and static, making the thread smoother and less prone to tangling. This is especially useful when working with fine or delicate threads.
Shorter Thread Lengths
While it might mean changing threads more frequently, using shorter lengths of floss can significantly reduce the likelihood of tangles. It’s a small trade-off for the time and frustration saved from untangling longer strands.
Mindful Needle Placement
When taking breaks from stitching, securely place your needle into the fabric near your work. This prevents it from being misplaced and stops the thread from twisting around other strands. This small step can save you from a potential tangle later on.
Avoid Pulling Too Tight
Maintaining a gentle tension on the thread while stitching is crucial. Pulling too tightly can lead to knots and, subsequently, tangles.
Practice finding the right balance of tension to ensure smooth stitching without over-tightening.
Separate Strands Carefully
When separating strands of floss, do so slowly and evenly. Rushing this step can lead to twisting and knotting. Taking a little extra time during this process can save you from a potential headache down the line.
Organize Threads by Color
When your pattern involves frequent color changes, consider organizing your threads by color in a way that’s easy to access.
Whether using a thread organizer or a simple box, having a system in place helps you quickly find the color you need, minimizing the risk of tangles.
Avoid Crossing Threads on the Back
When securing threads on the back of your work, be mindful not to cross different colors.
Crossing threads can lead to tangling or create bumps on the backside of your project. Aim for a tidy, organized back to match the front.
Tips and Tricks for Cross Stitching with Multiple Colors

Cross-stitching with multiple colors can be both rewarding and challenging. Adding a variety of hues to your projects allows for greater intricacy and depth in your designs.
To help you master the art of cross-stitching with multiple colors, here are some valuable tips and tricks:
Organize Your Workspace
Before diving into your cross-stitch project, ensure your workspace is tidy and well-organized.
Keep your floss, fabric, patterns, and tools within easy reach. A clean and clutter-free area will make it easier to work with multiple colors.
Sort Your Threads
Sorting your embroidery floss by color can save you valuable time. Use floss organizers or small bobbins to keep each color separate and labeled.
This will help you quickly locate the right color when needed.
Start with a Clear Pattern
A well-organized pattern is your roadmap for cross-stitching success.
Ensure your pattern is clear and easy to read, with distinct symbols or color codes for each thread color. Familiarize yourself with the pattern’s color key before starting.
Plan Your Color Changes
Review your pattern and plan where to make color changes in advance.
This prevents interruptions in your stitching flow and minimizes the need to backtrack or correct mistakes. It’s especially important for complex designs.
Use a Thread Conditioner
Thread conditioners like Beeswax or Thread Heaven can be handy. Running your floss through a conditioner before stitching can reduce tangling and make the thread smoother and easier to work with.
Anchor Threads Securely
When switching between colors, ensure your threads are anchored securely on the back of your fabric.
This prevents them from coming undone over time. A small knot or weaving the thread through existing stitches should suffice.
Cross-Stitch Parking Method
Consider using the parking method for large, intricate patterns with many color changes.
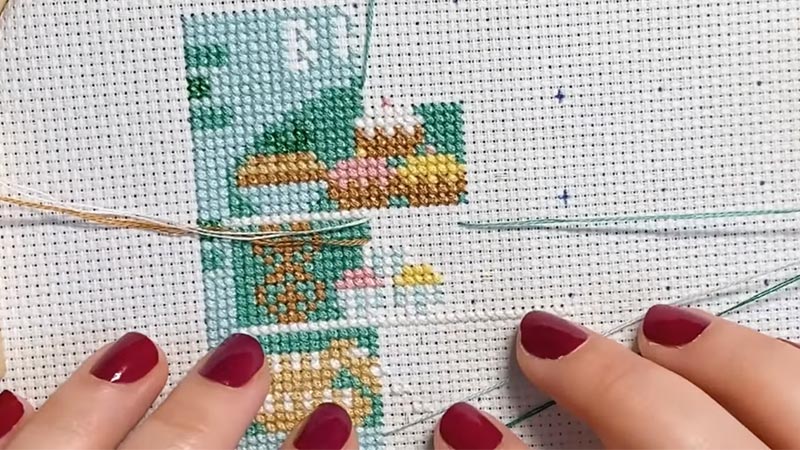
This involves leaving a color ‘parked’ in a specific spot on your fabric and picking it up later when needed. It can help keep your work organized.
Blend Colors for Smooth Transitions
Blend the old and new colors in your stitches when transitioning between colors for a smoother transition. This is especially useful for creating gradients or shading effects in your design.
Check Tension
Maintain consistent tension while stitching to ensure that all your stitches are of the same size. Uneven tension can result in a lumpy or distorted final piece.
Take Breaks and Rest Your Eyes
Cross-stitching can be intricate work that requires close focus. Remember to take regular breaks to rest your eyes and stretch your hands to prevent strain.
Practice Patience
Cross-stitching with multiple colors can be time-consuming, but the end result is worth the effort. Don’t rush through your project; take your time and enjoy the creative process.
FAQs
How do I choose the right colors for my cross-stitch project?
Consider the pattern and the overall look you want to achieve. Start with a color scheme that complements your design, and then select shades that provide contrast and depth.
How can I prevent tangles when working with multiple thread colors?
Keep your threads organized using bobbins or floss organizers. Additionally, use a thread conditioner like beeswax to reduce friction and tangling.
What is the parking method in cross-stitching?
The parking method involves leaving a thread “parked” in a specific spot on your fabric to be picked up later when needed.
How do I blend colors for smoother transitions in my cross-stitch work?
To blend colors, use both the old and new colors in your stitches when transitioning.
How do I secure threads when changing colors in cross-stitching?
When switching colors, anchor the threads securely on the back of the fabric to prevent them from coming undone.
Wrap Up
Mastering cross-stitching with multiple colors opens up a world of creative possibilities.
Organizing your workspace and threads, planning color changes, and using techniques like blending and anchoring threads are crucial. The parking method proves invaluable for intricate designs.
Consistent tension and occasional breaks ensure quality work. Embrace patience and experimentation; these lead to truly unique creations. Remember, every stitch contributes to a tapestry of artistry.
With practice, you’ll find joy in bringing vibrant, multicolored designs to life, and each finished piece will stand as a testament to your skill, dedication, and artistic flair in the world of cross-stitching.
Leave a Reply