The crumple tie-dye technique is a captivating form of artistic expression, offering a dynamic and unpredictable canvas for creativity.
Unlike traditional tie-dye methods, crumpling fabric before dyeing results in spontaneous, textured patterns that evoke a sense of free-spirited individuality.
This hands-on approach invites experimentation, allowing for a wide range of designs, from vibrant, multi-hued swirls to subtle, earth-toned motifs. Starting with damp fabric and using high-quality dye are pivotal steps in ensuring vivid and long-lasting results.
As we delve into this technique, we’ll uncover the intricacies of crumple tie-dye, providing you with the knowledge and confidence to embark on your own tie-dye journey.

What Is the Crumple Tie-Dye?
Crumple tie dye is a popular fabric dyeing technique that involves crumpling or scrunching up the fabric before applying dye. Unlike traditional tie-dye methods that use precise folding or binding, crumple tie-dye embraces randomness.
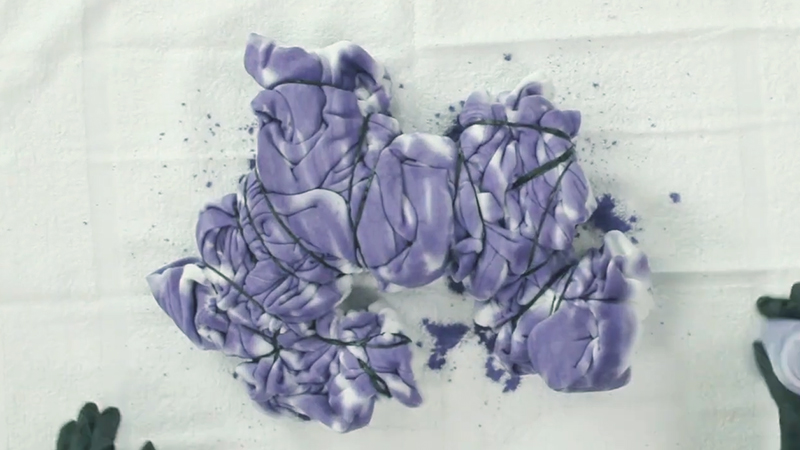
The fabric is laid flat and then scrunched into a loose, textured bundle. This creates irregular folds and creases, resulting in a distinctive, organic pattern once dyed.
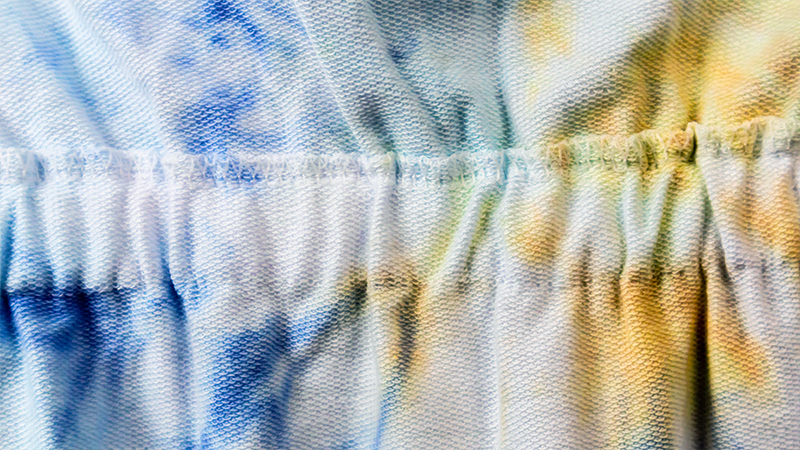
The dye is applied directly to the crumpled fabric, allowing it to seep into the crevices and interstices, resulting in a visually dynamic, multi-dimensional design.
The technique offers endless possibilities for color combinations and patterns, making it a versatile and creative form of textile art. Crumple tie-dye is a favorite among DIY enthusiasts, artists, and crafters for its easy application and visually striking results.
How to Crumple Tie Dye Technique?
Crumple tie-dye is a fun and creative way to add vibrant patterns to fabric using a crumpling method before applying dye. This technique results in a unique, organic design that is characterized by its irregular, textured appearance.
Here’s a step-by-step guide on how to achieve a crumple tie-dye effect:
Materials Needed:
- White Cotton Fabric.
- Fabric Dye.
- Squeeze Bottles or Spray Bottles.
- Rubber Bands.
- Plastic Gloves.
- Plastic Tablecloth or Garbage Bags.
- Plastic Bags or Plastic Wrap.
- Water.
- Bucket or Sink.
Steps:
Prepare Your Workspace
To create a comfortable and safe environment for tie-dying, start by covering your work surface with a plastic tablecloth or a few garbage bags.
This will protect your table or counter from any potential dye spills. Additionally, put on a pair of plastic gloves to shield your hands from the dye and to keep them clean throughout the process.
Prepare the Fabric
Before you begin, it’s crucial to prepare the fabric for optimal dye absorption. Washing the fabric beforehand removes any sizing or chemicals that may hinder the dye from penetrating evenly.
After washing, allow the fabric to remain slightly damp. This facilitates better dye spreading and absorption.
Crumple the Fabric
Lay the damp fabric flat on your work surface. Now, using your hands, start to crumple it up.
This is where your creativity comes into play. You can fold, twist, or scrunch the fabric in any way you like.
Experiment with different techniques like accordion folding, random scrunching, or even gentle twisting to create various textural effects on the fabric.
Secure with Rubber Bands
With your crumpled fabric in place, use rubber bands to hold it together. This step helps maintain the texture and pattern you’ve created. You can choose to apply the rubber bands randomly for an organic look, or deliberately create a pattern by sectioning off parts of the fabric.
Mix the Dye
Follow the instructions provided on the dye packaging to mix it with water. It’s essential to ensure that the dye is thoroughly dissolved and well-mixed. This will guarantee that your colors are consistent and vibrant when applied to the fabric.
Apply the Dye
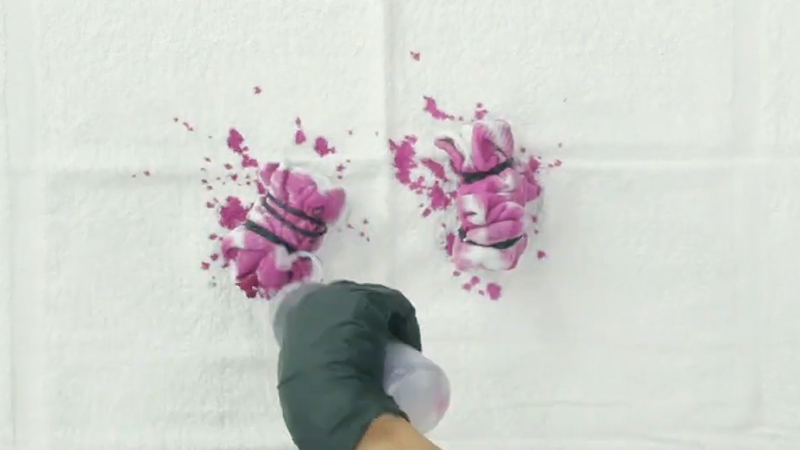
Armed with squeeze bottles or spray bottles filled with your prepared dye, it’s time to apply it to the crumpled fabric.
Because the fabric is folded and secured with rubber bands, the dye will seep into different areas, resulting in a beautifully unique pattern.
Consider using a variety of colors for a more dynamic and eye-catching effect. Overlapping colors can also create intriguing blends and gradations.
Wrap the Fabric
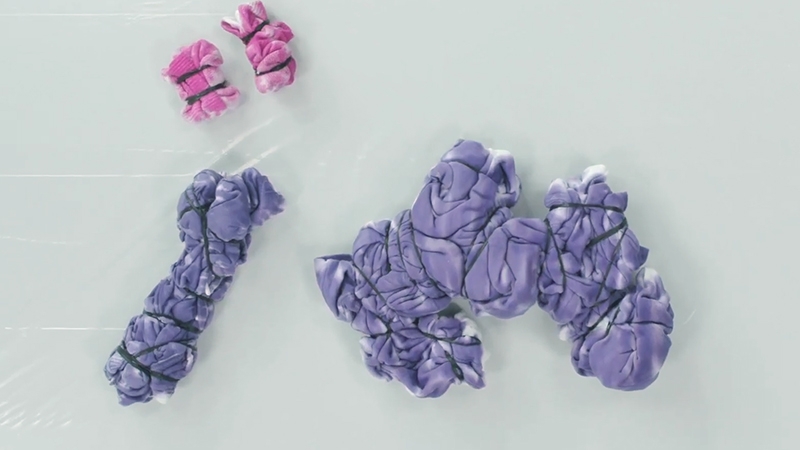
Once you’ve applied the dye, take care to wrap the dyed fabric in plastic bags or plastic wrap. This serves a dual purpose: it helps the dye set and prevents any bleeding of colors onto other areas of the fabric.
Let it Set
Allow the wrapped fabric to sit undisturbed for at least 6 to 8 hours. For those desiring more intense and vivid colors, you can let it sit for up to 24 hours. This patience ensures that the dye thoroughly permeates the fabric, resulting in long-lasting and vibrant tie-dye patterns.
Rinse and Unwrap
After the designated setting time has passed, it’s time to uncover your creation. Under a stream of cold water, gently rinse the fabric until the water runs clear. This process removes any excess dye, setting the colors and preventing them from bleeding.
Carefully remove the rubber bands and unfold the fabric. As you do so, you’ll be greeted by the reveal of your crumple tie-dye masterpiece, showcasing the intricate patterns and vivid colors you’ve created.
Wash and Dry
To lock in the colors, wash the tie-dyed fabric separately in cold water, using a mild detergent. Continue rinsing until the water runs clear. Afterward, allow it to dry in the shade to prevent any fading.
Creative Projects Using Crumple Tie-Dye

Crumple tie-dye is a versatile and fun technique that can be used in various creative projects.
Here are some ideas to inspire your next tie-dye endeavor:
Tie-Dye T-Shirts
Create a collection of tie-dye shirts with unique patterns and color combinations. Experiment with different folding techniques and color placements for a diverse range of wearable art.
Tote Bags
Customize plain tote bags with crumple tie-dye for eco-friendly, eye-catching accessories. These tie-dyed totes are not only fashionable but also perfect for grocery shopping, beach outings, or carrying everyday essentials.
Pillow Covers
Add a vibrant touch to your home decor with tie-dyed pillow covers. The crumple tie-dye technique can produce abstract and modern patterns that seamlessly complement various interior styles, from bohemian to contemporary.
Bandanas
Design personalized bandanas using crumple tie-dye. These versatile accessories can serve as stylish headbands, face coverings, or even statement pieces for your pets.
Canvas Shoes
Elevate plain canvas sneakers into trendy, tie-dyed footwear. The crumple tie-dye technique offers a unique and artistic way to transform your shoes into eye-catching fashion statements.
Wall Art
Stretch a large piece of white fabric over a wooden frame and apply crumple tie-dye to create a visually captivating piece of wall art. Hang it as a colorful focal point that adds personality and vibrancy to your living space.
Tablecloths or Napkins
Elevate your dining experience with tie-dyed tablecloths or napkins. Crumple tie-dye can introduce a playful and artistic element to your table setting, making it perfect for special occasions or everyday use.
Baby Onesies
Craft adorable and custom onesies for infants using the crumple tie-dye technique. These personalized garments not only make thoughtful gifts but also showcase your artistic flair.
Canvas Bags
Transform plain canvas bags into stylish carryalls by applying crumple tie-dye. These versatile bags can be used for shopping, picnics, or everyday handbags, adding a touch of creativity to your outfit.
Fabric Art
Utilize tie-dyed fabric created with the crumple technique as a canvas for other art forms. Embroider intricate designs, paint additional elements or incorporate appliqué to create mixed-media textile art that tells a unique visual story.
Matching Sets
Create coordinated ensembles by pairing a crumple tie-dye shirt with matching shorts or pants. This stylish approach showcases your design skills and creates a cohesive fashion statement.
Accessories
Craft hairbands, scarves, or headwraps using crumple tie-dye fabric. These accessories provide a versatile and stylish way to elevate your outfits, adding a touch of boho chic to your overall look.
Gift Wrapping
Utilize small pieces of crumple tie-dyed fabric as unique and reusable gift wrap. Not only is this a sustainable choice, but it also adds a distinctive and artistic touch to your presents, making them even more special.
Custom Bedding
Elevate your bedroom decor by applying crumple tie-dye to duvet covers, pillowcases, or shams. This dreamy and artistic touch creates a personalized sanctuary that reflects your unique style.
Festival Gear
Prepare for music festivals or outdoor events by creating tie-dyed clothing and accessories using the crumple technique. This popular choice for festival fashion allows you to express your creativity while standing out in the crowd.
Common Problems and How to Fix Them

While crumple tie-dye is a delightful creative process, like any craft, it can come with its share of challenges.
Here are some common problems encountered when tie-dyeing with the crumple technique and how to address them:
Uneven Dye Distribution
- Cause: Dye may not evenly penetrate the fabric, resulting in splotchy or uneven coloring.
- Solution: Ensure the fabric is damp but not overly wet before applying dye. Use a spray bottle to moisten specific areas if needed. Massage the dye gently into the fabric to help it spread more evenly.
Color Bleeding
- Cause: Colors bleed into each other, leading to blurred or mixed shades.
- Solution: Allow ample space between different color sections or let each color dry before applying the next. Use dye-fixative products to set the colors and minimize bleeding.
Fading Over Time
- Cause: Colors may fade with repeated washes and exposure to sunlight.
- Solution: Wash tie-dyed items separately in cold water with a gentle detergent. Avoid excessive sun exposure. Apply a fabric fixative or sealant to lock in colors and prevent fading.
Dye Not Setting Properly
- Cause: Dye does not set as expected, leading to color washout.
- Solution: Allow the tie-dye to sit for the recommended amount of time (typically 6-8 hours or longer for more intense colors). Rinse thoroughly with cold water to remove excess dye before unwrapping your project.
Too Much Dye Saturation
- Cause: Excessive dye application can result in a muddy appearance.
- Solution: Use a light hand when applying the dye. Begin with a small amount and add more if needed to achieve the desired color intensity.
Fabric Not Holding Color
- Cause: Some fabrics may not absorb and hold dye well, resulting in a faded or washed-out look.
- Solution: Stick to natural fibers like cotton, as they tend to absorb and hold dye more effectively. Pre-wash the fabric to remove any coatings that might inhibit dye absorption.
Tips for Successful Crumple Tie-Dyeing

Crumple tie-dyeing is a creative and unique method for adding vibrant patterns to fabric. To achieve the best results, consider these tips before starting your project:
Start with Damp Fabric
Before applying any dye, it’s crucial to ensure that the fabric is slightly damp. This allows the dye to spread more easily and ensures better absorption.
A damp fabric provides a receptive canvas for the dye to adhere to, resulting in more vivid and dynamic patterns.
Use High-Quality Dye
Investing in a reliable and high-quality fabric dye is essential for achieving vibrant and long-lasting results.
Quality dyes are designed to adhere well to fabric fibers, providing a rich and intense color payoff. Look for dyes specifically formulated for use on cotton fabrics for optimal results.
Protect Your Workspace
Covering your work surface with a plastic tablecloth or garbage bag is a practical step to prevent any accidental spills or stains.
This not only keeps your workspace tidy but also ensures that any dye runoff is contained and easily cleaned up.
Wear Gloves
Protecting your hands by wearing plastic gloves is a key safety measure. This not only keeps your hands clean but also prevents any potential skin irritation from the dye.
Additionally, gloves provide a barrier between your skin and the dye, ensuring a comfortable and mess-free experience.
Experiment with Folding
Crumple tie-dyeing is all about embracing creativity and spontaneity. Don’t be afraid to try different folding, twisting, and scrunching techniques to achieve unique effects.
Play around with the fabric to create interesting textures and patterns, allowing your artistic instincts to guide the process.
Secure with Rubber Bands
Rubber bands are essential for holding the crumpled fabric in place. They help maintain the texture and pattern during the dyeing process.
Be mindful of how tightly or loosely you secure the fabric, as this can influence the final design. Experiment with different banding techniques to achieve varying levels of compression.
Mix Dye Thoroughly
Following the dye instructions carefully is crucial. Ensure that the dye is well dissolved and thoroughly mixed.
This guarantees that the colors will be consistent and vibrant when applied to the fabric. Take the time to stir or shake the dye mixture until it reaches a uniform and smooth consistency.
Apply Dye with Care
Whether using squeeze bottles or spray bottles, apply the dye with precision and attention to detail.
Ensure that you cover all the creases and folds in the fabric, allowing the dye to penetrate deeply into the fibers. Take your time to control the flow of the dye, focusing on achieving even coverage.
Wrap for Setting
After applying the dye, take care to wrap the fabric in plastic bags or plastic wrap. This crucial step not only helps the dye set but also prevents any bleeding in other areas.
The wrapping process creates a controlled environment for the dye to interact with the fabric, ensuring vibrant and well-defined patterns.
Set Aside Ample Time
Patience is key in tie-dyeing. Allow the wrapped fabric to sit for at least 6-8 hours, or even longer for more intense colors.
This extended period allows the dye to fully penetrate the fabric fibers, resulting in vibrant and long-lasting colors. Resist the urge to rush this step, as it significantly impacts the final outcome.
Rinse Thoroughly
When it’s time to rinse, use cold water to remove excess dye. Thorough rinsing is crucial for setting the colors and preventing any residual dye from bleeding onto other areas.
Continue rinsing until the water runs clear, indicating that the majority of excess dye has been removed.
Wash Separately
After rinsing, it’s essential to wash your tie-dyed fabric separately using cold water and a mild detergent.
This step helps preserve the vibrancy of the colors and ensures that any remaining dye is thoroughly removed. Avoid using harsh detergents or bleach, as they can potentially fade or alter the colors.
Dry in Shade
To prevent fading, it’s advisable to let the tie-dyed fabric dry in the shade. Direct sunlight can cause colors to fade over time.
Hanging the fabric in a shaded area allows it to air dry naturally while protecting the vibrancy of the tie-dye patterns. This step ensures that your creations remain vivid and visually striking for years to come.
FAQs
Can I use any type of fabric for crumple tie-dye?
While crumple tie-dye works best on natural fibers like cotton, it can also be applied to other fabrics like linen or rayon.
Do I need to wash the fabric before tie-dyeing?
Yes, it’s recommended to wash the fabric before tie-dyeing to remove any sizing or chemicals that might interfere with dye absorption.
Can I mix different types of dye for crumple tie dye?
Yes, you can mix different types of dye, such as liquid and powder, as long as they are designed for use on fabric.
How can I create more defined patterns with crumple tie-dye?
For more defined patterns, consider using fewer folds and securing them tightly with rubber bands.
Can I use hot water to set the dye in a crumple tie-dye?
It’s recommended to use cold water for rinsing and setting the dye in a crumple tie dye.
Wrap Up
In embracing the crumple tie-dye technique, you’ve unlocked a world of artistic possibilities.
This hands-on approach, characterized by its random, textured patterns, offers a canvas for boundless creativity. From vibrant t-shirts to personalized accessories, each project bears the mark of your unique style.
Remember, starting with damp fabric and using high-quality dye are foundational steps. Secure with rubber bands, mix dye meticulously, and wrap for optimal color saturation. Patience is key during setting, followed by a thorough rinse.
Wash and dry with care. With these insights, you’re poised to embark on a tie-dye journey, creating wearable art that’s as distinctive as you are.
Leave a Reply