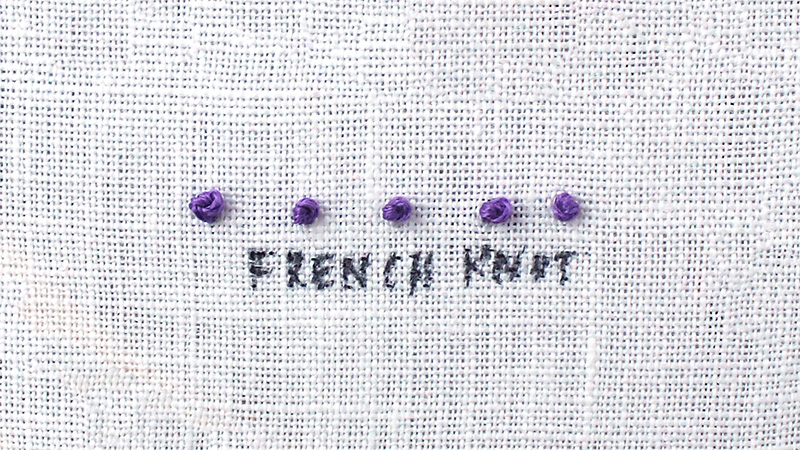
The French knot is a versatile and elegant embroidery technique that adds texture and dimension to your needlework projects.
Whether you’re a seasoned crafter or just starting your embroidery journey, learning how to create a perfect French knot is a valuable skill that will elevate your creations.
In this comprehensive guide, we will discuss how to do a French knot, from selecting the right materials to achieving flawless knots every time.
Whether you want to embellish a piece of clothing, create intricate floral designs, or add a personal touch to your home decor, the French knot will become an essential tool in your embroidery toolkit.
Embroidery enthusiasts, get ready to delve into the world of French knots as we unravel the secrets behind this timeless and beautiful technique.
With a bit of practice and the guidance provided here, you’ll be creating stunning French knots with confidence in no time. Let’s get started!

How to Do a French Knot?
A French knot only takes a few minutes to complete. To create a French knot, follow these simple steps:
Gather Your Materials
- Embroidery hoop
- Fabric
- Embroidery floss (stranded cotton)
- Embroidery needle
Thread Your Needle
Cut a length of embroidery floss (usually 18-24 inches) and separate the strands. A single strand or two strands work well for most French knots. Thread the floss through the eye of the embroidery needle and tie a knot at the end.
Prepare Your Fabric
Secure your fabric in an embroidery hoop to keep it taut and flat. Bring the needle up from the back of the fabric at the spot where you want to create the knot.
Create the Knot
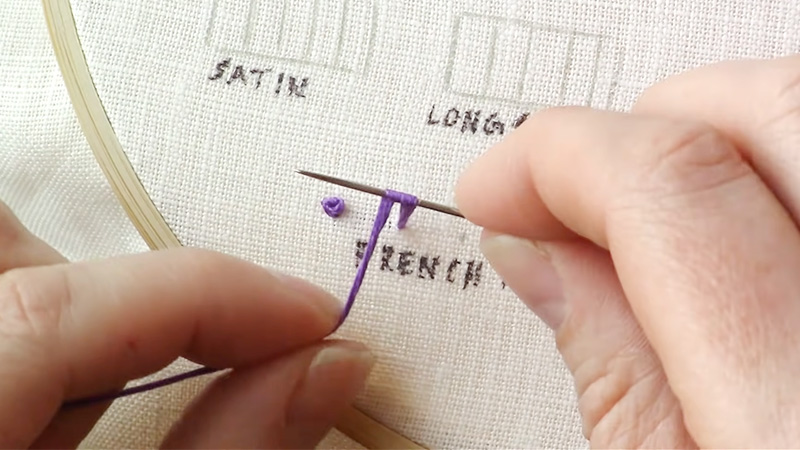
Hold the needle in your dominant hand and use your non-dominant hand to gently hold the thread taut. Wrap the thread around the needle’s shaft (not the tip) two or three times, depending on the desired size of the knot.
Insert the Needle
Insert the needle back into the fabric close to the spot where you brought it up. Gently pull the needle through the fabric while holding the wrapped thread taut.
Secure the Knot
As you pull, the wraps will form a knot on the fabric’s surface. Once the knot is secure, bring the needle to the back of the fabric and insert it to anchor the knot. Carefully trim any excess thread close to the fabric’s surface.
Practice and Experiment
Practice is essential for mastering French knots, so don’t be discouraged if your first attempts aren’t perfect. With time and patience, you’ll create these elegant knots effortlessly.
Experiment with different thread colors and densities to add texture and dimension to your embroidery projects. Happy stitching!
Why Does My French Knot Pull Through?

If your French knot keeps pulling through the fabric, there are a few common reasons why this might be happening:
Loose Tension
French knots require a delicate balance of tension. If you’re not holding the thread taut while wrapping it around the needle or if you’re not pulling it tightly enough as you complete the knot, it can easily pull through the fabric.
Thin Fabric
If you’re working with very thin or loosely woven fabric, French knots are more likely to pull through. In this case, you can try using a stabilizer or adding an extra layer of fabric behind the area where you plan to make the knot to give it more support.
Needle Size
Using a needle with a larger eye or a sharp point might create a larger hole in the fabric, making it easier for the knot to slip through. Opt for an embroidery needle with a smaller eye and a blunt tip for better results.
Thread Type
The type of thread you’re using can also affect the stability of your French knots. If the thread is too slippery, it may not hold the knot well. Try using a different brand or type of embroidery floss that has a better grip.
Knot Tightness
Make sure you’re wrapping the thread around the needle the correct number of times and that you’re pulling it tightly enough. Too few wraps or a loose pull can result in a knot that doesn’t secure properly.
Backing Knot
Ensure that you’ve inserted the needle into the back of the fabric correctly to anchor the knot. If the needle is not positioned correctly or doesn’t go through the fabric far enough, the knot may not hold.
Practice and patience are key when working with French knots. Experiment with different fabrics, threads, and techniques until you find the right combination that works for you and prevents your knots from pulling through the fabric.
How to Stitch a Flower with French Knot?

Creating a flower using French knots is a charming embroidery technique that adds dimension and texture to your floral designs. Here’s a step-by-step guide to stitching a simple flower with French knots:
Materials You’ll Need
- Embroidery hoop
- Fabric
- Embroidery floss (various colors)
- Embroidery needle
Prepare Your Fabric
Secure your fabric in an embroidery hoop to keep it taut and flat. Ensure the area you want to embroider is stretched evenly in the hoop.
Select Your Thread Colors
Choose the colors for your flower petals and center. Typically, flowers have a darker center and lighter petals but feel free to get creative with your color choices.
Outline the Flower
Start by sketching or tracing the outline of your flower onto the fabric using a water-soluble fabric marker or a pencil. This will serve as your guideline.
Create the Flower Center
Begin with the center of your flower. Thread your needle with a darker color for the center and bring the needle up from the back of the fabric at the center point of your flower.
Form French Knots for the Center
To create the center, make a series of tightly packed French knots in a circular pattern. You can vary the number of wraps around the needle to create texture.
Create the Petals
Thread your needle with a lighter color for the petals. Starting at the outer edge of the flower center, bring the needle up from the back of the fabric to the edge of a petal.
Make Petal French Knot
Form French knots for the petals by wrapping the thread around the needle and creating knots of varying sizes along the petal outlines.
Typically, smaller knots are near the center, and larger knots are toward the outside. Continue to add petals using the same technique. Space them evenly around the flower center.
Finishing Touches
Once you’ve created all the petals, take care to secure any loose threads on the back of the fabric by weaving them in or knotting them. Carefully trim any excess thread close to the fabric’s surface, being cautious not to cut the knots themselves.
Optional Details
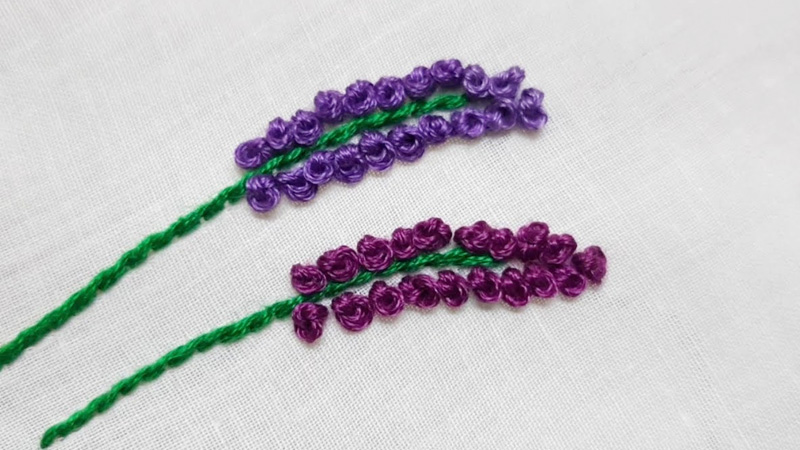
You can add leaves, stems, or additional elements to your floral design using various embroidery stitches to complement your French knot flower.
Remember, practice is key to achieving beautiful and consistent French knots. Experiment with different thread colors and densities to create stunning and unique embroidered flowers. Happy stitching!
What Are the Variations of the French Knot?

While the classic French knot is a widely used and recognized embroidery technique, there are several variations and adaptations that can add diversity and texture to your embroidery projects. Here are some variations of the French knot:
Bullion Knot
Similar in technique to the French knot, the bullion knot involves wrapping the thread around the needle multiple times (often more than a French knot) to create a longer, twisted knot. This knot is often used for creating textured flower centers and delicate stems.
Colonial Knot
A simpler and more secure alternative to the French knot, the colonial knot is made by forming a figure-eight shape with the thread and wrapping it around the needle before pulling it through the fabric. It’s known for being less prone to slipping and has a slightly different appearance.
Double French Knot
This variation involves making two French knots close together, either side by side or on top of each other. It’s commonly used to add extra dimension to embroidered eyes, berries, or small details.
French Knot Rose
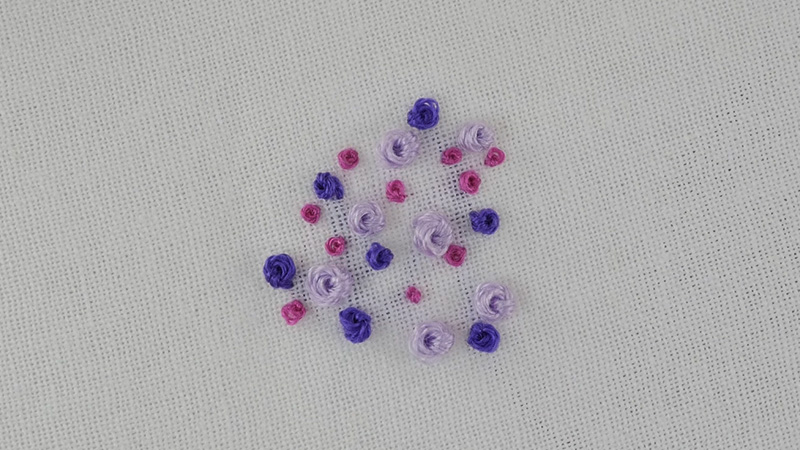
By arranging multiple French knots in a circular pattern, you can create a rose-like or floral design with a 3D effect. Varying the size and color of the knots can add depth and realism to the flower.
Padded French Knot
To give your French knots a raised or padded appearance, you can place a small piece of padding material (such as felt or batting) under the area where you’ll be making the knot. This creates a more prominent and textured knot.
Seed Stitch French Knot
Combine the French knot with the seed stitch to create a unique texture. Make a French knot, and then surround it with small seed stitches to resemble the seeds of a fruit or the center of a flower.
Spider Web Rose
This intricate technique involves creating a series of interconnected French knots, typically with different thread colors, to form a circular, web-like pattern. It’s often used for creating complex floral centers.
Variations in Wrapping
Experiment with different numbers of wraps around the needle to create variations in the size and texture of your French knots. Fewer wraps will result in smaller, tighter knots, while more wraps create larger, fluffier knots.
These variations allow you to explore different textures, effects, and applications for the basic French knot in your embroidery projects. Depending on your design and desired outcome, you can choose the variation that best suits your creative vision.
FAQs
The main difference lies in the wrapping technique. In a French knot, you wrap the thread around the needle’s shaft, while in a colonial knot, you create a figure-eight shape with the thread and then wrap it around the needle.
To avoid tangling, ensure that you keep the thread taut but not overly tight while wrapping it around the needle. Also, be mindful of the direction you’re wrapping the thread to maintain consistency and prevent knots from forming during the process.
You can use embroidery floss (stranded cotton) for French knots, and it’s a common choice. However, you can also experiment with other speciality threads like perle cotton, silk, or metallic threads to achieve different textures and effects.
Practice is key to achieving uniform French knots. Pay attention to the number of wraps you use, the tension you apply, and the consistency in your technique. Over time, your knots will become more uniform with practice.
To secure the back of your work, weave the loose thread ends under existing stitches on the backside of the fabric. This helps prevent knots from coming undone and keeps your embroidery tidy.
Conclusion
Congratulations! You’ve now learned the art of creating beautiful French knots. These tiny knots may seem simple, but they hold the power to transform your embroidery projects into works of art.
As you’ve discovered, practice is key to mastering this technique. Don’t be discouraged if your first attempts aren’t perfect; remember that even experienced embroiderers once started as beginners.
With each French knot you make, you’ll gain more confidence and precision. Experiment with different thread types, colors, and densities to create unique textures and effects.
Whether you’re adding delicate details to a quilt, bringing life to floral patterns, or personalizing gifts, French knots will be your go-to embellishment.
As you continue your embroidery journey, keep exploring new techniques and expanding your creativity. With patience and dedication, you’ll not only create beautiful pieces but also experience the meditative and therapeutic qualities of embroidery.
Leave a Reply