Mastering the art of the invisible stitch on pants is a valuable skill, offering a discreet and professional solution to mend or alter garments.
Whether you’re repairing a small tear or hemming trousers, this technique involves seamlessly joining fabrics without leaving visible stitches on the outside.
Both hand-sewing and machine-sewing methods provide versatile options. Choosing the right thread color, precise alignment of fabric edges, and the careful execution of stitches contribute to the success of this subtle yet effective sewing technique.
In this guide, we’ll explore step-by-step instructions for both hand and machine invisible stitching, empowering you to enhance the longevity and aesthetics of your pants.
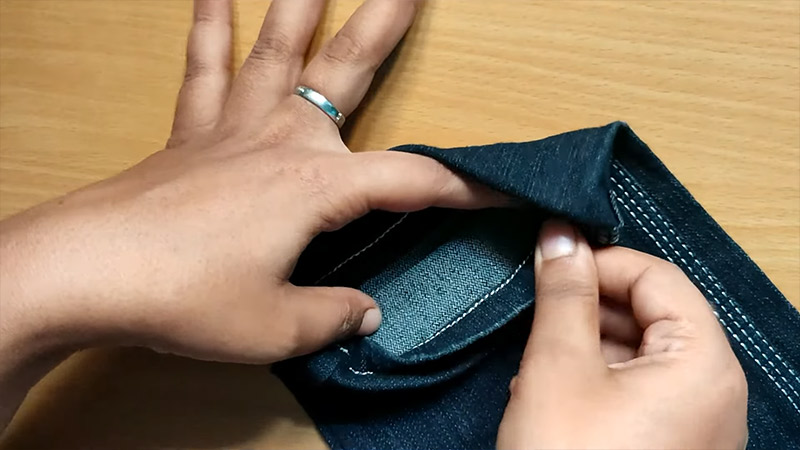
How to Do an Invisible Stitch on Pants by Hand?
Performing an invisible stitch, also known as a slip stitch or ladder stitch, on pants by hand is a useful skill for repairing small rips or hemming without leaving visible stitches on the outside.
Here’s a step-by-step guide on how to do an invisible stitch on pants:
Materials Needed:
- Needle
- Matching thread
- Pair of pants
- Scissors
- Pins
Steps:
1. Choose the Right Thread
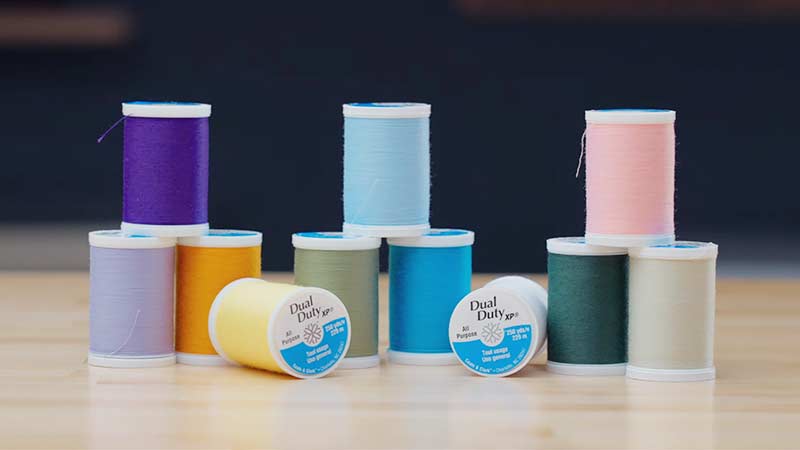
Selecting the appropriate thread is crucial for achieving an invisible stitch. Aim for a thread color that closely matches the color of your pants.
This helps to camouflage the stitches and ensures they blend seamlessly with the fabric. If an exact match isn’t possible, choose a slightly darker shade, as it tends to be less noticeable than a lighter one.
2. Thread the Needle
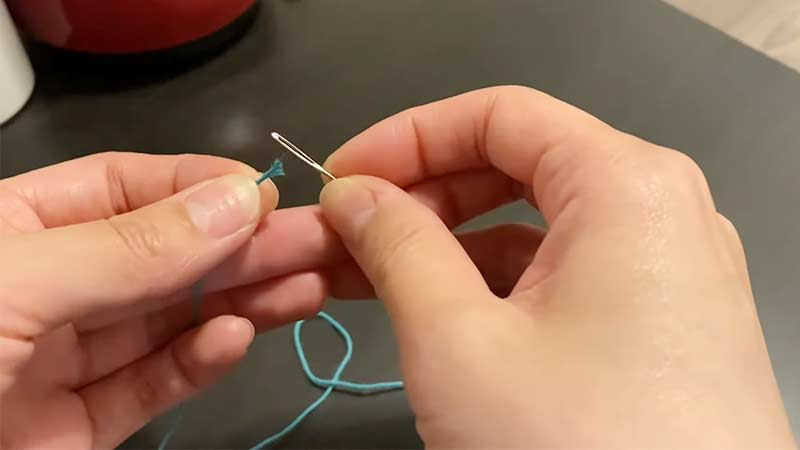
After choosing the thread, cut a manageable length, typically between 18 to 24 inches. Threading the needle can be made easier by moistening the thread’s end or using a needle threader.
Once threaded, tie a secure knot at the end. This knot will anchor your stitching and prevent the thread from pulling through the fabric.
3. Align the Edges
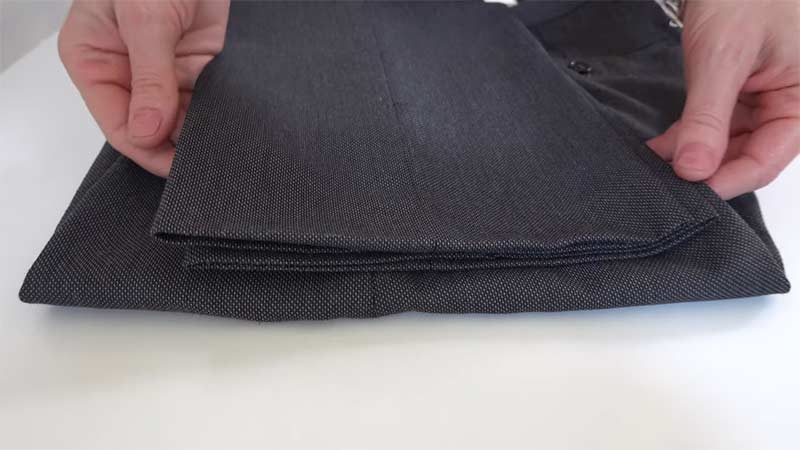
Before starting the invisible stitch, ensure that the edges of the fabric you are sewing together are correctly aligned.
If the fabric tends to shift, use pins to hold it in place. Proper alignment sets the foundation for a neat and even finish.
4. Start from Inside
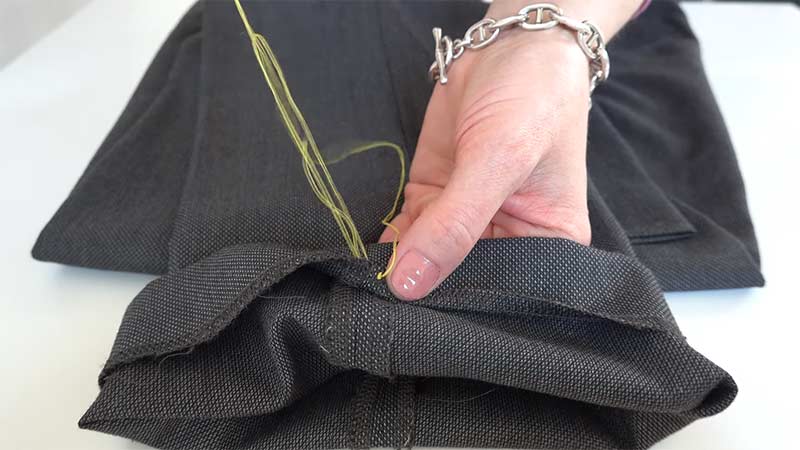
To conceal the starting knot, initiate the stitch from the inside of the pants. Insert the needle through the inner side of the fabric, bringing it out to the surface. This strategic starting point ensures that the knot remains hidden on the garment’s interior.
5. Hide the Knot
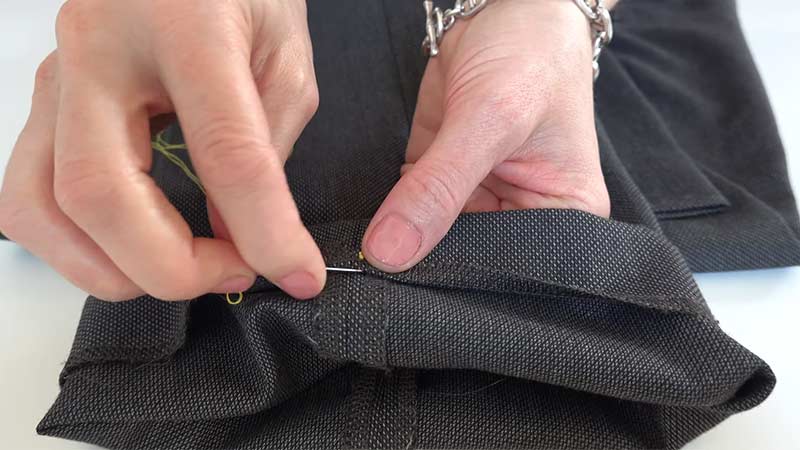
For an extra touch of invisibility, hide the starting knot by taking a small stitch on the inside of the fabric near the starting point.
Pass the needle through the loop created by this stitch before pulling it tight. This technique buries the knot close to the fabric, preventing it from being visible on the outside.
6. Insert Needle into One Side
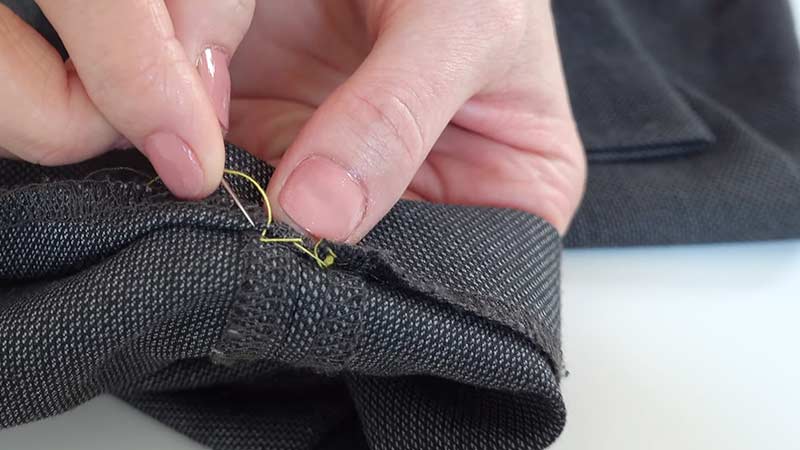
With the needle positioned on the outer side of the fabric, delicately insert it into one side, capturing only a few threads.
Pull the needle through, allowing a small loop to form on the inside of the garment. This loop is a crucial element of the invisible stitch and aids in maintaining a seamless appearance.
7. Insert Needle into Opposite Side
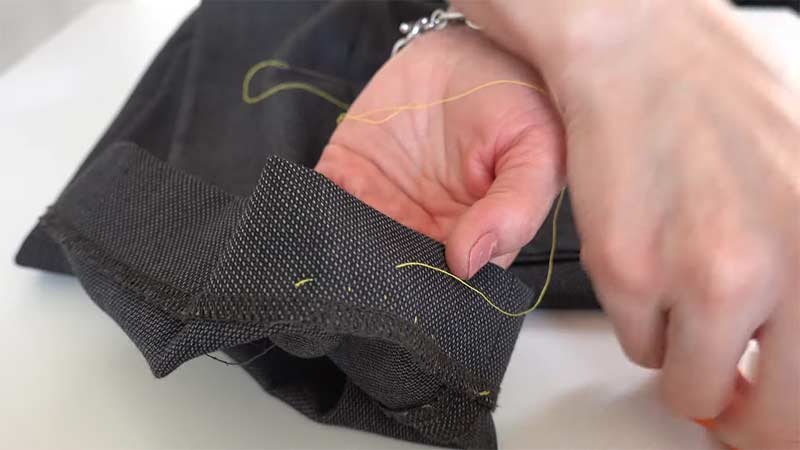
Transition the needle across to the opposite side of the fabric, ensuring it catches a similar few threads.
Gently pull the needle through, taking care not to pull too tightly to prevent puckering of the fabric.
This back-and-forth motion creates a series of stitches resembling a ladder, forming the foundation of the invisible seam.
8. Repeat the Process
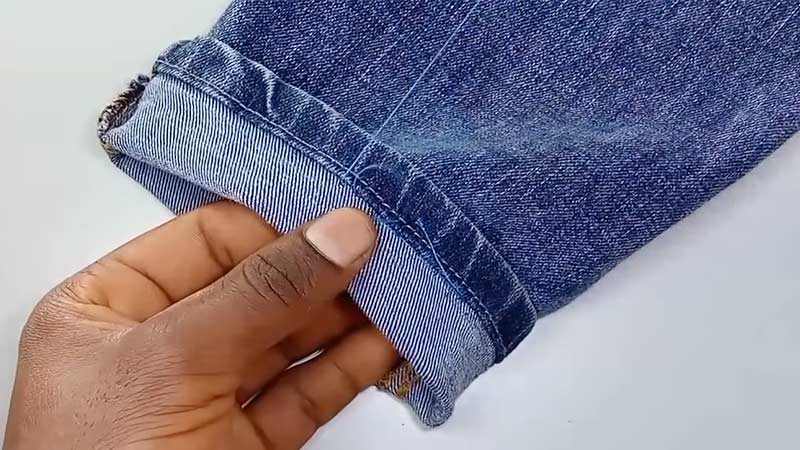
Consistency is key. Continue the stitching process, maintaining even spacing between stitches. Keep the tension consistent throughout to achieve a uniform and inconspicuous result.
As you progress, the ladder-like stitches will secure the fabric seamlessly, making the repair or hem virtually undetectable from the outside.
9. Check for Invisible Finish
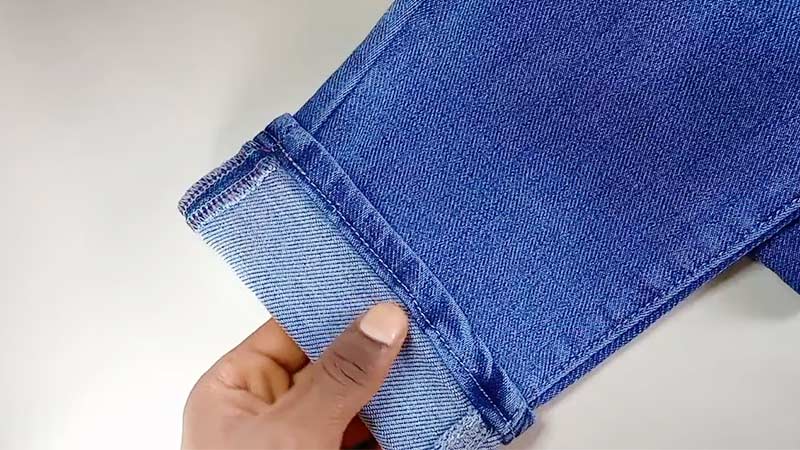
Regularly inspect the exterior of the pants to ensure the stitches remain hidden. Adjust the tension or stitch placement if necessary to maintain an invisible finish. This step is crucial for achieving a polished and professional look.
10. Tie Off the Thread
Upon reaching the end of the seam, secure the thread by taking a small stitch on the inside of the fabric. Tie a knot to anchor the thread securely.
Trim any excess thread with scissors, ensuring a tidy and inconspicuous conclusion to the stitching process.
11. Press the Seam
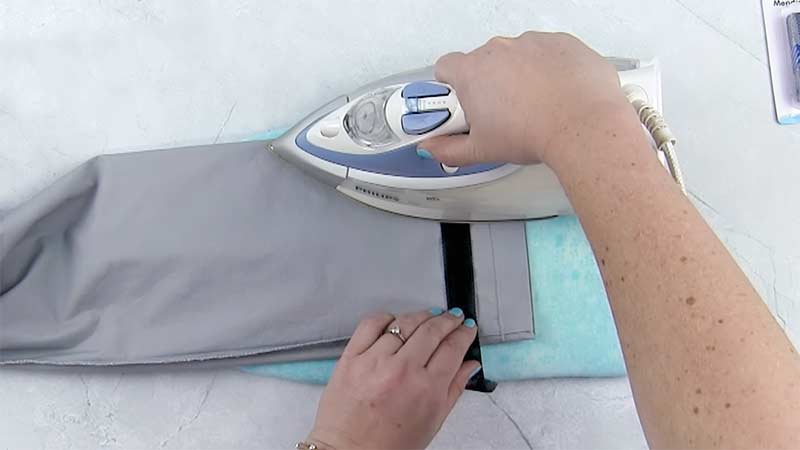
For an extra refined appearance, consider pressing the seam with a warm iron. This step helps set the stitches and creates a smoother finish.
Be cautious with heat-sensitive fabrics and use a pressing cloth if needed to protect the material.
How to Do an Invisible Stitch on Pants by Machine?
Using a sewing machine to create an invisible stitch on pants is a quicker alternative to hand sewing, and it provides a secure and professional finish.
Here’s a step-by-step guide on how to do an invisible stitch on pants using a sewing machine:
Materials Needed:
- Sewing machine
- Matching thread
- Pair of pants
- Scissors
- Sewing machine needle (appropriate for your fabric)
- Pins
Steps:
1. Choose the Right Thread
When selecting thread for machine stitching, it’s essential to closely match the color of your pants. Choosing a thread that blends seamlessly with the fabric conceals the stitches effectively, ensuring that the seam remains inconspicuous. If an exact match isn’t available, opt for a slightly darker shade, as it tends to be less noticeable.
2. Thread the Sewing Machine
Refer to your sewing machine’s manual for proper threading instructions. Thread the machine with the chosen color, ensuring it passes through all necessary guides and tension discs.
Select an appropriate needle for the fabric type; for example, use a universal needle for standard fabrics or a ballpoint needle for knits.
3. Align the Edges
Before you start sewing, ensure that the edges of the fabric you’re working with are properly aligned. If necessary, use pins to secure the fabric in place.
Proper alignment prevents any shifting during the sewing process, ensuring a neat and even seam.
4. Set the Machine to a Straight Stitch
Choose a straight stitch setting on your sewing machine. Set the stitch length to a medium setting, typically around 2.5mm. The straight stitch is suitable for creating a clean and nearly invisible seam on pants.
5. Start Sewing
Position the fabric under the sewing machine foot, aligning the needle with the edge of the fabric.
Lower the presser foot and begin sewing. Remove any pins as you sew to avoid damaging the machine or needle. Start with a few backstitches at the beginning to secure the thread.
6. Stitch Close to the Edge
Sew along the edge of the fabric, keeping the stitches close to the edge. This technique helps create a seam that is inconspicuous on the outside of the pants. Maintain a steady pace and guide the fabric to ensure even stitching.
7. Pivot at Corners
When sewing around corners or curves, stop with the needle down in the fabric. Lift the presser foot, pivot the fabric to the desired direction, lower the presser foot, and continue sewing. This technique ensures smooth and even stitching around corners, preventing uneven seams.
8. Backstitch at the End
As you approach the end of the seam, engage the backstitch function again to secure the thread. This prevents the stitching from unraveling over time. Once backstitched, trim any excess thread with scissors.
9. Press the Seam
For a professional finish, press the seam with a warm iron. Pressing helps set the stitches and gives the pants a polished appearance. Take care when ironing delicate fabrics and use a pressing cloth if needed to protect the material.
FAQs
How do I perform an invisible stitch on jeans?
To create an invisible stitch on jeans, choose a thread matching the denim color. Align the edges, start from the inside, and insert the needle through one side, catching a few threads.
Cross over to the opposite side, forming a ladder-like stitch. Repeat until the seam is complete, ensuring even spacing. Finish by tying off the thread and pressing if needed.
2. Can I use an invisible stitch to mend holes in my clothing?
Absolutely! An invisible stitch is an ideal solution for mending holes discreetly. Choose a matching thread, align the edges, and use the invisible stitch technique to seamlessly repair the hole, leaving minimal evidence of the mend.
3. How can I perform an invisible stitch on jeans by hand?
To create an invisible stitch on jeans by hand, choose a matching thread, align the edges, and start from the inside.
Insert the needle through one side, then cross over to the opposite side, forming a ladder stitch. Repeat until the seam is complete, tie off the thread, and optionally press the seam for a polished finish.
Last Words
Mastering the art of the invisible stitch on pants is a valuable skill that empowers individuals to maintain and elevate their wardrobe with precision and subtlety.
Whether accomplished by hand or with the aid of a sewing machine, the seamless joining of fabrics ensures a discreet and professional finish.
The careful selection of thread color, meticulous alignment of fabric edges, and the execution of stitches contribute to the overall success of this technique.
As you perfect the invisible stitch, you gain the ability to mend, alter, and rejuvenate your pants, elevating their longevity and aesthetic appeal. Embrace this skill, and confidently navigate the world of garment repair and customization.
Leave a Reply