Drawing collarbones, also known as clavicles, is an essential skill for artists seeking to create lifelike and anatomically accurate representations of the human form.
Collarbones play a pivotal role in defining the structure of the neck and shoulders, contributing to the overall realism and balance of a figure drawing. These slender, curved bones link the sternum to the shoulder blades, showcasing subtle variations in shape and prominence.
Mastering the art of drawing collarbones involves understanding their anatomy, symmetry, and integration within the broader context of the human body.
In this guide, we will take you through a step-by-step process to help you confidently and skillfully depict collarbones in your artwork, enhancing the authenticity of your figures.
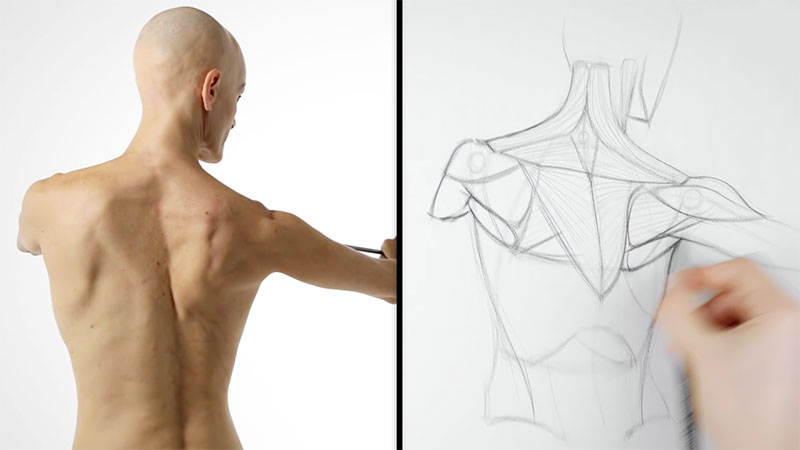
Easy 8 Steps To Draw Collar Bones
Collarbones Drawing can be a crucial detail in creating realistic and anatomically accurate figures, whether you’re working on a portrait, a fashion illustration, or any other type of artwork.
These lines should start around the base of the neck near the center of the chest (sternum) and gently curve outward as they move toward the shoulders. The curve should be subtle but noticeable. Think of them as two elongated, shallow “S” shapes.
Collarbones, also known as clavicles, are essential in defining the structure of the neck and shoulders.
Here’s a step-by-step guide on how to draw collarbones:
Materials you’ll need:
- Paper
- Pencil
- Eraser
- Reference
Step 1: Understand the Anatomy
Before you start drawing, take some time to study the anatomy of the collarbones. Collarbones, or clavicles, are long and slightly curved bones that form part of the shoulder girdle.
They start near the base of the neck and extend towards the shoulders, connecting the sternum in the front to the shoulder blades in the back.
Step 2: Draw the Collarbone sketch Structure
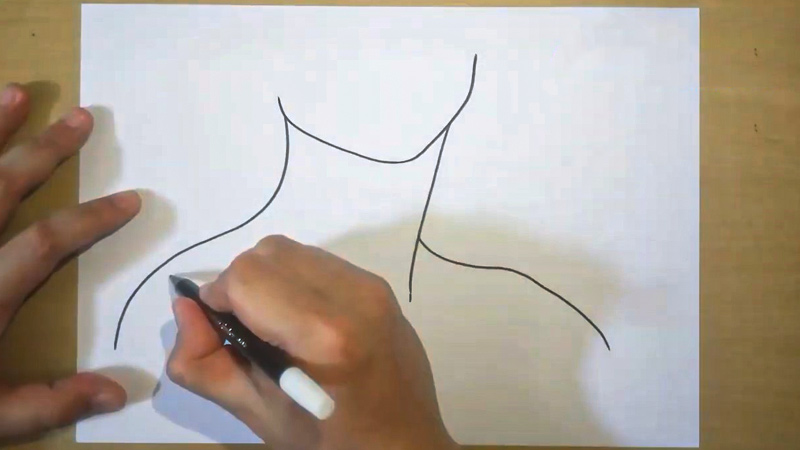
Begin your drawing by sketching out the collarbone structure of the upper torso. This includes the neck, shoulders, and chest. Pay close attention to the proportions and overall shape of the figure.
Use light, loose lines to create a preliminary outline, and don’t worry about details at this stage. The goal is to establish a foundation for your drawing.
Step 3: Locate the Collarbones
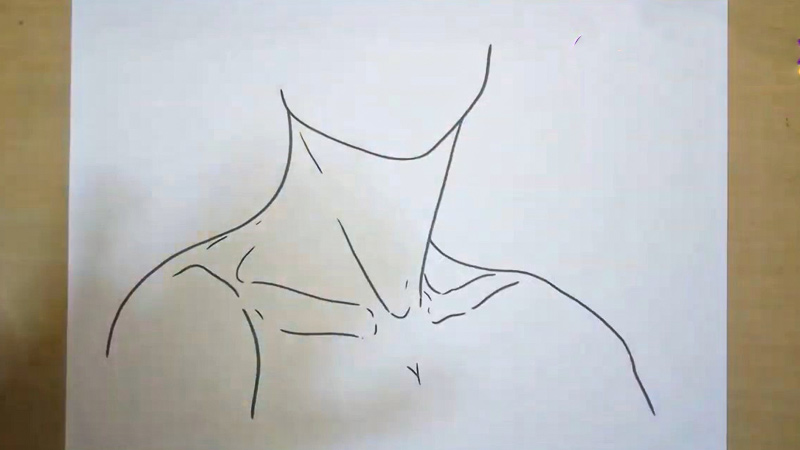
Now, let’s focus on the collarbones themselves. Begin by drawing two curved lines, one on each side of the neck.
Step 4: Add Details
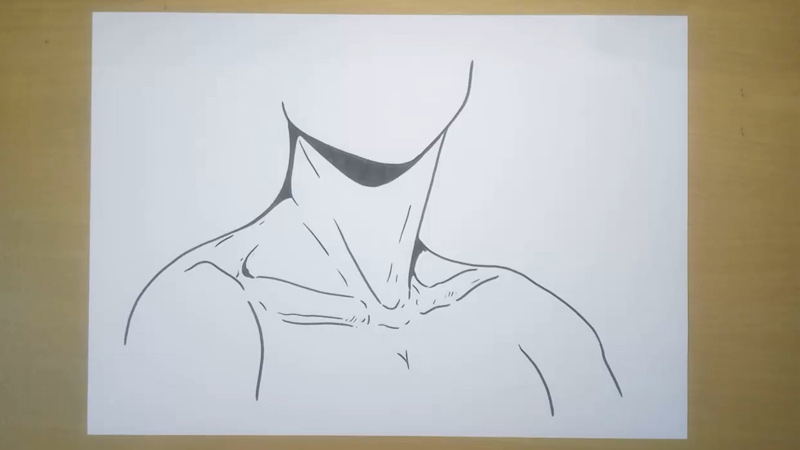
With the basic collarbone shapes in place, start refining them. Darken the lines to make them more defined, paying close attention to the curves and proportions.
Collarbones are typically more prominent near the neck and become less visible as they extend toward the shoulders. To indicate this, you can slightly taper the lines as they move outward.
Step 5: Check for Symmetry
It’s essential to ensure that your collarbones are symmetrical. Check that they start at the same point on each side of the sternum and extend to the same point on the shoulder blades. Correct any discrepancies to maintain a balanced and realistic appearance.
Step 6: Blend with the Rest of the Figure
Integrate the collarbones into the overall figure. Ensure they look like a natural part of the body by smoothing out any harsh transitions between the collarbones and the neck, shoulders, and chest. This blending helps make the anatomy look cohesive and realistic.
Step 7: Refine and Add Details
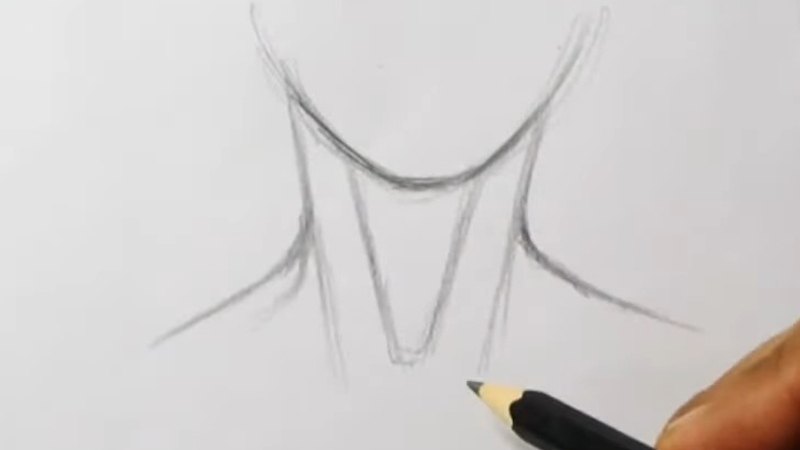
Take your time to refine your drawing further. Pay close attention to the subtleties of the collarbones.
They may have some gentle curves, and the level of prominence can vary among individuals. Use your eraser to clean up any stray lines or smudges and make necessary adjustments.
Step 8: Finalize and Add Shadows
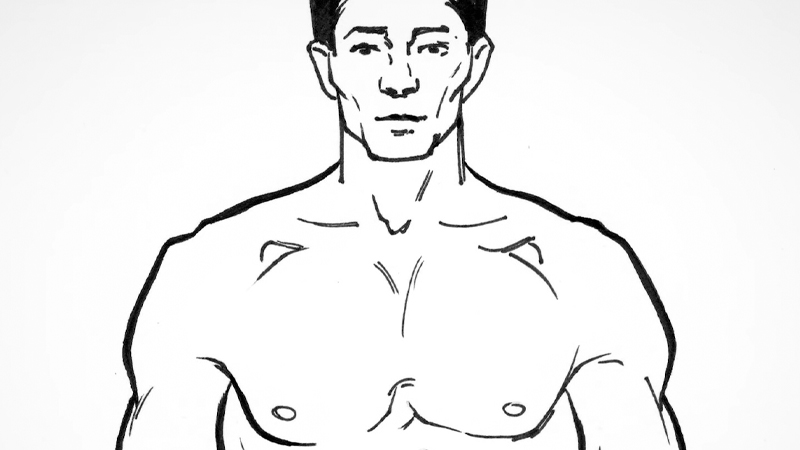
In the final step, add collarbone shading and shadows to your drawing to create depth and dimension. Observe how light falls on the collarbones and the surrounding areas.
Typically, there will be a slight depression along the top of each collarbone where it meets the skin. Use shading techniques to convey these subtle details, making the collarbones appear three-dimensional and realistic.
Differences to Draw Male and Female Collar Bones
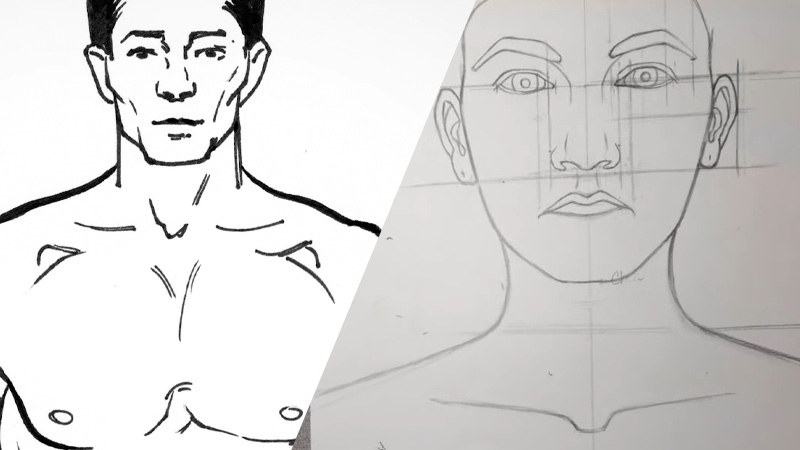
Drawing male and female collarbones can exhibit subtle differences due to variations in body structure and proportions between genders.
Here’s how to distinguish between them:
Shape and Size
- Male collarbones tend to be broader and thicker compared to females. When drawing male collarbones, emphasize their width and solidity.
- Female collarbones are typically narrower and more delicate in appearance. Pay attention to the graceful curves and slender form.
Muscularity
- Male collarbones may appear more robust due to the presence of broader shoulder muscles, such as the deltoids and trapezius. These muscles can create a more substantial and defined appearance.
- Female collarbones often appear softer and less muscular. While the clavicles are still present, they may be less pronounced due to a smaller muscle mass.
Neck Length
- In many cases, males tend to have slightly shorter necks relative to their overall body size. This can affect the placement and angle of the collarbones, which may appear closer to the shoulders.
- Females often have slightly longer necks relative to their body size, which can influence the placement and angle of the collarbones, making them appear more graceful.
Tips and Tricks for Drawing Collar Bones with Confidence
Drawing collarbones with confidence can enhance the overall realism and anatomy of your artwork.
Here are some tips and tricks to help you master this essential aspect of figure drawing:
Study Anatomy
Take the time to delve deeper into the anatomy of collarbones. Understand how they connect the sternum and shoulder blades, creating a horizontal curve.
Learn about the ligaments and muscles that surround them, as this knowledge will help you depict them more accurately.
Use References
References are invaluable. Look for high-quality images that showcase collarbones from various angles and perspectives. Analyze how lighting and shadows affect their appearance in different conditions.
Start with a Light Sketch
Begin your figure drawing with a light and proportional sketch. This foundation will guide you in placing the collarbones accurately in relation to the rest of the body.
Locate the Clavicles Carefully
Precisely locate the starting points of the collarbones by measuring from the sternum and shoulder blades. Use guidelines and light marks to ensure symmetry and accurate placement.
Pay Attention to Curvature
Collarbones have a subtle, elegant curve. Be mindful of this curve and mimic it in your drawing. Avoid making them too straight or overly pronounced unless it’s a stylistic choice.
Subtle Shadows and Highlights
To give your collarbones depth, add subtle shading and highlights. Focus on the area where the collarbones meet the skin; this is where shadows and highlights will be most noticeable.
Blend with the Neck and Shoulders
Ensure a harmonious transition between the collarbones, neck, and shoulders. Use blending techniques to avoid sharp lines and create a seamless, realistic appearance.
Vary the Line Thickness
Experiment with line thickness in your drawing. Thicker lines can emphasize the collarbones, drawing attention to this area, while thinner lines elsewhere in the figure maintain a balanced look.
Consider the Pose
Recognize that collarbones may appear differently depending on the pose. For instance, when the shoulders are raised in a shrug or during a dynamic pose, the collarbones become more prominent. Adjust your drawing accordingly.
Practice Regularly
Mastery comes with practice. Dedicate time to sketch collarbones from various references and explore different poses. Consistent practice hones your skills and builds confidence.
Feedback and Critique
Seek feedback from peers or mentors. Constructive critique can pinpoint areas for improvement and guide your progress in mastering collarbone drawing.
Experiment with Style
Don’t limit yourself to one style. Collarbones can be rendered in various ways, depending on your artistic vision. Experiment with different techniques and styles to find what suits your work best.
Study Real People
Take opportunities to observe the collarbones of real individuals. Pay attention to how they appear in different body types and postures. This firsthand experience will enhance your understanding of their variability.
Patience and Persistence
Remember that developing the skill to draw collarbones confidently takes time. Be patient with yourself, embrace mistakes as learning opportunities, and persist in refining your technique.
FAQS
Yes, collarbones can vary in prominence depending on an individual’s body composition.
People with lower body fat percentages may have more visible collarbones, while others with more muscular or larger neck and shoulder structures might have less pronounced ones.
Yes, as a person ages, changes in skin elasticity and muscle tone can affect the appearance of collarbones. Collarbones may become less prominent over time due to factors like aging skin and posture changes.
No, collarbone shapes can differ significantly among individuals. Some may have straighter collarbones, while others might have curvier or more angular ones. It’s essential to observe and accurately depict these variations when drawing.
Absolutely. Clothing can hide or accentuate collarbones, depending on the style and fit. Additionally, a person’s posture can alter how collarbones appear in a drawing, especially in dynamic or relaxed poses.
Yes, gender can influence collarbone anatomy in art. Generally, male collarbones might appear broader and more robust than female collarbones, which can be smaller and more delicate. However, these characteristics can vary widely among individuals and artistic representations.
To Recap
Mastering the art of drawing collarbones is an essential skill for artists seeking to capture the human form with precision and authenticity.
Understanding the anatomy, studying references, and practicing regularly are fundamental steps in achieving confidence and accuracy in this aspect of figure drawing.
Collarbones play a pivotal role in defining the structure of the neck and shoulders, and their subtle nuances can enhance the realism of your artwork.
By following the tips and techniques discussed, you can elevate your artistic abilities, bringing a newfound level of confidence to your depictions of collarbones.
With dedication and perseverance, you’ll not only improve your drawing skills but also enrich your capacity to convey the intricacies of human anatomy in your art.
Leave a Reply