Embroidering towels by machine is a creative and enjoyable craft that allows you to transform ordinary towels into personalized, decorative pieces.
Whether you’re looking to add a touch of elegance to your bathroom or searching for thoughtful gifts, machine embroidery offers a precise and efficient way to achieve stunning results.
In this guide, we will walk you through the step-by-step process of embroidering towels using an embroidery machine.
From selecting the right materials and hooping your towels to choosing the perfect embroidery design and mastering the machine’s operation, you’ll discover how to turn your plain towels into works of art.
Join us on this journey to learn the art of machine embroidery and infuse your linens with style and personality.

10 Easy Steps to Embroider Towels by Machine
Embroidering towels by machine is a fantastic way to add a personal touch to your linens and create unique, customized gifts for friends and family.
Machine embroidery allows you to add intricate designs, monograms, or decorative patterns to your towels with precision and ease.
Here’s a step-by-step guide on how to embroider towels using a machine:
Materials and Tools:
- Towels
- Embroidery Machine
- Embroidery Thread
- Stabilizer
- Embroidery Hoop
- Embroidery Design
Steps to Embroider Towels:
1. Prepare Your Towel
Start by laying your chosen towel flat on a clean, smooth surface. Take a moment to inspect it for any wrinkles or creases and make sure it’s properly cleaned.
Then, decide where you want to place the embroidery on the towel. Common placement options include the center, near the edge, or diagonally across a corner.
Use fabric chalk or removable marking tools to mark the exact spot for your design.
2. Hoop Your Towel

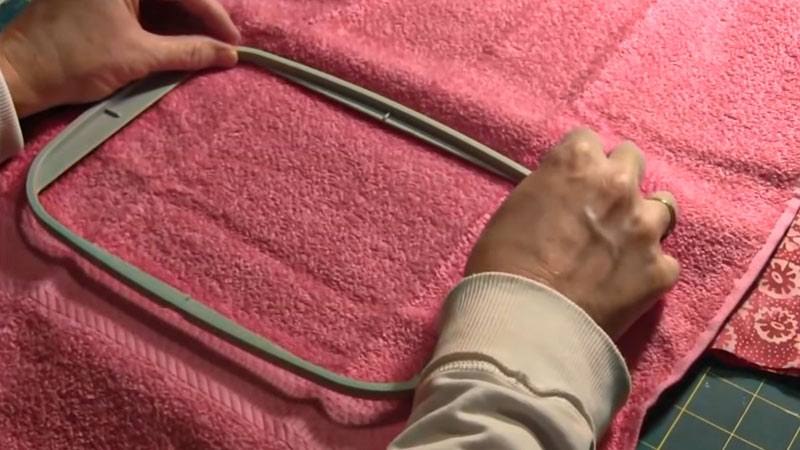
Begin by disassembling your embroidery hoop, separating the inner and outer rings. Lay the inner hoop beneath the towel, making sure it lines up with the marked placement from step one.
Carefully position the outer hoop on top, sandwiching the towel between the two hoops.
Once properly aligned, tighten the screw or fastening mechanism on the outer hoop to securely hold the towel in place within the hoop.
3. Prepare the Machine
Threading your embroidery machine is a crucial step. Select the embroidery thread color that complements your design and follow your machine’s user manual to thread it properly. Next, load your chosen embroidery design onto the machine.
If you’re designing your own pattern, use the machine’s built-in software or external embroidery software to create or import your design, ensuring it’s the right size and orientation for your towel.
4. Stabilize Your Towel
To prevent fabric distortion during embroidery, attach a suitable stabilizer to the back of the towel, covering the area where your design will be stitched. Ensure that the stabilizer is smooth and flat against the towel.
Some crafters prefer to use adhesive spray to secure the stabilizer in place, providing additional stability.
5. Embroider the Design

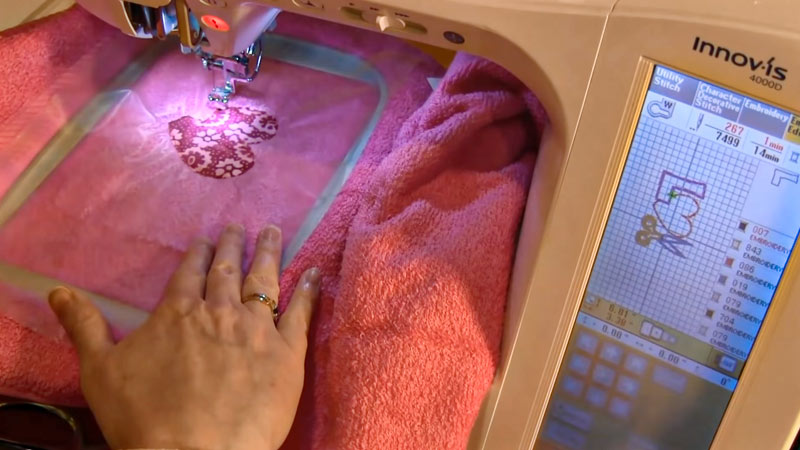
Gently lower the hooped towel into your embroidery machine. Verify that the needle is precisely centered over the marked design placement. Initiate the machine’s embroidery function, and it will commence stitching out your selected design on the towel. Be attentive to the machine’s progress to catch any issues like thread breakage or misalignment promptly.
6. Monitor the Machine
While the machine is in operation, keep a watchful eye on it. Regularly check for any signs of thread tension problems or other potential issues. Being vigilant during this step can help ensure a successful embroidery outcome.
7. Finishing Up
After the machine completes the design, carefully remove the hoop from the machine. Take your time when unhooping the towel, being gentle to prevent any unintended damage to the freshly stitched embroidery.
8. Trim Threads and Clean
Examine both the front and back of the towel for any loose thread ends. Use small scissors or snips to trim these threads close to the fabric’s surface.
If you used a tear-away stabilizer, gently tear away the excess from the back of the design, being careful not to damage the stitches.
9. Press the Towel
To give your embroidered towel a polished and professional appearance, use a steam iron set to a low heat setting.
Place a clean pressing cloth over the embroidered design to protect it from direct heat and steam. Then, press the towel gently to smooth out any wrinkles and set the stitches.
10. Enjoy Your Custom Towel
Your embroidered towel is now ready for use or gifting. Whether you’ve added a monogram, a decorative pattern, or a personalized touch, take pride in the unique and customized towel you’ve created.
It’s sure to be a cherished addition to your home or a thoughtful gift for someone special.
Challenges to Embroider Towels by Machine

Embroidering towels by machine can be a rewarding project, but it also comes with its fair share of challenges.
Here are some common challenges you might encounter and how to overcome them:
Stabilizing Issues
Towels have a loose and often stretchy weave, which can make them prone to puckering or shifting during embroidery. To address this, use a good-quality stabilizer appropriate for the towel’s thickness and weight. You may also consider using a water-soluble topping to prevent stitches from sinking into the towel’s pile.
Towel Thickness
Thick towels can be challenging to embroider, especially if your machine isn’t designed for heavy-duty work. Make sure your machine is up to the task, and use a larger or stronger embroidery needle to avoid breakage.
Hooping Difficulties
Hooping towels can be tricky because they are bulky and may not fit well in standard embroidery hoops. Consider using a magnetic or clamp-style hoop for better stability. If you’re still struggling, try a hooping aid or jig to keep the towel taut and even.
Design Density
Highly dense embroidery designs can cause towels to become stiff or lose their softness. Opt for lighter, open designs that are better suited to the fabric.
If you must use a denser design, consider using a water-soluble stabilizer on top to maintain the towel’s plushness.
Thread Tension
Proper thread tension is crucial to prevent thread breakage, looping, or birdnesting on the back of the towel. Test the tension with scrap fabric before embroidering on the actual towel, and make necessary adjustments.
Needle Selection
Using the wrong needle type or size can lead to issues like skipped stitches or fabric damage. For towels, use a sharp embroidery needle in an appropriate size for your fabric weight.
Design Placement
Deciding where to place your embroidery design on the towel can be challenging, especially if you want it centered or perfectly aligned. Measure and mark the center of your towel before hooping to ensure accurate placement.
Color Choice
Selecting thread colors that complement the towel’s color can be tricky. Consider using a contrasting or complementary color for your embroidery to make it stand out while maintaining harmony with the towel’s hues.
Machine Speed
Embroidering too quickly on delicate towels can cause fabric distortion or misalignment. Adjust your machine’s speed to a level that allows for precise stitching without compromising quality.
Cleaning and Care
After embroidering, towels may require extra care during washing and drying to preserve the embroidery. Always follow care instructions for both the towel and embroidery thread used.
Unique Tips and Techniques for Embroidering Towels by Machine
Machine embroidery on towels can be a fun and creative way to add a personal touch to your linens.
Here are some unique tips and techniques to enhance your machine embroidery on towels:
Use Water-Soluble Stabilizer for Pile Towels
When embroidering on towels with a high pile or thick fabric like terry cloth, consider using a water-soluble stabilizer on top of the fabric.
This prevents the embroidery stitches from sinking into the pile and results in a crisper design.
Experiment with Towel Texture
Towels come in various textures and thicknesses. Experiment with different types to create unique effects. For example, waffle weave towels can add a delightful textured element to your embroidery.
Monogram with Variegated Thread
Instead of a single-colored monogram, try using variegated thread. It creates a captivating gradient effect within the letters, making your monogram stand out even more.
Incorporate Metallic Threads
Metallic threads can add a touch of elegance and shine to your towel embroidery. However, they can be finicky. Use a metallic thread needle, reduce the machine’s speed, and consider using a thread conditioner to minimize breakage.
Customize Towel Edges
Don’t limit your embroidery to the main body of the towel. Embroidering the edges or hems of the towel can create a unique and stylish border effect.
Multi-Hooping for Larger Designs
If you want to embroider a large design that doesn’t fit within your embroidery hoop, learn how to do multi-hooping.
This involves repositioning the hoop and aligning your design properly to create a seamless larger pattern.
Add Towel Loops
For towels designed for hanging, consider adding a fabric loop or ribbon to one corner before embroidering. This way, you can both personalize the towel and make it more functional.
Use Embroidery Software for Lettering
When embroidering names or text, use embroidery software to create customized fonts and lettering styles. This allows you to design personalized messages or monograms that are truly one-of-a-kind.
Practice on Scrap Fabric
Before embroidering your actual towels, practice on a similar scrap piece of fabric. This helps you fine-tune your settings, and thread tension and ensures your design aligns correctly.
Customize Towel Sets
Create matching towel sets by using the same embroidery design or color scheme across different towel sizes, such as bath, hand, and face towels. It adds a coordinated touch to your bathroom decor.
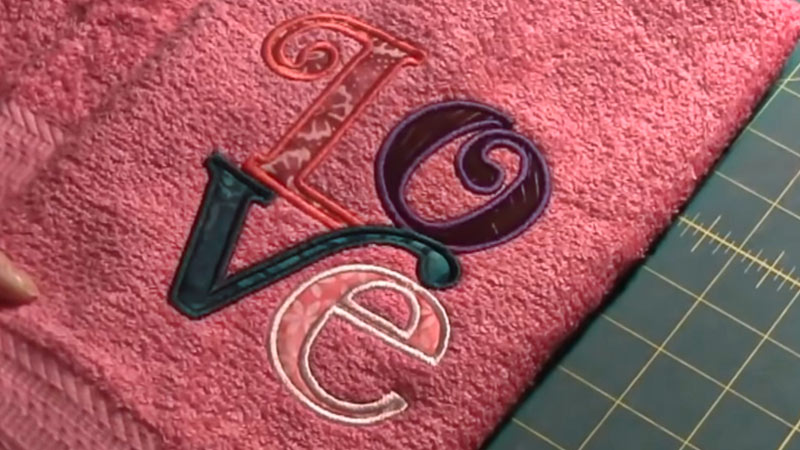
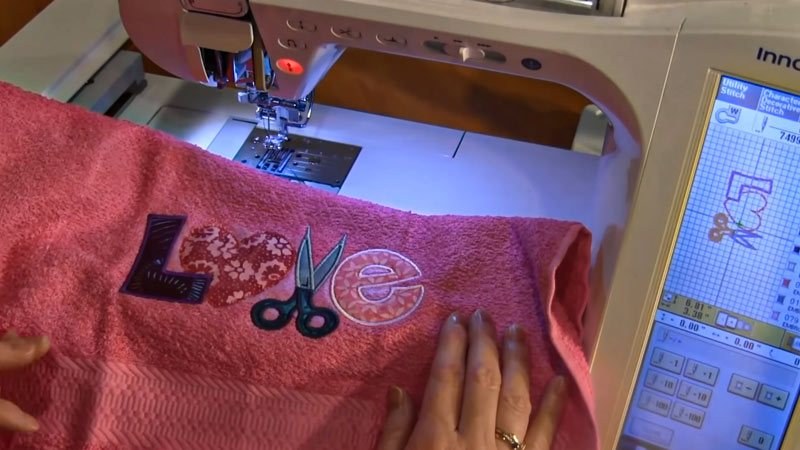
Consider Appliqué Embroidery
Appliqué is a technique where you embroider a fabric patch onto the towel, creating a unique and three-dimensional effect. This works particularly well for whimsical or themed designs.
Protect the Back of the Design
After embroidery, consider adding a soft, lightweight backing to the backside of the design to protect sensitive skin from the embroidery stitches, especially for baby or delicate skin towels.
FAQS
While the basic process remains the same, different towel materials (e.g., terry cloth, waffle weave, or linen) may require slight adjustments in machine settings like tension and stabilizer choice.
Embroidering on towels with fringed or tasseled edges can be challenging due to the uneven surface.
It’s generally a good practice to wash and dry your towels before embroidery to remove any sizing or residues that might affect the stitching. Just be sure to iron them flat before hooping.
While it’s possible to embroider towels using a regular sewing machine with an embroidery foot, it’s more challenging and limited in design options compared to dedicated embroidery machines.
To resolve puckering issues, adjust the machine’s tension, consider using a different stabilizer, or reduce the density of your design in the embroidery software to ensure a smoother result.
To Recap
Machine embroidery can truly elevate the appearance of your towels, turning them into personalized and cherished items that reflect your creativity and style.
With the step-by-step guidance provided in this guide, you’ve learned the essential techniques to embroider towels by machine successfully.
From careful hooping and design selection to monitoring your machine’s progress and finishing touches, you’ve acquired the skills needed to create beautifully embroidered towels.
Whether you’re crafting for your home or preparing thoughtful gifts for loved ones, machine embroidery allows you to add a unique and artistic touch to your linens.
So, embrace the art of machine embroidery, and let your towels become not just functional but also pieces of art that brighten your living spaces and warm the hearts of those who receive them.
Leave a Reply