Finishing sleeve seams is a critical aspect of sewing that elevates the quality and durability of garments. Whether you’re crafting a shirt, dress, or jacket, mastering this skill ensures a professional and polished result.
Properly finished seams enhance the garment’s aesthetic appeal and contribute to its longevity. This guide will explore techniques to expertly finish sleeve seams expertly, catering to different fabrics and design preferences.
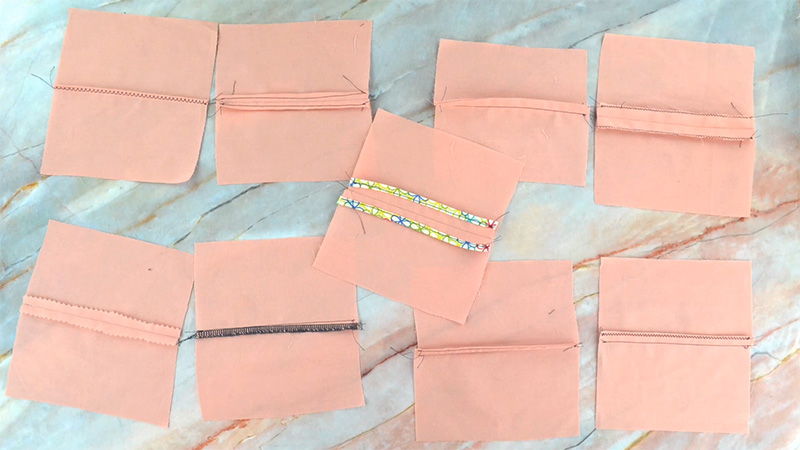
From serging and zigzag stitching to using specialty finishes like French seams or bias binding, this comprehensive tutorial will equip you with the knowledge and skills to achieve impeccable sleeve seam finishes in your sewing projects.

What Are Sleeve Seams?
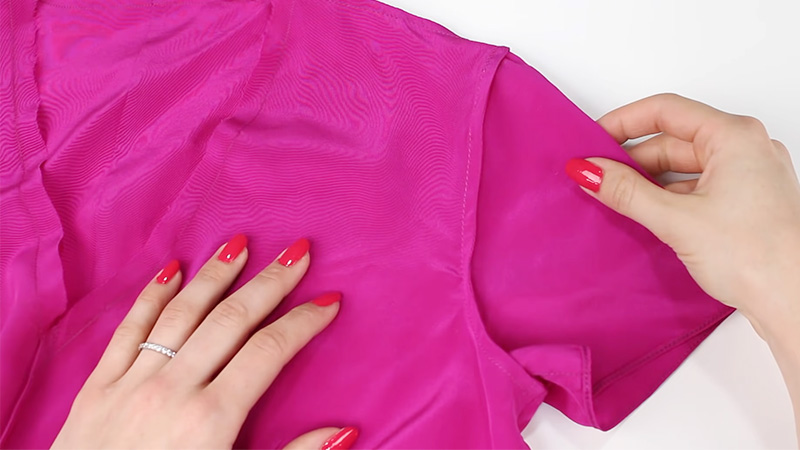
Sleeve seams are the stitched joins that connect the sleeves of a garment to its body. These crucial seams define the shape and fit of a garment’s short or long sleeves.
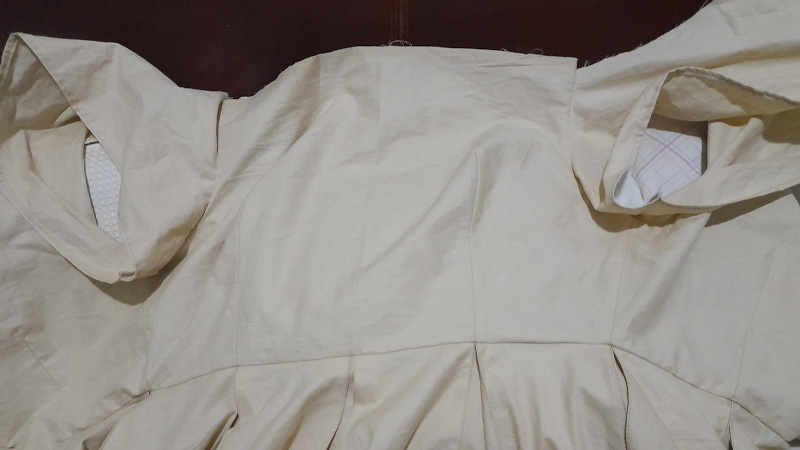
They can be found in various styles, including set-in, raglan, and Dolman sleeves. A set-in sleeve seam is a traditional, precise method for inserting the sleeve into an armhole.
Raglan sleeves have diagonal seams that extend from the underarm to the neckline, providing ease of movement.
Dolman sleeves are seamlessly integrated with the bodice, creating a relaxed, unstructured look. Properly sewn and finished sleeve seams ensure a comfortable fit, allowing the garment to drape gracefully and accommodating arm movement.
How to Finish Sleeve Seams?
Finishing sleeve seams is an essential step in sewing garments that involve sleeves, whether you’re working on a shirt, blouse, dress, or jacket.
Properly finished sleeve seams improve the garment’s durability and contribute to a neat and professional-looking final product.
Here’s a step-by-step guide on how to finish sleeve seams:
Materials You’ll Need:
- Sewing machine
- Matching thread
- Scissors
- Pins or clips
- Iron and ironing board
Sew the Sleeve Seams
When sewing sleeve seams, pin or clip your fabric pieces together securely. Follow your pattern’s guidelines for matching notches and seam allowances.
Ensure that your stitch is straight and backstitch at the beginning and end of your seam for extra durability.
Trim Excess Seam Allowance
Using sharp fabric scissors, carefully trim the excess fabric from the seam allowance. This step is crucial in areas where multiple seams intersect, reducing bulk and preventing uncomfortable lumps or bumps in your finished garment.
Finish the Edges with a Serger
A serger is a specialized machine that trims and finishes fabric edges in one step. When using one, guide the raw edges of your sleeve seam allowance through the serger, allowing it to encase the edges with stitches neatly.
Finish with a Zigzag Stitch
Suppose a serger isn’t available. In that case, your regular sewing machine can do the job. Set your machine to a medium-width zigzag stitch and a short length.
Stitch along the raw edge of the seam allowance, ensuring that the zigzag stitch fully encases the raw edges. This stitch provides a clean finish and prevents fraying.
Use Pinking Shears
Pinking shears are an excellent alternative for finishing seam edges. The zigzag edge helps prevent fraying. Gently trim the raw edge of the seam allowance with pinking shears. While not as secure as a serger or zigzag stitch, this method is quick and effective.
Press the Seams
Pressing is a crucial step for achieving a professional finish. Set your iron to the appropriate temperature for your fabric type. Open up the sleeve seams and gently press along both sides. This sets the stitches and gives your finished sleeve seams a crisp, polished look.
Topstitching
Suppose your design calls for it. In that case, add topstitching along the sleeve seams. This decorative touch can reinforce the seams, providing extra strength and stability. Use a matching thread and a straight stitch, stitching close to the seam on both sides.
Repeat for the Other Sleeve
For garments with two sleeves, repeat all these steps for the other sleeve to ensure consistency and a professional finish throughout your project.
Alternative Methods for Finishing Sleeve Seams

There are several alternative methods for finishing sleeve seams. Depending on your preference and the type of fabric you’re working with, you can choose the method that suits your project best.
Here are some alternative ways to finish sleeve seams:
French Seams
French seams are a clean and elegant way to finish seams, especially suitable for lightweight fabrics like chiffon or silk.
To create a French seam for a sleeve, sew the seam with the wrong sides, trim the seam allowance, fold the fabric so that the right sides are together, and sew a second seam that encases the raw edges.
Bias Binding
Binding the seam with bias or binding tape can add a decorative touch to your sleeve seams. To do this, sandwich the raw edges of the seam allowance between the bias tape, pin or clip it in place, and stitch along the tape’s edge.
Flat-Felled Seams
Flat-felled seams are solid and durable, often used in denim or heavy fabrics. To make a flat-felled seam for a sleeve, sew the seam with right sides together, trim one seam allowance, fold the other seam allowance over the trimmed edge, and topstitch the fold down.
Hong Kong Finish
This finish involves binding the raw edges of the seam allowance with bias tape. The binding is applied to both seam sides, creating a clean and finished look. This method is excellent for lightweight or sheer fabrics.
Serged and Folded
If you have a serger (overlock machine), you can finish the raw edges of the sleeve seam with a serged edge. Then, fold the serged edge once or twice and topstitch it down to encase the raw edges and provide a neat finish.
Fell Stitch
For fabrics that don’t fray much, like felt or fleece, you can use a fell stitch to finish the seam. This hand-sewing technique involves folding one seam allowance over the other and stitching it down with tiny, even stitches.
Piped Seam
Piping adds a decorative element to your seams. You can create a piped sleeve seam by sewing a piping cord between the seam allowances sandwiched between the fabric layers.
Care Instructions for Finishing Sleeve Seams

Taking care of finished sleeve seams is essential to maintain the integrity and appearance of a garment.
Here are some care instructions:
Gentle Washing
When laundering the garment, selecting a gentle cycle on the washing machine is crucial. This setting minimizes the mechanical stress on the fabric and seams, preserving their integrity.
Mild Detergent
Opt for a mild, pH-neutral detergent specifically designed for delicate fabrics. Harsh chemicals in regular detergents can weaken the threads and compromise the finish.
Avoid Bleach
Bleach is a powerful chemical that can weaken the fibers and cause discoloration. Always choose bleach-free alternatives to maintain the strength and color of the sleeve seams.
Hand Washing
Delicate fabrics or intricate finishes may benefit from hand washing. Gently agitate the garment in a basin of lukewarm water with a mild detergent, then rinse thoroughly. Avoid wringing or twisting, as this can stress the seams.
Avoid Aggressive Washing Techniques
Refrain from vigorous scrubbing or rubbing of the sleeve seams. Please treat them carefully to prevent fraying or damage to the delicate stitching.
Line Dry
Air drying is the preferred method to protect the integrity of the seams. Lay the garment flat on a clean surface or hang it on a padded hanger. This prevents stretching or straining of the seams when hanging on a regular hanger.
Iron on Low Heat
If ironing is necessary, use the lowest heat setting appropriate for the fabric. Additionally, place a pressing cloth or a clean piece of fabric between the iron and the garment. This extra layer safeguards the seams from direct heat, preventing any potential weakening.
Avoid Excessive Pulling
Take care when putting on or taking off the garment. Avoid pulling or tugging on the seams, as this can lead to stress and potentially cause them to unravel over time.
Store Properly
When not in use, fold the garment gently and store it in a cool, dry place. Avoid direct sunlight or moisture exposure, as these factors can weaken the fabric and seams.
Inspect Regularly
Periodically examine the seams for wear, loose threads, or stress points. Promptly addressing any issues through repairs or reinforcements can prevent further damage and prolong the garment’s lifespan.
FAQs
What is the purpose of finishing sleeve seams?
Finishing sleeve seams helps prevent fraying, adds durability, and provides a clean, professional look to the garment. It also contributes to the overall comfort and fit of the sleeves.
Which finishing technique is best for delicate fabrics like silk or chiffon?
For delicate fabrics, techniques like French seams or bias binding are ideal. They encase raw edges neatly without adding bulk, ensuring a refined finish.
Can I finish sleeve seams without a serger or overlock machine?
Absolutely. Techniques like zigzag stitching, pinking shears, or hand overcasting can effectively finish sleeve seams if a serger is unavailable.
Is it necessary to press sleeve seams after finishing?
Yes, pressing is crucial. It sets the stitches, flattens wrinkles, and gives the finished sleeve seams a polished appearance.
What do I do if I notice loose threads or damage on finished sleeve seams?
If you spot loose threads or damage, promptly repair them. This prevents further unraveling and maintains the integrity of the seam.
To Recap
Mastering the art of finishing sleeve seams is a fundamental skill for anyone engaged in garment construction. It’s not just about aesthetics but also about ensuring the longevity and comfort of the final product.
The techniques discussed in this guide, whether serging, zigzag stitching, French seams, bias binding, or other methods, offer versatility to suit various fabric types and design choices.
By applying these techniques diligently and with precision, you’ll elevate the quality of your garments, making them more durable and visually appealing.
With practice and attention to detail, you’ll confidently create beautifully finished sleeve seams that enhance the overall craftsmanship of your sewing projects.
Leave a Reply