Fixing pointy darts on a dress is a valuable skill in the world of sewing and fashion.
These pesky protrusions, caused by improper dart construction, can detract from the overall fit and aesthetic of a garment.
However, with the right techniques and attention to detail, pointy darts can be transformed into smoothly contoured lines that enhance the dress’s shape and style.
In this comprehensive guide, we will walk you through the step-by-step process of identifying, correcting, and preventing pointy darts.
Whether you’re a seasoned seamstress or a novice, mastering this skill will elevate your sewing projects, ensuring a tailored and professional finish to your dresses.

What Are Pointy Darts of Dress?
Pointy darts on a dress are sewing elements that play a crucial role in achieving a well-tailored fit.
These darts are typically triangular or wedge-shaped folds of fabric that are strategically stitched into the garment to contour it to the wearer’s body.
Pointy darts are found in various parts of a dress, such as the bust, waist, and back, and they serve to eliminate excess fabric, providing shape and definition.
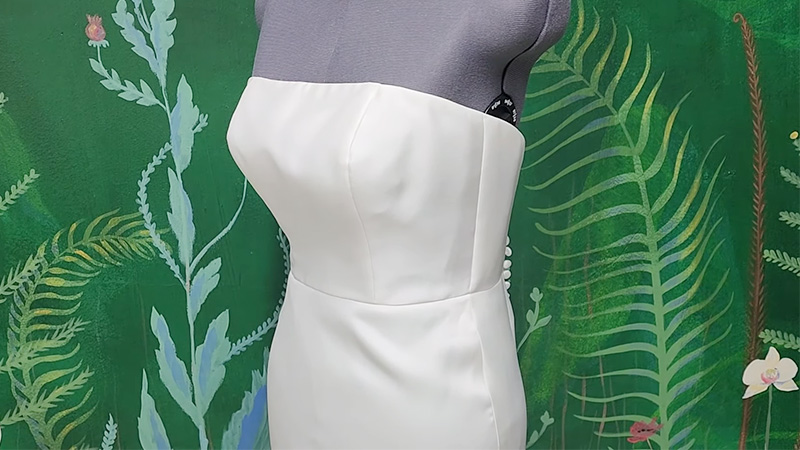
When executed correctly, these darts create smooth, curved lines that gracefully follow the body’s contours, enhancing the overall silhouette of the dress.
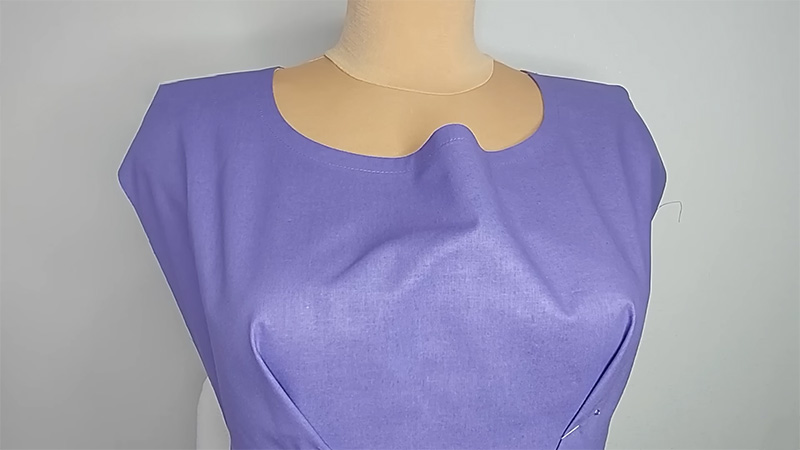
However, pointy darts can become problematic if not sewn accurately, leading to a pointed or puckered appearance.
Achieving well-shaped, smoothly-tapered darts is essential for a polished and flattering dress fit.
How to Fix Pointy Darts on Dress?

Fixing pointy darts on a dress can improve the overall fit and appearance of the garment.
Here’s a step-by-step guide to help you smooth out those pointy darts:
Materials You’ll Need
- Dress with pointy darts
- Seam ripper
- Chalk or fabric marker
- Pins
- Matching thread
- Sewing machine or needle if hand-sewing
- Iron and ironing board
Assess the Dart
Take a close look at the pointy dart on your dress.
To identify the cause of the pointiness, consider factors such as the angle of the stitching, whether the dart is too wide or narrow, or if there’s puckering along the seam.
Understanding the issue will guide your corrections.
Remove the Stitching
Using a seam ripper, gently and carefully remove the existing stitches from the dart. Start at the tip of the dart and work your way down towards the base.
Be cautious not to snag or stretch the fabric while doing this. Take your time to ensure the dart is completely opened.
Mark the New Dart Line
With the dart removed, use chalk or a fabric marker to mark the new dart line. Measure an equal distance from the apex (pointed end) to each leg of the dart. Aim for a smooth, gradual curve rather than a point. You can use a curved ruler or template for precision.
Pin the Dart
Fold the fabric along the newly marked dart line, aligning the right sides of the fabric together.
Use pins to secure the dart in place. Make sure the fabric is flat and smooth, and place the pins perpendicular to the dart line to maintain an even fold.
Sew the Dart
If you’re using a sewing machine, start stitching at the base of the dart. Sew towards the folded edge, gradually tapering the stitch line as you approach the tip of the dart.
This tapering will ensure a smooth, rounded shape and prevent any remaining pointiness.
Use a backstitch or secure stitch at the beginning and end of the dart for durability. If hand-sewing, use small, even stitches and maintain the gradual taper.
Press the Dart
After sewing, open up the dress and press the dart flat with an iron. Use the appropriate heat setting for your fabric, and use a pressing cloth if necessary to protect delicate materials.
Press the dart with the tip pointing downwards to further eliminate any potential pointiness. Ensure that the seam lies flat and blends seamlessly with the surrounding fabric.
Repeat for Other Darts
If your dress has multiple darts, repeat steps 2-6 for each one. Be patient and thorough with each dart to achieve a consistent and professional finish.
Try On the Dress
Put the dress back on and assess the fit. Check how the darts now conform to your body and whether the pointy dart issue has been resolved.
Make any additional adjustments as needed to achieve the desired fit.
Finish the Seams
Trim any excess fabric from the dart seam allowance if it causes bulkiness, but leave enough for a secure seam.
Finish the raw edges of the dart seam allowance using methods such as zigzag stitching or serging to prevent fraying and maintain the dress’s longevity.
Final Press
Give the entire dress one last press with the iron to ensure all darts lay flat and the dress looks impeccably finished. Pay attention to the overall shape and fit as you press.
What Causes Pointy Darts?

Pointy darts in a garment are typically caused by several factors related to the sewing and construction process.
Here are the most common reasons for pointy darts:
Incorrect Stitching Line
The most frequent cause of pointy darts is an incorrect stitching line.
If the stitching line does not smoothly and gradually taper from the wide base of the dart to its narrow apex (pointed end), it can result in a pointy appearance.
Uneven Tension
Inconsistent tension on the sewing machine can cause the fabric to pucker or gather unevenly when sewing darts. This can lead to a pointy dart as the fabric is not smoothly shaped.
Inadequate Notching or Clipping
Insufficient notching or clipping of the seam allowance at the dart’s tip can cause the fabric to bunch up, creating a pointy look.
Dart Too Wide or Narrow
Darts that are cut too wide or too narrow for the fabric can result in pointy ends. A dart that is too wide may not taper enough, while one that is too narrow may become too pointed.
Fabric Choice
Certain fabrics, like lightweight or slippery materials, can be more challenging to work with and may be prone to pointy darts if not handled carefully.
Sewing Machine Settings
Incorrect sewing machine settings, such as the stitch length or tension, can affect the outcome of darts.
Make sure your machine settings are appropriate for the fabric you’re working with.
Inadequate Pressing
Improper pressing techniques can contribute to pointy darts. It’s essential to press darts flat and in the correct direction to ensure they lie smoothly on the fabric.
How to Prevent Pointy Darts?

Preventing pointy darts in your sewing projects involves careful planning, precise execution, and attention to detail.
Here are steps you can take to prevent pointy darts:
Accurate Dart Marking
Begin by accurately marking the dart on your fabric. Use chalk or a fabric marker to mark the dart legs and the apex (pointed end) precisely.
Use a ruler or a curved ruler if necessary to ensure straight lines and smooth curves.
Proper Dart Width
Ensure that the width of the dart is appropriate for the fabric and the desired fit of the garment.
If the dart is too wide, it may not taper properly, resulting in a pointy end. Conversely, if it’s too narrow, it may become excessively pointed.
Notching or Clipping
Before sewing the dart, notch or clip the seam allowance at the dart’s tip. This reduces bulk and allows the fabric to lie smoothly when the dart is pressed open.
Make sure not to clip too close to the stitching line, as this can weaken the seam.
Precision Stitching
When sewing the dart, follow the marked stitching lines precisely. Begin stitching at the base of the dart and sew toward the apex.
Gradually taper the stitching line as you approach the apex to create a smooth curve.
Consistent Tension
Maintain consistent tension on your sewing machine to ensure even stitching. Uneven tension can cause the fabric to pucker and create pointy darts.
Test your machine’s tension settings on scrap fabric before working on your project.
Pressing Techniques
Proper pressing is essential to eliminate pointy darts. After sewing, press the dart flat with an iron.
The tip of the dart should be pressed downward to ensure a smooth transition from the dart to the fabric. Use a pressing cloth to protect delicate fabrics.
Practice and Skill Development
Sewing darts accurately takes practice. If you’re new to sewing or working with challenging fabrics, practice on scrap fabric first to develop your skills.
As you gain experience, you’ll become more proficient at creating well-shaped darts.
Choose the Right Thread
Use a thread that matches the fabric and is suitable for the weight and type of material you’re working with. The right thread can help prevent puckering and ensure even stitches.
Use Quality Tools
Quality sewing tools, such as sharp scissors, seam rippers, and pins, can make a significant difference in the precision of your work. Ensure your tools are well-maintained and in good condition.
FAQs
Pointy darts are triangular or wedge-shaped folds of fabric in a dress that, when improperly sewn, create pointed or puckered areas instead of smoothly contoured lines.
Pointy darts are often caused by inaccurate stitching lines, uneven tension on the sewing machine, inadequate notching or clipping of the seam allowance, or darts that are too wide or narrow for the fabric.
Yes, pointy darts can be fixed on a completed dress. The process involves carefully removing the stitching, adjusting the dart’s shape, and resewing it to achieve a smoother fit.
Fixing pointy darts may require practice, but it’s a valuable skill for sewers of all levels. Beginners can improve their dart-fixing skills with patience and attention to detail.
You’ll need a seam ripper, pins, chalk or fabric marker, matching thread, a sewing machine or needle (for hand-sewing), and an iron to fix pointy darts effectively.
To Wrap Up
The art of fixing pointy darts on a dress is a valuable skill that can elevate your sewing projects to new levels of precision and sophistication.
By understanding the common causes of pointy darts and mastering the techniques outlined in this guide, you can transform these troublesome anomalies into beautifully contoured and smoothly tapered design elements.
A well-fitted dress not only enhances your appearance but also boosts your confidence.
With patience, practice, and attention to detail, you can ensure that your dresses drape flawlessly, showcasing your craftsmanship and making a lasting impression.
So, embrace the challenge, refine your sewing skills, and enjoy the satisfaction of creating perfectly tailored garments.
Leave a Reply