Ice dyeing is a captivating and innovative technique that offers a fresh and imaginative approach to textile artistry.
Unlike conventional methods of fabric dyeing, ice dyeing involves the use of powdered dyes, ice cubes, and gravity to create unique, intricate, and often unpredictable patterns.
This artistic process encourages experimentation and enables individuals to craft one-of-a-kind designs on various fabric types.
Whether you’re a seasoned artist or a novice, ice dyeing provides a creative outlet that allows you to explore an array of color combinations, patterns, and artistic expressions.
This introduction aims to delve into How to Ice Dye, shedding light on the materials and methods used and highlighting the allure of the medium’s unpredictability and the artistic freedom it offers. It sets the stage for understanding the creative process behind ice dyeing.

What Is Ice Dye?
Ice dye, also known as ice dyeing or ice dyeing technique, is a unique and creative method of textile dyeing that yields stunning and unpredictable results.
Unlike traditional dyeing methods, where fabrics are immersed in liquid dyes, ice dyeing involves sprinkling or strategically placing powdered dyes onto a dry fabric surface, often atop a bed of ice cubes.
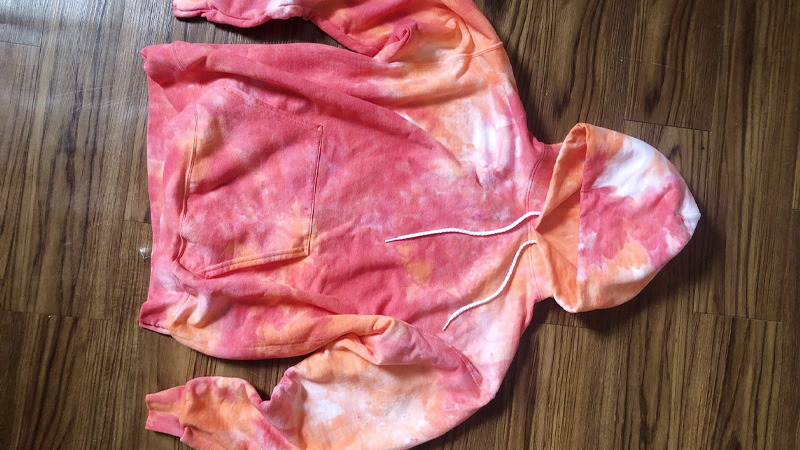
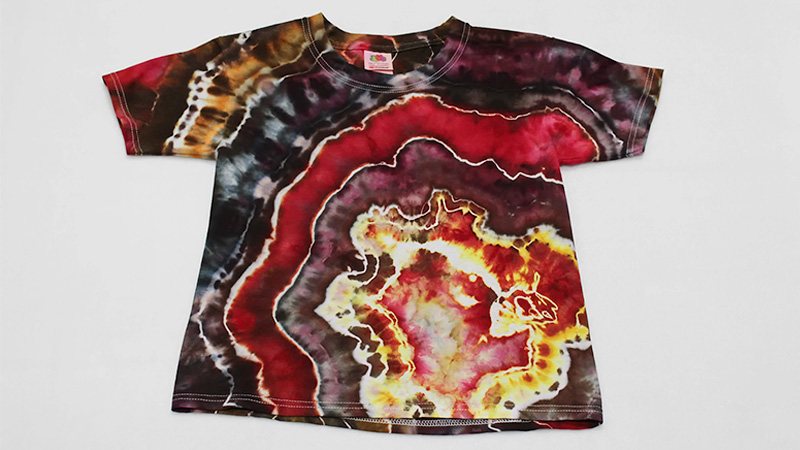
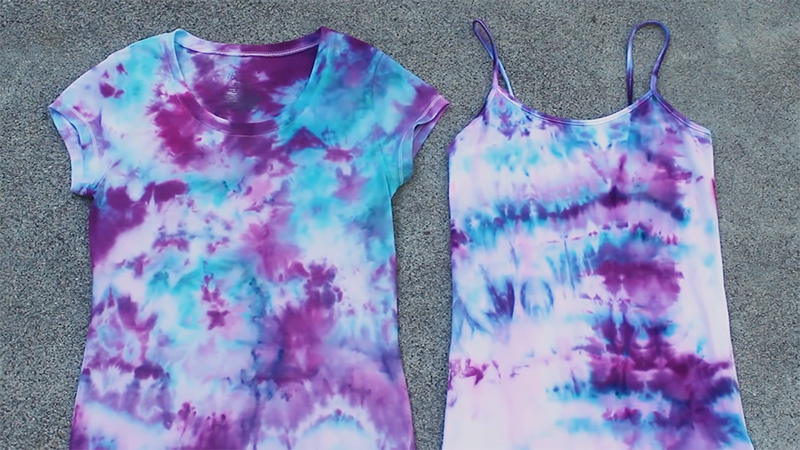
As the ice melts, it carries the dyes downward through the fabric, creating intricate and vibrant patterns. The dye’s movement is influenced by gravity and the melting ice, resulting in a tie-dye effect with intricate and organic designs.
The final outcome is characterized by its vivid colors and the intricate marbling or watercolor-like patterns that emerge, making ice dyeing a popular choice for creating one-of-a-kind, visually captivating garments, textiles, and artworks.
It’s a technique that encourages experimentation and artistic expression, as each piece is truly unique.
How To Ice Dye?
Ice dyeing is a captivating and creative technique for adding vibrant and intricate designs to fabrics. Here are some simple methods to help you get started:
Gather Your Materials
Before you begin, you’ll need fabric to dye, powdered fiber-reactive dyes, a rack or grate, a container to catch excess dye runoff, a tray or plastic bin to hold the fabric, and, of course, plenty of ice cubes.
Ensure your workspace is well-ventilated, and wear protective gear like gloves and a dust mask.
Prepare the Fabric
First, wash and thoroughly rinse your fabric to remove any sizing or contaminants. Allow it to dry completely before you start the dyeing process. You can use natural fibers like cotton, silk, or linen for the best results.
Arrange the Fabric
Lay the dry fabric on a rack or grate set inside the tray or bin. This will help elevate the fabric from the bottom, allowing the excess dye to drip off and preventing it from saturating the fabric excessively.
Apply Dye Powders
Sprinkle your chosen powdered dyes onto the fabric’s surface. You can experiment with various colors and patterns. Be as creative as you like, but remember that the dye’s movement is influenced by gravity, so consider this while creating your design.
Layer with Ice
Cover the dyed fabric with a generous layer of ice cubes. The ice will melt and carry the dye down into the fabric. You can use large or small ice cubes, depending on the effect you want to achieve.
Wait and Let it Melt
Allow the ice to melt and the dye to set into the fabric. This typically takes several hours, so be patient. The longer you wait, the more vibrant and intricate your design is likely to be.
Rinse and Dry
Once the ice has melted, rinse the fabric under cold running water to remove any excess dye. Continue rinsing until the water runs clear.
Finally, wash the fabric with a mild detergent, rinse again, and let it dry. Your beautifully ice-dyed fabric is now ready for use in your sewing projects or as a piece of art.
Remember that ice dyeing is an art form, and each piece will be unique due to the unpredictable nature of the dye’s movement. Feel free to experiment with different dye colors, patterns, and fabric types to create your one-of-a-kind, eye-catching designs.
Creative Ice Dye Patterns

Ice dyeing allows for a wide range of creative patterns and designs. Here are some imaginative ice dye patterns:
Galaxy Swirls
Create a mesmerizing galaxy-inspired pattern by placing concentric circles of vibrant dye colors like deep blues, purples, and blacks. As the ice melts, the colors blend and swirl, resembling the captivating hues of a galaxy.
This pattern evokes a sense of cosmic wonder and depth, making it perfect for unique clothing or art pieces.
Sunburst Radiance
Arrange the fabric in a radial pattern, like the rays of the sun. Apply warm and bright hues such as yellows, oranges, and reds around the center. As the ice melts, these colors blend outward, forming a sunburst effect.
This pattern exudes warmth and energy, making it an excellent choice for summer-themed garments or home decor items.
Pastel Watercolor Blooms
Choose a palette of soft pastel colors, such as pale pinks, blues, and greens. Sprinkle these colors randomly on the fabric and layer it with ice. As the ice melts, the colors bleed into each other, creating a delicate watercolor effect.
This pattern is reminiscent of blooming flowers in a spring garden, making it perfect for light and airy garments or artistic wall hangings.
Tropical Jungle
Opt for vibrant and lush tropical colors like emerald greens, rich blues, and vivid oranges. Apply these colors in random spots on the fabric and layer with ice.
As the ice melts, the colors blend, creating a vibrant and chaotic pattern reminiscent of a tropical jungle. This pattern adds a lively and exotic touch to clothing or accessories.
Ocean Waves
Use varying shades of blues and teals to mimic the colors of the ocean. Apply the dyes in wavy lines or concentric circles to represent ocean waves. As the ice melts, the colors blend and flow, creating a dynamic and fluid pattern reminiscent of rolling waves.
This pattern captures the calming and soothing essence of the sea, making it ideal for beachwear or home decor inspired by coastal living.
Mystical Marbling
Combine contrasting colors like deep purples and bright yellows in a marbling pattern. Sprinkle the colors in a random and chaotic manner on the fabric.
As the ice melts, the colors marble and blend, creating a mystical and enchanting pattern reminiscent of ancient marbled manuscripts. This pattern adds a touch of mystery and intrigue to garments or decorative items.
Geometric Explosion
Choose bold and contrasting colors such as reds, blacks, and whites. Apply the dyes in geometric shapes like triangles, squares, or diamonds. As the ice melts, the colors blend within the boundaries of the shapes, creating a striking geometric explosion pattern.
This design exudes modernity and boldness, making it perfect for contemporary clothing or avant-garde art pieces.
Experimenting with these creative ice dye patterns can lead to stunning and unique results, allowing you to express your artistic vision through the fabric in exciting and imaginative ways.
Mistakes To Avoid When Doing Ice Dye

Ice dyeing is a fascinating technique, but it can be tricky, especially for beginners. Here are some common mistakes to avoid when ice dyeing to help you achieve better results:
Overcrowding the Fabric
Overloading the fabric on the rack or bin can lead to ineffective dye penetration and an uneven distribution of colors. Avoid this mistake by giving your fabric enough space to allow the dye to flow freely and create intricate patterns.
Using Too Much Dye
Applying an excessive amount of dye powder can result in muddy and indistinct patterns. It’s crucial to strike a balance between vibrant colors and allowing the dye to move naturally.
Start with a conservative amount of dye, as you can always add more if needed.
Uneven Ice Distribution
Placing ice unevenly on the fabric may lead to an uneven dye distribution. Make sure to cover the fabric evenly with ice cubes to create balanced and appealing patterns. Avoid stacking ice in one area, as it can result in over-saturation.
Not Letting the Ice Melt Sufficiently
Impatience is a common pitfall. Allowing the ice to melt completely is essential for the dye to penetrate the fabric properly and create intricate designs. Rushing this step may yield underwhelming results, so be patient and let the ice do its work.
Using Incompatible Fabrics
Not all fabrics are suitable for ice dyeing. Fabrics with a high synthetic content may not hold the dye well, leading to faded or unimpressive results. Stick to natural fibers like cotton, silk, or linen for the best outcome.
Skipping the Rinse Step
After the ice has melted, rinsing the fabric to remove excess dye is crucial. Neglecting this step can result in color bleeding and fading during subsequent washes.
Rinse thoroughly until the water runs clear, and then wash your fabric with a mild detergent to set the dye.
Avoiding Safety Precautions
When working with powdered dyes, it’s essential to wear protective gear like gloves and a dust mask to prevent inhalation and skin contact.
Adequate ventilation in your workspace is also necessary to avoid inhaling dye particles. Ignoring safety precautions can lead to health risks and discomfort.
By avoiding these common ice-dyeing mistakes, you can create stunning, unique patterns and ensure that your ice-dyeing projects turn out beautifully and as intended.
Experimentation is part of the creative process, so don’t be discouraged by initial setbacks, and enjoy the journey of mastering this artistic technique.
FAQs
How do I select the right fabric for ice dyeing?
Selecting the right fabric is essential for successful ice dyeing. Natural fibers like cotton, silk, and linen work best, as they readily absorb the dye. These fabrics allow for vibrant colors and intricate patterns.
Can I use regular liquid dye for ice dyeing?
Ice dyeing requires powdered fiber-reactive dyes. These dyes are specifically designed to work with the ice and the fabric, allowing the colors to bleed and blend in captivating ways.
Is there a specific ice cube size to use?
There’s no strict rule for ice cube size, but larger cubes can yield more gradual color transitions, while smaller cubes may create more abrupt, intricate patterns. Experiment with both to achieve the effect you desire.
How long should I let the ice melt on the fabric?
Allow the ice to melt completely, which typically takes several hours. Patience is key to letting the dye penetrate and create intricate patterns. Rushing this step may result in less vibrant and less impressive designs.
Can I machine-wash ice-dyed fabrics?
Yes, after rinsing the fabric to remove excess dye, you can safely machine-wash ice-dyed fabrics using a mild detergent. However, wash them separately or with like colors to prevent color transfer.
Conclusion
Ice dyeing is a dynamic and captivating technique that has captured the imagination of textile artists, fashion designers, and craft enthusiasts alike. As we conclude our exploration of how to ice dye, it’s clear that this art form offers endless possibilities for self-expression and creativity.
The combination of gravity, powdered dyes, and melting ice creates enchanting and entirely unique patterns on fabric, making each piece a work of art in its own right.
The allure of ice dyeing lies not only in the vibrant and intricate designs it produces but also in the element of surprise, as every piece emerges with its distinct character.
Whether you’re seeking to infuse your wardrobe with personalized, eye-catching garments or looking to adorn your living space with decorative textiles, ice dyeing presents a versatile and exciting avenue for self-expression, experimentation, and artistic exploration.
Leave a Reply