There’s a certain magic in watching a paper boat gracefully float across a calm pond or a makeshift river. The timeless craft of creating paper boats is a delightful pastime that has captured the imaginations of people young and old for generations.
Whether you’re seeking a creative way to spend an afternoon or yearning for a playful adventure, making a paper boat is a charming and accessible endeavor. So, how to make a boat out of paper?
In this guide, we invite you to embark on a journey into the world of paper boat crafting. With just a single sheet of paper and a few folds, you’ll breathe life into a miniature vessel
So, join us as we set sail into the enchanting realm of paper boats. Whether you’re making them for pure enjoyment or as a whimsical addition to a special occasion, you’ll find that crafting these tiny boats is a voyage of creativity.

How to Make a Boat Out of Paper?
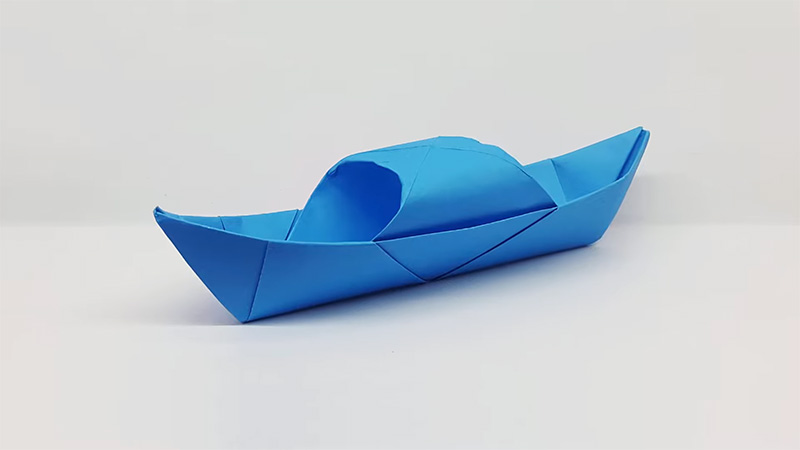
Creating a paper boat is a classic and enjoyable craft project. Here’s a step-by-step guide on how to make a simple paper boat:
Materials Needed
A rectangular sheet of paper (standard letter-size or A4 paper works well)
Start with the Paper
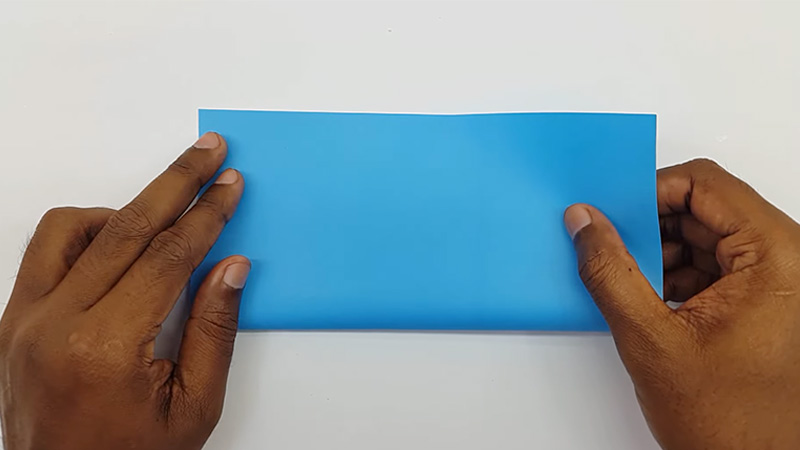
Begin with your rectangular sheet of paper. If you’re using standard letter-size paper, start with it in landscape orientation (horizontally).
Fold the paper in half lengthwise, bringing the top edge down to meet the bottom edge. Ensure that the edges are aligned perfectly, and then crease the fold firmly.
Unfold the Paper
Unfold the paper back to its original rectangular shape. Take the top-right corner of the paper and fold it diagonally across to the left edge, creating a triangle. The top edge of the paper should align with the left edge. Crease the fold well.
Repeat the same process with the top-left corner, folding it diagonally across to the right edge to create another triangle. The top edge of the paper should align with the right edge. Crease the fold firmly.
Fold the Bottom Flap
Flip the paper over to the other side. Take the bottom edge (the one opposite the triangles) and fold it upward, aligning it with the top edge. This creates a flap at the bottom of your triangles.
Form the Boat Shape
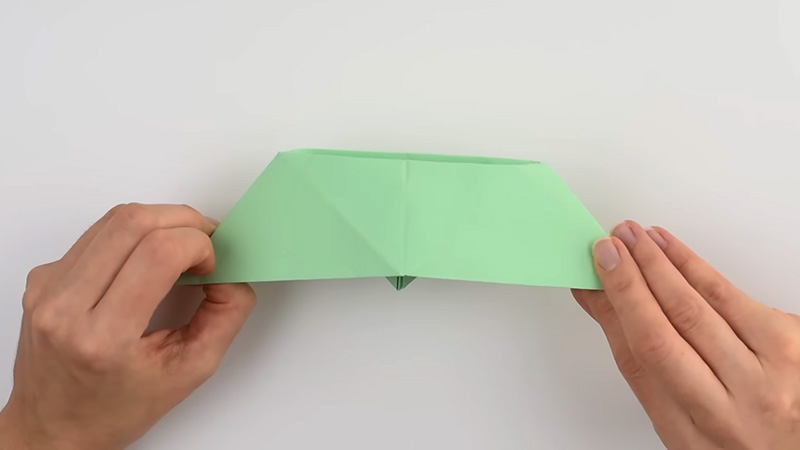
Carefully hold the paper by its two ends and gently pull them apart, while pushing the center of the paper inwards. As you do this, the two triangles will start to come together, forming the shape of a boat.
Final Adjustments
To complete your paper boat, press down on the sides to ensure that the triangles are securely joined together. Make sure the bottom flap is well-folded to create a flat base for the boat to sit on.
Ready to Sail
Your paper boat is now ready to set sail! You can gently place it in water, like a basin or a bathtub, and watch it float. Be cautious with outdoor use, as paper boats can be fragile and may not hold up well in natural bodies of water.
Enjoy the simple pleasure of creating and sailing your paper boat. Experiment with different paper sizes and colors to customize your fleet of miniature vessels.
What Paper to Use for Making a Boat?

Choosing the right paper for making a paper boat is crucial for its buoyancy and durability. Here are some suitable options:
Origami Paper
Origami paper is a popular choice for making paper boats. It’s lightweight, easy to fold, and comes in various colors and patterns, allowing you to add a decorative touch to your boat.
Standard Printer Paper
Standard printer paper (letter-size or A4) is readily available and can be used to make a simple paper boat. However, it may not be as durable as some other options, and you might need to be cautious with water exposure.
Colored Construction Paper
Colored construction paper can be used to make vibrant paper boats. While it’s thicker than standard printer paper, it’s still relatively lightweight and suitable for crafting small boats.
Water-Resistant Paper
If you plan to use your paper boat in water for an extended period, consider using water-resistant or wax-coated paper. This type of paper is more resistant to moisture and can help your boat stay afloat longer.
Thicker Cardstock
Thicker cardstock or cardboard can be used to create more robust and sturdy paper boats. These boats are less likely to become waterlogged quickly and can handle light water exposure better.
Recycled Materials
You can also repurpose materials like cereal box cardboard or milk carton material to create eco-friendly paper boats. Just ensure that they are clean and dry before use.
The choice of paper largely depends on your intended use and the level of decoration you desire. If your goal is to craft decorative paper boats for display, origami paper or colored construction paper might be ideal.
For functional boats that can handle water, consider using water-resistant paper or cardstock. Remember to test your paper boat in a controlled environment before using it in natural bodies of water to ensure it floats and remains intact as expected.
How to Make a Paper Boat Waterproof?

Making a paper boat waterproof can help it stay afloat longer and endure some exposure to moisture. Here are steps to waterproof a paper boat:
Materials Needed
- Your paper boat
- White school glue or clear waterproof adhesive
- A brush or foam brush
- A plastic tray or disposable container
- Wax paper or parchment paper
Prepare a Workspace
Lay down wax paper or parchment paper on a flat surface to protect it from glue spills.
Ensure that your paper boat is properly folded and in the desired shape. Make any necessary adjustments before proceeding.
Mix Waterproof Adhesive (Optional)
If you’re using a white school glue that’s not already waterproof, you can mix it with a small amount of water to create a thinner, more spreadable consistency. Aim for a 1:1 ratio of glue to water.
Apply the Waterproof Adhesive
Dip the brush or foam brush into the waterproof adhesive or thinned glue. Carefully and evenly brush a layer of the adhesive over the entire exterior surface of your paper boat.
Ensure that you cover all the exposed paper. Pay extra attention to seams and edges, as these are the most vulnerable to moisture.
Allow to Dry
Place your newly waterproofed paper boat on a clean, dry surface. Let it dry completely. This may take a few hours, depending on the thickness of the adhesive layer and humidity.
Apply Additional Coats (Optional)
If you want extra waterproofing, you can apply additional coats of adhesive, allowing each layer to dry before applying the next. Two to three layers should suffice for most purposes.
Test in Water
Once your paper boat is fully dry, it’s ready for a test in water. Place it in a container of water, like a basin or a bathtub, and observe how it floats. Ensure that the waterproofing works as expected.
Reapply if Necessary
If your boat absorbs water or doesn’t remain afloat as long as desired, you may need to reapply the waterproof adhesive to any areas that appear vulnerable.
By following these steps, you can enhance the waterproofing of your paper boat, allowing it to sail on the water with greater resilience.
However, keep in mind that no waterproofing method can make a paper boat completely impervious to moisture, so avoid prolonged exposure to water.
Removing waterproofing from a paper boat can be difficult, and it may damage the boat.
If you need to undo waterproofing, consider carefully scraping off the waterproof layer with a gentle touch. Be prepared for some changes in the boat’s appearance and structural integrity.
FAQs
To fold a paper boat accurately, make precise creases, ensure the edges align perfectly, and use a flat surface. Following step-by-step instructions or watching tutorial videos can also be helpful for beginners.
You can decorate your paper boat by using colored paper, markers, stickers, or even painting designs on the sail. Let your creativity shine by personalizing your boat with patterns or colors of your choice.
You can experiment with different boat designs, such as adding a cabin, creating a catamaran, or making multiple sails. These variations can add uniqueness and creativity to your paper boat projects.
Yes, paper boats can float in water. However, they are best suited for still or calm waters, such as a basin, bathtub, or a small pond.
Prolonged exposure to water can cause the paper to become waterlogged and lose its buoyancy.
When making paper boats with children, ensure they use child-safe scissors and supervise their activities, especially if they involve cutting. Be cautious with water play and provide a safe and controlled environment to avoid accidents around water sources.
Conclusion
The art of crafting paper boats is a timeless and enchanting pursuit that brings out the childlike wonder in all of us.
Throughout this guide, we’ve explored the simple yet delightful process of transforming a single sheet of paper into a miniature vessel that can navigate the waters of your imagination.
Paper boats offer a unique blend of creativity and nostalgia. Whether you’re launching them in a tranquil pond, bathtub, or even just across a tabletop “ocean,” these tiny vessels can transport you to distant shores of imagination.
As you continue to fold, float, and perhaps even decorate your paper boats, remember that the beauty of this craft lies not only in the finished creation but also in the journey of making it.
So, set sail on your paper boat adventures, whether alone or with friends, and let your imagination take you to places only limited by your creativity.
Leave a Reply