Creating a candy stripe friendship bracelet is a delightful endeavor that combines artistry with sentimentality. These bracelets, adorned with vibrant diagonal stripes, serve as cherished tokens of camaraderie.
With just two contrasting threads and a simple knotting technique, you embark on a creative journey that yields not just a piece of jewelry, but a symbol of lasting friendship.
This guide will walk you through the step-by-step process, from selecting the perfect colors to achieving precise knots.
Whether crafting for a cherished friend or as a personal keepsake, making a candy stripe friendship bracelet is a gratifying and meaningful endeavor that captures the essence of cherished connections.
What Is a Candy Stripe Friendship Bracelet?
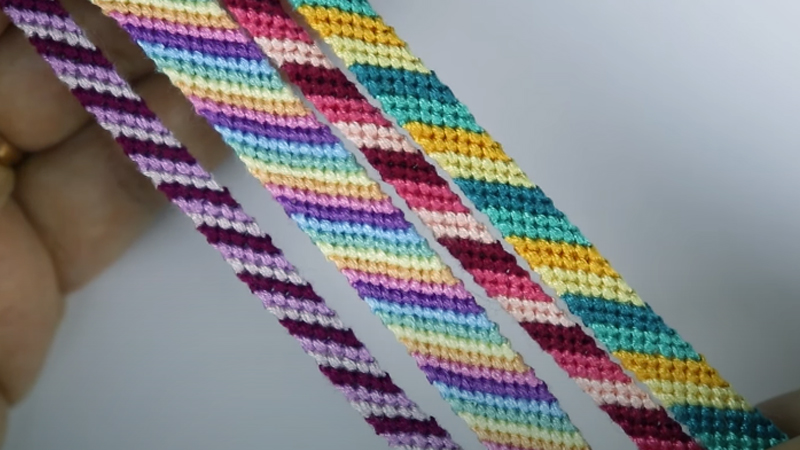
A candy stripe friendship bracelet is a popular and iconic type of handmade accessory often exchanged between friends as a token of affection and camaraderie.
These bracelets are characterized by their distinctive pattern of alternating, diagonal stripes, which resemble the colorful swirls found on candy wrappers, hence the name.
Typically crafted using embroidery floss, candy stripe bracelets are made by creating a series of knots in a diagonal fashion.
The choice of colors can vary widely, allowing for endless combinations and personalization. Traditionally, candy stripe bracelets feature two contrasting colors, but more intricate designs may incorporate additional shades.
These bracelets are not only visually appealing but also carry sentimental value, as they are often given as gifts to mark special occasions or to simply celebrate the bond between friends.
How to Make a Candy Stripe Friendship Bracelet? 11 Steps
A candy stripe friendship bracelet is a classic and colorful accessory that’s fun to make and even more fun to share with friends. It’s a great way to express creativity and show someone you care.
Here’s a step-by-step guide on how to make one:
Materials Needed:
- Embroidery Floss.
- Scissors.
- Tape or Safety Pin.
Steps:
Step 1: Choose Your Colors
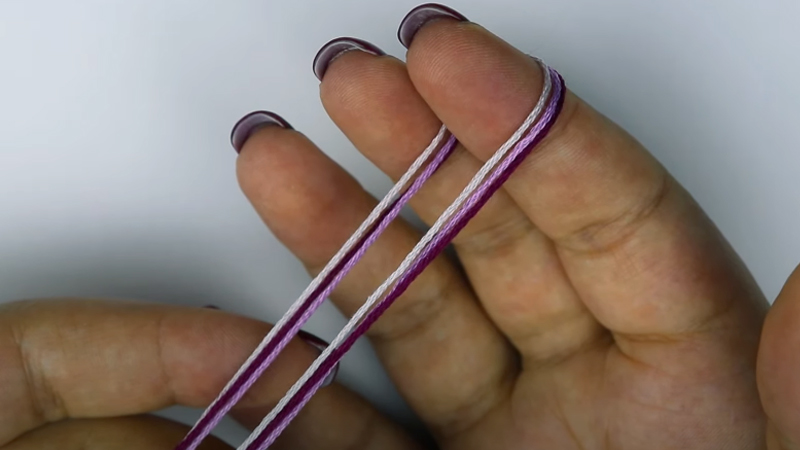
Consider creating a color palette that tells a story or conveys a feeling. For example, a combination of calming blues and greens might evoke a sense of tranquility, while vibrant reds and yellows can represent energy and joy. Choosing colors with intention adds a personal touch to your creation.
Step 2: Measure and Cut the Floss
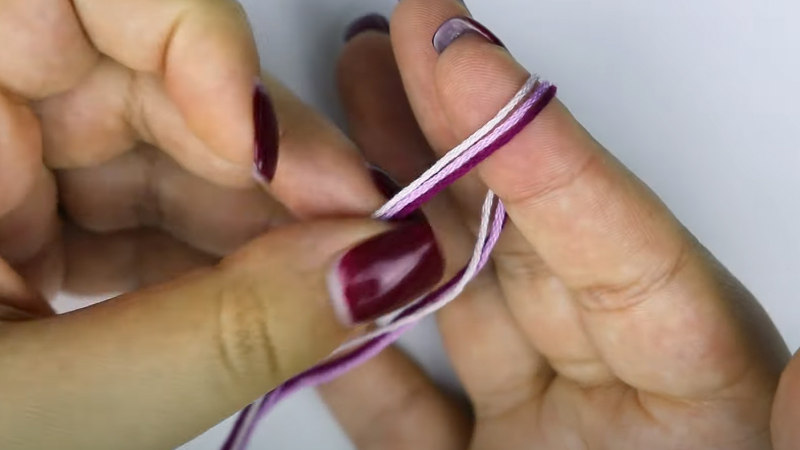
When you’re making bracelets for a group, pre-cutting multiple sets of floss can save time and ensure consistency. Remember, the length of the floss will determine the bracelet’s final size, so tailor it to the recipient’s wrist or opt for a standard length for versatility.
Step 3: Arrange the Floss
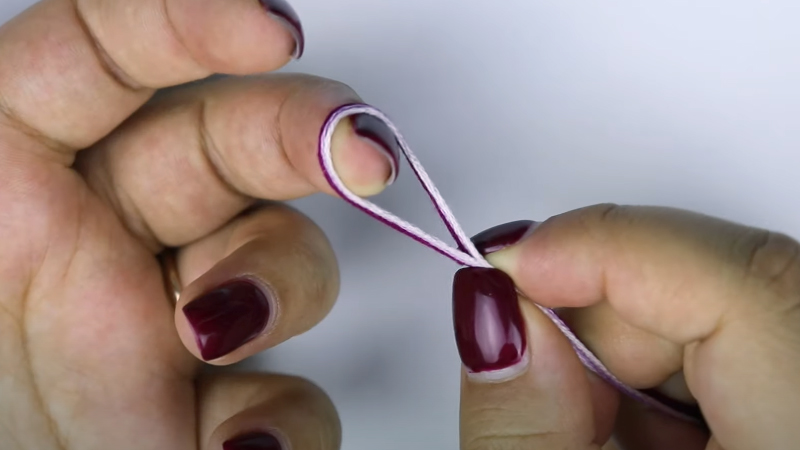
Take a moment to appreciate the symmetry of the looped end. A well-organized workspace sets the tone for a meticulously crafted bracelet. Pay attention to detail, as this initial setup paves the way for a polished final product.
Step 4: Secure the Loop
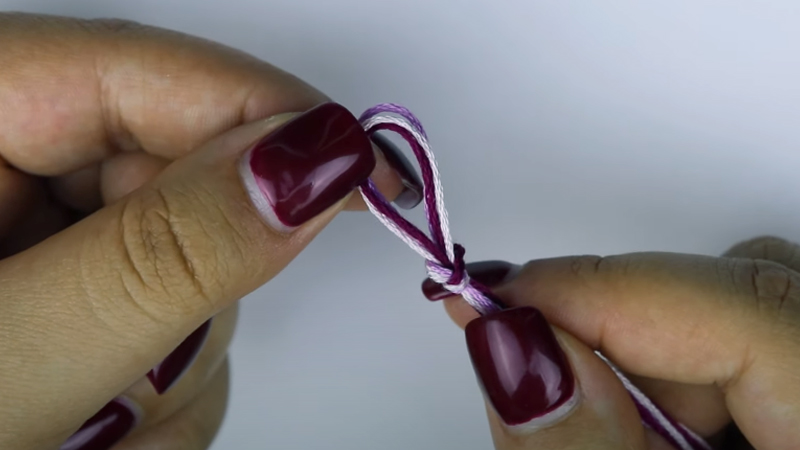
Consider using washi tape or masking tape for a secure hold that won’t damage the floss. Alternatively, opt for a sturdy safety pin.
A stable anchor ensures that your bracelet stays in place as you work, allowing for smooth and consistent knotting.
Step 5: Start Knotting
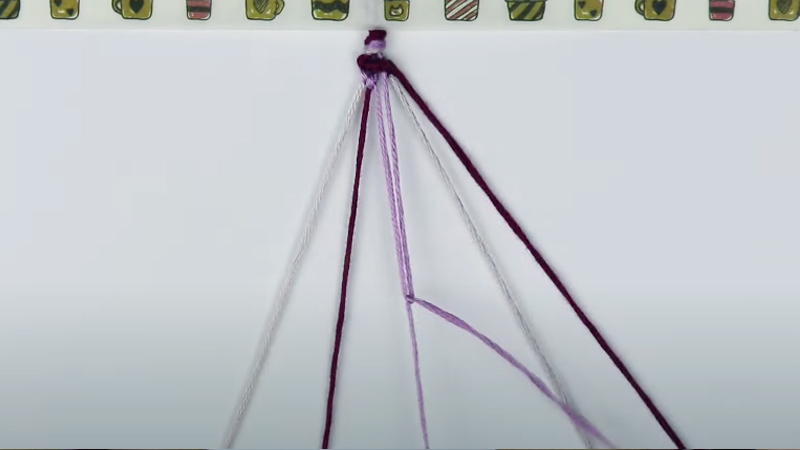
Immerse yourself in the rhythmic motion of knotting. Allow your fingers to find their natural flow. This step is where you begin to see your vision materialize. Embrace the process and enjoy the journey of creation.
Step 6: Tie a Knot
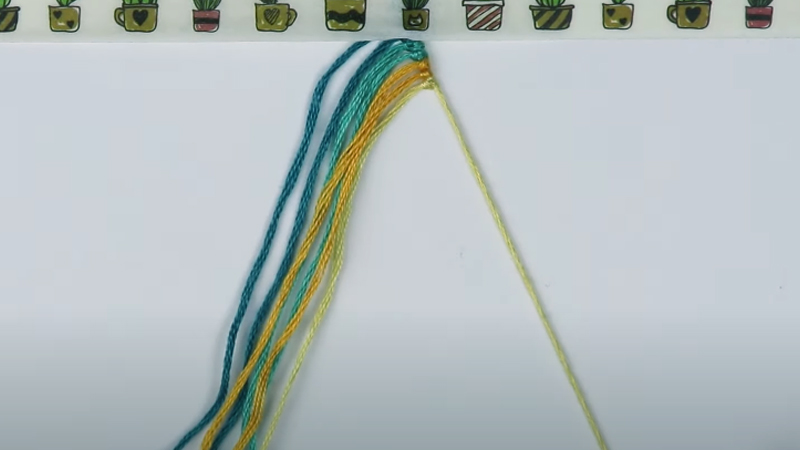
Experiment with different tension levels to see how they influence the look of your bracelet. Trust your instincts and adjust as needed. If a knot doesn’t sit perfectly, don’t be discouraged – it’s all part of the learning experience.
Step 7: Repeat
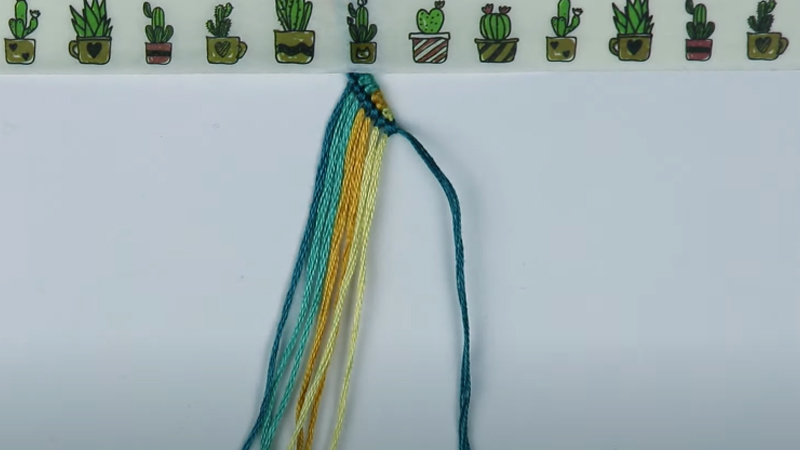
As you progress, take a moment to marvel at how each knot contributes to the overall pattern. If you make a mistake, don’t be afraid to unravel and try again. Perseverance and patience are key to achieving a flawless finish.
Step 8: Switch Colors
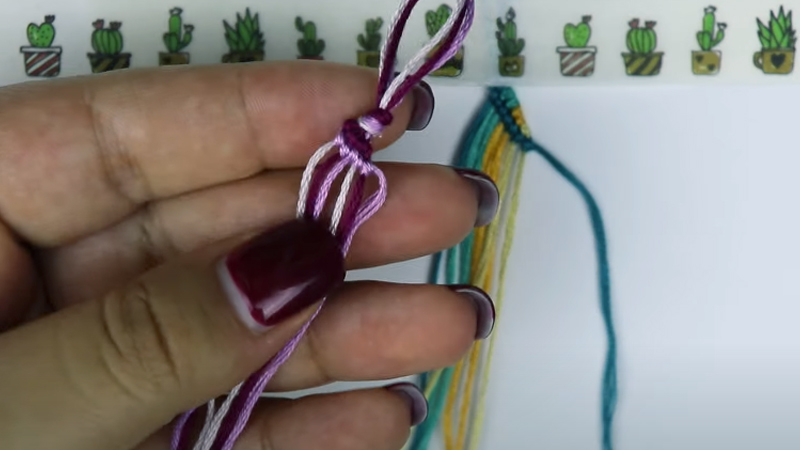
Consider using a tiny drop of fabric glue to reinforce the knot when transitioning to a new color. This extra measure can provide added durability, ensuring your bracelet withstands the test of time.
Step 9: Finishing the Bracelet
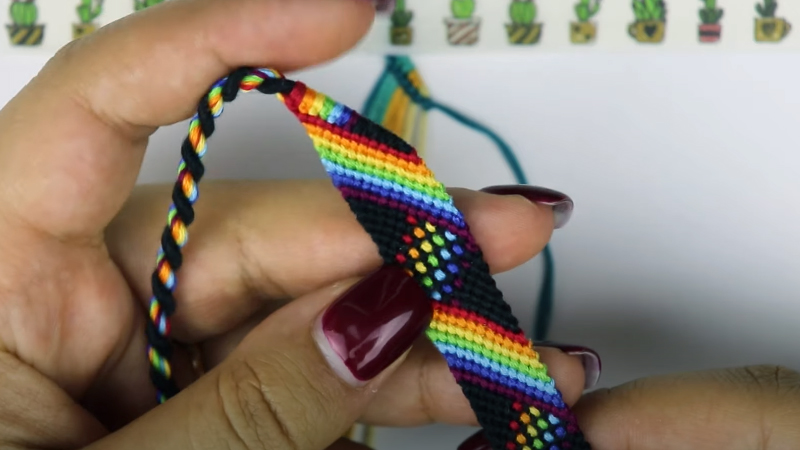
Experiment with different finishing touches, such as adding a charm or incorporating beads into the tie.
These small details can elevate the overall look and make the bracelet truly unique. Additionally, consider using fabric glue to secure the ends of the tie for extra reinforcement.
Step 10: Trim the Ends
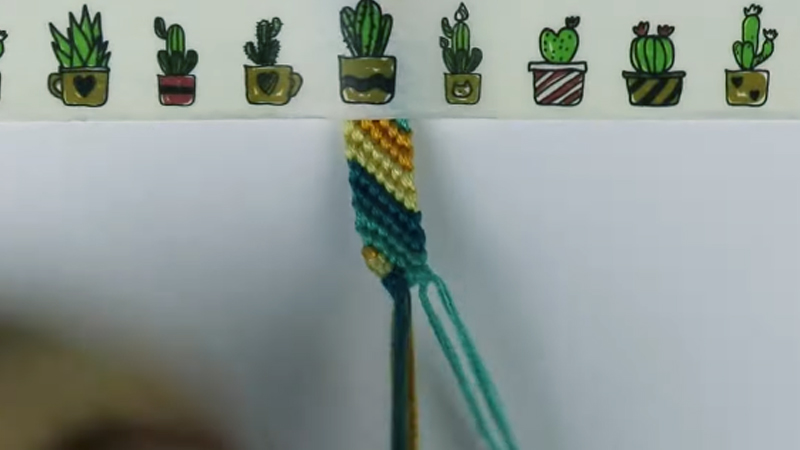
Hold the scissors steady and make a clean, precise cut. A well-trimmed edge adds a professional touch to your handmade creation. Take your time to ensure a polished finish.
Step 11: Present and Wear
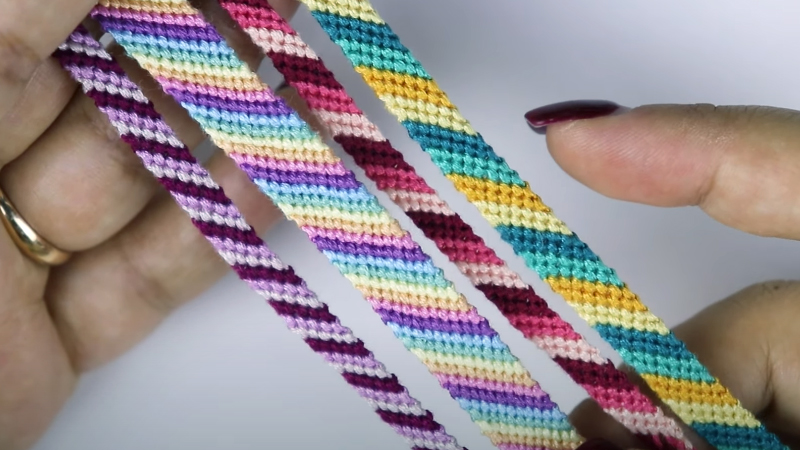
Include a heartfelt note or a small token alongside the bracelet to make the gift even more special. Encourage the recipient to wear it with pride, knowing that it was crafted with love and care.
Take a moment to adjust the bracelet for a comfortable fit, ensuring it’s a cherished accessory.
Common Issues and How to Fix Them
Creating a candy stripe friendship bracelet is a delightful project, but sometimes, you might encounter some common issues.
Here are a few potential problems and ways to fix them:
Uneven Knot Tension
- Issue: Some knots are tighter or looser than others, resulting in an uneven pattern.
- Fix: Pay close attention to the tension in each knot. Practice consistency in your knotting motion. If a knot is too tight, gently loosen it. If it’s too loose, adjust accordingly.
Knots Slipping or Coming Undone
- Issue: Knots are not holding, leading to the unraveling of the bracelet.
- Fix: Ensure that each knot is pulled tight enough to secure the floss in place. Consider using a small dot of clear nail polish or fabric glue on the knots for added security.
Difficulty in Adding a New Color
- Issue: Transitioning to a new color is proving challenging, and the knot isn’t secure.
- Fix: Tie a double knot when switching colors to ensure a stable transition. You can also add a small dab of clear glue to reinforce the knot.
Frayed Ends
- Issue: The ends of the floss are fraying and becoming difficult to work with.
- Fix: To prevent fraying, apply a small amount of clear nail polish to the tips. Allow it to dry before continuing. You can also trim the ends periodically to maintain a clean edge.
Incorrect Length
- Issue: The bracelet is turning out too short or too long for the intended recipient.
- Fix: Measure the recipient’s wrist accurately before starting. Adjust the length of the floss accordingly. It’s better to have a bit of extra length than to fall short.
Pattern Mistakes
- Issue: You’ve made a mistake in the pattern, such as skipping a knot or using the wrong color.
- Fix: Carefully backtrack to the point of the mistake and correct it. Undo the incorrect knots and re-knot the correct sequence.
Difficulty in Finishing the Bracelet
- Issue: You’re unsure how to end the bracelet securely.
- Fix: Consider adding a braided or twisted tie to the end for a secure finish. Alternatively, use a small amount of fabric glue to secure the final knots.
Losing Track of the Pattern
- Issue: It’s easy to get confused about which color comes next in the pattern.
- Fix: Use a small chart or pattern guide to help you keep track. You can create a simple diagram on paper or use a digital template.
Difference Between Candy Stripe Bracelet and Double Chevron Bracelet
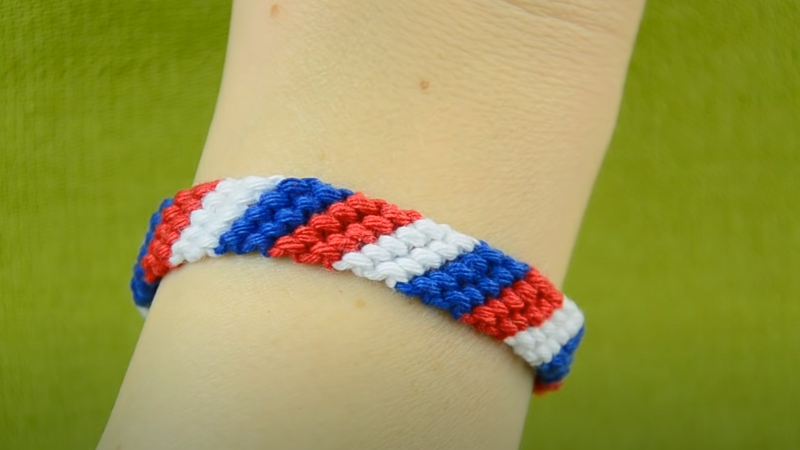
Candy stripe bracelets and double chevron bracelets are both popular types of handmade friendship bracelets, but they have distinct differences in terms of their patterns and designs:
Candy Stripe Bracelet
- Pattern: The candy stripe bracelet is characterized by its simple and classic diagonal stripe pattern. It typically features two alternating colors that create a straightforward, striped design.
- Technique: To create a candy stripe bracelet, you primarily use forward knots, which involve looping one thread over the other and pulling it through to create a knot. These knots are made diagonally, forming the stripes.
- Complexity: Candy stripe bracelets are relatively straightforward and are often chosen by beginners due to their simplicity. They are easy to learn and quick to make.
- Appearance: The candy stripe design results in a linear and straightforward pattern, making it easy to identify with its diagonal stripes. It has a clean and uncomplicated look.
Double Chevron Bracelet
- Pattern: Double chevron bracelets, also known as an arrowhead or zigzag bracelets, are characterized by a more intricate and dynamic V-shaped pattern. They typically feature two or more rows of V-shaped motifs.
- Technique: Creating a double chevron bracelet involves a combination of forward and backward knots, as well as careful knot placement to achieve the chevron or V-shaped design. The pattern often requires more attention to detail and precision.
- Complexity: Double chevron bracelets are generally more complex than candy stripe bracelets. They require a good understanding of knotting techniques and may take longer to complete due to their multi-layered pattern.
- Appearance: The double chevron pattern creates a visually striking bracelet with multiple layers of V-shapes, resulting in a more textured and intricate design. It has a dynamic and eye-catching appearance.
What Types of Knots Should You Use for a Candy Stripe Bracelet?
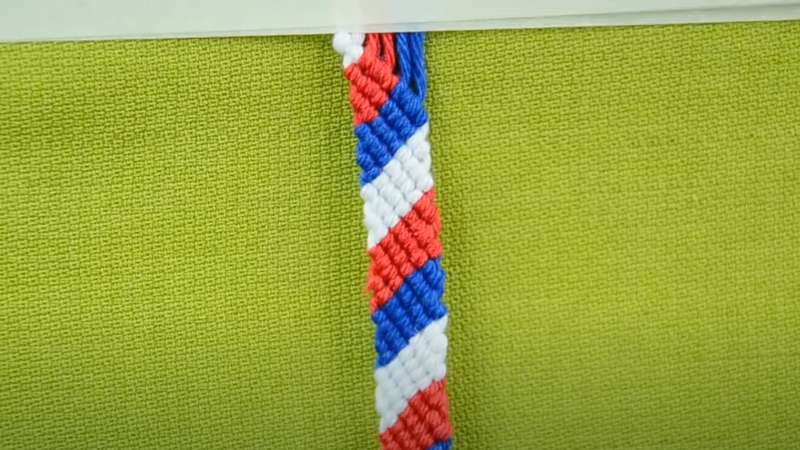
For a candy stripe friendship bracelet, you primarily use a simple knot called the “forward knot.” This knot is the key to creating the diagonal stripes characteristic of candy stripe patterns.
Here’s how to make a forward knot:
Start with Two Threads
Begin with two strands of embroidery floss, usually about 60 inches (150 cm) long each. These will form the basis of your candy stripe bracelet.
You can choose any combination of colors, but traditionally, one color is used for the stripes and another for the background.
Cross Thread A Over Thread B
Hold thread A in your right hand and thread B in your left. Position thread A over thread B to create a simple “X” shape. This sets the stage for the knotting process.
Loop Thread A Behind Thread B
With thread A now positioned on top, bring it under thread B, creating a loop that extends behind thread B. This maneuver is crucial for forming the knot.
Pull Tight
Gently tug both ends of thread A and thread B to tighten the knot. The knot should be snug but not overly tight. This step is pivotal in ensuring that the knot is securely held in place.
Repeat
Continue making forward knots to create the diagonal stripes in your candy stripe bracelet. Each forward knot should begin where the previous one left off. This repetition is what establishes the distinct candy stripe pattern.
By practicing these steps, you’ll develop a rhythm and precision in your knot-making technique.
Remember, the consistency of your knots contributes to the overall polished appearance of the bracelet.
Tips for Success
Embarking on a friendship bracelet project can be a creative and enjoyable endeavor.
To ensure a successful and rewarding experience, consider these valuable tips:
Gather Quality Materials
Begin by gathering high-quality embroidery floss in the colors and quantities you need. Investing in durable floss ensures that your bracelet will withstand wear and tear, making it a lasting token of friendship.
Choose Appropriate Lengths
Estimate the length of floss you’ll need based on the intended wrist size and the chosen pattern. It’s better to have a bit of extra than to run out mid-way through your project.
Organize Your Workspace
Clear a well-lit, clutter-free area to work in. Organize your materials, and use containers or organizers to keep threads from tangling. A tidy workspace facilitates smooth and focused crafting.
Practice Consistent Tension
Maintaining consistent tension while knotting is crucial for a neat and uniform pattern. Whether making forward or backward knots, strive for a steady hand to achieve a polished final result.
Be Patient and Persistent
Friendship bracelet making is a skill that improves with practice. Don’t be discouraged by initial attempts. Keep experimenting with different patterns and techniques, and you’ll notice your proficiency growing.
Keep Knots Neat
Take your time with each knot, ensuring they’re tight enough to hold but not so tight that they distort the pattern. Well-formed knots contribute to the bracelet’s overall quality and appearance.
Plan Your Design
Before starting, familiarize yourself with the pattern you’ve chosen. Having a clear plan in mind helps prevent mistakes and ensures a smooth crafting process.
Experiment with Color Combinations
Don’t be afraid to get creative with your color choices. Different combinations can produce stunning and unique results. Consider the recipient’s preferences and the message you want to convey.
Add Personal Touches
Incorporate beads, charms, or even initials to add a personal touch to your bracelet. These small embellishments can enhance the overall aesthetic and make the bracelet even more special.
Take Breaks When Needed
When you find yourself becoming fatigued or frustrated, it’s perfectly fine to take a break. Stepping away and returning with fresh eyes can lead to better results and a more enjoyable crafting experience.
Embrace Imperfections
Remember that handmade items often come with their own unique quirks. Embrace any imperfections as a testament to the human touch that went into crafting the bracelet.
FAQs
What materials do I need to make a candy stripe friendship bracelet?
To make a candy stripe friendship bracelet, you’ll need embroidery floss in your chosen colors, scissors, and something to secure your bracelet while you work, like tape or a safety pin.
How do I choose the right colors for my candy stripe bracelet?
Consider the recipient’s preferences, favorite colors, or any special meaning behind certain colors.
Is it challenging to make a candy stripe bracelet if I’m a beginner at crafting?
Not at all! Candy stripe bracelets are one of the simplest friendship bracelet patterns, making them a great choice for beginners.
How long should I make my candy stripe bracelet?
The length of your bracelet will depend on the recipient’s wrist size and how many knots you want to make.
What’s the best way to finish off a candy stripe friendship bracelet neatly?
You can finish your bracelet by tying a knot at the end. For added security and a polished look, consider adding a braided or twisted tie or using a dab of clear nail polish on the ends to prevent fraying.
To Recap
In crafting a candy stripe friendship bracelet, the artistry lies in the simplicity of forward knots. With two contrasting threads, the technique creates vibrant diagonal stripes, forming a timeless pattern. Starting with a deft cross and loop, each knot tightens to perfection.
The rhythmic repetition builds a bracelet that not only adorns but symbolizes camaraderie. By mastering these fundamental steps, you unlock a world of creative potential in crafting personalized tokens of friendship.
With patience and practice, you’ll weave not just threads, but memories, into each bracelet, cementing the bonds that make friendship enduring and precious. Create, give, and wear with pride, knowing it’s a piece of your heart in every stitch.
Leave a Reply