Embarking on the journey of crafting a shirt with Cricut Infusible Ink opens a world of endless creative possibilities.
This innovative technology allows for the seamless integration of vibrant, long-lasting designs onto fabric, creating a professional-quality garment. The process involves precision in design, careful cutting, and expert heat application.
Understanding the steps and nuances ensures a successful outcome. From selecting the right materials to mastering the heat transfer process, each element plays a crucial role.
In this guide, we’ll explore step-by-step instructions, offering insights and tips to help you craft a personalized shirt that reflects your unique style and creativity.

What Is Cricut Infusible Ink?
Cricut Infusible Ink is a cutting-edge crafting material that enables users to create vibrant, professional-quality designs on compatible surfaces like fabrics and ceramics.
Unlike traditional heat transfer materials, Infusible Ink undergoes a unique sublimation process. This means that when heat and pressure are applied, the ink transforms into a gas and permeates the surface, resulting in a seamless, permanent, and remarkably vivid finish.
The end result is a design that becomes one with the material, ensuring it won’t peel, crack, or fade over time.
Available in a range of colors and patterns, Infusible Ink offers endless creative possibilities for personalized apparel, home décor, and more, making it a favorite among crafters and DIY enthusiasts.
How to Make a Shirt With Cricut Infusible Ink?
Making a shirt with Cricut Infusible Ink is a fun and creative way to personalize your clothing. Cricut Infusible Ink allows you to transfer vibrant, long-lasting designs onto your shirts with professional-looking results.
Follow these steps to create your custom shirt with Cricut Infusible Ink:
Materials You’ll Need:
- Cricut cutting machine
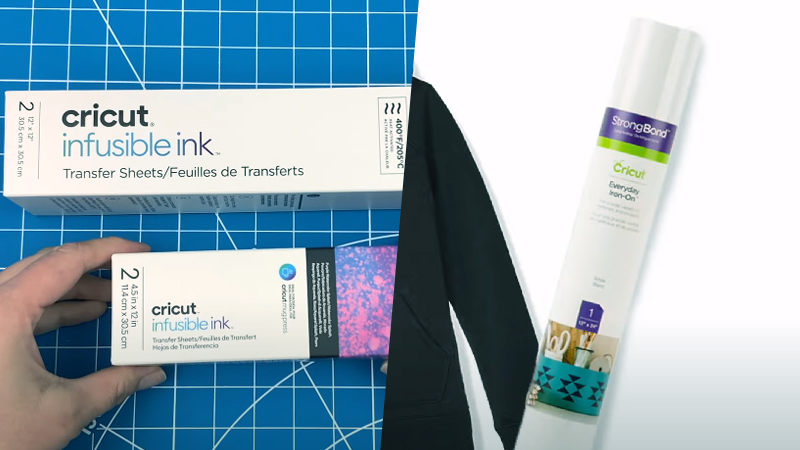
- Cricut Infusible Ink transfer sheets or pens
- Cricut EasyPress or a heat press
- Cricut standard grip cutting mat
- Cricut-compatible shirt or fabric
- Cricut heat-resistant tape
- Butcher paper
- A computer or mobile device with Cricut Design Space installed
- Weeding tools
- lint roller
Steps to Make a Shirt with Cricut Infusible Ink:
Design Your Image
In Cricut Design Space, take your time to explore the plethora of options available. You can customize existing designs, import your own images, or even draw your own using the design tools. Experiment with colors, sizes, and arrangements until you achieve the desired look.
Load Infusible Ink Transfer Sheet or Pen
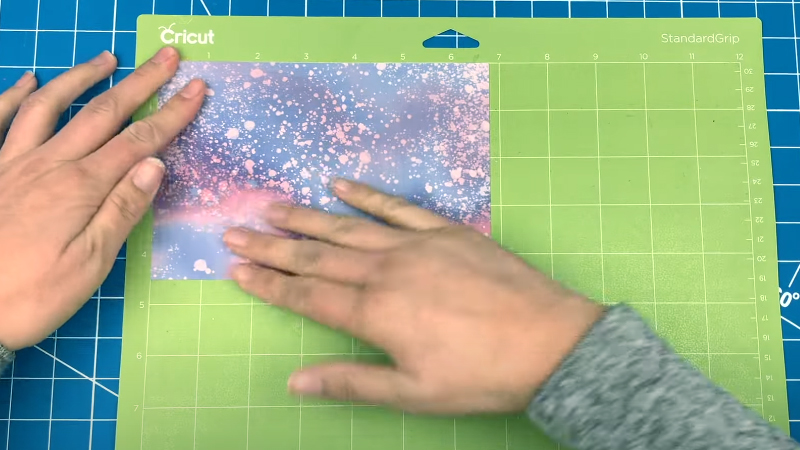
Ensure that the transfer sheet is perfectly flat on the StandardGrip cutting mat, with the shiny side facing down.
This orientation is crucial as it ensures that the cutting machine etches your design on the correct side. If you’re using Infusible Ink pens, make sure they are securely inserted in the machine.
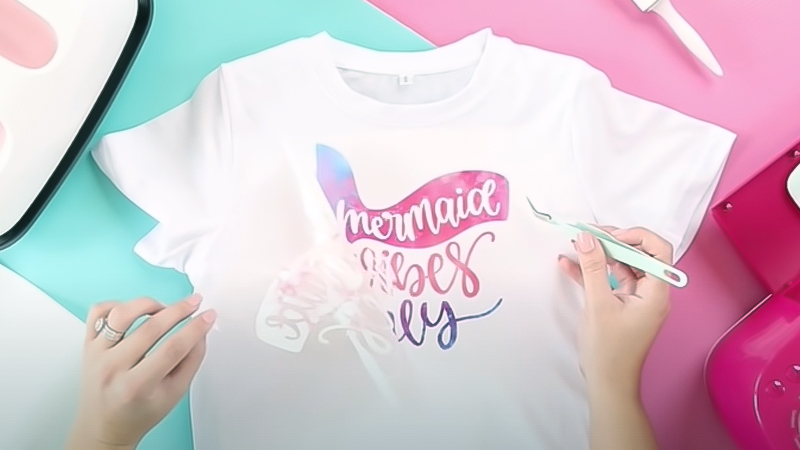
Weed Your Design
Weeding requires a delicate touch. Take your time and use the weeding tools provided by Cricut or your fingers to carefully remove the excess Infusible Ink material. Pay extra attention to intricate details to ensure a clean, professional finish.
Prepare Your Shirt
A well-prepared shirt is the canvas for your design. Smooth out any wrinkles and ensure the fabric lies flat.
Preheating your EasyPress or heat press not only ensures an even transfer but also eliminates any moisture that could affect the process.
Position Your Design
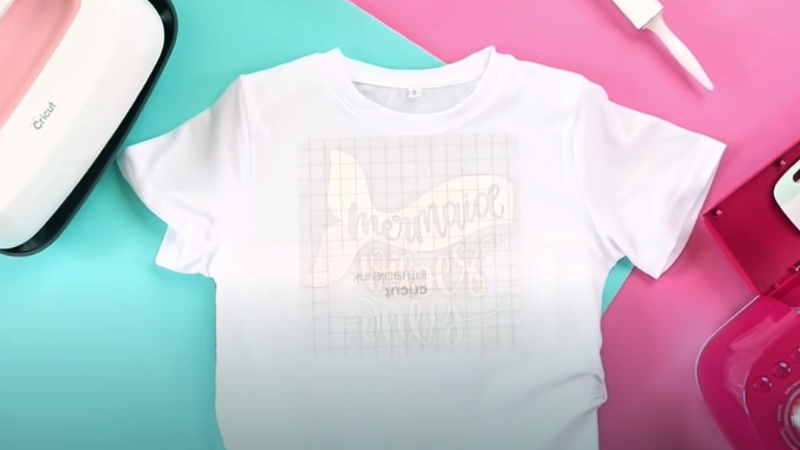
Gently lay the weeded Infusible Ink design onto your shirt, making sure the inked side is facing down. Take a moment to align it precisely and center it to your liking.
This step determines the final placement of your design, so be sure to double-check before proceeding.
Secure with Heat-Resistant Tape
Using heat-resistant tape, gently secure the edges of your design to the shirt. Take care not to tape over the actual design, as this could interfere with the transfer. This step is crucial for keeping the design in place during the heat application process.
Heat Transfer
Here’s where the transformation occurs. Cover your design and shirt with a sheet of butcher paper. Make sure your EasyPress or heat press is set to the recommended temperature and duration for Infusible Ink.
Apply even pressure, ensuring that the heat evenly covers the entire design. This causes the ink to sublimate, permanently fusing it with the fabric.
Reveal Your Design
After the designated time has elapsed, allow your shirt to cool completely. This step is critical as it allows the ink to set properly.
Once cool, carefully peel off the transfer sheet. Proceed slowly and meticulously to ensure that none of the design sticks to the sheet.
Enjoy Your Custom Shirt
Congratulations! Your custom shirt is now a wearable work of art. Treat it like any other piece of clothing; it’s washable and the design will remain vibrant and durable.
Whether you wear it yourself or gift it to someone special, you can take pride in your creation.
Difference Between Infusible Ink and Iron-on Vinyl

Infusible Ink and Iron-on Vinyl are both popular materials used in crafting, but they have significant differences:
Transfer Process
- Infusible Ink: It uses a sublimation process. When heated, the ink turns into a gas and permeates the material, creating a permanent bond. This means the design becomes part of the material itself.
- Iron-on Vinyl: Also known as heat transfer vinyl (HTV), it involves adhering a vinyl sheet to the surface using heat and pressure. The vinyl layer sits on top of the material.
Finish
- Infusible Ink: It produces a seamless, smooth finish. The design is embedded into the material, creating a vibrant, professional look.
- Iron-on Vinyl: The design remains on the surface, and there may be a slight texture from the vinyl.
Durability
- Infusible Ink: It’s highly durable. The design won’t peel, crack, or fade over time. It can withstand repeated washes without losing vibrancy.
- Iron-on Vinyl: It’s durable but may eventually show signs of wear with frequent washing and extended use.
Compatible Materials
- Infusible Ink: Works best on compatible surfaces like polyester or polyester-blend fabrics, and certain types of ceramics. It doesn’t work on cotton or other natural fibers.
- Iron-on Vinyl: Can be used on a wide range of materials, including cotton, polyester, leather, and more. It’s versatile and adheres well to various surfaces.
Cutting and Weeding
- Infusible Ink: Requires precise cutting and weeding as it’s a thin, delicate material. Intricate designs may require careful handling.
- Iron-on Vinyl: Cutting and weeding are relatively straightforward, making it accessible for beginners.
Design Flexibility
- Infusible Ink: Limited to specific compatible materials, but offers a seamless, professional finish.
- Iron-on Vinyl: More versatile in terms of materials, but the vinyl layer remains on the surface.
Layering
- Infusible Ink: Doesn’t allow for layering designs on top of each other.
- Iron-on Vinyl: Can be layered to create multi-colored and intricate designs.
Color Options
- Infusible Ink: Available in a range of vibrant colors and patterns.
- Iron-on Vinyl: Offers a wide variety of colors, finishes, and specialty options (e.g., glitter, holographic).
How do you fix it when you make a mistake?

When working with Cricut Infusible Ink, it’s not uncommon to encounter mistakes.
Here’s how you can address some common issues:
Design Not Cutting Correctly
- Issue: The Cricut machine may not have cut the design accurately or completely.
- Solution: Check that the blade is sharp and properly installed. Ensure the material is securely placed on the cutting mat. Also, confirm that the machine settings in Cricut Design Space match the material you’re using.
Difficulty Weeding the Design
- Issue: It can be challenging to remove the excess Infusible Ink material from the transfer sheet.
- Solution: Use fine-tipped weeding tools or your fingers to gently remove the excess material. Take your time and work carefully, especially with intricate designs.
Design Doesn’t Transfer Completely
- Issue: Some parts of the design may not have transferred onto the shirt or surface properly.
- Solution: Ensure that you’re using compatible materials, such as polyester or polyester-blend fabrics. Double-check that you’ve applied even pressure and heat during the transfer process.
Faded or Dull Colors After Transfer
- Issue: The colors may appear less vibrant than expected after the transfer.
- Solution: Ensure that you’re using high-quality Infusible Ink products. Confirm that you’re using the correct settings for your EasyPress or heat press, including the recommended temperature and time.
Peeling or Cracking Design
- Issue: The design may start to peel or crack after washing or wearing.
- Solution: Make sure you’ve followed the proper care instructions after the transfer process. Use mild detergent, wash inside out, and avoid high heat settings when drying.
Ink Bleeding or Spreading
- Issue: The ink may bleed or spread beyond the intended design area.
- Solution: Ensure that you’re using a lint-free cloth to clean the surface before applying the design. Avoid using excessive heat or pressure during the transfer process, as this can cause the ink to spread.
Uneven Transfer
- Issue: The design may not transfer evenly, resulting in patches or uneven coloring.
- Solution: Ensure that you’re applying even pressure across the entire design. Make sure your EasyPress or heat press is evenly heated and that you’re using a heat-resistant surface underneath
Care For Your Shirt After Using Infusible Ink

After creating a stunning design with Infusible Ink, it’s important to follow proper care instructions to ensure your shirt maintains its vibrant look and durability.
Here’s a guide on how to care for your shirt after using Infusible Ink:
Wait Before Washing
After the intricate process of infusing the design onto your shirt, exercise patience. Allowing your shirt to cool and settle for a minimum of 24 hours post-transfer is crucial. This ensures that the ink has ample time to fully set and adhere to the fabric.
Wash Inside Out
Turning your shirt inside out before washing is a small but effective precaution. This simple step provides an extra layer of protection to the vibrant design, shielding it from direct contact with other items in the wash. It’s a thoughtful way to prolong the life of your creation.
Use Cold Water
When it’s time for a wash, always opt for cold water. Hot water can be harsh on the Infusible Ink, potentially causing the design to fade prematurely. Cold water is gentle yet effective in maintaining the vibrancy of your shirt’s custom design.
Mild Detergent
Choose a mild, color-safe detergent for washing your Infusible Ink-adorned shirt. Harsh chemicals or bleach-containing products can be detrimental to the integrity of the design.
A gentle, color-safe detergent will effectively clean your shirt without compromising the vibrant colors.
Skip Fabric Softener
Avoid the use of fabric softeners or any products containing bleach when washing your shirt.
These agents can interfere with the ink’s bonding process and may lead to a diminished appearance over time. Opting for a gentle, bleach-free detergent is a safer choice for your custom-designed garment.
Gentle Cycle
Opt for a gentle cycle on your washing machine. This setting minimizes the amount of friction and agitation your shirt undergoes during the wash. It’s a small adjustment that can significantly extend the lifespan of your Infusible Ink design.
Avoid Overcrowding
To prevent unnecessary rubbing and potential damage to the design, avoid overcrowding the washing machine.
Providing your shirt with ample space during the wash cycle ensures that it retains its vibrant colors and sharp details.
Air Dry or Low Heat
After washing, consider air drying your shirt. If you prefer to use a dryer, select a low-heat setting.
Exposing your custom-designed shirt to excessive heat can potentially compromise the integrity of the Infusible Ink, so a gentle drying approach is recommended.
No Dry Cleaning
Dry cleaning is not recommended for shirts adorned with Infusible Ink designs. The chemicals used in the dry cleaning process can be harsh on the ink and may lead to fading or damage. Stick to gentle, at-home washing methods for the best results.
Store with Care
When storing your shirt, take care to fold it carefully. This prevents unnecessary creasing or friction against other items, which could potentially affect the longevity of the design. Storing it in a cool, dry place will help maintain the integrity of the Infusible Ink.
FAQS
What materials can I use with Cricut Infusible Ink?
Cricut Infusible Ink works best on compatible materials like polyester or polyester-blend fabrics. It’s not suitable for natural fibers like cotton.
Can I reuse the Infusible Ink transfer sheet?
No, the Infusible Ink transfer sheet is for one-time use only. After it has been heat applied, it cannot be used again.
Do I need a Cricut machine to create designs with Infusible Ink?
Yes, you’ll need a Cricut cutting machine (e.g., Cricut Maker, Cricut Explore Air) to cut your designs from Infusible Ink transfer sheets or pens.
Is Infusible Ink safe for washing and everyday wear?
Yes, Infusible Ink designs are durable and permanent. They can withstand repeated washes without fading, peeling, or cracking.
Can I layer Infusible Ink designs on top of each other?
No, Infusible Ink does not allow for layering designs on top of each other. Each layer of Infusible Ink needs to be applied separately.
To Recap
Creating a shirt with Cricut Infusible Ink is a captivating blend of art and technology. The process involves meticulous design creation, precise cutting, and expert heat application.
Infusible Ink offers a remarkable advantage with its ability to produce seamless, vibrant, and permanent designs. Careful attention to washing and maintenance is vital to ensure your custom shirt stands the test of time.
While it requires precision, patience, and adherence to specific guidelines, the result is a personalized garment that retains its vivid colors and durability, making it a cherished addition to your wardrobe or a thoughtful gift for loved ones.
Leave a Reply