In the era of face masks, comfort is paramount. Ear savers have emerged as a practical solution to alleviate the discomfort caused by mask straps.
These small but invaluable accessories redistribute pressure away from the ears, making extended mask-wearing significantly more bearable.
This guide will walk you through the process of crafting your own ear savers, tailored to your preferences and needs. Whether you choose soft fabric, flexible silicone, or thin plastic, you’ll learn how to shape, adjust, and personalize these savers for a perfect fit.
Join us on this journey to create a simple yet impactful accessory that enhances the mask-wearing experience for you and those around you.

What Are Ear Savers?
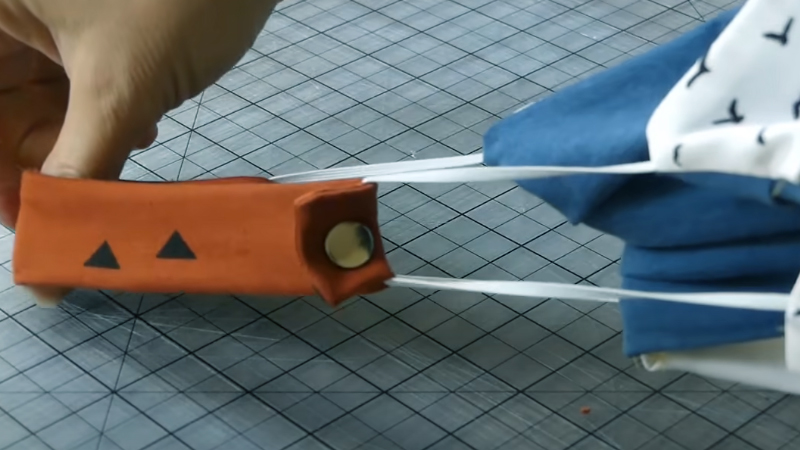
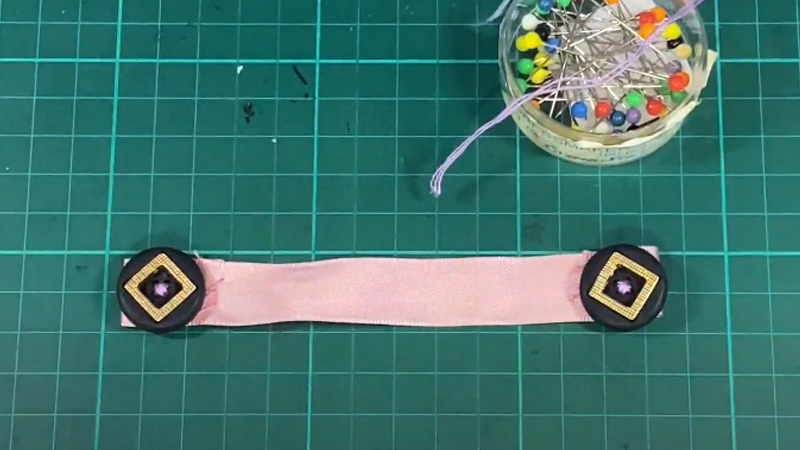
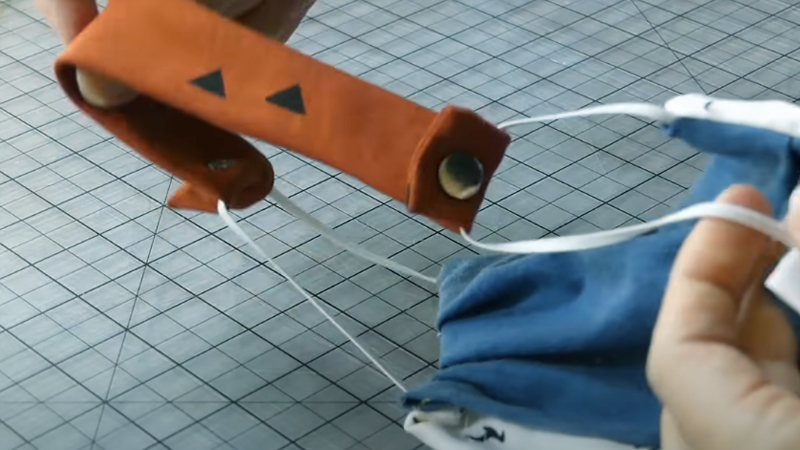
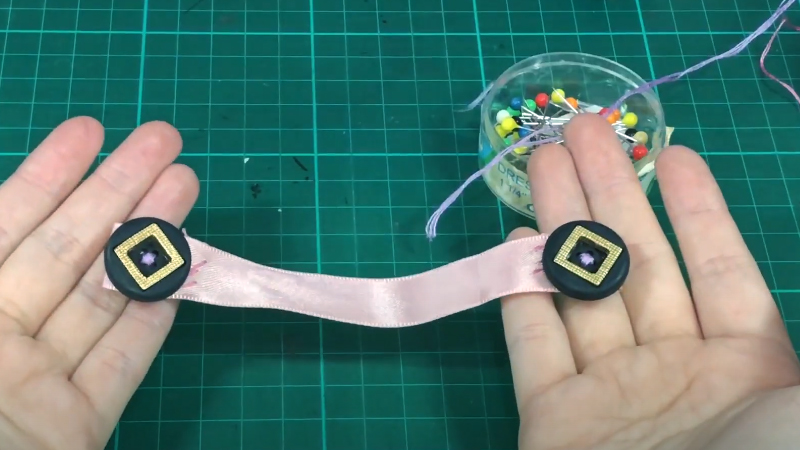
Ear savers are simple accessories designed to make wearing face masks more comfortable. They are typically small strips or bands made from various materials like fabric, silicone, or plastic.
These bands have hooks or notches on either end to which the ear loops of a face mask can be attached. By doing so, ear savers effectively transfer the pressure and strain from the mask’s elastic straps away from the ears.
During the COVID-19 pandemic, when wearing masks for extended periods became a widespread practice, ear savers gained popularity.
They proved particularly helpful for frontline workers, such as healthcare professionals, who had to wear masks for long shifts. By alleviating the pressure on the ears, ear savers made mask-wearing a more sustainable and comfortable practice.
How to Make Ear Savers?
Ear savers are simple and practical accessories designed to make wearing face masks more comfortable by relieving the pressure and discomfort caused by mask straps behind the ears.
Making ear savers is a straightforward and DIY-friendly project that can help you and others in your community stay comfortable while wearing masks.
Here’s a step-by-step guide on how to make ear savers:
Materials You’ll Need:
- Flexible Material
- Scissors.
- Hole Punch or Drill.
Steps to Make Ear Savers:
Measure and Cut
Take a measuring tape or ruler and decide on the length and width of your ear saver. As mentioned earlier, a typical size is around 6 to 7 inches long and about 0.5 to 1 inch wide. Keep in mind that the width should be enough to comfortably accommodate mask straps.
When you’re using fabric, lay it out flat and mark the dimensions with a fabric pencil or chalk. For silicone or plastic, use a marker to make clear, visible lines.
Shape the Ear Saver
When you’re opting for a curved design, you’ll want to gently heat your material. For fabric, you can use a hot iron, making sure to avoid direct contact. For plastic or silicone, you can use a heat gun or warm water.
Apply heat carefully and gradually, checking the flexibility of the material until it’s pliable enough to shape. Gently bend it to create the desired curve.
Add Adjustment Holes
When you decide to add adjustment holes, make sure they’re evenly spaced along the length of the ear saver.
Use a hole punch for fabric or a drill with a small bit for plastic or silicone. The holes should be large enough to easily pass a mask strap through.
Consider the different head sizes of potential users when placing the holes. A good rule of thumb is to space them about half an inch apart.
Smooth the Edges
Using sandpaper or a file, gently smooth any rough or sharp edges, especially if you’re working with plastic or silicone.
Pay special attention to the holes you’ve created. This step is crucial for ensuring the ear saver doesn’t cause any discomfort or irritation to the skin.
Test for Comfort
Put on a mask and attach the mask straps to your newly crafted earsaver. Wear it for an extended period to ensure it’s comfortable and doesn’t cause any irritation. If you’ve added adjustment holes, try different lengths to find the most comfortable fit.
Personalize
This step is all about adding a personal touch. Use fabric markers, stickers, or other decorative elements to customize your ear savers. This can be a fun way to make them more appealing and unique.
Use and Share
Now that you have a comfortable and personalized earsaver, put it to good use. Wear it whenever you’re wearing a mask for an extended period. Consider making extra ear savers to share with family, friends, or your community.
They can be incredibly helpful for those who need to wear masks for extended periods, such as healthcare workers, essential workers, or anyone with specific health conditions.
Benefits of Using Ear Savers

Using ear savers provides several important benefits, particularly in the context of prolonged mask-wearing:
Comfort
Ear savers alleviate the pressure and friction that mask straps can cause behind the ears.
This is especially crucial for individuals who need to wear masks for long durations, such as healthcare workers, essential workers, and those with certain health conditions.
Reduced Discomfort and Irritation
Without ear savers, mask straps can rub against the skin, leading to irritation, redness, and even sores. Ear savers create a barrier between the straps and the skin, minimizing the risk of discomfort.
Prevents Ear Fatigue
Wearing masks for extended periods can lead to ear fatigue, where the constant pressure on the ears becomes tiring and uncomfortable. Ear savers distribute the pressure more evenly, reducing this fatigue.
Ensures Proper Fit
Some individuals may find it challenging to get a snug fit with mask straps alone. Ear savers can improve the fit by allowing for better tension adjustment, ensuring the mask stays securely in place.
Promotes Hygiene
Ear savers can be easily cleaned and sanitized, which is particularly important in environments where hygiene is crucial, such as hospitals and healthcare facilities.
Customizable and Adjustable
For ear savers with adjustment holes, users can choose the length that provides the most comfort for them. This personalization makes them suitable for a wide range of head sizes.
Extends Mask Lifespan
By reducing strain on mask straps, ear savers can help prevent them from becoming stretched or damaged over time. This can extend the lifespan of masks, especially for those using reusable ones.
Encourages Consistent Mask Use
When masks are more comfortable to wear, individuals are more likely to keep them on for longer periods. This is crucial for maintaining safety measures in settings where masks are required.
Accessibility and Inclusivity
Ear savers are a simple and cost-effective solution that can make a significant difference for people with various needs, including those with sensory sensitivities or conditions that affect skin sensitivity.
Community Support and Solidarity
Making and sharing earsavers can be a way to show support and solidarity within a community. It’s a tangible way to help those who need to wear masks regularly.
Safety Precautions When Handling Materials and Tools

When working on any DIY project, including making ear savers, it’s important to prioritize safety.
Here are some essential safety precautions to keep in mind when handling materials and tools:
Wear Protective Gear
Before you begin any project, ensure you’re wearing the appropriate personal protective equipment (PPE). Safety glasses or goggles protect your eyes from flying debris or splashes.
Gloves shield your hands from cuts, abrasions, or exposure to potentially harmful substances. When there’s a risk of inhaling dust or fumes, consider wearing a dust mask or respirator.
Work in a Well-Ventilated Area
Ventilation is crucial, especially when working with materials that release fumes or dust.
If possible, work near an open window or use a fan to circulate air. In spaces without natural ventilation, consider using a mechanical ventilation system to maintain fresh air flow.
Use Tools Safely
Familiarize yourself with the tools you’re using. Read and understand the manufacturer’s instructions, paying attention to any safety precautions.
Ensure that all tools are in good working condition, with no loose parts or damaged handles. Always use tools for their intended purpose and avoid makeshift solutions.
Keep the Work Area Organized
A tidy workspace not only helps you find the tools and materials you need more easily, but it also reduces the risk of accidents.
Make sure there are no tripping hazards, and store tools and materials in their designated places when not in use. This also includes properly coiling and securing any cords or hoses to prevent tangling.
Proper Handling of Sharp Objects
When using sharp objects like scissors or knives, always exercise caution. Cut away from your body and keep your fingers clear of the cutting path.
Use a cutting surface that’s stable and won’t slip. If you need to pass a tool to someone else, do so with the handle first and always communicate clearly.
Mind Electrical Safety
When your project involves power tools, prioritize electrical safety. Ensure that outlets are grounded and that extension cords are appropriate for the tools being used.
Avoid using power tools in wet conditions or near water sources to prevent electrical shock hazards.
Use Caution with Heat Sources
When working with heat sources, such as heat guns or open flames for shaping materials, extreme care is essential. Follow the manufacturer’s guidelines for safe operation.
Be mindful of the temperature settings to avoid overheating, which can cause burns or damage to the material. Keep a fire extinguisher nearby as an extra precaution.
Avoid Contact with Hazardous Materials
When your project involves potentially hazardous substances, such as chemicals or certain types of plastics, familiarize yourself with their safe handling procedures.
Use gloves, aprons, and other protective equipment as recommended by safety guidelines. Ensure adequate ventilation when working with volatile or noxious materials.
Dispose of Waste Properly
Dispose of any waste materials, such as cuttings, scraps, or used consumables, in accordance with local regulations.
Some materials may be considered hazardous waste and require special handling or disposal methods. Avoid throwing them in regular trash bins to prevent environmental harm.
Be Mindful of Ergonomics
Maintain a comfortable and neutral body posture while working. Avoid awkward positions or repetitive movements that can lead to strains or musculoskeletal issues. Arrange your work area so that tools and materials are within easy reach, minimizing the need for excessive stretching or bending.
Store Materials Safely
When not in use, store materials and tools in a secure and organized manner. Store sharp objects in a safe place, and keep them out of reach of children or pets.
Ensure that flammable materials are stored away from heat sources or open flames to prevent potential fire hazards.
Educate Yourself
If you’re unfamiliar with a particular material or tool, take the time to educate yourself before using it. Refer to instructional videos, manuals, or reputable online resources.
Seek advice from experienced individuals or professionals who are knowledgeable about the specific material or tool you’re working with.
Seek Assistance if Needed
When you encounter a situation where you’re unsure about a technique or are using a tool with which you’re not familiar, don’t hesitate to ask for help.
Seek guidance from someone experienced or consult relevant resources. It’s better to seek assistance than risk potential accidents or mistakes.
Tips for Effective Usage

As wearing masks has become a common practice in various situations, especially in public spaces and workplaces, finding ways to enhance comfort is crucial. Ear savers are simple yet effective accessories that can make a significant difference.
Here are some tips to ensure you get the most out of using ear savers:
Proper Placement
When using an ear saver, make sure it sits comfortably at the back of your head, with the mask straps looped around the ends.
The ear saver should be positioned horizontally, allowing the straps to rest securely without causing pressure points.
Adjustment for Comfort
When your ear saver has adjustment holes, take the time to find the right fit. Experiment with different hole placements to ensure a snug but not too tight fit.
This customization can greatly enhance comfort, especially for extended periods of mask-wearing.
Regular Cleaning and Sanitizing
Keep your ear saver clean by regularly washing or sanitizing it. This is particularly important for those in healthcare or other high-risk environments. Most ear savers can be easily wiped down with a disinfectant or washed with soap and water.
Consider Material and Design
Depending on your needs and preferences, choose an ear saver made from a material that suits you best. Soft fabric ear savers can be comfortable against the skin, while silicone or plastic ones are easy to clean and maintain.
Avoid Overstretching Straps
While ear savers help relieve pressure on the ears, be cautious not to overstretch the mask straps.
The straps should be snug but not overly tight. Overstretching may lead to a less effective seal around the mask, reducing its protective capabilities.
Replace Damaged or Worn Earsavers
Regularly inspect your ear saver for any signs of wear and tear. If you notice any damage, it’s advisable to replace it to maintain optimal comfort and effectiveness.
Personalize for Added Comfort
Consider adding extra padding or cushioning to your ear saver for even greater comfort. This can be achieved by attaching soft fabric or foam to the side that comes into contact with your skin.
Share with Others
When you have the means to do so, consider making extra ear savers to share with friends, family, or colleagues. This simple act can greatly benefit those who need to wear masks for extended periods.
Educate and Advocate
Spread awareness about the benefits of using ear savers. Encourage others to explore this simple solution for enhanced mask-wearing comfort, especially for individuals who wear masks regularly in their professions.
FAQS
What Materials Can I Use to Make Ear Savers?
You can use various materials like soft fabric (cotton, fleece), flexible silicone rubber sheets, or thin, flexible plastic sheets (like PVC or PET).
Do I Need Special Tools to Make Ear Savers?
Basic tools like scissors, a hole punch (if adding adjustment holes), sandpaper, or a file for smoothing edges are typically sufficient.
How Long Should an Ear Saver Be?
A standard ear saver is around 6 to 7 inches long, but you can adjust the length to your preference. The width is typically about 0.5 to 1 inch.
Can I Personalize or Decorate My Ear Savers?
Yes, you can personalize your ear savers using fabric markers, stickers, or other embellishments to add a unique touch.
Are Ear Savers Reusable?
Yes, ear savers are designed to be reusable. They can be cleaned and sanitized as needed, making them a practical accessory for regular mask-wearers.
To Recap
In crafting ear savers, you’ve not only fashioned a practical accessory but also contributed to comfort and well-being in a masked world.
Your choice of material, personalized adjustments, and attention to safety measures ensure a product that’s both functional and tailored to individual needs.
As you share these ear savers with others, you’re extending a gesture of care and support. Remember, the small actions count, and your efforts in making and distributing ear savers make a meaningful difference.
Together, we forge a path toward a more comfortable and considerate mask-wearing experience for everyone. Thank you for being a part of this positive change.
Leave a Reply