Fabric yo-yos, also known as fabric rosettes or Suffolk puffs, are whimsical and versatile adornments that can infuse a touch of vintage charm into your craft projects.
Whether you’re an experienced crafter or a novice looking for a creative endeavor, learning how to make fabric yo-yos is a delightful and straightforward process.
These small, gathered fabric circles can be used to embellish quilts, clothing, accessories, or home decor, breathing life into your designs.
In this guide, we’ll take you through the step-by-step process of crafting fabric yo-yos, offering both traditional hand-stitching methods and using Clover Yo-Yo Makers for precision and ease.
Unlock your inner artisan and start creating these charming fabric embellishments today.
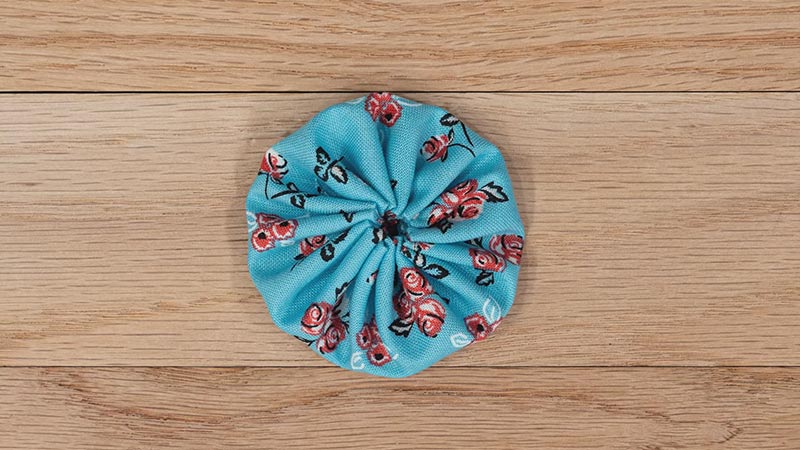
What Are Fabric Yo-Yos?
Fabric yo-yos, also known as fabric rosettes or Suffolk puffs, are small circular pieces of fabric that are gathered and sewn together to form a gathered ruffled shape.
They are typically made by hand-sewing a running stitch along the edge of a fabric circle and then gathering the fabric by pulling the thread.
This creates a puffed, gathered shape in the center with a flat, circular border. Fabric yo-yos are used as decorative embellishments in various craft projects.
They can be sewn onto quilts, clothing, accessories, or home decor items, adding a charming and whimsical touch to the overall design. They can also be strung together to create garlands or used individually as buttons or closures.
How to Make Fabric Yo-Yos?
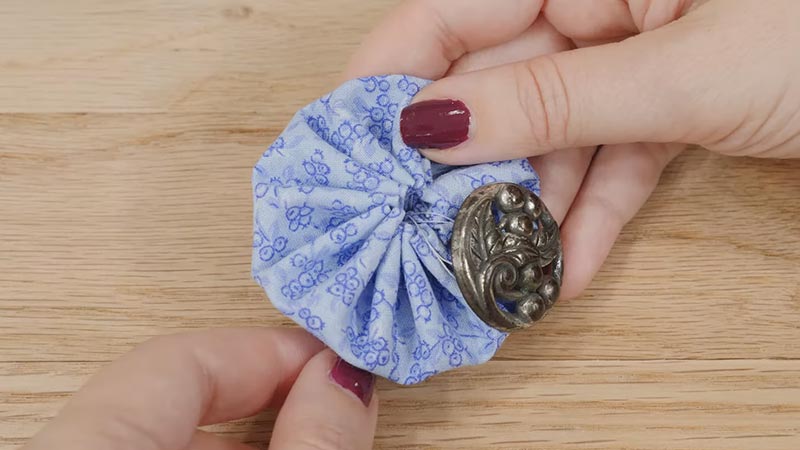
Fabric yo-yos, also known as fabric rosettes or Suffolk puffs, are charming and versatile embellishments that can be used in various craft projects.
These small, circular pieces of gathered fabric add a delightful touch to quilts, clothing, accessories, and home decor. Making fabric yo-yos is a fun and creative endeavor, and it’s a great way to use up fabric scraps.
In this guide, we’ll walk you through the steps of making fabric yo-yos.
Materials You’ll Need:
- Fabric scraps
- Needle
- Thread
- Scissors
- Template (optional)
Step-by-Step Instructions:
Prepare Your Fabric
Begin by selecting the fabric you want to use for your yo-yos. You can choose various colors and patterns to create a visually appealing assortment.
Cut your fabric into circles when it isn’t already in small pieces. You can use a circular template (e.g., a lid, a cup, or a cardboard circle) to trace and cut out uniform circles. The size of the template will determine the size of your yo-yo, so choose accordingly.
Thread Your Needle
When you’re new to sewing, threading a needle can be a bit tricky. Hold one end of the thread between your fingers and moisten it slightly to make it easier to pass through the eye of the needle. With a bit of practice, this will become second nature.
Knot the thread
Create a knot at the end of the thread. Hold the end of the thread between your fingers and roll it between your thumb and forefinger.
Then, pull it tight to form a knot. This will ensure that your thread doesn’t slip through the fabric as you work.
Create a Running Stitch
As you begin your running stitch, make sure to position your needle about a quarter-inch from the edge of the fabric.
This will give you enough room to gather the fabric without compromising its structural integrity. Keep your stitches even and consistent for a polished finish.
Gather the Fabric
When you start to gather the fabric, do so gently. Pull the thread gradually, distributing the gathering evenly around the circle.
If you pull too forcefully, you risk snapping the thread or creating uneven gathers. Take your time to achieve a neat and even result.
Secure the Yo-Yo
To secure your yo-yo, stitch through the gathered folds. Make sure to go through all layers of fabric to create a sturdy hold. Consider making a small knot within the gathers for added reinforcement. This will help prevent any unraveling over time.
Flatten and Shape the Yo-Yo
Take a moment to appreciate the transformation as you gently flatten and shape the gathered fabric into a pleasing circular form.
This step is where you have the opportunity to fine-tune the appearance of your yo-yo. Adjust the gathers as needed to create a balanced and visually appealing result.
Repeat the Process
Don’t rush the process. Take your time to create each yo-yo with care and attention to detail. Experiment with different fabrics and sizes to add a dynamic range of textures and visual interest to your projects.
Use Your Fabric Yo-Yos
Let your creativity run wild! Fabric yo-yos can be incorporated into a wide range of projects. For quilts, arrange them in patterns or scatter them randomly for a playful touch.
On clothing, they can be used as decorative accents or functional closures. Consider turning them into jewelry, hair accessories, or even embellishments for home decor items like cushions or wall hangings.
How to Make Fabric Yo-Yos with a Clover Yo Yo Maker?
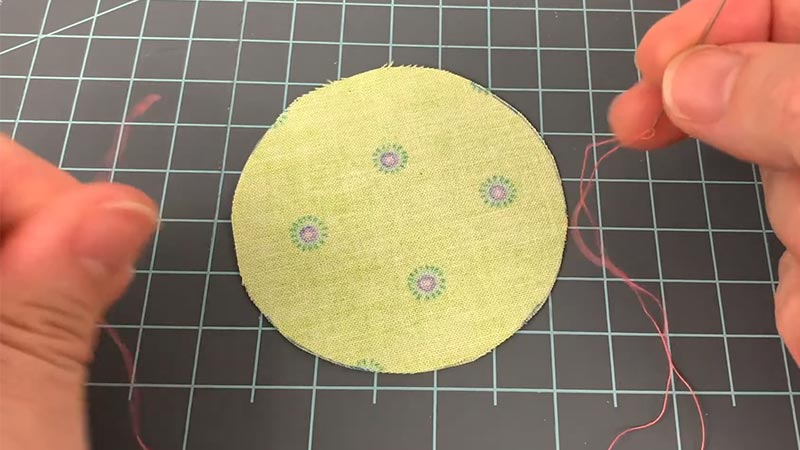
Using a Clover Yo-Yo Maker is an excellent way to create fabric yo-yos with precision and speed. These handy tools come in various sizes, making it easy to customize your yo-yos.
Here’s a step-by-step guide on how to make fabric yo-yos with a Clover Yo-Yo Maker:
Prepare Your Fabric
Start by selecting your fabric scraps. This is where your creativity comes into play – choose colors, patterns, and textures that complement your project.
Ensure that the fabric pieces you cut out are slightly larger than the size of the Yo-Yo Maker you’re using. This will give you enough fabric to work with.
Open the Yo-Yo Maker
The Clover Yo-Yo Maker is a convenient tool with two plastic disks. Gently separate the disks to open the Yo-Yo Maker. It’s designed to make the process of creating fabric yo-yos much easier and more precise.
Place the Fabric
Now, position one of your fabric circles on the front disk of the Yo-Yo Maker.
Make sure that the right side of the fabric is facing up and that it completely covers the circular opening. This will be the side of the fabric that’s visible once the yo-yo is finished.
Snap the Yo-Yo Maker Closed
Carefully align the back disk of the Yo-Yo Maker with the front disk, ensuring that the fabric is held securely in place.
Gently press the two disks together until they snap into place. The fabric should now be sandwiched between the two disks.
Trim Excess Fabric
Using a pair of scissors, trim any excess fabric that extends beyond the edges of the Yo-Yo Maker. This step ensures that your yo-yo will be neat and well-proportioned.
Thread Your Needle
Thread a needle with a thread length, typically about 18-24 inches long. Make sure to knot the end securely. This will be used to gather the fabric and form the yo-yo.
Start Stitching
Locate the small hole at the center of the Yo-Yo Maker. Insert your threaded needle from the back (wrong side) of the fabric through this hole to the front (right side). This is where your stitching will begin.
Create a Running Stitch
Begin making running stitches along the fabric’s edge, following the Yo-Yo Maker’s circular shape.
The Yo-Yo Maker provides evenly spaced holes to guide your stitching. Continue stitching until you’ve gone all the way around the fabric circle. This process creates the gathers that form the yo-yo.
Secure the Yo-Yo
Once you’ve completed your running stitches, gently pull the thread to gather the fabric. This will cause the fabric to bunch up and form the yo-yo shape. Be sure to adjust the gathers to your liking.
Knot and Trim the Thread
To secure the gathered fabric, stitch through the folds a few times. Tie a knot to secure it, and trim any excess thread. This ensures that your yo-yo will hold its shape over time.
Open the Yo-Yo Maker
Gently unsnap the two disks of the Yo-Yo Maker. This will release your fabric yo-yo, which should now be securely held in shape by the gathering stitches.
Remove the Fabric Yo-Yo
Push the fabric yo-yo out from the back disk of the Yo-Yo Maker. It should pop out easily, revealing its nicely gathered form.
Flatten and Shape the Yo-Yo
Take a moment to shape your yo-yo. Adjust it as needed to create a well-rounded and even appearance. This step allows you to fine-tune the look of your yo-yo.
Repeat the Process
Feel free to make as many fabric yo-yos as you desire, using different fabrics and sizes. This is where you can let your creativity shine, experimenting with various colors and patterns for your projects.
Use Your Fabric Yo-Yos
Incorporate your fabric yo-yos into your crafting projects. These little embellishments add a charming touch, whether it’s quilting, clothing, accessories, or home decor.
Their uniform size and shape, thanks to the Yo-Yo Maker, make them ideal for creating patterns or simply adding a delightful flourish to your creations.
What Kind of Fabric Should You Use?
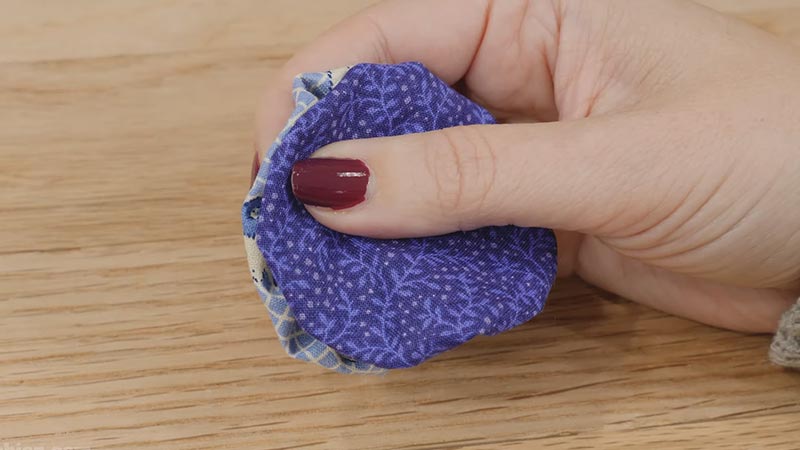
When making fabric yo-yos, you can use a wide variety of fabrics, and the choice depends on your project and personal preference.
Here are some types of fabric commonly used for fabric yo-yos:
Cotton Fabric
Cotton is a versatile and widely used fabric for fabric yo-yos. It’s favored for its ease of handling, durability, and wide availability in various colors and patterns. Quilting cotton, in particular, is a popular choice due to its tightly woven structure, which allows for neat gathers.
Calico
Calico is a type of plain-woven cotton fabric that often features small, simple prints. Its lightweight nature and soft texture make it ideal for creating quaint and traditional-looking yo-yos. Calico’s charming patterns add a timeless appeal to fabric yo-yo projects.
Muslin
Muslin is a lightweight, loosely woven cotton fabric. While it may not have intricate patterns, it provides a clean, natural canvas for yo-yo making. Its airy texture lends itself well to creating soft and delicate yo-yos that can be used in various projects.
Linen
Linen is a natural fabric made from the fibers of the flax plant. It offers a slightly rougher texture than cotton, giving fabric yo-yos a rustic, earthy feel.
Linen works particularly well for projects with a vintage or shabby chic aesthetic, adding a touch of natural elegance.
Silk
Silk is a luxurious and elegant choice for fabric yo-yos. Its smooth, lustrous surface provides a sophisticated finish, making it ideal for special occasions or projects that require a touch of opulence. Silk fabric yo-yos can elevate the overall aesthetic of your creation.
Polyester and Blends
Synthetic fabrics like polyester or blends offer various textures and finishes. They can provide a shiny, metallic, or even textured look, making them suitable for projects with a contemporary or decorative style. These fabrics offer versatility and durability.
Tulle or Organza
Tulle and organza are sheer, lightweight fabrics that add an ethereal quality to fabric yo-yos. They are often used in bridal, eveningwear, or other projects that require a delicate and airy touch. These fabrics create a whimsical and romantic effect.
10 Fun Ideas for Fabric Yo-Yos Projects
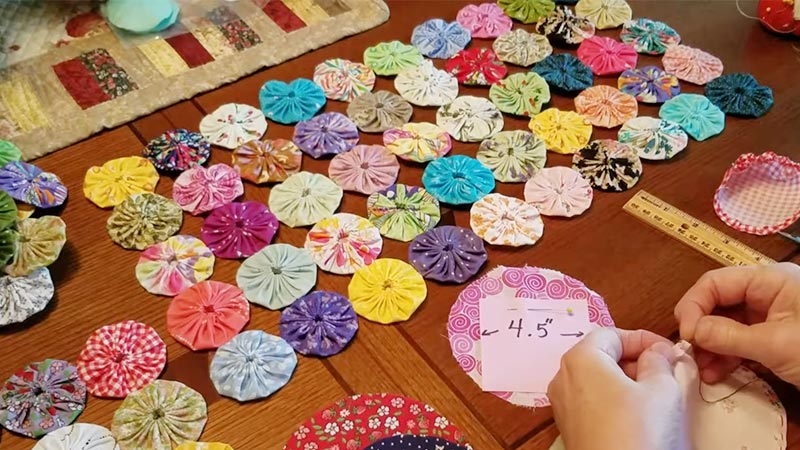
Fabric yo-yos are versatile and can be incorporated into various creative projects.
Here are ten fun and imaginative ideas to inspire your next fabric yo-yo project:
1. Yo-Yo Quilt
A yo-yo quilt is a labor of love, with each yo-yo carefully stitched together to form a stunning fabric mosaic. Consider playing with color gradients or creating a pattern, like a flower garden or a medallion.
This project allows you to showcase your yo-yo-making skills in a functional and visually captivating way.
2. Yo-Yo Garland
A yo-yo garland is a whimsical addition to any celebration. Consider using themed fabrics for holidays or special occasions. Drape it along mantels, windows, or across tables for an instant burst of color and texture.
3. Yo-Yo Headbands or Hair Clips
These accessories are a playful way to incorporate fabric yo-yos into your personal style. Experiment with different fabrics, sizes, and arrangements to create head-turning adornments that complement various outfits.
4. Yo-Yo Brooches
Yo-yo brooches offer a creative way to add a unique touch to your wardrobe. Mix and match fabrics to create versatile accessories that can be pinned onto lapels, scarves, or even used as a closure for a cardigan.
5. Yo-Yo Pillow Covers
Transform plain pillow covers into statement pieces by sewing on fabric yo-yos. Consider creating a focal point with a cluster of yo-yos or scatter them for a more eclectic look. This project is a quick way to refresh your home decor.
6. Yo-Yo Table Runner
A yo-yo table runner is a delightful way to add color and texture to your dining table. Experiment with different layouts and color schemes to achieve the desired effect.
This project offers an opportunity to showcase your creativity during gatherings and special occasions.
7. Yo-Yo Appliqué
Use fabric yo-yos as appliqués to breathe new life into your clothing. Whether it’s a simple flower on a child’s shirt or a bold statement on a denim jacket, this project allows you to infuse your wardrobe with personalized, handmade flair.
8. Yo-Yo Wall Art
Create a custom piece of wall art by arranging fabric yo-yos in an artistic composition.
Consider using a color scheme that complements your decor. This project offers a unique way to express your creativity and decorate your living space.
9. Yo-Yo Tote Bag
Personalize a plain tote bag with fabric yo-yos to create a functional and stylish accessory.
Choose colors and patterns that resonate with your personal style. This project not only adds visual interest but also showcases your craftsmanship.
10. Yo-Yo Keychains
Craft small fabric yo-yos to create charming keychains. Attach them to keys or bags for a whimsical touch. Consider using sturdy fabrics and secure attachments to ensure durability.
FAQs
What materials do I need to make fabric yo-yos?
You will need fabric scraps, a needle, thread, scissors, and a Clover Yo-Yo Maker for added convenience.
Do I need sewing experience to make fabric yo-yos?
No, fabric yo-yos are beginner-friendly. Basic hand-sewing skills are helpful, but even beginners can learn the process quickly.
What size should I cut my fabric circles for yo-yos?
It depends on your preference, but a common starting size is around 4 to 6 inches in diameter. You can adjust based on the size of yo-yo you want.
Can I use different fabrics for my yo-yos?
Absolutely! Fabric yo-yos are a great way to use up fabric scraps. You can mix and match colors, patterns, and textures for a unique look.
How can I ensure uniform yo-yo sizes?
If you want consistent sizes, consider using a Clover Yo-Yo Maker. These tools provide a precise template for creating yo-yos of specific sizes, ensuring uniformity in your projects.
Wrap Up
Crafting fabric yo-yos is a delightful journey into the world of handmade embellishments. Whether you’re adorning a quilt or garment or crafting a unique accessory, these charming rosettes add a touch of vintage elegance.
You transform fabric scraps into whimsical creations by following simple steps, reflecting your artistic flair. Using a Clover Yo-Yo Maker streamlines the process, ensuring consistent sizes with ease.
Embrace the versatility of fabric yo-yos, exploring endless possibilities for creative expression. As you incorporate these quaint adornments into your projects, you infuse them with a personal touch that speaks volumes about your craftsmanship and artistic sensibilities
Leave a Reply