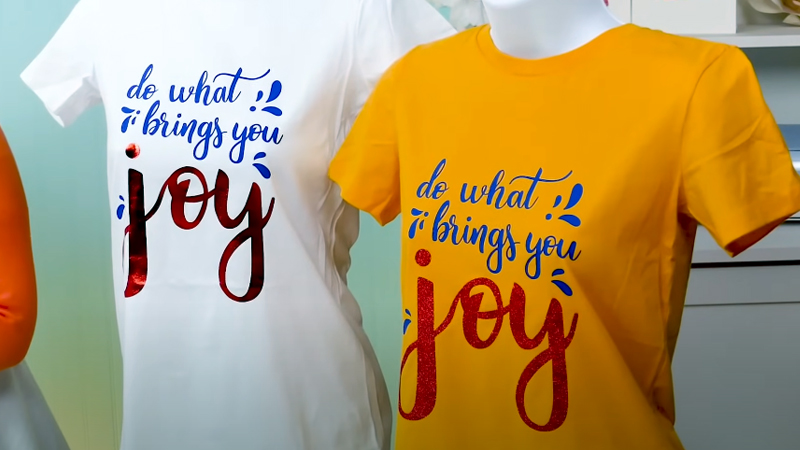
Embarking on the journey of crafting shirts with Cricut Iron-On Vinyl opens a world of creative expression. This versatile medium allows you to transform plain fabrics into personalized masterpieces, making every garment a unique reflection of your style.
From designing in Cricut Design Space to the meticulous process of application, this guide will walk you through each step. Discover the art of precise cutting, proper heat application, and caring for your vinyl-adorned shirts.
With a dash of imagination and a sprinkle of technique, you’ll unlock the potential to craft apparel that’s not only stylish but also infused with your individual flair.

What Is Cricut Iron-on Vinyl?
Cricut Iron-On Vinyl, also known as Heat Transfer Vinyl (HTV), is a versatile crafting material used to create custom designs on fabrics. It comes in rolls or sheets with a heat-activated adhesive backing that adheres to clothing when heat and pressure are applied.
This vinyl is compatible with Cricut cutting machines, allowing for precise cutting of intricate designs. It’s available in a wide range of colors, finishes, and specialty options like glitter or stretchable vinyl.
Once applied, Cricut Iron-On Vinyl provides a durable, long-lasting design that can withstand regular washing. It’s popular for customizing apparel, tote bags, accessories, and more, making it a favorite among DIY enthusiasts and crafters.
How to Make Shirts With Cricut Iron-on Vinyl?
Creating custom shirts with Cricut Iron-On Vinyl is a fun and creative way to personalize your wardrobe or make unique gifts for friends and family. Cricut is a popular brand of cutting machines that can precisely cut designs from various materials, including Iron-On Vinyl, also known as Heat Transfer Vinyl (HTV).
In this guide, we’ll walk you through the steps to make shirts with Cricut Iron-On Vinyl.
Materials You’ll Need:
- Cricut Cutting Machine.
- Iron-On Vinyl.
- T-shirt or Fabric.
- Weeding Tools.
- Heat Press or Iron.
- Teflon or Parchment Paper.
Step-by-Step Instructions:
Designing Your Shirt
In the creative hub of the Cricut Design Space, you’re presented with a canvas for your imagination. Here, you can select from a wide array of pre-designed templates or embark on your own artistic journey.
The tools provided allow you to manipulate shapes, text, and images, giving you complete control over your design. Once you’ve finalized your creation, take a moment to resize it according to the dimensions of the shirt you’ve selected.
Preparing the Cutting Mat
The cutting mat serves as a crucial intermediary between your design and the Cricut machine. Gently place the Iron-On Vinyl on it, ensuring that the carrier sheet, with its glossy surface, is facing downwards.
As you load the mat into the Cricut machine, follow its instructions meticulously, allowing it to align and secure the vinyl in place.
Cutting Your Design
With precision and finesse, the Cricut machine brings your design to life. Configure the settings on your machine to match the type of Iron-On Vinyl you’ve chosen.
Once the machine has worked its magic, delicately employ your weeding tools to remove any excess vinyl, leaving behind only your meticulously crafted design.
Getting Your Shirt Ready
As the machine finishes its task, shift your focus back to the shirt. Preheat your heat press or iron to the recommended temperature for your specific Iron-On Vinyl. Each type of vinyl carries its own preferences, so it’s vital to consult the manufacturer’s instructions for this crucial step.
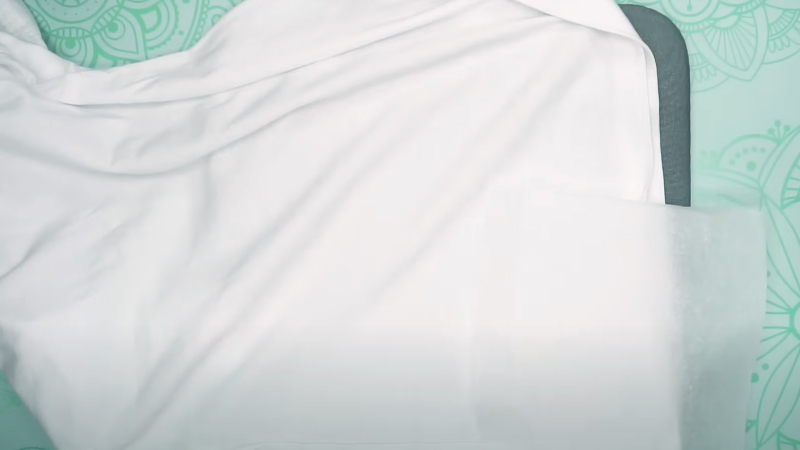
Gently lay the shirt on a clean, level surface, ensuring all wrinkles are smoothed out. This ensures an even canvas for your vinyl masterpiece.
Positioning and Applying the Vinyl
With your design now in hand, it’s time for the grand reveal. Carefully position your weeded vinyl masterpiece on the shirt, making certain it’s perfectly centered and aligned.
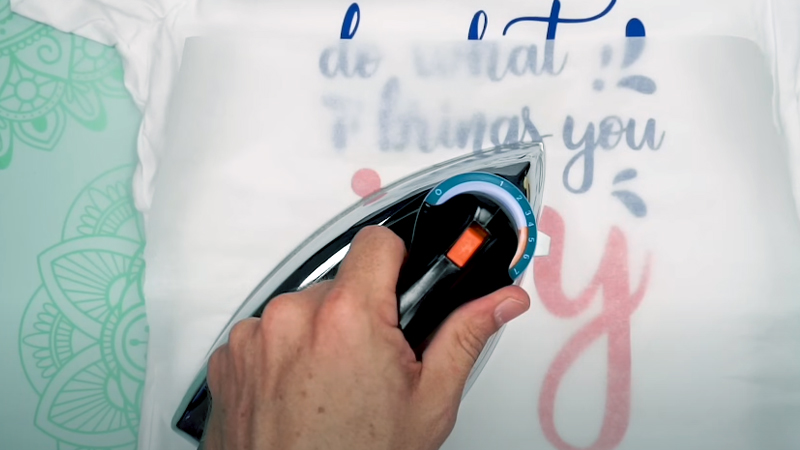
To safeguard the design during the next stage, cover it with a protective layer of Teflon or parchment paper.
Applying Heat
Here comes the transformative moment. If you’re employing a heat press, adhere to the manufacturer’s recommended temperature and time settings.
When an iron is your tool of choice, press down with confidence, moving it continuously for the specified duration, usually around 20-30 seconds. Apply even pressure across the entire design, ensuring each element adheres securely to the fabric.
Cooling and Peeling
With the heat application complete, allow the vinyl to cool for a brief period, or until it’s cool to the touch.
Gently peel off the carrier sheet, which boasts a shiny surface, in a slow, measured motion. Should any portion of the vinyl show signs of lifting, halt the peeling process and reapply heat as needed.
Final Touches
Should it be necessary, reapply the Teflon or parchment paper and subject the design to a few additional seconds of heat. This extra step ensures an unyielding bond between the vinyl and the fabric.
Allow the shirt to cool completely before donning it or tossing it in the wash. While most Iron-On Vinyl is machine washable, it’s always prudent to double-check the specific vinyl’s care instructions to ensure longevity.
What Type of Fabric Is Best for Iron-on Vinyl Projects?

The type of fabric best suited for Iron-on Vinyl projects is typically cotton or cotton-blend fabrics.
These fabrics provide a smooth, even surface for the vinyl to adhere to, ensuring a secure bond and a professional-looking finish.
Here’s a bit more detail on why these fabrics are ideal:
Cotton and Cotton Blends
Cotton is a natural fiber known for its breathability and absorbency. It provides an excellent surface for Iron-On Vinyl adhesion. Cotton blends, which combine cotton with other materials like polyester or rayon, offer a versatile option.
These blends often balance comfort with durability, making them a popular choice for a wide range of Iron-On Vinyl projects.
Polyester Blends
Fabrics that blend polyester with other fibers bring a blend of characteristics to Iron-On Vinyl projects. Polyester adds durability, wrinkle resistance, and moisture-wicking properties.
When combined with cotton or other materials, it creates a versatile fabric choice suitable for a variety of applications.
Jersey Knits
Jersey knit fabrics are soft, stretchy materials commonly used for t-shirts and casual wear. They provide comfort and flexibility, which can make them suitable for Iron-On Vinyl projects.
However, it’s important to select jersey knits with a higher cotton content to ensure proper adhesion of the vinyl.
Canvas
Canvas is a heavyweight fabric known for its sturdiness and density. It’s an excellent choice for Iron-On Vinyl projects, especially for items like tote bags and shoes. The tightly woven fibers provide a stable surface for the vinyl to adhere securely.
Denim
Denim is a rugged fabric known for its durability and dense weave. It’s a prime choice for Iron-On Vinyl projects due to its ability to withstand the high heat necessary for application. The sturdy texture of denim ensures a reliable bond between the vinyl and fabric.
Microfiber or Performance Fabrics
Performance fabrics, often made from microfiber materials, are designed for athletic wear. They offer moisture-wicking properties, durability, and flexibility.
Fabrics with a high polyester content are commonly used, but it’s crucial to refer to the manufacturer’s recommendations for heat settings to ensure successful adhesion.
Faux Leather
Faux leather, also known as pleather, can be used for Iron-On Vinyl projects, but it’s important to approach it with caution.
Synthetic materials may have coatings or textures that can affect the adhesion of the vinyl. Conducting a small test application is advised to ensure a successful outcome
How Do You Prevent the Vinyl From Peeling or Lifting After Washing?

Preserving the vibrancy and integrity of your Iron-on Vinyl designs is essential for ensuring they stand the test of time. One of the primary concerns is preventing the vinyl from peeling or lifting after washing.
Here’s a detailed look at how to safeguard your vinyl-adorned garments:
Proper Application Technique
A successful Iron-on Vinyl project begins with a meticulous application. Start by preparing the fabric: it should be clean, smooth, and free of wrinkles.
During the heat press, apply even and consistent pressure to establish a robust bond between the vinyl and the fabric. This ensures a secure adhesion that lasts through numerous washes.
Adequate Heat and Pressure
Achieving the right temperature and pressure is paramount. Follow the manufacturer’s recommendations for your specific vinyl type.
Whether using a heat press or a household iron, it’s crucial to maintain steady, even pressure to ensure the vinyl adheres securely.
Cooling and Peeling Technique
After the application of heat, allow the vinyl to cool sufficiently before attempting to peel off the carrier sheet.
Rushing this step can lead to the vinyl not fully adhering to the fabric. Patience is a critical factor in achieving a long-lasting bond.
Laundering Care
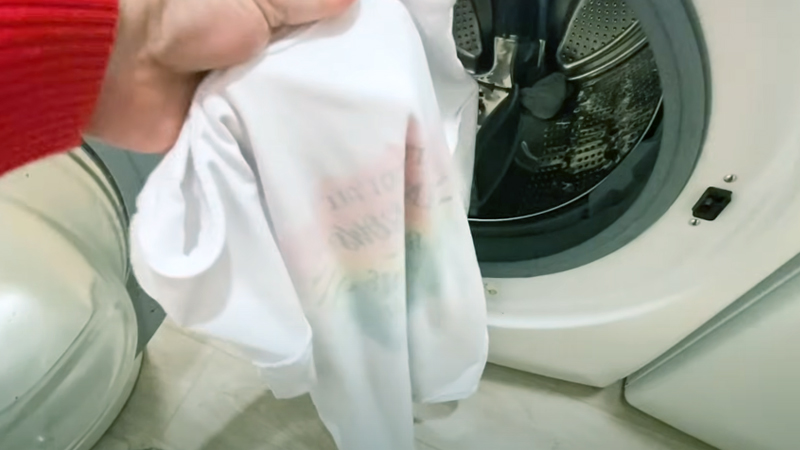
When it’s time to wash your vinyl-adorned garment, take the precaution of turning it inside out. Use cold water and opt for the gentle cycle setting on your washing machine.
Harsh detergents or bleach can weaken the adhesive bond, so opt for milder options to safeguard the vinyl’s integrity.
Avoiding High Heat in the Dryer
Resist the temptation to use high heat settings in the dryer. Instead, consider air-drying your garment or using a low-heat setting. Excessive heat can cause the vinyl to warp or peel over time, compromising the longevity of your design.
Inspect and Reinforce When Necessary
Perform regular checks on your vinyl-adorned designs after washing. If you notice any areas starting to lift, take immediate action.
Reapply heat using a protective sheet to reinforce the bond. This proactive measure can help extend the life of your custom creations.
Store Garments Carefully
When not in use, take care to fold your vinyl-adorned garments rather than hanging them. This precaution helps prevent unnecessary stretching or peeling of the vinyl, ensuring your designs remain intact and vibrant.
Caring for Your Shirt With Cricut Iron-on Vinyl

Creating a shirt with Cricut Iron-On Vinyl is a rewarding endeavor, but proper care is essential to ensure your design stands the test of time.
With a few simple steps, you can maintain the vibrancy of your vinyl and the integrity of the fabric.
Here’s how:
Turn Inside Out
To safeguard your vinyl design, turn the shirt inside out before placing it in the washing machine. This precaution minimizes friction between the vinyl and other fabrics during the wash cycle.
Gentle Cycle
Opt for a gentle cycle setting on your washing machine. Aggressive cycles can subject the vinyl to undue stress, potentially leading to premature wear and peeling.
Cold Water
Use cold water to wash your shirt. Hot water can weaken the adhesive bond between the vinyl and fabric, which may compromise the design’s longevity.
Mild Detergent
Choose a mild detergent that doesn’t contain bleach or harsh chemicals. Such additives can be abrasive, posing a risk to both the vinyl and the fabric.
Air Dry or Low Heat
To maintain the integrity of your design, consider air drying your shirt or using a low-heat setting in the dryer. High heat can cause the vinyl to warp or peel over time.
Avoid Overcrowding
Prevent overcrowding in the dryer, as it allows your shirt to dry evenly without excessive friction on the vinyl design.
Iron Inside Out
When ironing is necessary, turn your shirt inside out. Use a low heat setting on the iron, without steam, and be cautious to avoid direct contact with the vinyl design.
Use a Pressing Cloth
Place a clean, thin cloth over the vinyl design before ironing. This additional layer acts as a buffer, protecting the vinyl from direct heat and potential damage.
Fold, Don’t Hang
To prevent stretching or peeling, avoid hanging your vinyl-decorated shirt. Instead, neatly fold it and store it in a drawer or on a shelf.
Separate from Rough Textures
During storage, ensure your shirt is kept away from rough surfaces or objects that may rub against the vinyl. This precaution helps maintain the design’s integrity.
Avoid Harsh Chemicals
Refrain from using strong chemicals or abrasive cleaners on your shirt. These substances can compromise the vinyl’s adhesive and the fabric’s quality.
Patch Test
When you have doubts about a particular detergent or cleaning method, perform a patch test on a small, inconspicuous area of the shirt before applying it to the entire garment.
FAQs
Can I Apply Cricut Iron-On Vinyl to Any Type of Fabric?
Cricut Iron-On Vinyl works best on fabrics made of cotton or cotton-blend materials.
Do I Need a Heat Press, or Can I Use an Iron?
While a heat press provides consistent heat and pressure, you can use a household iron for smaller projects.
Can I Layer Different Colors of Iron-On Vinyl?
Yes, you can layer different colors of Iron-On Vinyl to create multi-colored designs.
How Do I Resize and Edit Designs in Cricut Design Space?
In Cricut Design Space, select your design and use the resize handles to adjust its dimensions.
Is it Possible to Remove Iron-On Vinyl from Fabric?
While it’s technically possible to remove Iron-On Vinyl, it can be a challenging process and may damage the fabric.
Wrap Up
Creating custom shirts with Cricut Iron-On Vinyl is a rewarding craft that allows for endless creative possibilities.
By following the steps outlined in this guide, from designing in Cricut Design Space to careful application and proper care, you can produce personalized, long-lasting designs on fabric.
Remember to select suitable materials, adjust settings accordingly, and exercise patience in the process. With practice, you’ll refine your technique and explore new design ideas.
Embrace the versatility of Iron-On Vinyl and enjoy the satisfaction of wearing or gifting your unique creations. With attention to detail and a touch of creativity, your shirts will be a testament to your craftsmanship.
Leave a Reply